Snom C620 User Manual
Sip wireless conference phone
Hide thumbs
Also See for C620:
- Quick installation manual (24 pages) ,
- Administrator and provisioning manual (190 pages)
Table of Contents
Advertisement
Quick Links
Advertisement
Table of Contents

Related Manuals for Snom C620


Summary of Contents for Snom C620
- Page 1 C620 SIP Wireless Conference Phone User Manual EU/UK/AU...
- Page 2 Snom therefore disclaims all warranties and liability for the accurateness, completeness, and currentness of the information published, except in the case of intention or gross negligence on the part of Snom or where liability arises due to binding legal provisions.
-
Page 3: Table Of Contents
Table of contents Introduction ........1 Redialing a call .......... 19 Adjusting call volume ......19 About the C620 SIP Wireless Conference phone ............1 Muting active calls ........19 Temporarily silencing the ringer ..20 Introduction ........2 Putting a call on hold ....... 20 Parts checklist.......... - Page 4 Table of contents Deleting a speed dial entry ....37 Speakerphone ........55 Settings..........38 Conference phone battery ....56 Call Features Menu ........38 Charging ............. 56 Call Features menu items ...... 38 Battery disposal ........56 Setting Do Not Disturb (DND) ....39 Factory reset the base station ..
-
Page 5: Introduction
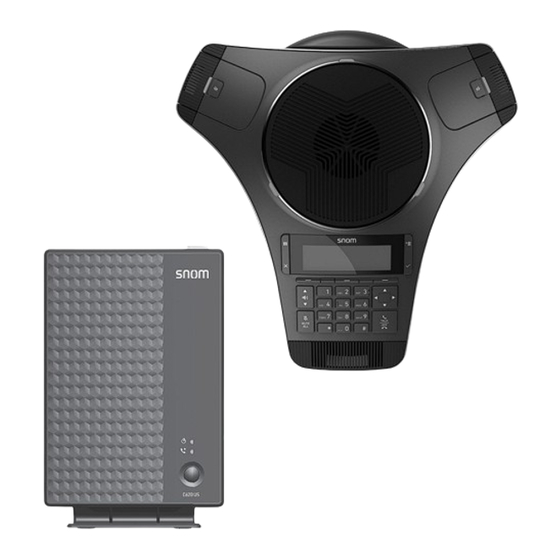
Introduction About the C620 SIP Wireless Conference phone The C620 SIP Wireless Conference phone is designed for use in office settings. It consists of a base station, conference phone, and two wireless mics, enabling participants in a meeting room to deliver clear conversation during a conference... -
Page 6: Introduction
Introduction Parts checklist Your C620 SIP Wireless Conference phone package contains the items shown below. Save your sales receipt and original packaging in the event warranty service is necessary. Wireless Wireless Mic Mic x2 battery door x2 ErisStation Wireless Mic... -
Page 7: Getting Started
The supplied DC 12V 3A round jack power adapter is designed for use only with the C620 conference phone. It is not designed to power other devices. Do not connect the supplied DC 12V 3A round jack power adapter to any other... -
Page 8: Installing The Wireless Mic Battery
Getting started • The DC 12V 3A round jack power adapter is intended to be correctly oriented in a vertical or floor mount position. The prongs are not designed to hold the plug in place if it is plugged into a ceiling, under-the-table, or cabinet outlet. Ethernet cable Installing the wireless mic battery 1. -
Page 9: Conference Phone Overview
• Indicates the system status. See also "Status indicators on the conference phone / wireless mics" on page 9. 2. Speaker AW | Snom C620 SpeakerBox Mickey Law | 27.Mar.2019 | Revision 1.5 (Hold) • Press to put a call on hold. See "Putting a call on hold" on page 20. - Page 10 Getting started 5. Soft keys • Press to perform actions as indicated by the on-screen labels. • When the phone is idle, press to adjust the ringer volume. • During a call, press to adjust the listening volume. 7. MUTE ALL •...
-
Page 11: Wireless Mic Overview
Getting started Wireless mic overview 1. Microphone • Functions as an extended microphone of the conference phone during a call. 2. Status indicator • Indicates the system status. See "Status indicators on the conference phone / wireless mics" on page 9. (MUTE ALL) •... -
Page 12: Base Unit Overview (Front)
Getting started Base unit overview (front) (Power LED) Power LED Power LED • See "Status indicators on the base station" on page 11. VoIP LED (VoIP LED) VoIP LED • See "Status indicators on the base station" on page 11. 3. -
Page 13: Status Indicators On The Conference Phone / Wireless Mics
Getting started Status indicators on the conference phone / wireless mics D E F A B C G H I J K L M N O P Q R S T U V W X Y Z a » A Function Status indicator Power up... - Page 14 Getting started Function Status indicator Registration • Flashes Red and Green alternately when DECT registration in progress. • Steady Green for five seconds when registration successful. • Steady Red for five seconds when registration failed or canceled. Paged by base •...
-
Page 15: Status Indicators On The Base Station
Getting started Status indicators on the base statio Power LED VoIP LED Power up • Power LED is Steady Green. Power down • Power LED is Off. Deregistration • Power and VoIP LEDs flash Green quickly while ready to deregister devices. •... -
Page 16: Idle Screen
Getting started Idle screen The Idle screen appears after the phone is connected and configured for your SIP PBX service. The Idle screen indicates that you have no active or held calls. From the Idle screen, you can press: • to view the directories that are available to you. -
Page 17: Using The Main Menu
Getting started Icon Status Call counter - more than one call is active. More than one call is active. Press p or q to view another call. Using the Main Menu Press to show the Main Menu. Press q or p to highlight menu items. Press to select a highlighted menu item. -
Page 18: Input Modes
Getting started Input Modes When you dial a phone number, the input mode is always numerals. When you edit directory entries, the current input mode is indicated by the label of the middle softkey. For example, for uppercase letters. To switch to the next input mode, press the middle softkey underneath the display. = Uppercase letters = Numerals = Lowercase letters... - Page 19 Getting started Input mode & Æ À Á Â Ç Œ È É Ê Ë Í Î Ï Ó Ô Ñ Ù Ú Û Ü Ÿ space < > Examples: • Press the 1 key six times quickly to type the & character. •...
-
Page 20: Conference Phone Operation
Conference phone operation Making calls You can make a call at any time by pressing and then entering the number on the keypad. When the phone is in idle mode or has calls on hold, you can make a call by entering the phone number on the keypad and then pressing Dial call the number. -
Page 21: Using A Wireless Microphone During A Call
Conference phone operation Making a call in idle mode or with call(s) on hold: Enter the phone number on the keypad. Backspc • Press to delete an incorrect digit. Dial the number by pressing When the call is answered, the active call screen appears. Note that the default active call screen soft keys are shown above. -
Page 22: Call Waiting
Conference phone operation Call waiting If you are on a call, and receive an incoming call from an outside number, the handset displays the Call Waiting screen. If you answer the call, your active call will be put on hold. To answer the incoming call: •... -
Page 23: Redialing A Call
Conference phone operation Redialing a call When the phone is idle, press Press q or p to highlight Call History, then press Press q or p to highlight Dialed Calls, then press The Dialed Calls screen appears. With Review selected, press Press q and p to select the number you want to redial. -
Page 24: Temporarily Silencing The Ringer
Conference phone operation To end mute of all microphones: Press MUTE ALL on the conference phone or press • on a wireless mic. The status indicators turn green, and the symbol disappears. Temporarily silencing the ringer When the conference phone is ringing, you can temporarily silence the ringer without disconnecting the call. -
Page 25: Transferring Calls
Conference phone operation If another party puts you on hold, you may see the message Held by far end. This message depends on compatibility between phones and PBX types, and may not always appear. Press to end the call. Transferring calls You can transfer a call to someone else at another phone. - Page 26 Conference phone operation To cancel the transfer: ◦ Press on the Transfer To screen. The active call screen reappears. -OR- Press on the dialing screen. The On hold screen reappears. ◦ Press when the second call is active. You will hang up on the second call.
-
Page 27: Making A Conference Call
Conference phone operation Making a conference call You can hold a conference call between yourself and two other callers. To make a conference call using manual entry: During a call, press Conf. The call is automatically put on hold and the Conference with screen appears. Enter the number for the party you want to join your conference, and press Dial or wait until phone dials automatically. - Page 28 Conference phone operation For call history, press q or p to highlight Review, and press Press q or p to select the party you want to join your conference. Dial Press Your phone calls the number. When the second call is established, you can talk to the party to advise them of the conference call.
-
Page 29: Setting Up A Network Conference
Conference phone operation Ending a conference call: • Press to hang up on both calls. Setting up a network conference A network conference is hosted by your service provider and allows multiple parties to join a conference. A Network Conference works in a similar way to the regular conference described above. - Page 30 Conference phone operation To view the Messages menu: When the phone is idle, press Press q or p to highlight Message, then press The Message menu appears. Press q or p to highlight a line, then press Your conference phone dials the voicemail retrieval number.
-
Page 31: Paging
Conference phone operation Paging This feature helps you find the conference phone and any misplaced wireless mics within the range of the base unit. To start the paging tone: • Press the LINK key on the base station. The Paging screen appears. •... -
Page 32: Directory
Directory About the directory The Directory menu enables you to store names and phone numbers in four types of directories: • Local – available only on your conference phone. • Base – available on all conference phones in your system. •... -
Page 33: Adding A Directory Entry
Directory The following soft keys are available when viewing a directory entry. Press t or u to view the desired softkeys. Back Returns to LastNme Sorts the list by Type Displays the Directory list last name / first contact’s other FirstNme screen name from the top... -
Page 34: Reviewing Directory Entries
Directory Reviewing directory entries Press With Directory highlighted, press Press p or q to select the directory you want, and then press Press p or q to browse through the directory entries. NOTE: When the directory is empty, the conference phone displays “... -
Page 35: Editing A Directory Entry
Directory Editing a directory entry Search for the desired entry in the directory (see "Reviewing directory entries" on page 30 or "Searching for a directory entry" on page 30). Edit Press t or u until the softkey appears. Edit Press The Edit screen appears. -
Page 36: Deleting All Directory Entries
Directory Deleting all directory entries Del. all From a directory entry, press t or u until the softkey appears. Del. all Press A confirmation screen appears. To confirm deletion, press . To cancel deletion, press... -
Page 37: Call History
Call History Call history The call history provides available name and number information for incoming and outgoing calls. The newest entries replace the oldest. You can view call history information for: • Missed calls—incoming calls that were not answered. • Received calls—incoming calls that you answered or silenced. -
Page 38: Dialing A Call History Entry
Call History The following soft keys are available when viewing a call history entry. Press t or u to view the desired softkeys. Delete Deletes the Dial Dials the entry Edit Dial Displays the entry predial screen so you can edit the number before dialing Saves the call... -
Page 39: Deleting A Call History Entry
Call History The Add new screen appears. The phone automatically fills in the name and number, if available. If necessary, edit the name and number. Backspc • To erase a character/digit, press To move to the next item, press q or •... -
Page 40: Speed Dial
Speed dial Speed dial The speed dial menu enables you to enter up to 10 numbers that you dial frequently. Dialing a speed dial number • When the conference phone is not in use, press and hold a dialing key (0-9) that matches the speed dial entry number (for entry 10, press and hold 0). -
Page 41: Deleting A Speed Dial Entry
Speed dial Use the dial pad keys to change the Name and Number. Press Next after entering each item. To select a character/digit, press t or u. • • To erase a character/digit, press Backspc To move to the next item, press q or •... -
Page 42: Settings
Settings You can change the conference phone settings from the Call Features menu (see below) and the User Settings menu (see page 42). The following pages describe how to change the conference phone settings from both menus. Call Features Menu To display the Call Features menu: Press when the conference phone is not in use. -
Page 43: Setting Do Not Disturb (Dnd)
Settings Setting Do Not Disturb (DND) You can set Do Not Disturb (DND) for each line assigned to your phone. When DND is set, the ringer is silenced and the phone rejects incoming calls and pages; the caller receives the busy signal. After rejecting a call, the phone displays the Missed Calls screen. - Page 44 Settings Press p or q to highlight the line for which you want to configure call forward settings, and then press Press q or p to highlight the desired option: • Always • Busy • No answer Press On the next screen, with Set On/Off highlighted, press Press q or p to highlight On or Off, and then press Press q or p to highlight Phone number, and then press Enter the phone number to which you would like to forward calls.
-
Page 45: Setting Block Anonymous
Settings Setting Block Anonymous Block Anonymous enables the phone to reject incoming calls that have no caller ID. To set block anonymous: From the Call Features menu, press p or q to highlight Block anonymous, and then press The Block Anonymous menu appears. Press p or q to highlight the desired line, and then press Press q or p to highlight On or Off. -
Page 46: Setting Missed Call Alert
Settings Setting Missed Call Alert The Missed call alert setting enables the phone to display the missed call alert screen (see "Missed calls" on page 18). To set missed call alert: From the Call Features menu, press p or q to highlight Miss call alert, and then press Press q or p to highlight Show alert or Hide alert. -
Page 47: User Settings Menu Items
Settings Press q or p to highlight Status & Settings, and press The Status & Settings menu appears. Press q or p to highlight User settings, and press The User settings menu appears. Press q or p to highlight menu items. Press to select a highlighted menu item. -
Page 48: Setting Date And Time
You will hear a confirmation tone. Setting Date and time Before using the C620, set the date and time as follows. The date and time will be displayed on the conference phone when idle. To set the date format:... -
Page 49: Renaming The Phone
Settings To manually set the date and time: From the User settings menu, press q or p to highlight Set Date/Time, and then press Press q or p to highlight Date/Time, and then press On the Set date screen, enter the date. •... -
Page 50: Setting The Display Settings
Settings Use the dialing pad to enter the new name. Backspc • To delete a characer, press Save Press to save your selection. You will hear a confirmation tone. Setting the display settings Use the display menu to set the screen appearance and backlight behavior. To set the contrast: From the User settings menu, press q or p to highlight Display, and then press The Display menu appears. -
Page 51: Setting The Audio Settings
Settings Press to save your selection. You will hear a confirmation tone. * NOTES: • If Backlight On is off and BackLight Idle is on, the LCD backlight always lights up. • If Backlight On is on and BackLight Idle is off, the LCD backlight turns off after being idle for as long as the set Timeout period. - Page 52 Settings To set the ringer volume: When the phone is idle, press to change the ringer volume level as desired. To set the low battery tone: From the User settings menu, press q or p to highlight Audio, and then press press q or p to highlight Advisory Tones, and then press The Advisory Tones screen appears.
- Page 53 Settings To set the key tone: From the User settings menu, press q or p to highlight Audio, and then press Press q or p to highlight Advisory Tones, and then press Press q or p to highlight Key Tone, and then press Press q or p to select On or Off.
-
Page 54: Registration
Registration Registering the conference phone to the base Your conference phone is pre-registered to the base station. If you need to manually re-register the conference phone, follow these steps: Place the conference phone in the charging dock, and make sure it is connected to power. -
Page 55: Deregistering The Conference Phone
Registration Press the # key on the conference phone to begin registration. The conference phone displays the message “Registering... please wait.” When registration is complete, the conference phone beeps and then displays “Speaker Registered.” If the conference phone fails to register, remove it from the charger for a few seconds, replace it in the charger, and repeat the registration procedure. -
Page 56: Registering The Wireless Mics To The Base
Registration Registering the wireless mics to the base Your wireless mics are pre-registered to the base station. If you need to manually re-register the wireless mics, follow these steps: Press Press q or p to highlight Status & Settings, and then press Press q or p to highlight User Settings, and then press Press q or p to highlight Registration, and then press Press q or p to highlight Wireless microphone, and then press... -
Page 57: Deregistering The Wireless Mics
Registration Deregistering the wireless mics Press Press q or p to highlight Status & Settings, and then press Press q or p to highlight User Settings, and then press Press q or p to highlight Registration, and then press Press q or p to highlight Deregistration, and then press Press q or p to highlight the wireless microphone you want to deregister. -
Page 58: Register A C52-Sp Dect Expansion Speakerphone
Wireless Conference Phone. If your organization uses DECT auto registration: The C52-SP will automatically register to the C620. You do not need to take any further action. If your organization does NOT use DECT auto registration (or if you are not sure):... -
Page 59: Speakerphone
Registration Deregister a C52-SP DECT Expansion Speakerphone Press Press q or p to highlight Status & Settings, and then press Press q or p to highlight User Settings, and then press Press q or p to highlight Registration, and then press Press q or p to highlight Deregistration, and then press On the Deregistration menu, press q to select WIRELESS SPE, and then press... -
Page 60: Conference Phone Battery
Conference phone battery Charging It takes up to 11 hours for the conference phone battery to be fully charged (the battery icon has 3 bars ). When the conference phone is fully charged, you can expect the following operating times: Operation Operating time While the conference phone is in use... -
Page 61: Factory Reset The Base Station
Factory reset Factory reset the base station Using a paperclip, or something similar, press and hold the reset button on the back of the base station for 15 seconds. Release the reset button. During the next one to two minutes, the following occurs: •... -
Page 62: Troubleshooting
If you have difficulty with your conference phone, please try the suggestions below. snomamericas.com For customer service, visit our website at My C620 SIP Wireless Conference phone does not work at all. After powering up the base station (see page 3), the LCD display will show the idle screen. Press and you will hear a dial tone. - Page 63 Note: If your have more than one C620 SIP Wireless Conference phone in the office, use the Paging function (page 27) to identify the wireless mics that are...
- Page 64 Allow at least one minute for the wireless mics and base station to synchronize. • If your have more than one C620 SIP Wireless Conference phone in the office, use the Paging function (page 27) to identify the wireless mics that are connected to the corresponding base station.
- Page 65 Troubleshooting The status indicator on the wireless mic does not turn orange when in charging cradle. • The wireless mic might be fully charged. • Clean the charging contacts on the wireless mic and the charging cradles each month with a pencil eraser or a dry non-abrasive fabric. •...
-
Page 66: Important Information
Important information Please read the instructions on safety and disposal and on how to set up and use the device before using it and also give them to other users to read or inform those users of their contents. Save this manual and do not give the device to third parties without it. -
Page 67: Technical Specifications
• Minimum distance between microphones: 30 cm Important battery information Use only the batteries that came with the product or contact Snom if you need replacement batteries. Caution: do not use any other type of battery since this may lead to leakage, fire, explosion, or other dangerous situations. -
Page 68: Disposal
• The batteries can be charged and discharged hundreds of times, but they will eventually wear out. Contact Snom if you need to replace the batteries. • If left unused, a fully charged battery will lose its charge over time. - Page 69 Ascot, Berkshire SL5 7HP, UK Canada office.uk@snom.com Manufacturer: Snom Technology GmbH VTech Telecommunications Ltd. 130 avenue Joseph Kessel 23/F., Tai Ping Industrial Centre, 78960 Voisins-le-Bretonneux, Block 1, France 57 Ting Kok Road, Tai Po office.fr@snom.com HONG KONG © 2023 Snom Technology GmbH v1.01...
Need help?
Do you have a question about the C620 and is the answer not in the manual?
Questions and answers