Table of Contents
Advertisement
Advertisement
Table of Contents

Subscribe to Our Youtube Channel
Related Manuals for Snom C520-WiMi


Summary of Contents for Snom C520-WiMi
- Page 1 User Manual C520-WiMi IP Conference Phone...
-
Page 2: Important Safety Instructions
Important safety instructions When using the conference phone , basic safety precautions should always be followed to reduce the risk of fire, electric shock and injury to persons, including the following: 1. Read and understand all instructions. 2. Follow all warnings and instructions marked on the product. 3. - Page 3 • If the product has been dropped and the base unit and/or wireless mic has been damaged. • If the product exhibits a distinct change in performance. 13. Avoid using the conference phone during an electrical storm. There is a remote risk of electric shock from lightning.
- Page 4 Table of contents Muting active calls ........22 Introduction ......... 1 About the C520-WiMi Conference Phone 1 Temporarily silencing the ringer ....23 Locating wireless microphones ....23 Introduction ......... 2 Making and receiving calls on cell phone 24 Parts checklist..........2 Transferring Bluetooth calls from the C520-WiMi to your cell phone ....25...
- Page 5 Table of contents Speakerphone operation ......50 WebUI ......... 51 Using the Web User Interface (WebUI) ..51 Status ..............52 Call Settings ...........53 User Preferences .........55 Program Dial Soft Keys .......56 Speed Dial ............57 Directory ............58 Blacklist (Deny List) ........61 User Password ..........61 Appendix ........
-
Page 6: Introduction
C520-WiMi, you can use the conference phone in parallel with your cell phone, or use a Bluetooth headset for a private conversation. For large meeting rooms, you can extend the range of the C520-WiMi with up to three Snom C52 DECT expansion speakerphones. -
Page 7: Introduction
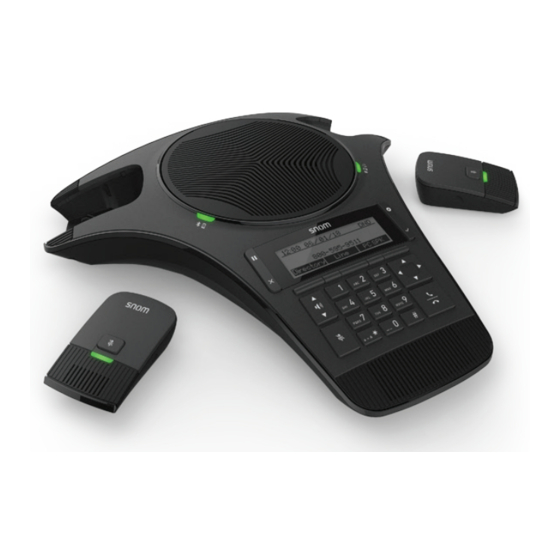
Introduction Parts checklist Your conference phone package contains the items shown below. Save your sales receipt and original packaging in the event warranty service is necessary. PQRS WXYZ a » A Wireless mic ×2 Quick installation Base unit guide Battery door ×2 Battery ×2 Power adapter Li-ion Polymer batteries. -
Page 8: Getting Started
Getting Started Connecting The C520-WiMi can be powered by AC power or Power over Ethernet (PoE). If PoE is not available, use AC power, as shown below. Note: the conference phone requires a network connection to an IP PBX to operate. -
Page 9: Install The Wireless Mic Battery
Network switch or router Ethernet cable Note: You can connect the C520-WiMi to both PoE and AC power. Ensure that you Ethernet cable connect the cables in the order shown in the diagram on page 2. The phone will use PoE;... -
Page 10: Before Use
Recheck the installation diagram and the connections to the unit. • Ensure the unit is correctly configured with the correct SIP account information. For more information, see the C520-WiMi Administrator and Provisioning Guide, available at www.snom.com. • Consult your service provider if you require additional user accounts or if you suspect a service disruption is at fault. -
Page 11: Base Unit Overview (Front)
Getting Started Base unit overview (front) Status LED (system status) Wireless Wireless microphone microphone Loudspeaker Status Status LED of LED of Bluetooth Bluetooth speakerphone headset Two-way toggle Two-way toggle Display Four-way toggle DE F M NO PQ RS W XYZ Two-way toggle a »... -
Page 12: Base Unit Overview (Front), Continued
Getting Started Base unit overview (front), continued 1. Status LED. • Indicates the system status. See "Status indicators overview" on page 10. 2. Loudspeaker 3. Cell 2/Headset Bluetooth status LED • Indicates the status of the Bluetooth-connected device. See "Status indicators overview"... -
Page 13: Base Unit Overview (Front), Continued
Getting Started Base unit overview (front), continued 12. Context-sensitive function keys Press to perform actions as indicated by the labels in the function key line on the display. 13. Hold/Cancel key (toggle) • When in a call, press to put the call on hold and to unhold the held call. •... -
Page 14: Wireless Microphone Overview
Getting Started Wireless microphone overview 1. Microphone • Functions as a extended microphone of the conference phone during a call. 2. Status LED • Indicates the system status. See "Status indicators overview" on page 10. 3. MUTE ALL • During a call, press to mute or end mute all microphones in the system. 4. -
Page 15: Status Indicators Overview
Getting Started Status indicators overview Status LED on the conference phone Yellow (single short When phone is starting to power up and when it has flash) powered up and is ready to use. Green (fast flash) Incoming call Green (steady) In a call Green (slow flash) Call on hold... -
Page 16: Idle Screen
Instead of "Device 2", it will show the name of the device as it appears on the "Device" list. See "Using the Bluetooth menu" on page 32. • to view the "Device" list and to connect the C520-WiMi to a Bluetooth Connect device. -
Page 17: Active Call Screen Icons
Getting Started Active call screen icons During a call, the following screen icons indicate the call’s status. Icon Status Speakerphone—the speakerphone is active. Headset—audio is being routed to a Bluetooth or DECT headset. Call counter—more than one call is active. More than one call is active. -
Page 18: Using The Phone Menu
Conference phone operation Using the phone menu 1. Press to show the main menu. 2. Press to highlight menu items. 3. Press or the corresponding dial pad key to select a highlighted menu item. For example, when Features is highlighted, you can press to view the Features submenu. -
Page 19: Making Calls
Conference phone operation Making calls You can make a call at any time by pressing and then entering the number on the keypad. When the phone is in idle mode or has calls on hold, you can make a call by entering the phone number on the keypad and then pressing to call the Dial... -
Page 20: Ending The Call
Conference phone operation • Press to delete an incorrect digit. Backspc • Press to change from entering digits to entering letters (if you need to enter a domain name as part of the number). In letter mode, press a » A to enter symbols. -
Page 21: Missed Call
Conference phone operation On the incoming call screen, you can also press: • to terminate the incoming call. Reject • to forward the call to another number. Forward Missed call If you don’t respond to an incoming call, the phone displays a missed-call alert screen. If a missed call alert screen appears, you can press: •... -
Page 22: Transferring Calls
Conference phone operation If another party puts you on hold, you may see the message Held by far end. This message depends on compatibility between phones and PBX types, and may not always appear. Press to end the call. Transferring calls You can transfer connected calls as well as calls ringing on your phone. -
Page 23: Conference Phone Operation
Conference phone operation • Using the directory or call history 1. With an incoming call ringing, press . The phone stops ringing and the Forward Forward to screen appears. 2. Press 3. Press to select the Features menu 4. In the Features menu, press: •... - Page 24 Conference phone operation 2. Enter the number to which you want to transfer the call and either press Dial or wait for the phone to dial automatically. You can also use a number from a list, such as the Directory or Call History. Press , then to select the Features menu.
-
Page 25: Making A Conference Call
Conference phone operation ◦ (or scroll to 3 Directory and press ) to access the Directory; D EF ◦ (or scroll to 4 Call History and press ) to access the call history. G HI Select the number you want to use from one of the folders. 4. -
Page 26: Setting Up A Network Conference
Conference phone operation 1. During a call, press to view the next set of soft keys. 2. Press . The call is automatically put on hold, and a Conf. with target ConfCall screen showing all calls on hold appears. 3. Highlight the desired call and press Select . -
Page 27: Redialing
Conference phone operation The Message menu displays the mailboxes you can access from your phone. If your phone has more than one line, you may be able to access multiple mailboxes. Press to highlight the desired mailbox and press to access messages in that mailbox. When there is no New Message alert screen, you can access the Message menu using the phone menu. -
Page 28: Temporarily Silencing The Ringer
Conference phone operation Temporarily silencing the ringer When the conference phone is ringing, you can temporarily silence its ringer without disconnecting the call. The next call will ring normally at the preset volume. Press on the base unit. The symbol appears in the upper right corner of the display Note: You can also press on the phone to adjust the ringer volume. -
Page 29: Making And Receiving Calls On Cell Phone
Answering calls to the cell phone When a cell phone is connected to the C520-WiMi, incoming calls to the cell phone can be answered on the C520-WiMi. Note: You can have concurrent cell phone and SIP account calls (one call will be on hold while the other call is active) on the C520-WiMi, but you cannot have more than one cell phone call. -
Page 30: C520-Wimi To Your Cell Phone
Use Cell Conference calls with a Bluetooth-connected cell phone When you have an active cell phone call on the C520-WiMi, you can create a three-way conference between you, the cell phone call, and another SIP account caller. For more information about creating conference calls, see "Making a conference call" on page 20 . -
Page 31: Using A Bluetooth Headset
You can use a DECT headset for both SIP account calls and cell phone calls. To route audio to a BT headset, a SIP call must be established first at the C520-WiMi. You can then route the SIP call using the... -
Page 32: Phone Features
Phone Features Using the Features menu On the Features menu, you can manage incoming calls, Bluetooth devices, use the directory, access your messages, view the call history, and manage your speed dial numbers. Accessing the Features menu: . The Main Menu appears. 1. -
Page 33: Using The Call Menu
Phone Features Using the Call menu On the Call menu, you can manage how your phone handles incoming calls. The settings available on the Call menu include: Setting Description page 1. Do Not Disturb You can set Do Not Disturb (DND) for each line assigned to your phone. -
Page 34: Setting Do Not Disturb
Phone Features The Call menu appears. Setting Do Not Disturb 1. From the Call menu, if necessary, press to highlight Do Not Disturb. 2. Press 3. On the Do Not Disturb menu, highlight the line for which you want to turn Do Not Disturb On or Off. - Page 35 Phone Features 7. Press q. 8. Enter the number to which you would like to forward calls. 9. (If you selected Call forward no ans earlier) Press . 10. (If you selected Call forward no ans earlier) Press to set the No answer delay between 1 to 10 rings.
- Page 36 Phone Features Using the Call menu (continued) Enabling missed call alerts: 1. From the Call menu, press to highlight Missed call alert. 2. Press The Missed call alert menu appears. 3. Press or to turn missed call alerts on (Yes) or off (No). 4.
-
Page 37: Using The Bluetooth Menu
1. From the Bluetooth menu, with Device list highlighted, press The Device list appears, showing the registered devices. 2. On your Bluetooth device, enable Bluetooth. Place your device close to the C520-WiMi. 3. On the Device list, highlight the device you want to connect and then press... - Page 38 Connect Discon’ct Note: The C520-WiMi can use only the first two Bluetooth devices on the Device list for calls (as shown by the Device 1 and Device 2 soft keys on the Idle screen. See page 11 for information about the Idle screen). For example, if you highlight...
-
Page 39: Changing The C520-Wimi Pin
Note: Methods for activating Bluetooth may vary depending on your phone’s operating system. 8. When the CELL 1 and CELL 2 LEDs flash on the C520-WiMi, select C520-WiMi on your phone’s list of available Bluetooth devices. 9. If prompted by your phone, enter the C520-WiMi PIN. The default PIN is 0000. -
Page 40: Using The Local Directory
Phone Features Using the local directory You can store the names and phone numbers for up to 200 contacts in the directory. Once directory entries are saved, you can dial them directly from the directory. You can also search directory entries by first or last name. When adding an entry, you can enter numbers for work, mobile, and other. - Page 41 Phone Features Calling a contact: 1. Press (see "Searching directory entries" on page 37) to select Search the directory entry. 2. To view other numbers for the entry, press Type 3. When the desired number appears, press Dial Note: If you view a directory entry when the phone is in dial mode, press Dial to dial the number.
- Page 42 Phone Features Searching directory entries 1. From the Local or Blacklist directory, press until the soft key Search appears. 2. Press Search The search screen appears. 3. To filter your search by first name or last name, press to move to the Search field. 4.
-
Page 43: Call History
Phone Features Call history The call history provides available name and number information for the last 200 incoming and outgoing calls. The newest entries replace the oldest. You can view call history information for: • All calls—all categories of calls •... - Page 44 Phone Features The following soft keys are available when viewing a call history entry: Delete • - deleting the entry Dial • - dialing the entry Edit dial • - displaying the predial screen so you can edit the number before dialing Save •...
-
Page 45: Speed Dial
Phone Features Deleting a single call history entry: While viewing the desired entry, press Delete Deleting multiple call history entries 1. While viewing the list of call history folders, press to highlight the folder for which you would like to delete all entries: All calls, Missed calls, Received calls, or Dialed calls. -
Page 46: Sending A Multicast
Phone Features 6. Use the dial pad keys to enter the name and number. • Press to switch between entering numbers, lower-case letters, and upper-case letters. • When you start entering characters, the soft key changes to Cancel . Press to delete incorrect characters. -
Page 47: Configuring The Phone
Configuring the Phone Configuring the phone You can configure the phone using one of two methods: 1. The User settings menu on the phone 2. The Web UI which you access using your Internet browser. This section describes the user settings menu. For information about the WebUI, see page 51. -
Page 48: Preferences
Configuring the Phone Preferences Use the Preferences menu to set the language and the date and time formats, and to restart the phone. 1. From the User settings menu, open the Preferences submenu by pressing The Preferences menu appears. 2. Press the number key 1 - 3 on the keypad to open each respective submenu. Alternatively, scroll with , if necessary, to highlight the setting and press Setting the language 1. - Page 49 Configuring the Phone Setting the date format that appears on the idle screen: to highlight Clock date. 1. From the Date & Time menu, press 2. Press to select the desired date format (DD/MM/YY, MM/DD/YY, YY/MM/DD) 3. Press Save Setting the Time Zone: 1.
-
Page 50: Restarting The Phone
Configuring the Phone Restarting the phone From the Preferences menu, open the Restart phone submenu by pressing Alternatively, scroll with to highlight the setting and press . The Restart phone screen appears. • To restart the phone, press • To return to the Preferences menu, press Display Use the Display menu to set screen appearance and backlight behavior. -
Page 51: Audio
Configuring the Phone Setting the "backlight off" timeout: This setting determines after how many seconds the backlight will revert to the idle setting when there has been no activity on the phone for the specified time. The default is 30 seconds. 1. - Page 52 Configuring the Phone Setting the key tone: 1. From the Audio menu, open the Ringer tone screen by pressing . Alternatively, AB C scroll with to highlight the setting and press . The Key tone menu appears. 2. Press to turn key tones on or off. When off, key presses are silent. 3.
-
Page 53: Registering Wireless Microphones
Registering wireless microphones The wireless microphones delivered with the C520-WiMi are preregistered. If you do need to register a wireless microphone (e.g., if you have purchased a C520-WiMi Replacement Microphone), it must be registered to the phone. • The phone must be idle when registering wireless microphones. -
Page 54: Registering Wireless C52 Speakerphones
Configuring the Phone Registering wireless C52 speakerphones For large meeting rooms, you can extend the range of the C520-WiMi with up to three wireless DECT Snom C52 Speakerphones. You can use the speakerphone to answer and end calls and mute the audio on the entire system (i.e., the conference phone and all connected devices like speakerphones and wireless microphones). -
Page 55: Speakerphone Operation
LEDs. Ringer: When a call is ringing on the C520-WiMi, it rings on the C52 as well, and the LEDs flash green. Press to mute the ringer on the speakerphone for this call and this device only. -
Page 56: Webui
WebUI Using the Web User Interface (WebUI) Use an Internet browser to access the Web User Interface (WebUI) of the conference phone. After you log on to the WebUI, you can configure the following features: • Call Settings (See page 53) •... -
Page 57: Status
WebUI User mode Admin mode Name user admin Password user admin 7. Click Log In. The Web UI appears. Click topics from the navigation bar at the top of the page, and then click the desired setting on the left side of the Web UI to see the page for that setting. You view and change settings in two different types of fields: drop-down lists and entry fields into which you type information. -
Page 58: Call Settings
WebUI Call Settings To view the call settings, click SYSTEM in the WebUI header, and then click Call Settings in the sidebar. You can configure call settings for each account available to your phone. Click Account 1, Account 2, and so on to select the call settings page for the desired account. - Page 59 WebUI Call Settings (continued) Call Forward Settings Setting Description Enable Call Forward Select to enable call forwarding for all calls on that account. Always Target Number Enter a number to which all calls will be forwarded. Enable Call Forward Select to enable call forwarding for calls when you are on another call Busy on that account.
-
Page 60: User Preferences
WebUI User Preferences On the User Preferences page, you can configure some basic settings for your phone and set how your phone responds to calls. After changing any settings on this page, click Save to save them. General User Settings Setting Description Range... -
Page 61: Program Dial Soft Keys
WebUI User Preferences (continued) Call Hold Reminder Settings Setting Description Range Default Enable Call Hold Enables or disables the call hold n/a — Select Enabled Reminder Tone reminder tone. to enable Tone Interval (secs) Sets the interval for the call hold 10–300 30 seconds reminder tone. -
Page 62: Speed Dial
WebUI To enter program dial soft keys: 1. Enter the Program Dial key label. Labels that exceed the width of the soft key will end with ... when they appear on the phone. 2. Enter a value that the Program Dial key will dial. 3. -
Page 63: Directory
WebUI Directory To view the local directory, click CONTACTS in the WebUI header, and then click Local Directory in the sidebar. On the Local Directory page, you can manage your local directory entries. You can sort, edit, delete, and add contact information for up to 200 entries. The page also allows you to export your phone’s local directory or import a local directory file. - Page 64 WebUI Local Directory Click To... Sort the list by last name. Edit information for an entry. View the last page of entries. View the next page of entries. Delete selected entries from the directory. Click Select All to select every entry on the page you are viewing. Add a new directory entry.
- Page 65 WebUI Directory (continued) Editing a directory entry: 1. Click Edit for the entry you want to edit. The Edit Local Directory Entry page appears. 2. Edit or add the desired information. 3. Click Save. Importing Local Directory You can import an existing local directory file. Importing a directory file replaces all your previous local directory entries.
-
Page 66: Blacklist (Deny List)
WebUI Blacklist (Deny List) You can manage the blacklist of blocked numbers on the WebUI. Calls from blocked numbers will not ring your phone, or be recorded in your call history. The procedures for adding, deleting and editing entries are the same as for the Directory. See "Directory"... -
Page 67: Appendix
To reduce the risk of fire or injury, read and follow these instructions: • Use only the batteries provided or equivalent. To order a replacement, visit our website at www.snom.com. • Do not dispose of the batteries in a fire. Check with local waste management codes for special disposal instructions. -
Page 68: Troubleshooting
Troubleshooting If you have difficulty with your conference phone, please try the suggestions below. Finding the firmware version As part of troubleshooting, you may need to provide the firmware version of the conference phone. 1. When the phone is idle, press 2. - Page 69 Troubleshooting The conference phone does not ring when there is an incoming call. • Make sure there is a dial tone before dialing. • Make sure the ringer volume of the phone is not set to off (page 6). • Make sure the DC power cable, Ethernet cable, AC power cord, and the power adapter are plugged in properly (see page 3).
- Page 70 Troubleshooting 4. In the User Settings menu, press Wireless microphones. 5. In the Wireless mirophone menu, press Deregister and confirm by pressing "Yes". If successful, the display will say "Wireless microphones are deregistered". Their LEDs will flash red and green alternatingly. 6.
- Page 71 Troubleshooting • Other electronic products such as ham radios and other DECT phones can cause interference with the conference phone. Try installing the conference phone as far away as possible from these types of electronic devices. Status Indicator on the wireless microphone flashes orange. The wireless microphone has low battery.
- Page 72 Troubleshooting There is interference during a telephone conversation. My calls fade out when I am using the wireless microphone. • Move the wireless microphone closer to the phone. It may be out of range. • Appliances plugged into the same circuit as the base unit can cause interference. Try moving the appliance or base unit to another outlet.
-
Page 73: Precautions For Users Of Implanted Cardiac Pacemakers
Precautions for users of implanted cardiac pacemakers Cardiac pacemakers (applies only to digital cordless telephones): Wireless Technology Research, LLC (WTR), an independent research entity, led a multidisciplinary evaluation of the interference between portable wireless telephones and implanted cardiac pacemakers. Supported by the U.S. -
Page 74: Maintenance
Maintenance Taking care of the conference phone Your conference phone contains sophisticated electronic parts, so it must be treated with care. Avoid rough treatment Place the wireless mic down gently. Save the original packing materials to protect the conference phone if you ever need to ship it. -
Page 75: Technical Specifications
Technical specifications Frequency control Crystal controlled PLL synthesizer Transmit frequency Wireless microphone: 1881.792-1897.344 MHz (EMEA) Conference phone: 1881.792-1897.344 MHz (EMEA) Channels Optimal and minimum Optimal distance between the base unit/wireless mic and the participant: 60 cm distances Minimum distance between each wireless mic: 30 cm Power requirements Wireless mic: Ni-MH Battery Pack;... - Page 76 +44 161 348 7500 Tel. +886 2 8751 1120 +44 169 348 7509 +886 2 8751 1130 offi ce.uk@snom.com offi ce.tw@snom.com Your specialist retailer - Ihr Fachhändler - Votre distributeur - Su distribuidor - Il tuo rivenditore: © 2017 Snom Technology GmbH v1.01...
Need help?
Do you have a question about the C520-WiMi and is the answer not in the manual?
Questions and answers