Table of Contents
Advertisement
Quick Links
Advertisement
Table of Contents

Related Manuals for RGBlink D8


Summary of Contents for RGBlink D8
- Page 1 User Manual Article No: RGB-RD-UM-D8 E003 Revision No: V1.3...
-
Page 2: Table Of Contents
Chapter 3 Use Your Product ............................. 13 3.1 Main Menu ..............................13 3.1.1 Device ..............................13 3.1.2 Settings ..............................13 3.1.3 Load Presets ............................24 3.1.4 Language ..............................25 © Xiamen RGBlink Science & Technology Co., Ltd. Ph: +86 0592 5771197 | support@rgblink.com | www.rgblink.com... - Page 3 Chapter 5 Support ................................46 5.1 Contact Us ............................... 46 Chapter 6 Appendix ..............................47 6.1 Terms & Definitions ............................47 6.2 Revision History ............................. 52 © Xiamen RGBlink Science & Technology Co., Ltd. Ph: +86 0592 5771197 | support@rgblink.com | www.rgblink.com...
-
Page 4: Declarations
RGBlink. If the purchaser or a third party carries out modifications or repairs on goods delivered by RGBlink, or if the goods are handled incorrectly, in particular if the systems are commissioned operated incorrectly or if, after the transfer of risks, the goods are subject to influences not agreed upon in the contract, all guarantee claims of the purchaser will be rendered invalid. -
Page 5: Operators Safety Summary
To protect users from electric shock, ensure that the chassis connects to earth via the ground wire provided in the AC power Cord. The AC Socket-outlet should be installed near the equipment and be easily accessible. © Xiamen RGBlink Science & Technology Co., Ltd. Ph: +86 0592 5771197 | support@rgblink.com | www.rgblink.com... - Page 6 The environment in which you install your device should be clean, properly lit, free from static, and have adequate power, ventilation, and space for all components. © Xiamen RGBlink Science & Technology Co., Ltd. Ph: +86 0592 5771197 | support@rgblink.com | www.rgblink.com...
-
Page 7: Chapter 1 Your Product
1 x DB9 to RJ11 Cable Cable Cable Cable Cable 1 x 8K DP Cable Note: AC Power Cable supplied as standard according to destination market. © Xiamen RGBlink Science & Technology Co., Ltd. Ph: +86 0592 5771197 | support@rgblink.com | www.rgblink.com... -
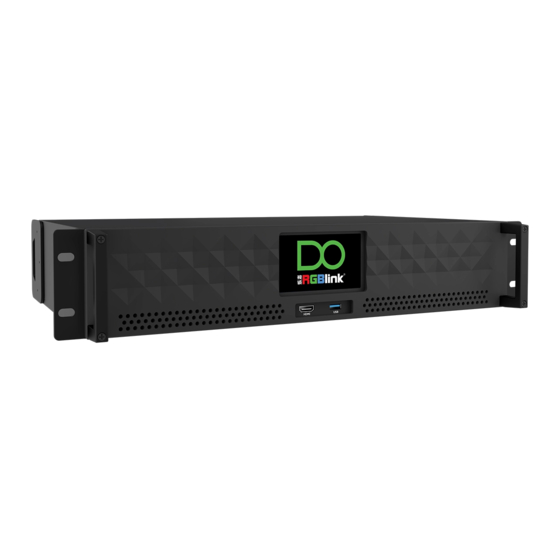
Page 8: Product Overview
Create a visual experience. The D8 (HDMI 2.1) is standard with one HDMI 2.1 input interface; D8 (DP 1.4) is standard with one DP 1.4 input interface; D8 PLUS is standard with one HDMI 2.1 and one DP 1.4 input interfaces. Models with different configuration allow flexibility in application and can meet the requirements of 8K input signal transmission. -
Page 9: Rear Panel
● D8 (HDMI 2.1) is standard with Single HDMI 2.1 Input Interface ● D8 (DP 1.4) is standard with Single DP 1.4 Input Interface Input Interface ● D8 PLUS is standard with Single HDMI 2.1 Input Interface and Single DP 1.4 Input Interface Output Interface Standard with Quad HDMI 2.0 Output Ports... -
Page 10: Dimension
Increase the safety and reliability, and avoid accidents such as fire and Ground Screw explosion caused by static electricity 1.2.3 Dimension Following is the dimension of D8 for your reference: Dimension: 484mm×378mm×88.9mm D8 (HDMI 2.1) D8 (DP 1.4) © Xiamen RGBlink Science & Technology Co., Ltd. -
Page 11: Key Features
● Genlock input and loop throuch ● XPOSE 2.0 control ● Support standard output resolution and customize output resolution ● Hot swap ● Open API © Xiamen RGBlink Science & Technology Co., Ltd. Ph: +86 0592 5771197 | support@rgblink.com | www.rgblink.com... -
Page 12: Chapter 2 Install Your Product
Chapter 2 Install Your Product Note: D8 (HDMI 2.1)、D8 (DP 1.4) and D8 PLUS are same in installation. This chapter takes D8 (HDMI 2.1) as example. 2.1 Plug in Power Connect power and D8 with standard Power Cord. Plug one end of the power cable to the D8’s power interface. -
Page 13: Turn On Your Product
2.3 Turn on Your Product Push the power switch on the rear panel and the system begins to work. © Xiamen RGBlink Science & Technology Co., Ltd. Ph: +86 0592 5771197 | support@rgblink.com | www.rgblink.com... -
Page 14: Chapter 3 Use Your Product
If the current interface is <Device>, click <Main Menu>, that is, the previous menu option to return to the previous interface, as shown in the figure below. © Xiamen RGBlink Science & Technology Co., Ltd. Ph: +86 0592 5771197 | support@rgblink.com | www.rgblink.com... - Page 15 Click <Output> in <Settings> to set output resolution. You can choose Standard Resolution or Custom Resolution. Standard Resolution: Click <Standard> to select standard resolution from the box. © Xiamen RGBlink Science & Technology Co., Ltd. Ph: +86 0592 5771197 | support@rgblink.com | www.rgblink.com...
- Page 16 Click <Custom> to enter the following interface. D8 supports to customize output resolution. If you set the resolution to 3840x2160@50, type in Width, Height and Frequency one by one and click “Enter” to save. Then check the set resolution in <Device> interface.
- Page 17 Click <Split> to choose splicing layout and configure parameters. There are 3 split modes available, including Cross, H 1/4 and V 1/4. Split Mode Description Cross © Xiamen RGBlink Science & Technology Co., Ltd. Ph: +86 0592 5771197 | support@rgblink.com | www.rgblink.com...
- Page 18 H 1/4 V 1/4 Note: D8 is set to Cross by default. Cross: Click <Cross> and the touch screen displays as follows: Set H Total, V Total, Width 1 and Height 1 of screen according to actual need. For example: Set H Total to 7680, V Total to 4320, Width 1 to 3840, Height 1 to 2160, then Width 2 is 3840, same as Width 1, Height 2 is 2169, same as Height 1.
- Page 19 ● Width 2: 3840 ● Width 3: 2160 Use the numeric keyboard to enter parameters, then click "Save Settings" > "Confirm" to save above settings. © Xiamen RGBlink Science & Technology Co., Ltd. Ph: +86 0592 5771197 | support@rgblink.com | www.rgblink.com...
- Page 20 ● Height 1:2160 ● Height 2:1080 ● Height 3:1920 Use the numeric keyboard to enter parameters, then click "Save Settings" > "Confirm" to save above settings. © Xiamen RGBlink Science & Technology Co., Ltd. Ph: +86 0592 5771197 | support@rgblink.com | www.rgblink.com...
- Page 21 If you set Resolution to 7000x4000@60, use the numeric keyboard to enter the Width, Height and Frequency one by one and then click “Enter” to confirm. © Xiamen RGBlink Science & Technology Co., Ltd. Ph: +86 0592 5771197 | support@rgblink.com | www.rgblink.com...
- Page 22 Check values set, then click “ Apply” > “Confirm”. Complete EDID settings on D8, then set resolution on the signal source (such as a computer) to be same as the D8. If you set EDID on D8 to 7000x4000@60, the steps to set the resolution on a computer are as follows: ●...
- Page 23 ● Step 4: Customize resolution:Enter 7000 in the "Horizontal pixels", 4000 in the "Vertical lines" and 60 in the “Refresh rate”. Enter the custom resolution values, then click “Test”. Select “Yes” in the pop-up to apply the custom resolution. © Xiamen RGBlink Science & Technology Co., Ltd. Ph: +86 0592 5771197 | support@rgblink.com | www.rgblink.com...
- Page 24 Reset EDID: Click “ Reset EDID”> “ Confirm” to clear previous settings. 3.1.2.4 Layer Back to <Settings>, then click <Layer> to enter following interface. © Xiamen RGBlink Science & Technology Co., Ltd. Ph: +86 0592 5771197 | support@rgblink.com | www.rgblink.com...
-
Page 25: Load Presets
Notice: All parameters will be restored to default parameters, which include but not limited to device IP, EDID, preset scenes, etc. 3.1.3 Load Presets Back to main interface, then click <Load> to load presets. © Xiamen RGBlink Science & Technology Co., Ltd. Ph: +86 0592 5771197 | support@rgblink.com | www.rgblink.com... -
Page 26: Language
D8 provides 16 positions for saving banks, which are allowed to be loaded. Note: Yellow background: current bank; Green background: with parameter saved; Grey background: empty bank. Click the desired bank, and the interface will pop up "Do you want to Load Bank X", shown as below. Click <Confirm>... -
Page 27: Version
To switch the input signal, you can simply click the desired input source, and the display will synchronize its switching according to the selected input signal. © Xiamen RGBlink Science & Technology Co., Ltd. Ph: +86 0592 5771197 | support@rgblink.com | www.rgblink.com... -
Page 28: Xpose 2.0 Installation
1. Double click ,it will pop-up the installer language box, select the language, for example, select “English”, and click “OK” to confirm. 2. Click “Next”to install. © Xiamen RGBlink Science & Technology Co., Ltd. Ph: +86 0592 5771197 | support@rgblink.com | www.rgblink.com... - Page 29 Click “Install”. 4. During installation, it will pop up the window of Install Shield Wizard for Virtual Com port. 5. Click “Next”. © Xiamen RGBlink Science & Technology Co., Ltd. Ph: +86 0592 5771197 | support@rgblink.com | www.rgblink.com...
- Page 30 6. Then click “Install", as shown in the figure. Click “Finish” and complete the installation, as shown in the figure below. 8. Click “Finish”and is ready to run the XPOSE software. © Xiamen RGBlink Science & Technology Co., Ltd. Ph: +86 0592 5771197 | support@rgblink.com | www.rgblink.com...
-
Page 31: Xpose 2.0 Operation
3.3 XPOSE 2.0 Operation Note: The following XPOSE 2.0 operation takes D8 PLUS as an example, D8 (HDMI 2.1) and D8 (DP 1.4) operate the same except for the difference of input interface. 3.3.1 Login in XPOSE Double click this icon... -
Page 32: System Setting
Keyboard setting is designed to fit for different operation system such as Windows and Mac. Users can set short cut keys. © Xiamen RGBlink Science & Technology Co., Ltd. Ph: +86 0592 5771197 | support@rgblink.com | www.rgblink.com... - Page 33 File Path: Save the current keyboard Settings in the script to the local path. File Name: script file name. Load Script: Load/Delete. Click Return to back to <System Setting>. © Xiamen RGBlink Science & Technology Co., Ltd. Ph: +86 0592 5771197 | support@rgblink.com | www.rgblink.com...
- Page 34 Ethernet Connection: Search only those connect via Ethernet. Both Are Chosen: Click both, both connections change synchronously. Note: D8 Only supports Serial Port Connection. Display Setting: Users can turn on Expanding Mode if there is an extension screen. Novice Guide: Check novice guide for quicker operation of XPOSE software.
- Page 35 Authorization Set: Functions on XPOSE 2.0 on this computer that the users are allowed to operate. Click the green block to remove the function not to be permitted. © Xiamen RGBlink Science & Technology Co., Ltd. Ph: +86 0592 5771197 | support@rgblink.com | www.rgblink.com...
-
Page 36: Output|Input|Overview
Standard Resolutions can be chosen from as shown in the 1024×768@75 to 7680×1080@60 right figure. 2. D8 supports to customize output resolution. Click output port and type in Width, Height and Refresh Rate. © Xiamen RGBlink Science & Technology Co., Ltd. - Page 37 Scale: X/Y:the starting horizontal and vertical position Width/Height : the horizontal and vertical size of scale. Crop: Support cropping for position, height and width. © Xiamen RGBlink Science & Technology Co., Ltd. Ph: +86 0592 5771197 | support@rgblink.com | www.rgblink.com...
- Page 38 Factory Setting Remove EDID: clear the previous EDID parameter Tick Remove EDID and then click Reset. © Xiamen RGBlink Science & Technology Co., Ltd. Ph: +86 0592 5771197 | support@rgblink.com | www.rgblink.com...
-
Page 39: Display Management
Display System is for users to set layout of outputs. Click to enter layout management interface. D8 is set to Cross by default, shown as figure in right. If you need layouts such as H 1/4, V 1/4 or others, press and hold to cancel current screen group and then create a new container. - Page 40 2. Click <Create>, the container will display in the interface, and shows the width and height of each Display. 3. Click<Save> to save the container. © Xiamen RGBlink Science & Technology Co., Ltd. Ph: +86 0592 5771197 | support@rgblink.com | www.rgblink.com...
-
Page 41: Layer Management
The output being replaced will turn from gray to white in the list. Display System D8 allows users to edit the name of the Display Area that has been created by clicking 3.3.5 Layer Management Layer Management is designed to manage the layer of each monitor. - Page 42 As the signal is dragged in, the layer number decreases. If the layer number has been used up, the signal cannot be dragged in. Note: D8 only supports 1*8K layer. © Xiamen RGBlink Science & Technology Co., Ltd. Ph: +86 0592 5771197 | support@rgblink.com | www.rgblink.com...
- Page 43 Moving the mouse to drag the layer. Layer Remove Click the cross on the top right of the layer to remove the layer if needed. © Xiamen RGBlink Science & Technology Co., Ltd. Ph: +86 0592 5771197 | support@rgblink.com | www.rgblink.com...
-
Page 44: Preset Management
New Preset Name to rename a Preset (Bank). Click the color block after Color Selection and choose a new color for the boarder of chosen bank. © Xiamen RGBlink Science & Technology Co., Ltd. Ph: +86 0592 5771197 | support@rgblink.com | www.rgblink.com... - Page 45 4. Fill in the “Duration” 5. Click “OK” Users can click to edit and to delete. After settings done, turn on “Loop Switch” . © Xiamen RGBlink Science & Technology Co., Ltd. Ph: +86 0592 5771197 | support@rgblink.com | www.rgblink.com...
-
Page 46: Chapter 4 Order Codes
Chapter 4 Order Codes 4.1 Product Code 130-0008-01-0 D8 (HDMI 2.1) 130-0008-02-0 D8 (DP 1.4) 130-0008-03-0 D8 PLUS © Xiamen RGBlink Science & Technology Co., Ltd. Ph: +86 0592 5771197 | support@rgblink.com | www.rgblink.com... -
Page 47: Chapter 5 Support
Chapter 5 Support 5.1 Contact Us © Xiamen RGBlink Science & Technology Co., Ltd. Ph: +86 0592 5771197 | support@rgblink.com | www.rgblink.com... -
Page 48: Chapter 6 Appendix
1920 × 1080 at 120 Hz or 2560 × 1440 at 60 Hz). It added support for 10 bpc, 12 bpc, and 16 bpc color depth (30, 36, and 48 bit/px), called deep color. © Xiamen RGBlink Science & Technology Co., Ltd. Ph: +86 0592 5771197 | support@rgblink.com | www.rgblink.com... - Page 49 GBIC, and CATV. SC is one of the most popular options, as its simplicity in design comes along with great durability and affordable prices. © Xiamen RGBlink Science & Technology Co., Ltd. Ph: +86 0592 5771197 | support@rgblink.com | www.rgblink.com...
- Page 50 ●HDBaseT: A video standard for the transmission of uncompressed video (HDMI signals) and related features using Cat © Xiamen RGBlink Science & Technology Co., Ltd. Ph: +86 0592 5771197 | support@rgblink.com | www.rgblink.com...
- Page 51 ●MIDI: MIDI is the abbreviation of Musical Instrument Digital Interface. As the name indicates the protocol was developed for communication between electronical musical instruments and latterly computers. MIDI instructions are © Xiamen RGBlink Science & Technology Co., Ltd. Ph: +86 0592 5771197 | support@rgblink.com | www.rgblink.com...
- Page 52 © Xiamen RGBlink Science & Technology Co., Ltd. Ph: +86 0592 5771197 | support@rgblink.com | www.rgblink.com...
-
Page 53: Revision History
Aster 2. Add INPUT option in Main Menu All information herein is Xiamen RGBlink Science & Technology Co Ltd. excepting noted. is a registered trademark of Xiamen RGBlink Science & Technology Co Ltd. While all efforts are made for accuracy at time of printing, we reserve the right to alter otherwise make change without notice.
Need help?
Do you have a question about the D8 and is the answer not in the manual?
Questions and answers