Table of Contents
Advertisement
Quick Links
Advertisement
Table of Contents

Related Manuals for RGBlink FLEX DS1


Summary of Contents for RGBlink FLEX DS1
- Page 1 FLEX DS1 USER MANUAL Article No: RGB-RD-UM-DS1 C001 Revision No: V1.0...
-
Page 2: Table Of Contents
Chapter 4 Ordering Codes..........................29 4.1 Product.............................29 4.2 Sending Card............................ 29 Chapter 5 Support ............................30 5.1 Contact Us............................30 Chapter 6 Appendix............................31 6.1 Specification.............................31 6.2 System Upgrade..........................33 6.3 Terms & Definitions......................... 35 6.4 Revision History..........................39 FLEX DS1 User Manual... -
Page 3: Declarations
RGBlink. If the purchaser or a third party carries out modifications or repairs on goods delivered by RGBlink, or if the goods are handled incorrectly, in particular if the systems are commissioned operated incorrectly or if, after the transfer of risks, the goods are subject to influences not agreed upon in the contract, all guarantee claims of the purchaser will be rendered invalid. -
Page 4: Operators Safety Summary
AC power Cord. The AC Socket-outlet should be installed near the equipment and be easily accessible. Unpacking and Inspection Before opening shipping box, inspect it for damage. If you find any damage, notify the shipping carrier FLEX DS1 User Manual... -
Page 5: Contents
Site Preparation The environment in which you install your product should be clean, properly lit, free from static, and have adequate power, ventilation, and space for all components. FLEX DS1 User Manual... -
Page 6: Chapter 1 Your Product
Chapter 1: Your Product Chapter 1 Your Product 1.1 In the Box Power cable USB cable DVI cable DUAL LINK to Screwdriver Warranty card DVI+VGA cable &USB file Anti-static bag Certificate of Qualification Note: The USB file contains Warranty/Registration Card. AC Power Cord supplied as standard according to the destination market. -
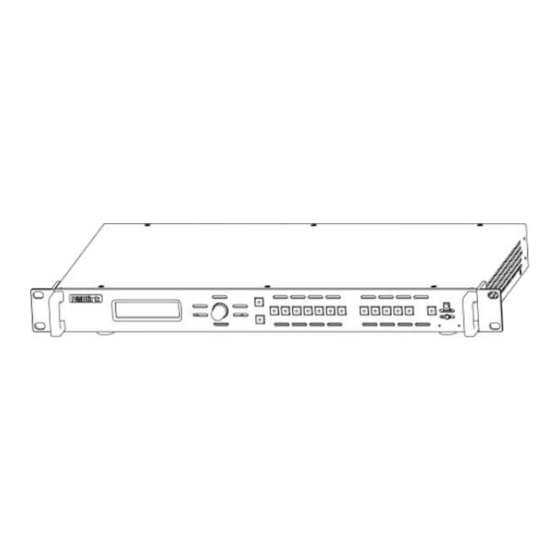
Page 7: Product Overview
Chapter 1: Your Product 1.2 Product Overview FLEX DS1 is a video processor that can be only operated on Google Chrome. It can be connected to the PC through the LAN port at the rear panel, and completely operated on Chrome. Concise but complete, it can be used to schedule and play programs in restaurants (menu and price) , outdoor advertisements and weddings. -
Page 8: Rear Panel
Chapter 1: Your Product 1.2.1 Rear Panel Inputs HDMI Can be connected to HDMI output port. CVBS Can be connected to video signal from high-definition player and computer. VGA/Yp Can be connected to video signals from high-definition player and computer. Can be connected to video signals from high-definition player, DVD and computer. -
Page 9: Dimension
Chapter 1: Your Product 1.2.2 Dimension... -
Page 10: Chapter 2 Installing Your Product
Chapter 2: Installing Your Product Chapter 2 Installing Your Product 2.1 Plugging in Signals (1) Connect the device to computer with a LAN cable. Control the output with computer. (2) Connect HDMI/DVI3 OUT to HDMI/DVI IN, the signal processed by computer is the output signal. -
Page 11: Ip Settings
Chapter 2: Installing Your Product 2.3 IP Settings (1) Turn on the power of DS1. (2) Connect DS1 and computer with a LAN cable. (3) The IP address of DS1 will be displayed on the screen during the starting up. (4) For example, if the IP address shown on the screen is 192.168.100.2, follow the steps as below to set the IP of the computer: Set the IP of the computer as 192.168.100.6 and the subnet mask as 255.255.255.0. -
Page 12: Dhcp
Chapter 2: Installing Your Product Note: It can be operated on Google Chrome ONLY. The last number of the IP (computer and device) cannot the same, but make sure that they belong to the same network segment. 2.4 DHCP It can also be connected by DHCP. - Page 13 Chapter 2: Installing Your Product Note: The DHCP is controlled by a DHCP server that dynamically distributes network configuration parameters, such as IP addresses, for interfaces and services. A DHCP server enables computers to request IP addresses and networking parameters automatically, reducing the need for a network administrator or a user to configure these settings manually.
-
Page 14: Chapter 3 Using Your Product
Chapter 3: Using Your Product Chapter 3 Using Your Product 3.1 Understanding the MENU Structure... -
Page 15: Using The Menu
Chapter 3: Using Your Product 3.2 Using the MENU 3.2.1 Design 1. New Design Upload File (1) Select <New Design> on the MENU page; (2) Click the “Upload File” icon on the left; Video, audio, image, PDF and HTML can be uploaded to DS1, see below: Media Type Filename Extension Resolution... - Page 16 Chapter 3: Using Your Product Delete File Drag the target file to the trash can icon to delete the file: Edit File (1) Drag the target file to the canvas: (2) The file can be moved at will, and several files can be dragged to the same canvas.
- Page 17 Chapter 3: Using Your Product Note: The max size of the video is 1920×1080. There should be one video on a canvas at a time. A maximum of 6 widgets can be used on a canvas at a time. ...
- Page 18 Chapter 3: Using Your Product Transition duration: set the transition duration. Opacity: set the opacity of the layer. (4) After setting, make sure that it is saved by clicking <Save>. Go to Scheduler: It will skip to the Scheduler interface after saving. OK: It will remains on the current interface.
- Page 19 Chapter 3: Using Your Product The user can delete one or more designs by ticking the target design and clicking <Delete Design>. Playlist Right click the file on the canvas, select <Playlist> to view the playlist. 2. Load Design Click <Load Design> on the MENU page. The box will pop up:...
- Page 20 Chapter 3: Using Your Product The user can also view all saved designs on the left of the Scheduler interface. 3. Widgets Above the canvas on the New Design interface, there are 10 widgets: Web, Text, Text Banner, Image Banner, Analog Clock, Digital Clock, RSS, Streaming, Remote Folder and Live Data. Any widget can be dragged to the canvas, and can be edited.
- Page 21 Chapter 3: Using Your Product Width Set the width of the layer Height Set the height of the layer Offset X Set the X Offset Offset Y Set the Y Offset Layer order Set the order of layers when there are two or more [Greater number means upper layer] layers;...
- Page 22 Chapter 3: Using Your Product Bottom to Top or Top to Bottom can be selected. Speed Set the scrolling speed. A greater number means a [Greater number means faster speed] faster speed. Foreground color Set the color to text Background color Set the color of background Opacity Set the opacity of the layer.
- Page 23 Chapter 3: Using Your Product Width Set the width of the layer Height Set the height of the layer Layer order Set the order of layers when there are two or more [Greater number means upper layer] layers; a greater number means an upper layer. Set the scrolling direction.
- Page 24 Chapter 3: Using Your Product [Greater number means lower opacity] greater opacity. Font size Set the font size time format (year/month/date; Format string hour/minute/second) Name Function Media type Widget name Media duration (sec) Set the play duration (second) X (pixel) Set the horizontal position of the layer Y (pixel) Set the vertical position of the layer...
- Page 25 Chapter 3: Using Your Product Layer order Set the order of layers when there are two or more [Greater number means upper layer] layers; a greater number means an upper layer. Enter the URL Remote Folder Name Function Media type Widget name Media duration (sec) Set the play duration (second)
- Page 26 Chapter 3: Using Your Product Source type CSV, JSON or XML can be selected Source link Enter the source link Data mapping Enter the target data Refresh interval Edit the refresh interval Operation (take Analog Clock for example): (1) Drag the Analog Clock icon to the canvas: (2) Right click the widget, and select Properties to set the parameters.
-
Page 27: Scheduler
Chapter 3: Using Your Product 3.2.2 Scheduler 1. New Plan Schedule designs (1) Enter the Scheduler interface to check the designs. Designs are shown on the left. The most recent design is placed on the top. The user can select the period format (month/week/day) at the top right corner. ... - Page 28 Chapter 3: Using Your Product The user can select a period or a day to repeat the program. (4) Click “Apply”. (5) After setting, make sure to save the schedule by clicking <Save>, or it will not be played. Note: The periods cannot be overlapped.
-
Page 29: Controller
Chapter 3: Using Your Product 2. Load Plan Click <Load Plan> on the MENU page. The live plans will be loaded. The user can also load plans by clicking <Load> on the Scheduler interface. 3. Export Plan The user can export the live plans to computer in ZIP file, which will be automatically saved to the root directory of the U disk. - Page 30 Chapter 3: Using Your Product Set the output resolution (1) There are 9 resolutions in total: 1920×1080 / 1366×768 / 1360×768 / 1280×1024 / 1280×800 /1280×720 / 1024×768 / 800×600 / 640×480 (2) Click “Apply”. Set the rotation (1) 4 rotation degrees can be selected: 0°/90°/180°/270° (2) Click “Apply”.
- Page 31 Chapter 3: Using Your Product The user can click Reboot or Shutdown to reboot or shut down the device. The user can also schedule a day (Monday to Sunday or Daily) and time (hour/minute) to for a timed shutdown, reboot or starting up. Click “Add”, and the schedule will be displayed in the Task box. The schedule can be edited or deleted.
- Page 32 Chapter 3: Using Your Product Register Information If the registration code is missing, please contact us for a new registration code. Server Information Set the IP address and server port number. Change Password Only the password can be changed. The user name cannot be changed. Network Config DHCP connection or IP can be selected.
-
Page 33: Language
Chapter 3: Using Your Product To enable or disable logs, and set the size. System Upgrade Refer to System Upgrade. 3.2.4 Language 7 languages are available, they are simplified Chinese, traditional Chinese, English, German, Japanese, Korean and Spanish. -
Page 34: Chapter 4 Ordering Codes
Chapter 4 Ordering Codes Chapter 4 Ordering Codes 4.1 Product 710-0001-01-0 FLEX DS1 4.2 Sending Card Product Code Item 880-0001-01-0 TS 802 Linsn LED Sender Card with 2 outputs 880-0011-01-0 Colorlight LED Sender Card with 2 outputs 880-0012-01-0 Colorlight LED Sender Controller with 4 outputs... -
Page 35: Chapter 5 Support
Chapter 5: Support Chapter 5 Support 5.1 Contact Us... -
Page 36: Chapter 6 Appendix
Chapter 6: Appendix Chapter 6 Appendix 6.1 Specification CVBS Input Number of Inputs Connector Standard BNC Socket Supported Standards PAL/NTSC Signal Level 1Vpp±3db (0.7V Video+0.3v Sync) 75 ohm Multiplex 480i, 576i VGA/YP Input Number of Inputs Connector Standard DB15 Socket Supported Standard VGA-UXGA R, G, B, Hsync, Vsync: 0 to1Vpp±3dB (0.7V Video+0.3v Sync) 75 ohm... - Page 37 Chapter 6: Appendix Connector Standard DVI-I socket SMPTE: 625/25/50 PAL, 525/29.97/59.94 NTSC, 1080P50/59.94/60,1080i50/59.94/60, Supported Resolution 720p50/59.94/60 VESA: 800×600@60 I 1024×768@60 I 1280×768@60 I 1280×1024@60 I 1600×1200@60 I 1920×1080@60 Signal Level TMDS pwl, single pixel input, 165MHz bandwidth Format Standard HDMI 1.3 DVI Output Number of Outputs Connector...
-
Page 38: System Upgrade
Chapter 6: Appendix 6.2 System Upgrade 1. Things to know before upgrade The browser must be Google Chrome. Remember the IP address shown on the screen during the starting up. The package is ZIP compressed file. Decompression is NOT required. ... - Page 39 Chapter 6: Appendix (4) Click <System Config> under <Controller>. (5) Select <System Upgrade>. (6) Upload the ZIP file. (7) Click “Apply”. The dialog box reading “Upgrade?” will pop up, click “OK” to upgrade. (8) Click “OK” to reboot. (9) It will skip to the login interface after reboot.
-
Page 40: Terms & Definitions
Chapter 6: Appendix 6.3 Terms & Definitions The following terms and definitions are used throughout this guide. “ASCII”: American Standard for Information Interchange. The standard code consisting of 7-bit coded characters (8 bits including parity check) used to exchange information between data processing systems, data communication systems, and associated equipment. - Page 41 Chapter 6: Appendix and 9000°K. “Contrast ratio”: The radio of the high light output level divided by the low light output level. In theory, the contrast radio of the television system should be at least 100:1, if not 300:1. In reality, there are several limitations.
- Page 42 Chapter 6: Appendix compression, storage and transmission of moving image information such as motion video, CD-quality audio, and control data at CD-ROM bandwidth. The MPEG algorithm provides inter-frame compression of video images and can have an effective compression rate of 100:1 to 200:1.
- Page 43 Chapter 6: Appendix presented on a particular display. “SDI”: Serial Digital Interface. The standard based on a 270 Mbps transfer rate. This is a 10-bit, scrambled, polarity independent interface with common scrambling for both component ITU-R 601 and composite digital video and four channels of (embedded) digital audio.
-
Page 44: Revision History
Chapter 6: Appendix 6.4 Revision History The table below lists the changes to the User Manual. Version Time ECO# Description Principal V1.0 2017-08-08 0000# Release Monica...
Need help?
Do you have a question about the FLEX DS1 and is the answer not in the manual?
Questions and answers