Table of Contents
Advertisement
Quick Links
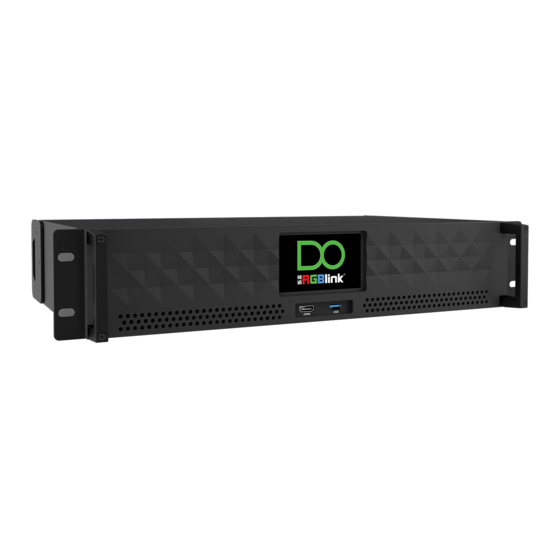
D8
Quick Start
● 8K@60 input, HDCP 2.2 compliance
● Built-in 4'' LCD touch screen control
● 8K EDID management
● Genlock synchronization unequal splicing, multiple splicing layouts available
● Layer cropping and scaling
● Genlock input and loop throuch
● XPOSE 2.0 control
● Support standard output resolution and customize output resolution
● Hot swap
● Open API
Advertisement
Table of Contents

Summary of Contents for RGBlink D8
- Page 1 Quick Start ● 8K@60 input, HDCP 2.2 compliance ● Built-in 4'' LCD touch screen control ● 8K EDID management ● Genlock synchronization unequal splicing, multiple splicing layouts available ● Layer cropping and scaling ● Genlock input and loop throuch ● XPOSE 2.0 control ●...
-
Page 2: Table Of Contents
Main Interface .....................9 Device ......................9 Settings ......................9 Load Presets ....................12 Language ..................... 13 Version ......................13 XPOSE 2.0 ......................14 Contact Information ....................15 © Xiamen RGBlink Science & Technology Co., Ltd. Ph: +86 0592 5771197 | support@rgblink.com | www.rgblink.com... -
Page 3: Overview
D8 continues to lead the display technology to become an 8K@60-level video processor in the industry. Create a visual experience. The D8 is standard with one HDMI 2.1 (or DP 1.4) input interface port, which can meet the requirements of 8K input signal transmission. -
Page 4: Packing Configuration
Note: 1. AC Power Cable supplied as standard according to destination market. 1. We offer 8K HDMI Cable for D8 (HDMI 2.1) model and 8K DP Cable for D8 (DP 1.4) model. © Xiamen RGBlink Science & Technology Co., Ltd. -
Page 5: Hardware Orientation
Rack Mount Ears Handle Handle Name Description 4-inch LCD touch screen allows you to directly control D8, which optimizes Touch Screen the user experience. Use with the load-bearing screws to fix device on the rack. Rack Mount Ears For carrying device. -
Page 6: Rear Panel
Output Interface Communication Interface Name Description ● D8 (HDMI 2.1) is standard with Single HDMI 2.1 Input Interface Input Interface ● D8 (DP 1.4) is standard with Single DP 1.4 Input Interface Output Interface Standard with Quad HDMI 2.0 Output Module Standard with 1xRS 232 Serial Port,1xLAN Network Port (preliminary),... -
Page 7: Install Your Product
Install Your Product Note: D8 (HDMI 2.1) and D8 (DP 1.4) are same in installation. This chapter takes D8 (HDMI 2.1) as example. Plug in Power Connect power and D8 with standard Power Cord. Plug one end of the power cable to the D8’s power interface. -
Page 8: Turn On Your Product
Turn on Your Product Push the power switch on the rear panel and the system begins to work. © Xiamen RGBlink Science & Technology Co., Ltd. Ph: +86 0592 5771197 | support@rgblink.com | www.rgblink.com... -
Page 9: Use Your Product
Use Your Product Main Interface Turn on D8, and the Main Interface includes Menu and SN serial number. Note: Click the previous option to exit current interface step-by-step until back to Main Interface. Device Click <Device> to check Input and Output Status and Resolution. - Page 10 Back to <Settings>, click <Split> to choose splicing layout and configure parameters. 3 split modes available, including Cross (by default), H 1/4 and V 1/4. © Xiamen RGBlink Science & Technology Co., Ltd. Ph: +86 0592 5771197 | support@rgblink.com | www.rgblink.com...
- Page 11 “Confirm”. Note: The resolution on the signal source (such as a computer) needs to be same as the D8. Refer to <User Manual> for details. © Xiamen RGBlink Science & Technology Co., Ltd. Ph: +86 0592 5771197 | support@rgblink.com | www.rgblink.com...
-
Page 12: Load Presets
Height as needed. Then click "Save Settings" > "Confirm" to save above parameters. Load Presets Back to Main Interface, then click <Load> to load presets. © Xiamen RGBlink Science & Technology Co., Ltd. Ph: +86 0592 5771197 | support@rgblink.com | www.rgblink.com... -
Page 13: Language
D8 provides 16 positions for saving banks. Yellow background: current bank; Green background: with parameter saved; Grey background: empty bank. Note:Please do Scene Setting in XPOSE 2.0 firstly and then you can load bank. Language Back to Main Interface, then click <English> to set system language. -
Page 14: Xpose 2.0
XPOSE 2.0 Operation Download XPOSE 2.0 software from RGBlink website. https://www.rgblink.com/xpose_software.aspx Please refer to user manual of D8 for how to install and operate XPOSE 2.0. https://rgblink-web.azurewebsites.net/productsinfo.aspx?id=232 © Xiamen RGBlink Science & Technology Co., Ltd. Ph: +86 0592 5771197 | support@rgblink.com | www.rgblink.com... -
Page 15: Contact Information
All video products are designed and tested to the highest quality standard and backed by full 1 years parts and labor warranty. Warranties are effective upon delivery date to customer and are non-transferable. RGBlink warranties are only valid to the original purchase/owner. Warranty related repairs include parts and labor, but do not include faults resulting from user negligence, special modification, lighting strikes, abuse(drop/crush), and/or other unusual damages.


Need help?
Do you have a question about the D8 and is the answer not in the manual?
Questions and answers