Bosch radlonlcs D6412 Installation Manual
Control/communicator
Hide thumbs
Also See for radlonlcs D6412:
- Operation and installation manual (76 pages) ,
- Program entry manual (140 pages)
Table of Contents
Advertisement
Advertisement
Table of Contents

Related Manuals for Bosch radlonlcs D6412


Summary of Contents for Bosch radlonlcs D6412
- Page 1 D6412/D4412 Control/Communicator Installation Guide...
-
Page 2: Table Of Contents
D6412/D4412 Contents Contents Introduction ..................................7 Manual Organization ................................7 Other Literature Referenced ..............................8 Documentation Conventions ..............................8 1.3.1 Type Styles Used in this Manual............................8 1.3.2 Tips, Important Notes, Cautions and Warnings ........................9 FCC Notice .................................... 9 1.4.1 Part 15 .................................... - Page 3 D6412/D4412 Contents Power Supply ..................................20 Primary Power ..................................20 4.1.1 Primary (AC) Power Circuit ..............................20 4.1.2 Installing the Transformer ..............................20 Secondary Power ................................20 4.2.1 Secondary (DC) Power ..............................20 4.2.2 Installing the Battery ................................21 4.2.3 Replacement ..................................
- Page 4 D6412/D4412 Contents 10.0 Off-Board Outputs ................................42 10.1 Overview ..................................... 42 10.2 DX3010 Octo-Output Module ............................. 42 10.2.1 Overview ..................................... 42 10.2.2 Configuring the DX3010 Octo-Output Module ........................42 10.2.3 Relay Outputs ..................................42 10.2.4 Installation ................................... 43 10.2.5 DX3010 to D6412/D4412 SDI Bus Wiring Connections ....................44 10.2.6 Address Programming ...............................
- Page 5 D6412/D4412 Tables Appendix A: Approved Applications Compliance Guide ......................67 Listings and Approvals ..................................67 System Chart ..................................... 68 System Wiring Diagrams, Issue A ..............................69 Current Rating Chart for Standby Battery Calculations ........................70 Standby Battery Requirements ................................. 71 Standby Battery Calculation for NFPA 72 Fire Alarm Applications ....................
- Page 6 D6412/D4412 Figures Figures Figure 1: System Configuration ................................ 10 Figure 2: Enclosure Mounting ................................17 Figure 3: Installer Switch ................................... 18 Figure 4: System Status LED ................................22 Figure 5: On-Board Outputs ................................24 Figure 6: RJ31X/RJ38X Wiring ................................. 25 Figure 7: System Status LED ................................
-
Page 7: Introduction
D6412/D4412 Introduction Introduction This manual addresses the installation of the D6412 and D4412 Control/Communicators only, and should not be used for any other panel. Manual Organization This manual is divided into 16 sections with seven appendices. Table 1 contains a summary of each section. Section Description Introduction - this section. -
Page 8: Other Literature Referenced
D6412/D4412 Introduction Other Literature Referenced Throughout this manual, references will be made to other documentation. Review the documents in the table below for a complete description of the panel. Part numbers are included for ordering purposes. Name of Document Part Number D6412/D4412 Program Entry Guide 45351 D6412 Program Record Sheet... -
Page 9: Tips, Important Notes, Cautions And Warnings
D6412/D4412 Introduction 1.3.2 Tips, Important Notes, Cautions and Warnings Throughout this document, helpful tips, important notes, cautions and warnings will be presented for the reader to keep in mind. These appear different from the rest of the text as follows; Important Notes - should be heeded for successful operation and programming. -
Page 10: Overview
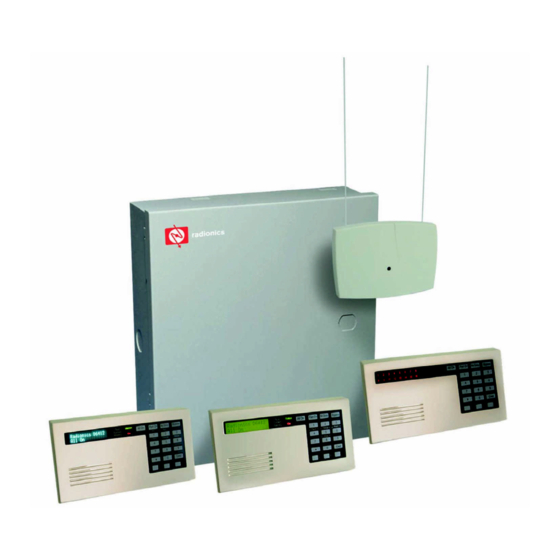
D6412/D4412 Overview Overview RF3224 Premises RF Receiver (up to 4 RF keypads DX3010 and 32 keyfobs) Octo-Output Module DX2010 Point Expansion Module Control/ Communicator DX4010 8 On-Board Serial Interface Module Sensor Loops (for connection of serial printer 4 On-Board or other RS-232 device) Outputs Use Command Centers and/or keyswitches to arm the panel by area. -
Page 11: Battery Discharge/Recharge Schedule
D6412/D4412 Overview 2.1.4 Battery Discharge/Recharge Schedule Discharge Cycle AC Off: Command centers indicate trouble. AC Fail report sent as programmed. 13.8 VDC: Charging Float Level 12.1 VDC: Low Battery trouble at command centers. Low Battery report as programmed. 10.2 VDC: Panel shuts down as voltage falls below 10.2 VDC Recharge Cycle AC On: Panel restarts, battery charging begins, AC restoral report sent as programmed, AC trouble clears from command centers. -
Page 12: Control/Communicator Configurations
D6412/D4412 Overview 2.1.12 Control/Communicator Configurations D6412 - Complete Control/Communicator assembly in the D2203 Universal Enclosure. A CX4010 Transformer is supplied. D6412LT - Complete Control/Communicator assembly in the D2203 Universal Enclosure. A CX4010 Transformer must be ordered separately. D6412LC - Complete Control/Communicator assembly without an enclosure or transformer. A CX4010 Transformer must be ordered separately. -
Page 13: Communicator
D6412/D4412 Overview 2.3.3 Communicator The panel uses a built-in digital communicator to send reports to the receiver. The panel transmits reports in either Modem IIIa², Contact ID or Pager format. Only the following Central Station Receivers support the panel’s Modem IIIa Format: •... -
Page 14: Emi/Lightning Transient Protection
D6412/D4412 Overview 2.3.8 EMI/Lightning Transient Protection The panel maintains Radionics’ high level of quality and field dependability. Its design significantly reduces electromagnetic interference and malfunction generally caused by lightning. 2.3.9 Programming Use either a text keypad or the Remote Account Manager (RAM IV) to program the panel. Refer to the D6412/ D4412 Program Entry Guide (P/N: 45351) for programming options. -
Page 15: Listings And Approvals
D6412/D4412 Overview Ordered Separately Order the following to complete a basic 8-point installation. • Command Center (or keyswitch) • D118 Speaker (for PO 2 in supervised configuration) D118 not investigated by UL • D126 Battery • D164 Phone Cord Configured packages are also available. Please consult your Radionics Product Catalog. The following literature is available in a separate literature package for dealers. -
Page 16: Installation
D6412/D4412 Installation Installation Before You Begin This section contains a general installation procedure. It refers to other sections of the manual for detailed instructions. Radionics recommends you review this manual and the D6412/D4412 Program Entry Guide (P/N: 45351) before you begin the installation to determine the hardware and wiring requirements for the features you want to use. Have the following additional documents handy as you read through this manual: •... -
Page 17: Installing The Assembly
D6412/D4412 Installation Installing the Assembly Place the panel mounting clips on the appropriate standoff in the enclosure (see Figure 2). Slide the panel into the slots at the top of the enclosure and then secure it with the two screws provided (see Figure 2). -
Page 18: Closing The Installer Switch
D6412/D4412 Installation 3.5.2 Closing the Installer Switch Closing the Installer Switch disables the panel (see Figure 3). System reporting is disabled and the system cannot be armed. A system trouble shows at all keypads. Opening the Installer Switch from the closed position resets the panel. The panel resets all its timers, counters, indexes, and buffers. -
Page 19: Install Modules
D6412/D4412 Installation 3.6.4 Install Modules Power Down First: Power down the unit by unplugging the transformer and disconnecting the battery. Radionics recommends that you power down the unit when installing modules, or when making wiring connections to the panel. Install and wire any modules required for your installation as described in the module’s installation instructions. -
Page 20: Check For Fire Alarm Verification
D6412/D4412 Power Supply Check for Fire Alarm Verification You must check the Alarm Verification Box in the lower left corner of the label if you programmed Point 1 for Fire with Verification. See Point Index in the D6412/D4412 Program Entry Guide (P/N: 45351). See Section 14.0, Installation Label, for the location of the Alarm Verification Box on each installation label. -
Page 21: Installing The Battery
D6412/D4412 Power Supply 4.2.2 Installing the Battery Place the battery upright in the base of the enclosure. Locate the red and black leads supplied in the literature pack. Push one connector on the black battery lead to panel’s ‘Batt-’ connector, and then push the lead’s other connector to the negative (-) side of the battery. -
Page 22: System Status Led
D6412/D4412 Power Outputs 4.2.7 System Status LED The System Status LED shows system status, including power supply status as described below. Figure 4 shows the location of the LED on the panel. System Normal on for 50 ms, off for 1 sec. Battery Missing off for 200 ms, on for 1 sec. -
Page 23: Alarm Power
D6412/D4412 Power Outputs 5.2.3 Alarm Power Provides positive 12 VDC for PO 2 (Programmable Output 2) when it is configured as a siren driver and PO 1 when it is configured as the alarm output. Continuous Power Output 5.3.1 Continuous Current Draw The continuous current draw for powered devices connected to the Aux Power terminals, the Installer’s Keypad Connector and Outputs PO 1 to PO 4 (when programmed for continuous output) are restricted as follows: 120 mA for Fire and Combined Fire/Burglary systems... -
Page 24: Telephone Connections
D6412/D4412 Telephone Connections Unexpected Output at PO 1 to PO 4: If these outputs do not provide the alarm output you expect: • Check the programming for Programmable Outputs in the Outputs section of the D6412/D4412 Program Entry Guide (P/N: 45351). •... -
Page 25: Location
D6412/D4412 Telephone Connections Location To prevent jamming of signals, wire the RJ31X jack or RJ38X jack to support line seizure as shown in Figure 6. Install the jack on the street side of the phone switch, wired ahead of any PBX equipment. Line seizure temporarily interrupts normal phone usage while the communicator transmits data. -
Page 26: Phone Line Fault
D6412/D4412 Telephone Connections Phone Line Fault The panel has a circuit that tests the phone line for voltage. The normal voltage on a telephone line is approximately 48 VDC (24 VDC for some phone systems). The phone line monitor senses trouble when the voltage drops low enough (between 1 and 3 volts). -
Page 27: Figure 8: Ground Start
D6412/D4412 Telephone Connections The PO 1 jumper is not used when interfacing PO 2, 3 or 4 to a D133 or D134. See Figure 8 for details. You must connect a proper earth ground reference to the earth ground terminal. IMPORTANT Ground start not for use in Fire or combined Fire/Burglary applications. -
Page 28: Onboard Sensor Loops
D6412/D4412 Onboard Sensor Loops Onboard Sensor Loops Description The panel provides eight on-board sensor loops. Each sensor loop functions independently and does not interfere with the operation of the others. The on-board sensor loops can be set to the default single point configuration with a 2.2 k Ω... -
Page 29: Sensor Loop 1 Configuration
D6412/D4412 Onboard Sensor Loops Remove Jumper Plug from JP2 JP2-PO1 Select Alrm Aux (+) Aux (-) Smoke Detector D285/D285TH w/ 2.21 k D292 Base Resistor D275 EOL Relay End-of-Line Module Figure 10: Typical Four-Wire Smoke Detector Wiring Sensor Loop 1 Configuration Sensor Loop 1 can be used for applications other than a fire point. -
Page 30: Doubled Point Configuration
D6412/D4412 Onboard Sensor Loops The number of normally-open and/or normally-closed detection devices each sensor loop can supervise is limited only by the resistance on the loop. The total resistance for wire length and contacts, minus the end-of- line resistor, must not exceed 100 Ω. You can determine the condition of the on-board sensor loops in the default configuration (single point, 2.2 k Ω... -
Page 31: Sensor Loop Response Time
D6412/D4412 Onboard Sensor Loops Sensor Loop Response Time The panel scans both on and off-board sensor loops per Point Index programming. See Point Index Configuration in the D6412/D4412 Program Entry Guide (P/N: 45351). The panel scans sensor loops for ‘pulses’ (electrically off normal events). The Point Index determines the Pulse Count and Pulse Count Time for each sensor loop. -
Page 32: Off-Board Sensor Loops
D6412/D4412 Off-board Sensor Loops Off-board Sensor Loops SDI Point Expanders You can expand the number of points on the panel by connecting modules to the panel’s SDI (data) Bus. Use the DX2010 Point Expansion module to add wired points. Use a compatible Premises RF Receiver to add wireless points. -
Page 33: Table 5: Off-Board Sensor Loops - Location/Address Assignment
D6412/D4412 Off-board Sensor Loops Location Device Pt Index Area Point # 3 DX2010 (Default) (Default) (Default) (Default) On-Board D9528 Doubled RF Receiver 1 RF Receiver 2 Nibble: Nibble: Nibble: Nibble: SDI Addr SDI Addr SDI Addr 50 SDI Addr 51 0801 0802 0803... -
Page 34: Dx2010 Point Expander Module
D6412/D4412 Off-board Sensor Loops DX2010 Point Expander Module 8.2.1 DX2010 Overview You can connect up to five DX2010 Point Expander Modules to the D6412 (three to the D4412). In the single point configuration, each DX2010 adds eight points to the system. In the doubled point configuration, each DX2010 adds 16 points to the system. -
Page 35: Figure 15: Installing The Dx2010 In The Panel's Enclosure
D6412/D4412 Off-board Sensor Loops D6412/D4412 PCB J P 1 A U X ILIAR Y Ins ta lle r J P2 - PO 1 S e lec t A lr m P O1 C om C om C om L- 6 C o m Enclosure Wall DX2010 Side... -
Page 36: Dx2010 To Panel Sdi Bus Connections
D6412/D4412 Off-board Sensor Loops 8.2.3 DX2010 to Panel SDI Bus Connections Connect the panel’s Data and Aux Power terminals to the DX2010 module as shown in Figure 17. Refer to Table 6 for the SDI bus wiring length requirements. 22 AWG (0.8 mm) 18 AWG (1.2 mm) Panel to DX2010 1000 ft. -
Page 37: Dx2010 Auxiliary Output Connections
D6412/D4412 Off-board Sensor Loops DX2010 D6412/D4412 +OUT- TMPR 1 COM Green (Data) Yellow (Data) Black (-) Red (+) External 12 VDC Power Supply Figure 18: Wiring the DX2010 for External Power Supply 8.2.4 DX2010 Auxiliary Output Connections The DX2010 has the capacity to provide 12 VDC at up to 100 mA from the Auxiliary Output (-) OUT (+) terminals to power external devices such as motion detectors. -
Page 38: Dx2010 Tamper Input Connections
D6412/D4412 Off-board Sensor Loops 8.2.5 DX2010 Tamper Input Connections Each DX2010 module provides an input for tamper devices. The tamper input is in addition to the point sensor loops. Supervising an enclosure tamper does not consume a point. A fault on the tamper input is reported as a tamper event for the SDI address the DX2010 is set to. -
Page 39: Dx2010 Doubled Sensor Loop (Point) Wiring
D6412/D4412 Off-board Sensor Loops 8.2.6.2 DX2010 Doubled Sensor Loop (Point) Wiring Wire as shown in Figure 22. Input Terminals Common 1 to 8 DX2010 Inputs DX2010 Inputs (See Table 7) (See Tables 7 & 8) Open for alarm Open for alarm otherwise otherwise Normally Closed... -
Page 40: Dx2010 Status Led
D6412/D4412 Off-board Sensor Loops For example: You want to use a DX2010 sensor loop for panel Point Location 9 (see Locations in the D6412/ D4412 Program Entry Guide (P/N: 45351) for a detailed description of locations and their relationship to points). You must connect a DX2010 and set its address DIP switches to 102. -
Page 41: On-Board Outputs
D6412/D4412 On-board Outputs On-Board Outputs The panel supports up to four on-board programmable outputs (PO 1 to PO 4). Programmable Output 2 (PO 2) can be configured as a supervised siren driver. See Global Output Configuration in the D6412/D4412 Program Entry Guide (P/N: 45351) for programming instructions. When programmed as a siren driver, PO 2 draws power from the Alrm + terminal. -
Page 42: Off-Board Outputs
D6412/D4412 Off-board Outputs Unexpected Output at PO 1 to PO 4: If these outputs do not provide the alarm output you expect: • Check the programming for Programmable Outputs in the Outputs section of the D6412/D4412 Program Entry Guide (P/N: 45351). •... -
Page 43: Installation
D6412/D4412 Off-board Outputs 10.2.4 Installation You can install the DX3010 in the enclosure with the panel (see Figure 27) with the mounting hardware supplied with the DX3010. D6412/D4412 PCB J P1 AU XILIARY Ins talle r J P2-PO1 Selec t Alrm C om Enclosure Wall... -
Page 44: Dx3010 To D6412/D4412 Sdi Bus Wiring Connections
D6412/D4412 Off-board Outputs 10.2.5 DX3010 to D6412/D4412 SDI Bus Wiring Connections Refer to Table 11 for the SDI bus wiring length requirements. If the DX3010 is to be installed far from the control panel, then the control panel cannot be used to power the DX3010. -
Page 45: Address Programming
D6412/D4412 Off-board Outputs If you need to power the DX3010 from an external power source, connect it to the power source and the panel as shown in Figure 30. See Section 4.3, External Power Supply, for external power supply restrictions. D6412/D4412 DX3010 Yellow... -
Page 46: Arming Devices
D6412/D4412 Arming Devices 11.0 Arming Devices 11.1 Description Command Centers, maintained or momentary contact keyswitches, Premises RF arming devices, or any combination are used to arm and disarm areas. The D6412 may contain up to four areas (up to two areas on the D4412) that can be armed and disarmed individually. -
Page 47: Command Center Installation
D6412/D4412 Arming Devices 11.2.2 Command Center Installation Consult the Command Center installation manual for installation and mounting instructions. Command Centers connect to the panel in parallel as shown in Figure 33. Green Yellow Black Yellow Green Black Back of Command Center D6412/D4412 PCB Figure 33: Wiring Command Centers to the D6412/D4412 Refer to Table 15 for panel SDI Bus to Command Center wiring length requirements. -
Page 48: D268/D269, D279 Independent Zone Control
D6412/D4412 Arming Devices Green Yellow Black Yellow Green Black Back of Command Center D6412/D4412 PCB External 12 VDC Power Supply Figure 34: External Power for Command Centers 11.3 D268/D269, D279 Independent Zone Control You can program on-board points 2 to 8 so that the D268, D269 or D279 (or later versions) Independent Zone Controls operate as independent point controls (arms and disarms the point). -
Page 49: Keyswitch
D6412/D4412 Arming Devices 11.4 Keyswitch 11.4.1 Keyswitch Description You can connect a maintained or momentary contact arming station (UL Listed security device keyswitch) to master arm/disarm any of the areas in the system. The keyswitch is connected to an on-board or off-board point’s sensor loop. -
Page 50: Sdi Devices
D6412/D4412 SDI Devices 12.0 SDI Devices 12.1 Description The panel supports a variety of SDI devices, including the Command Centers, DX2010 Point Expanders, and DX3010 Octo-Outputs discussed in previous sections. 12.2 Installation Consult the installation manual for the specific SDI device for complete installation instructions. SDI devices connect to the panel in parallel as shown in Figure 36. -
Page 51: Dx4010 Rs-232 Serial Interface Module
D6412/D4412 SDI Devices Figure 37 shows the common from the External Power Supply Module connected to both the Command Centers’ common and the common on the Control/Communicator. SDI Device D6412/D4412 Green Yellow Black External 12 VDC Power Supply Figure 37: External Power for SDI Devices 12.3 DX4010 RS-232 Serial Interface Module Radionics’... -
Page 52: Dx4010 Installation
D6412/D4412 SDI Devices 12.3.1 DX4010 Installation The intended installation location for the DX4010 is in the plastic enclosure that it is shipped in. This is a low- profile, aesthetically appealing housing that can be placed on a desktop or similar surface. Distance from the panel is determined by the total combined wire length of all devices (including keypads) connected to the panels Data terminals. -
Page 53: Configuration Jumpers
D6412/D4412 SDI Devices D6412/D4412 Com Port AUX/Data Connector Pin Location Serial Port DX4010 DX4010 SDI Bus Black (GND) Green Yellow Null Modem Cable Figure 40: Creating a RAM IV Direct Connection 12.3.4 Configuration Jumpers P2 – Diagnostic LED Pins The diagnostic LEDs can be used for troubleshooting purposes. See Figure 41 for jumper plug placements. The DX4010 will draw more current when the diagnostic LEDs are enabled. -
Page 54: Supervision
D6412/D4412 SDI Devices Address DIP Switches Use the address DIP switches to assign Address 250 to the DX4010 when a serial device is connected to it. Set the DIP switches to Address 0 (zero) when preforming a remote programming direct connection. See Figure 42 for proper DX4010 DIP Switch positioning, and Table 16 for DX4010 address settings. -
Page 55: Installer's Keypad And Installer Mode
D6412/D4412 SDI Devices 13.0 Installer’s Keypad and Installer Mode 13.1 Installer’s Keypad Connector The Installer’s Keypad must be set to Address 0 (set MODE to OFF) and the Installer Switch must be closed in order to program the panel from the keypad. IMPORTANT Figure 44 shows you how to connect and disconnect an Installer’s Keypad (D623 or D625 Text Command Center) and enter the Installer’s Mode. -
Page 56: Service Start/Service End Reports
D6412/D4412 Installer’s Keypad & Installer Mode 13.2.2 Service Start/Service End Reports After you enter your installer passcode and press Cmd 41 to enter the Installer’s Mode, the panel sends a Service Start report. When you exit the installer’s mode, it sends a Service End Report. INSTALLER SWITCH NORMAL (OPEN) AUXILIARY... -
Page 57: Press [6] For Output Test
D6412/D4412 Installer’s Keypad & Installer Mode 13.3.6 Press [6] for Output Test When you press [6] for Output test, the display shows Output 1, Hold [*] for ON. Press and hold the [*] key to turn output on. Press the [*] key (without holding) to end current output test and to advance to next output. Press [Cmd] to return to the Installer’s Menu. -
Page 58: Testing Rf Devices
D6412/D4412 Installer’s Keypad & Installer Mode 13.3.7.2 Testing RF Devices To test RF devices that have been added to the system, press [2] when “Test RF Devices? Press 2.” scrolls across the display. The display will then show the following: Point Location Area Number... -
Page 59: Viewing/Removing Rf Id Codes
D6412/D4412 Installer’s Keypad & Installer Mode 13.3.7.3 Viewing/Removing RF ID Codes To view or remove RF ID codes that have been added to the system, press [3] when “View or Remove RF ID? Press 3.” scrolls across the display. The display will then scroll through the properly configured RF devices: Point Location Area Number... -
Page 60: Exiting The Installer's Menu
D6412/D4412 Installer’s Keypad & Installer Mode The PK32 connects to the pins marked AUXILIARY (JP1) on the panel’s PCB. Status LED Programming Key (PK32) AUXILIARY Installer JP2-PO1 Select Alrm D6412/D4412 PCB Figure 51: PK32 to D6412/D4412 Connections 13.3.10 Exiting the Installer’s Menu When you are ready to exit the Installer’s Menu and return the system to normal operation, open the Installer’s Switch. -
Page 61: Press [0] Call For Service Details
D6412/D4412 Installer’s Keypad & Installer Mode 13.3.11 Press [0] Call for Service Details The system displays Call for Service to end users when they press [Cmd 42] to display System Troubles and there is a Call for Service condition present. The first line of the display is fixed. -
Page 62: Installation Label
D6412/D4412 Installation Label 14.0 Installation Label This system should be installed in accordance with the National Electrical Code, NFPA 70, the National Fire Alarm Code, NFPA 72 and the local authority having jurisdiction. Depending on the application, the installation is to be in accordance with one or more of the following UL standards: UL681 Installation and Classification of Mercantile and Bank Burglar Alarm Systems;... - Page 63 D6412/D4412 Installation Label This system should be installed in accordance with the National Electrical Code, NFPA 70, the National Fire Alarm Code, NFPA 72 and the local authority having jurisdiction. Depending on the application, the installation is to be in accordance with one or more of the following UL standards: UL681 Installation and Classification of Mercantile and Bank Burglar Alarm Systems;...
-
Page 64: Terminal Quick Reference
D6412/D4412 Terminal Quick Reference 15.0 Terminal Quick Reference Silkscreen Term Description (below terminals) 18 VAC 18 V, 22 VA; up to 50 ft. (15.3 m), #18 AWG (1.2 mm), Stranded. Earth Ground Symbol Earth Ground. SDI data on Terminals 4 &5. Panel supports up to 1,000 ft. (305 m) of #22 AWG (0.8 mm) wire on these terminals (any Data, Grn (Green) configuration). -
Page 65: Troubleshooting
D6412/D4412 Troubleshooting 16.0 Troubleshooting 16.1 Introduction Radionics provides this guide to help you troubleshoot problems with the panel. To prevent problems from occurring, read the preceding sections of this manual and the D6412/D4412 Program Entry Guide (P/N: 45351) to verify that the panel is correctly installed and programmed. Below are various problems that may occur followed by explanations of the problems (cause) and solutions. -
Page 66: Command Center Issues
D6412/D4412 Troubleshooting 16.1.3 Command Center Issues Problem Cause Solution I entered Cmd 50 at my command Cmd 50 (Move to Area) is Program at least one point and assign it to the center, but it will not let me move disabled if there are no points particular area. -
Page 67: Appendix A: Approved Applications Compliance Guide
D6412/D4412 Appendix A Appendix A: Approved Applications Compliance Guide Listings and Approvals Fire • UL • CSFM • NYC-MEA - Approved by New York City’s Materials and Equipment Acceptance System. Burglary • UL • SIA Introduction The System Chart references components evaluated and listed by Underwriters’ Laboratories for compatibility with the Control/Communicator. -
Page 68: System Chart
D6412/D4412 Appendix A Enclosures Radionics offers three optional enclosures for the control/communicator. • The D8103 enclosure is suitable for residential fire and/or burglary installations and commercial burglary applications that do not require attack resistance or approval by Factory Mutual or NYC-MEA. (See the Appendix B: System Chart for acceptable applications.) •... -
Page 69: System Wiring Diagrams, Issue A
D6412/D4412 Appendix A The D6412/D4412 control panel is suitable for Police Station connect applications, including Grade A Mercantile Premises and Grade A Mercantile Safe and Vault alarm systems. Suitable for Grade AA Mercantile Premises and Grade AA Mercantile Safe and Vault alarm systems when the Model D6412/D4412 DACT unit is installed in conjunction with the Model D8122 derived channel subscriber terminal unit. -
Page 70: Current Rating Chart For Standby Battery Calculations
D6412/D4412 Appendix A Current Rating Chart for Standby Battery Calculations AC Power On AC Power Off In Alarm Normal Current Minimum Current Maximum Current Quantity Each Each Each Model Number Used Unit* Total Unit Total Unit Total D6412/D4412 _______ Keypads D621 _______ = _____... -
Page 71: Standby Battery Requirements
D6412/D4412 Appendix B Standby Battery Requirements Household Burglary and Commercial Burglary Four hours of standby battery capacity required. Central Station or Local Fire Alarm 24 hours of standby plus 4 minutes of alarm operation required. See Central Station or Local Systems Ampere- Hour Calculation Formula in the Standby Battery Calculation for NFPA 72 Fire Alarm Applications section. - Page 72 D6412/D4412 Glossary 24-Hour Point: Points that are always on even when the system is turned off. Two types: Fire Points and Non- Fire 24-Hour Points. Area: An installer-specified collection of points that can be armed and disarmed independently. An area can report with its own account number. Opening, closing, alarm, trouble, and restoral reports are all associated with an area.
- Page 73 D6412/D4412 Glossary Latching: The locking in of a circuit by means of a holding contact. Modem IIIa Modem IIIa is a Radionics reporting format (protocol) the D6412/D4412 uses to communicate to central station receivers. Even though you can program the panel to report in other formats, only Modem IIIa reports are referenced in this document.
- Page 74 D6412/D4412 Glossary Sked: A scheduling parameter that allows a selected event to happen at a specific time. Trouble: A service condition that needs to be corrected, such as a broken wire. Trouble Tone: A warble tone that is on briefly, followed by a pause, followed by the warble tone (repeatedly). Visible Point: A point that displays at command centers during alarm or trouble conditions.
- Page 75 D6412/D4412 Index Accessories ................11 Called Party Disconnect ............26 D621 ................... 11 Command Centers ..............46 D623 ................11, 12 Address Assignment ............46 D625 ................... 11 Installation ................47 D9128 ................. 11 Communication Failure ............26 D9129 ................. 11 Compatible Equipment D9533 .................
- Page 76 Installation ............... 16, 18 Phone Cord Connection ............25 Closing Installer Jumper ........... 18 Phone Line Fault ..............26 Connecting Earth Ground ..........17 PK32 ..................11 Installer Mode ................ 55 Point Status ................56 Installer’s Keypad ..............55 Power ..................20 Connector ................
Need help?
Do you have a question about the radlonlcs D6412 and is the answer not in the manual?
Questions and answers