Table of Contents
Advertisement
Quick Links
Advertisement
Table of Contents

Related Manuals for Bosch FPT-DACT


Summary of Contents for Bosch FPT-DACT
- Page 1 FPT-DACT Operation & Installation Guide Fire Communicator...
-
Page 2: Table Of Contents
FPT-DACT | Operation & Installation Guide | Contents EN | 2 Contents 5.4.3 PROG INPUTS ............. 35 Overview ................5 5.4.4 PROG RELAY ............37 System Overview ............ 5 5.4.5 PROG ACC’NTS ..........37 Features and Specifications ........ 5 5.4.6 PROG FORMATS .......... - Page 3 Parts List ............... 7 Figure 4: Light Pipe ............10 Table 5: Report Routing with Primary and Alternate Figure 5: Mounting the FPT-DACT Board ....10 Phone Number, Phone 2 Backup ....19 Figure 6: Conduit Connections ........11 Table 6: Input Point Voltage Levels ......
- Page 4 FPT-DACT | Operation & Installation Guide | Notices EN | 4 are notified in advance so you can maintain Notices uninterrupted telephone service. FCC Compliance Notice If you experience trouble with this equipment, contact This equipment was tested and complies with the limits the manufacturer for information on obtaining service or for a Class “A”...
-
Page 5: Overview
Although the FPT-DACT can withstand short power losses up to 5 min, connect it to an unswitched, uninterrupted power source. If the FPT-DACT loses power for more than 5 min, the: • History buffer might clear and all stored events are lost. -
Page 6: System Supervision
The Reset Report is issued when the FPT-DACT is reset from any off normal condition. The FPT-DACT has one Form “C” Relay rated 1 A at 30 VDC. The Form “C” Relay that is normally held activated, deactivates for any trouble condition the FPT- DACT detects. -
Page 7: History Buffer
1.2.8 History Buffer Light pipe (1) The FPT-DACT has a history buffer that retains up to 100 events. Each event is tagged with the date and time of occurrence. This buffer can be viewed when a FMR- Refer to Figure 4 on page 10 for the ground DACT Keypad is attached to the FPT-DACT. -
Page 8: Pcb Layout
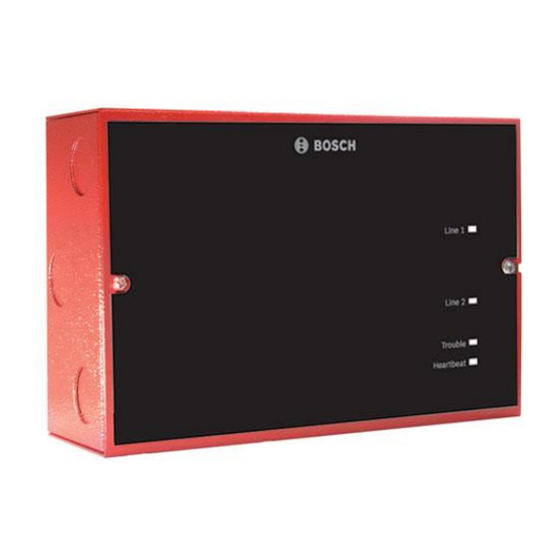
FPT-DACT | Operation & Installation Guide | 1.0 Overview EN | 8 1.2. 1 1 PCB Layout Figure 1 shows the layout of the FPT-DACT printed circuit board (PCB). Figure 1: FPT-DACT PCB Layout LINE 1 LINE 2 SYS TROUBLE... -
Page 9: Installation
5 - Left exterior 3 - Machine screw 2. Using the FPT-DACT case as a template, mark the mounting hole locations on the desired wall. 3. Hang the case on the wall using the appropriate installer-supplied mounting screws (see Figure 3). -
Page 10: Figure 4: Light Pipe
4. Slide the light pipe over the end of the PCB so that they align with the LED (see Figure 4). Figure 4: Light Pipe 5. Mount the FPT-DACT board in its enclosure using the mounting screws and mounting clips provided. Then attach the ground wire (see Figure 5). -
Page 11: Figure 6: Conduit Connections
2 - Enclosure knockouts 3 - Conduit 4 - Use no more than 500 ft (152 m) of wire to connect the FACP and the FPT-DACT. 5 - FPT-DACT The FACPs using open collector outputs must be compatibility listed. When using conduit within 20 ft (6 m), configure the inputs for non-supervised operation. -
Page 12: Connecting The Fpt-Dact
2.2. 1 Input Point Connections Remove all power before making or breaking any connections to the FPT-DACT. Failure to do can cause personal injury and damage to the equipment. See Figures 7 through 13 (pages 12 through 15) when making connections to the FPT-DACT. -
Page 13: Figure 8: Open Collector Input Point Wiring (Supervised)
FPT-DACT | Operation & Installation Guide | 2.0 Installation EN | 13 Figure 8: Open Collector Input Point Wiring (Supervised) 1 - FPT-DACT 5 - Keypad terminals 2 - Power + (red) 6 - Earth ground (green) 7 - EOL resistor 2.21 k Ω , UL Listed, P/N: 25899... -
Page 14: Figure 10: Dry Contact Input Point Wiring (Supervised)
FPT-DACT | Operation & Installation Guide | 2.0 Installation EN | 14 Figure 10: Dry Contact Input Point Wiring (Supervised) KEYPAD NC C NO 3 4 5 Power (+) Contact Relay Panel Ground Earth Ground 1 - FPT-DACT 5 - Keypad terminals... -
Page 15: Trouble Relay Connections
FPT-DACT | Operation & Installation Guide | EN | 15 2.2.2 Trouble Relay Connections Refer to Figure 12 when making connections to the FPT-DACT Trouble Relay terminals. Figure 12: Typical Trouble Relay Connections (Supervised) KEYPAD NC C - A B... -
Page 16: Telephone Connections
FPT-DACT | Operation & Installation Guide | 2.0 Installation EN | 16 2.2.3 Telephone Connections Notification Do not connect registered equipment to party lines or Telephone Cord Installation coin-operated telephones. If the local telephone company Connect the primary telephone line to the FPT-DACT requests notification before you connect the FPT-DACT Modular Jack Line 1 using a telephone cord. -
Page 17: Figure 15: Connecting A Keypad Programmer To The Fpt-Dact
2.0 Installation FPT-DACT | Operation & Installation Guide | EN | 17 Figure 15: Connecting a Keypad Programmer to the FPT-DACT LINE 1 LINE 2 SYS TROUBLE HEARTBEAT 1 2 3 4 5 KEYPAD NC C NO + + - - A B... -
Page 18: System Startup
FPT-DACT | Operation & Installation Guide | 3.0 System Startup EN | 18 5. Assign the FPT-DACT telephone numbers. Refer to System Startup 2: PHONE NUMS in Section 5.0 Programming. System Power up When you complete Steps 1 through 5, refer to This section describes the proper sequence of events Section 5.0 Programming... -
Page 19: System Operation
Phone Number 2 on Phone Line 1. telephone line. 2. If the report still fails on either telephone number on Phone Line 1, the FPT-DACT tries to send the report on Phone Line 2 using Phone Number 1. If 4. 1 .2... -
Page 20: Wait For Dial Tone
FPT-DACT | Operation & Installation Guide | 4.0 System Operation EN | 20 The yellow telephone line LED indicates there is active Table 5 on page 19 shows the procedure the FPT-DACT communication and shows line fault conditions. The follows in attempting to communicate with the central... -
Page 21: Communications Tests
Auto Test When it is time to send a report, the FPT-DACT checks Auto Test is an automatic test that verifies proper its status. When there are any alarms, troubles, or system... -
Page 22: Input Point Operation
FPT-DACT with an AC Fail Delay between 0 and 24 h. You can also program the FPT-DACT to Wait for The AC Fail Delay time set for the FACP is DC where the FPT-DACT must detect an AC failure on independent of the AC Fail Delay time set one input and a low battery condition on a second input. -
Page 23: Trouble Relay Operation
An input programmed to signal a trouble condition from the FACP does not affect or activate the on-board trouble relay. The on-board trouble relay activates on: Low Battery*: When activated, the FPT-DACT sends a • any on-board FPT-DACT trouble condition Low Battery Report. -
Page 24: Keypad Operation
FPT-DACT | Operation & Installation Guide | 4.0 System Operation EN | 24 This keypad has a two-line, 16-character display Keypad Operation showing information on various FPT-DACT programming functions. In most cases, the first line While installing the FMR-DACT-KEYPAD, the system does not monitor the input points contains general system status information;... -
Page 25: Scrolling Menus
4.4.2 Scrolling Menus Test Mode Menu. You can also press [Test] on the keypad When properly connected to the FPT-DACT, the FMR- DACT-KEYPAD shows a scrolling menu of possible (Figure 20). user actions along its second line. This scrolling menu Figure 20: Exclusive Keys is the FPT-DACT Main Menu. -
Page 26: History
FPT-DACT | Operation & Installation Guide | 4.0 System Operation EN | 26 Submenu Items: The corresponding key to a submenu Figure 23: Event History Example item can appear in the second line preceding a colon. Press the corresponding key to select that item. For example, press [1] to select PROG TIME from the Programming Mode Menu (Figure 22). -
Page 27: Table 8: Event History Abbreviations
4.0 System Operation FPT-DACT | Operation & Installation Guide | EN | 27 Table 8: Event History Abbreviations Abbreviation Meaning Abbreviation Meaning A, ALRM Alarm OFFNORM Off normal at test AUTOTST Auto test PGMG:FLT Trouble programming ARST Alarm restore Phone Line 1... -
Page 28: Programming
• Press [* Clear] after pressing [* Command] to return to the submenu or menu selections. Refer to Figure 24 for the complete programming key sequence for setting the FPT-DACT operational date. Figure 24: Programming Key Sequence for System Date... -
Page 29: Programming Key Sequences
5.0 Programming FPT-DACT | Operation & Installation Guide | EN | 29 Level 3 provides options that branch from Level 2 Programming Key Sequences (Figure 25). The third number in the key sequence A programming key sequence is a series of keys you represents the option selected in Level 3. -
Page 30: Program Menu Tree
5.0 Programming FPT-DACT | Operation & Installation Guide | EN | 30 Program Menu Tree Level 2 Level 3 Level 4 Level 5 (Programming Menu) 1: SYSTEM 1: TEST TIME TEST FREQ (_) 1: PROG TIME 2: AUTO TEST 2: TEST FREQUENCY... - Page 31 5.0 Programming FPT-DACT | Operation & Installation Guide | EN | 31 Level 2 Level 3 Level 4 Level 5 Level 6 (Programming Menu) 3: PHONE 3: PHONE 1 1: 19D, 14A, 10PS 5: PROG ACC’NTS CONTROL TONE 2: 18D, 23A, 10PS 3: 19D, 14A, 20PS For 4/2 reporting format only.
- Page 32 FPT-DACT | Operation & Installation Guide | 5.0 Programming EN | 32 Level 2 Level 3 Level 4 Level 5 (Programming Menu) 1: FIRE ALRM D1 1: EVENTS 1: 4/2 POINT RPT 6: PROG FORMATS 2: FIRE RSTR D1 3: WATERFLOW D1...
-
Page 33: Programming The Fpt-Dact
To set the current date and time for system operations: Programming the FPT-DACT 1. At the Prog Time Submenu, press [1] to select The FPT-DACT uses scrolling menus to show the menu 1: SYSTEM. The window shows: choices. The Main Menu shows:... -
Page 34: Prog Timers
3: DAYLIGHT SAV. The window shows: is sent immediately. DAYLIGHT SAVING? To set the FPT-DACT to wait and send AC Fail and NO: YES (1)/NO (0) Low Batt Reports simultaneously: 2. The current setting precedes the colon (:) in the 1. -
Page 35: Prog Inputs
Once you enter the point number, the display scrolls through the PROG INPUT options: Programming WAIT DLY TIME for 00 allows PROG POINT (___) the FPT-DACT to send an AC Fail Report 1: CONFIGURE without delay. 2: SUPERVISED To choose the length of time to wait after receiving an 2. - Page 36 FACP AC Fail Delay time is FPT-DACT. set for 6 h and the FPT-DACT AC Fail Delay time is set for 12 h, the AC Fail Report is 5. Press [* Clear] to return to the Prog Inputs sent from the FPT-DACT 18 h from the time Submenu.
-
Page 37: Prog Relay
5. Press [* Clear] to return to the Prog Acc’nts --->[4]: PROG RELAY--->[2]: ACTIV GND STRT. Submenu. This option allows the FPT-DACT to use the on-board 6. Program Account Number 2 using the same trouble relay for ground start operation. - Page 38 FPT-DACT | Operation & Installation Guide | 5.0 Programming EN | 38 To set telephone control: To comply with UL and NFPA standards, use 1. At the Prog Acc’nts Submenu, press [3] to select both telephone numbers. 3: PHONE CONTROL. The window shows:...
- Page 39 5.0 Programming FPT-DACT | Operation & Installation Guide | EN | 39 Press [# Command] to verify your selection. Press 2. Press the number key that corresponds to your [* Clear] to return to the Phone Control Submenu. selection. The window that appears depends on your choice.
-
Page 40: Prog Formats
FPT-DACT | Operation & Installation Guide | 5.0 Programming EN | 40 The Dialing Type determines which format the FPT- To set the amount of time the FPT-DACT waits before DACT uses for dialing on each telephone line. hanging up: Tone/ Pulse attempts tone dialling first, and then 1. - Page 41 5.0 Programming FPT-DACT | Operation & Installation Guide | EN | 41 2. Press [1] to select 1: EVENTS. The window shows: 4/2 POINT RPT 1: ZONE 1 D2 4/2 POINT RPT 2: ZONE 2 D2 1: FIRE ALRM D1...
- Page 42 FPT-DACT | Operation & Installation Guide | 5.0 Programming EN | 42 To set report codes for system conditions: 3: SIA SILENC RPT 1. At the Prog Formats Submenu, press [2] to select To access SIA SILENC RPT, select [0]: PROGRAM 2: 4/2 RPT CODES.
-
Page 43: Prog Deflts
1: BUS ADDRESS --->[7]: PROG DEFLTS--->[2]: DEFAULT ALL EE. 2: SUPERVISE BUS This option allows you to set the FPT-DACT to the The SLAVE CONECTN feature allows you to program original factory programming configuration. parameters for the serial connection to the control panel. -
Page 44: Operating Modes
FPT-DACT | Operation & Installation Guide | 5.0 Programming EN | 44 To initiate a Manual Communications Test: Operating Modes 1. At the Main Menu, press [3] to select 3: TEST. The The FPT-DACT operating modes are Program, Status, Test Modes window appears. -
Page 45: Appendix A: Troubleshooting
Make a test call to verify the line is free of Contact Technical Support distortion and noise. Temporarily swap Lines 1 immediately at (888) 886-6189. and 2 on the FPT-DACT to check if the problem External The external RAM failed. indication moves to the FPT-DACT’s other RAM Test Failure can occur any time. -
Page 46: Input Points
Failure During failure, the FPT-DACT continuously cycles through its If the FPT-DACT fails to send the Manual Test Report start-up routine. Each time the in two attempts or the [* Clear] key is pressed, the report start-up routine occurs, the SYS transmission is aborted. -
Page 47: Appendix B: 4/2 Reporting Codes
GND FLT RSTR Ground Fault Trouble Restore. Sent for ground fault trouble problems. * Item is sent only when the FPT-DACT is configured to communicate with a D8024 or D10024/D10024A Analog FACP. ** Item is for future use. 1/05 | F01U002505B... - Page 48 UNKNOWN Unknown Fault. Sent for problems of an unknown nature. FAULT * Item is sent only when the FPT-DACT is configured to communicate with a D8024 or D10024/D10024A Analog FACP. ** Item is for future use. 1/05 | F01U002505B...
-
Page 49: Appendix C: Fire Communicator Report Summary
Appendix C FPT-DACT | Operation & Installation Guide | EN | 49 Appendix C: Fire Communicator Report Summary Table 11: Reporting Summaries Point-Related Events 4/2 Code Report Contact ID Contact ID Modem IIIa Default Description Code Description Code Description Description... - Page 50 Refer to Notes 1 through 9 on page 52. * In Modem IIIa2, the FPT-DACT uses Communications Fail to report a Data Lost event. The FPT-DACT reports an Equipment Fail and Equipment Fail Restore with Condition 006 to report an actual Communications Fault.
-
Page 51: Table 12: Equipment Fail Conditions
Note 9: For the 4/2 code, P is a programmable digit for each input point. On a FPT-DACT that is serially connected to an analog FACP, Table 11 on pageS 49 and 50 only applies if the reported address (C for Contact ID, SDI for Modem IIIa ) is less then 100. - Page 52 FPT-DACT | Operation & Installation Guide | Appendix C EN | 52 Table 12: continued Data in Code Event Generated By Description Address Field Control panel FACP NAC C Open Control panel The NAC C is open. address Control panel...
-
Page 53: Appendix D: Programming Defaults
• Line 1 Dialing Type: Tone/Pulse * Once the user enters the system date and time, resetting the FPT-DACT to its default settings does not reset the Line 2 Dialing Type: • Tone/Pulse system date and time. The system time can be corrupted •... - Page 54 FPT-DACT | Operation & Installation Guide | Appendix D EN | 54 Program Formats (4/2 Rpt Codes Group 2) • AC Fail Rst: Auto Tst Rpt: • • Off Norm Tst: • Phone 1 Trbl: • Phone 1 Trbl Rstrl: •...
-
Page 55: Appendix E: Report Routing
Appendix E FPT-DACT | Operation & Installation Guide | EN | 55 Appendix E: Report Routing Table 14: Non-Point Related Report Routing The information in Appendix E shows the mapping of point-related and non-point-related events to their Non-Point-Related Events respective report routing group, lists the priority level... -
Page 56: Appendix F: Compatibilities
FPT-DACT | Operation & Installation Guide | Appendix F EN | 56 Appendix F: Compatibilities Table 15 identifies the receivers and panels that are compatible with the DCT-1/-1E DACT for the required UL method. Use the DCT-1/-E for receivers that are not listed as compatible. -
Page 57: Index
FPT-DACT | Operation & Installation Guide | Index EN | 57 Index Symbols Input Point Connections ............12 4/2 Point Report ............... 40 Inputs .................... 6 AC Failure ................35 Configuration ................6 AC Fail Delay ................34 Fire ................... 22, 35 AC Failure Inputs .............. - Page 58 FPT-DACT | Operation & Installation Guide | Index EN | 58 Program Defaults Alternate 4/2 Codes ............43 Clear History ................. 43 Scrolling Menus ................. 25 Default EE ................43 Selecting Menu Items .............. 25 Program Formats ..............40 Self-Testing ..................6 Program Inputs .................
- Page 59 Notes FPT-DACT | Operation & Installation Guide | EN | 59 Notes 1/05 | F01U002505B...
- Page 60 Bosch 130 Perinton Parkway Fairport, NY 14450-9199 USA www.boschsecurity.us Customer Service: (800) 289-0096 Technical Support: (888) 886-6189 © 2005 Bosch F01U002505B...
Need help?
Do you have a question about the FPT-DACT and is the answer not in the manual?
Questions and answers