
Subscribe to Our Youtube Channel
Related Manuals for Rockwell Automation PowerFlex 7000


Summary of Contents for Rockwell Automation PowerFlex 7000
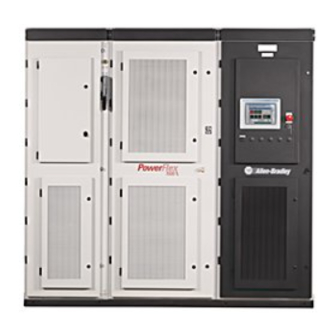
- Page 1 PowerFlex 7000 Medium Voltage AC Drive Air-Cooled (’B’ Frame)—ForGe Control Bulletin Number 7000 User Manual Original Instructions...
- Page 2 If this equipment is used in a manner not specified by the manufacturer, the protection provided by the equipment may be impaired. In no event will Rockwell Automation, Inc. be responsible or liable for indirect or consequential damages resulting from the use or application of this equipment.
-
Page 3: Table Of Contents
SGCT Testing ..........64 Rockwell Automation Publication 7000-UM202H-EN-P - November 2023... - Page 4 Replacing Air Filters..........128 Rockwell Automation Publication 7000-UM202H-EN-P - November 2023...
- Page 5 Final Reporting..........176 Rockwell Automation Publication 7000-UM202H-EN-P - November 2023...
- Page 6 Disposal ........... 205 Rockwell Automation Publication 7000-UM202H-EN-P - November 2023...
- Page 7 ............209 Rockwell Automation Publication 7000-UM202H-EN-P - November 2023...
- Page 8 Table of Contents Notes: Rockwell Automation Publication 7000-UM202H-EN-P - November 2023...
-
Page 9: Preface
The manual contains material that enables regular operation and maintenance of the drive system. What Is Not in This Manual This manual provides information specific to maintaining the PowerFlex 7000 ‘B’ frame drive. This document does not include topics such as: •... -
Page 10: General Precautions
AC supply, or excessive ambient temperatures may result in malfunction of the system. ATTENTION: Only personnel familiar with the PowerFlex 7000 Variable Frequency Drive (VFD) or Adjustable Speed Drive (ASD) and associated machinery should plan or implement the installation, startup, and subsequent maintenance of the system. -
Page 11: Connect To Service And Support And Product Documentation
Documentation Scan the left QR code to get connected to your Regional Customer Care Group. Scan the right QR code to get connected to the PowerFlex 7000 Medium Voltage Drive product page, where you can access user manuals, technical specifications, firmware manuals, and more. -
Page 12: Additional Resources
PFLEX-SG003 features. Provides detailed information on hardware replacement, overview, control and power PowerFlex 7000 Medium Voltage AC Drive (A Frame) - ForGe Control, component definition, maintenance and specifications for air-cooled medium voltage publication 7000A-UM200 variable frequency drives... -
Page 13: Powerflex 7000 Drive Overview
Topology The PowerFlex 7000 drive uses a pulse width modulated (PWM) – current source inverter (CSI) topology. This topology applies to a wide voltage and power range. The power semiconductor switches used are easy-to-series for any medium voltage level. -
Page 14: Rectifier Designs
Chapter 1 PowerFlex 7000 Drive Overview Rectifier Designs Configurations The PowerFlex 7000 drive offers three rectifier configurations for ‘B’ frame drives: • Direct-to-Drive™ (AFE rectifier with integral line reactor and CMC) • AFE rectifier with separate isolation transformer • 18-pulse rectifier with separate isolation transformer... - Page 15 Figure 3 - 3300/4160 AFE Rectifier with Separate Isolation Transformer LINE CONVERTER DC LINK MACHINE CONVERTER REMOTE ISTX ISTX SGCTs SGCTs U (T1) 2U (X1) V (T2) 2V (X2) W (T3) 2W (X3) Rockwell Automation Publication 7000-UM202H-EN-P - November 2023...
-
Page 16: Cooling Technology
AFE configurations. While both configurations draw heat away from the semiconductors, heatpipes are bigger, more efficient, and require larger fans and airflow. Information and graphics in this manual show both configurations. Rockwell Automation Publication 7000-UM202H-EN-P - November 2023... -
Page 17: Motor Compatibility
Chapter 1 PowerFlex 7000 Drive Overview Motor Compatibility The PowerFlex 7000 drive achieves near-sinusoidal current and voltage waveforms to the motor, resulting in no significant additional heating or insulation stress. Temperature rise in the motor connected to the VFD is typically 3 °C (5.5 °F) higher compared to across-the-line operation. -
Page 18: Simplified Electrical Diagrams
U (T1) 3U (Y1) 3U (Y1) 3V (Y2) 3V (Y2) V (T2) V (T2) 3W (Y3) 3W (Y3) W (T3) W (T3) 2U (X1) 2U (X1) 2V (X2) 2V (X2) 2W (X3) 2W (X3) Rockwell Automation Publication 7000-UM202H-EN-P - November 2023... -
Page 19: 3300/4160V
U (T1) 3U (Y1) 3U (Y1) 3V (Y2) 3V (Y2) V (T2) V (T2) 3W (Y3) 3W (Y3) W (T3) W (T3) 2U (X1) 2U (X1) 2V (X2) 2V (X2) 2W (X3) 2W (X3) Rockwell Automation Publication 7000-UM202H-EN-P - November 2023... -
Page 20: 6600V
U (T1) 3U (Y1) 3U (Y1) 3V (Y2) 3V (Y2) V (T2) V (T2) 3W (Y3) 3W (Y3) W (T3) W (T3) 2U (X1) 2U (X1) 2V (X2) 2V (X2) 2W (X3) 2W (X3) Rockwell Automation Publication 7000-UM202H-EN-P - November 2023... -
Page 21: Functional Safety
Safe Torque Off Safe Torque Off is a functional safety feature that is integrated into the PowerFlex 7000 drive, available for AFE and Direct-to-Drive configurations. The drive can receive a safety input signal (for example, from an optical sensor or a safety gate) and remove rotational power from the motor, allowing the motor to coast to a stop. -
Page 22: Arcshield Technology
AFE Direct-to-Drive configurations and is designed to help protect employees and minimize unplanned outages and downtime. The PowerFlex 7000 drive system with ArcShield option is a fully integrated Allen- Bradley® CENTERLINE® controller and PowerFlex 7000 drive combination. This safety feature redirects the energy from an arc flash event through the top of the enclosure. -
Page 23: Operator Interface
PowerFlex 7000 Drive Overview Operator Interface The human-machine interface (HMI) board is an HIM-enabling device for the PowerFlex 7000 drive. The board lets you acquire all the necessary executable tools, documentation, and reports required to commission, troubleshoot, and maintain the drive. - Page 24 Ethernet cable, when required. This is ideal for unmanned sites, where a dedicated HIM is not required. See publication 7000-UM201 for detailed instruction for the HIM. See publication 7000-UM151 for detailed instruction for ‘B’ frame drives using the PanelView 550 HIM. Rockwell Automation Publication 7000-UM202H-EN-P - November 2023...
-
Page 25: Power Component Definition And Maintenance
‘B’ frame models. For information regarding power wiring and cabling connections (as might be necessary for routine maintenance), see the PowerFlex 7000 ‘B’ frame installation manual, publication 7000-IN007. Control Power Off Tests Perform the following checks before applying control power to the drive. - Page 26 If the key does not function when the door is tightly bolted closed, adjustments will have to be made to the depth of the counterpart. This can be done by adding shims on the landing plate where the counterpart is mounted. Rockwell Automation Publication 7000-UM202H-EN-P - November 2023...
-
Page 27: Control / Cabling Cabinet Components
Figure 20 - Cabling Cabinet for AFE Rectifier (Heatsink Model) Hall Effect Sensors Grounding Network (For use with Isolation Transformer) Ground Filter (For use with Line Reactor) Sensing Boards Line Terminals Motor Terminals Motor Filter Capacitors Current Transformers Surge Arresters Rockwell Automation Publication 7000-UM202H-EN-P - November 2023... - Page 28 Isolation Transformer) Ground Filter (For use with Line Reactor) Surge Arresters Motor Terminals Hall Effect Current Sensors Voltage Sensing Boards Line Terminals Current Transformers Zero Sequence Current Transformer (used with Line Reactor) Rockwell Automation Publication 7000-UM202H-EN-P - November 2023...
- Page 29 Figure 22 - Cabling Cabinet for AFE Rectifier (6600V Heatpipe Model) Motor Terminals Surge Arrestors Grounding Filter (for use with Line Reactor) Hall Effect Current Zero Sequence Sensors Current Transformer Current Transformer Voltage Sensing Boards Line Terminals Rockwell Automation Publication 7000-UM202H-EN-P - November 2023...
- Page 30 Power Component Definition and Maintenance Figure 23 - Cabling Cabinet for 18-pulse Rectifier (Motor Filter Capacitors not shown) Motor Terminals Hall Effect Sensor Transient Voltage Sensing Suppression Boards Network Hall Effect Sensor Line Terminals Current Transformer Rockwell Automation Publication 7000-UM202H-EN-P - November 2023...
- Page 31 Power Component Definition and Maintenance Figure 24 - AC line Reactor Cabinet with Connection Cabinet (Heatsink Model) Line Terminals Line Filter Motor Capacitor Terminals Zero Sequence Current Transformer Motor Filter Capacitors Line Reactor Rockwell Automation Publication 7000-UM202H-EN-P - November 2023...
- Page 32 Chapter 2 Power Component Definition and Maintenance Figure 25 - AC Line Reactor Cabinet (6600V Heatpipe Model) Fans Resistors Line Reactor Line Reactor Baffle Rockwell Automation Publication 7000-UM202H-EN-P - November 2023...
- Page 33 Chapter 2 Power Component Definition and Maintenance Figure 26 - AC Line Reactor with Connection Cabinet (Heatpipe Model) Fans Motor Filter Capacitors Line Filter Capacitors Resistors Line Reactor Baffle Line Reactor Rockwell Automation Publication 7000-UM202H-EN-P - November 2023...
-
Page 34: Voltage-Sensing Assembly
10,800V (7.2 kV x 1.5 pu) down to low voltage levels that the PowerFlex 7000 analog control board (ACB) can use. To measure up to twelve independent voltage channels, link two assemblies together, with one assembly acting as the master assembly and the second as the slave assembly. -
Page 35: Input Transient Protection
The voltage is clamped for a change in current of several orders of magnitude (Figure 28). Rockwell Automation Publication 7000-UM202H-EN-P - November 2023... - Page 36 The fuses are E-rated, current-limiting fuses with a high interrupting rating. Because they are current-limiting, they limit both the magnitude and duration of fault currents. They are small dimension, ferrule-type fuses with a fiberglass body, and mount in standard fuse clips. Rockwell Automation Publication 7000-UM202H-EN-P - November 2023...
- Page 37 Chapter 2 Power Component Definition and Maintenance IMPORTANT Rockwell Automation selects the fuses sent with the transient suppression network based on their characteristics (including internal resistance) for optimum MOV performance and protection. Do not substitute other fuses without contacting the factory first.
- Page 38 5. Replace the MOV (polarity is not an issue). 6. Continue by replacing the screws and connecting links. Each MOV panel is grounded. One MOV (see Figure 30 on page 38 for location) must connect to the grounding lead. Rockwell Automation Publication 7000-UM202H-EN-P - November 2023...
-
Page 39: Surge Arresters
If there is a harmonic filter on the MV bus connected to the drive, the filter must satisfy relevant international or local standards, such as IEEE Std 1531— Clause 6.4, to avoid high inrush currents. Rockwell Automation Publication 7000-UM202H-EN-P - November 2023... - Page 40 8. Connect the leads to the surge arrester. 9. Torque the surge arrester hardware to 28 N•m (21 lb•ft). Figure 32 - Surge Arresters (Heatsink Model) Surge Arresters Rockwell Automation Publication 7000-UM202H-EN-P - November 2023...
- Page 41 Failure to do so may result in injury or death. PowerFlex 7000 18-pulse and select AFE drives come with an installed grounding network. The number of capacitors varies depending on the system voltage.
- Page 42 6. Insert the new sensor. Orient the arrows as shown in Figure 7. Slide the bus bar back into place and secure with the M10 hardware. 8. Replace the output connector, noting the correct orientation. Rockwell Automation Publication 7000-UM202H-EN-P - November 2023...
- Page 43 Figure 35 - Hall Effect Current Sensor located within Cabinet Hall Effect M10 Hardware Current Sensor Bus Bar Figure 36 - Hall Effect Current Sensor (detail) Base Hardware Arrows must be oriented properly Rockwell Automation Publication 7000-UM202H-EN-P - November 2023...
-
Page 44: Filter Capacitor Cabinet
The capacitors have internal “bleeding resistors” to discharge the capacitor and reduce its voltage below 50V in five minutes when disconnected. Figure 37 shows a typical three-phase capacitor. Figure 37 - Motor Filter Capacitor Rockwell Automation Publication 7000-UM202H-EN-P - November 2023... -
Page 45: Filter Capacitor Mounting Plate
6600V-400KVAR 90 Hz, Capacitor Mounting Plate PN-326214 PN-E089298 BIORIPHASO/TF 400/6.6/T FL66C40EJXXR4B Assembly on page 6600V-500 kVAR 90 Hz, 6600V-500KVAR 90 Hz, No action required. PN-326211 PN-E089299 BIORIPHASO/TF 500/6.6/T FL66C50EJXXR4B No mounting plate needed. Rockwell Automation Publication 7000-UM202H-EN-P - November 2023... -
Page 46: Replacing Filter Capacitors
ATTENTION: The porcelain bushings are extremely fragile and any force applied to the bushings can damage the seal between the bushing and the body causing potential leaks or chipping. See Publication 7000-IN010, “Handling, Inspection, and Storage of Medium Voltage Line Filter Capacitors”. Rockwell Automation Publication 7000-UM202H-EN-P - November 2023... - Page 47 If replacing ICAR capacitors, there is no mounting plate If replacing Ducati capacitors, remove this plate Front mounting bracket not shown. 5. Remove the hardware to remove the brackets from the capacitor. Rockwell Automation Publication 7000-UM202H-EN-P - November 2023...
- Page 48 Fasten the mounting plate to the drive cabinet using four M6 bolts (6 N•m [4.4 lb•ft]). 8. Slide the new capacitor back until it fits into the slot. Fasten the front bracket. Rockwell Automation Publication 7000-UM202H-EN-P - November 2023...
-
Page 49: Testing Filter Capacitors
Testing Filter Capacitors There are two ways to test line filter capacitors. Rockwell Automation recommends the first method as it reduces the chance of re-torque issues because the capacitors are not disconnected. If the readings are unsatisfactory, the second method is more accurate, but involves disconnecting and testing them individually. - Page 50 6. Calculate the capacitance from the measured values of test voltage and current. For a good capacitor, the calculated capacitance value for each of Rockwell Automation Publication 7000-UM202H-EN-P - November 2023...
-
Page 51: Converter Cabinet Components
For control/cabling cabinets, see Control / Cabling Cabinet Components on page 27. For DC link and fan cabinets, see DC Link Cabinet Components on page 108. Rockwell Automation Publication 7000-UM202H-EN-P - November 2023... - Page 52 Figure 38 - Converter Cabinet (Heatsink Model, 2400V) Ground Bus Differential Pressure Sensor Inverter Modules Isolated Gate Driver Power Supplies (IGDPS) Rectifier IGDPS not required in drives with SPS boards installed Rectifier Modules Rockwell Automation Publication 7000-UM202H-EN-P - November 2023...
- Page 53 Figure 39 - Converter Cabinet (Heatsink Model, 3300…4160V) Differential Pressure Ground Bus Sensor Isolated Gate Driver Power Supplies (IGDPS) Inverter Modules Rectifier IGDPS not required in drives with SPS boards installed Rectifier Modules Rockwell Automation Publication 7000-UM202H-EN-P - November 2023...
- Page 54 Figure 40 - Converter Cabinet (Heatsink Model, 6600V) Ground Bus Differential Pressure Sensor Isolated Gate Driver Power Supplies (IGDPS) Inverter Modules Rectifier Modules Rectifier IGDPS not required in drives with SPS boards installed Rockwell Automation Publication 7000-UM202H-EN-P - November 2023...
- Page 55 Driver Power Driver Power Supplies (IGDPS) Supplies (IGDPS) Rectifier modules Figure 42 - Converter Cabinet, 6600V (Heatpipe Model) Inverter modules Isolated Gate Isolated Gate Driver Power Driver Power Supplies Supplies (IGDPS) (IGDPS) Rectifier modules Rockwell Automation Publication 7000-UM202H-EN-P - November 2023...
-
Page 56: Powercage Module Overview
Use a grounding wrist strap when handling sensitive circuit boards. ATTENTION: If equipped, the SPS circuit board is sensitive to static charges. Do not handle these boards without proper grounding. Rockwell Automation Publication 7000-UM202H-EN-P - November 2023... -
Page 57: Resistance Checks
SGCT PowerCage modules for 2400V systems do not need matched devices and have no sharing resistor. SCR PowerCage modules always have sharing resistors even if matched devices are not necessary. Sharing resistors in SCR PowerCage modules provide a diagnostic function. Rockwell Automation Publication 7000-UM202H-EN-P - November 2023... -
Page 58: Sgct And Snubber Circuit
Snubber Resistor Anode Test Cathode Heatsink Heatsink Figure 44 - Snubber Circuit for SGCT module (with SPS board) Cs-1 Rsn-2 SPS Board Rsn-1 J1-1 J1-2 Cs-2 Snubber Resistor Anode Cathode Test Heatsink Heatsink Rockwell Automation Publication 7000-UM202H-EN-P - November 2023... - Page 59 Figure 46 - 2400V Two Device PowerCage Module (with SPS Boards installed) SPS Mounting Assembly with SGCT SGCT Temperature Feedback Board Clamp Head Pivot Plate Heatsink SPS Board Mounting Assembly without Temperature Feedback Board Module Housing Rockwell Automation Publication 7000-UM202H-EN-P - November 2023...
- Page 60 Figure 48 - 3300/4160V Four Device Rectifier PowerCage Module (with SPS Boards installed) SPS Mounting Assembly with Pivot Plate Matched Set Temperature Feedback Board Matched Set Clamp Head Two SGCTs Two SGCTs Heatsink SPS Mounting Board Assembly without Module Housing Temperature Feedback Board Rockwell Automation Publication 7000-UM202H-EN-P - November 2023...
- Page 61 Figure 50 - 6600V Six Device PowerCage Module (with SPS Boards installed) Matched Set Matched Set Pivot Plate Three SGCTs Clamp Head Three SGCTs Heatsink SPS Mounting Assembly without SPS Mounting Assembly with Module Temperature Feedback Board Temperature Feedback Board Housing Rockwell Automation Publication 7000-UM202H-EN-P - November 2023...
- Page 62 Figure 51 - 3300/4160V Four Device PowerCage Module (Heatpipe Model) End Position Module Housing Heatpipe Assembly Heatpipe Heatpipe Support Channel Assembly Matched Set Clamp Base Two SGCTs Matched Set Clamp Head Temperature Two SGCTs Feedback Board Rockwell Automation Publication 7000-UM202H-EN-P - November 2023...
- Page 63 In addition to the snubber circuit, a sharing resistor connects in parallel with the SGCT. The sharing resistor ensures the equal distribution of the voltage among the SGCTs connected in series. Connect SGCTs in series to increase the Rockwell Automation Publication 7000-UM202H-EN-P - November 2023...
-
Page 64: Sgct Testing
60 kΩ and 75 kΩ indicates the SGCT is in good condition and that wiring to the SGCT is correct. If the SGCT fails, it will be in the shorted mode, 0 Ω. The anode-to-cathode resistance check will be 0 Ω. Rockwell Automation Publication 7000-UM202H-EN-P - November 2023... - Page 65 Figure 55 - Resistance Measurements SGCT PowerCage Module (with SPS Board Mounting Assembly) Resistance value between two heatsinks is sharing resistance in parallel with anode-cathode resistance Resistance value between heatsink and test point is snubber resistance Figure 56 - Resistance Measurements (Heatpipe Model) Rockwell Automation Publication 7000-UM202H-EN-P - November 2023...
- Page 66 PowerCage with the Cooling Coil Facing the device End Position Heatpipe as show End Position Heatpipe as show assembled assembled in the left side of PowerCage in the right side of PowerCage Rockwell Automation Publication 7000-UM202H-EN-P - November 2023...
-
Page 67: Snubber Resistance (Sgct Device)
SGCT used. If the resistor is found to be out of tolerance, see page page 72 for detailed instructions on replacing the snubber resistor assembly. Rockwell Automation Publication 7000-UM202H-EN-P - November 2023... -
Page 68: Snubber Capacitance (Sgct Device)
Figure 59 - Snubber Capacitor Test Sharing Resistor Snubber Snubber Resistor Capacitor Test Point SGCT Measure capacitance between heatsink and test point (or from heatsink to heatsink) Heatsink Heatsink Snubber test point Rockwell Automation Publication 7000-UM202H-EN-P - November 2023... -
Page 69: Replacing The Sgct
Yellow LED ON indicates the gate is ON, and Flashes alternately with LED 1 while gating LED 1 LED ON indicates the gate is OFF, and Flashes alternately with LED 2 while gating Rockwell Automation Publication 7000-UM202H-EN-P - November 2023... - Page 70 Uniform Clamping Pressure on page 87 to clamp the heatsinks to a uniform pressure. If equipped, re-install the SPS board and mounting bracket, and reconnect the snubber connection to J1 of the SPS board. Rockwell Automation Publication 7000-UM202H-EN-P - November 2023...
- Page 71 Figure 62 - Replacing the SGCT (if SPS board is installed) Inside nut for SGCT captive screws loosening and applying load to assembly DO NOT ADJUST outside nut Clamp head block SPS board mounting assembly captive screws Rockwell Automation Publication 7000-UM202H-EN-P - November 2023...
-
Page 72: Replacing Snubber And Sharing Resistor
1. Remove the PowerCage module as outlined in Removing the PowerCage Module on page Note the connection of the leads for correct replacement. 2. Detach the leads located on the bottom of the resistor assembly. Rockwell Automation Publication 7000-UM202H-EN-P - November 2023... - Page 73 Make vertical cut on gasket at these two locations between resistor cage and main PowerCage module 3. Remove the push nuts on the end of the retaining rod. 4. Pinch the clip together and pull off. Rockwell Automation Publication 7000-UM202H-EN-P - November 2023...
- Page 74 The gel minimizes possible damages to the resistor bank during transportation from the factory. You do not need to reapply any gel when inserting the new resistor bank. Remove the resistor bank from the PowerCage module. Rockwell Automation Publication 7000-UM202H-EN-P - November 2023...
- Page 75 8. Slide the retaining rod into place and push the clips back into place. 9. Connect the leads to the resistor bank 10. Install the PowerCage module as outlined in Removing the PowerCage Module on page Rockwell Automation Publication 7000-UM202H-EN-P - November 2023...
-
Page 76: Replacing Sharing Resistors
Torque M8 hardware to 7 N•m (60 lb•in). 13 mm Socket M8 Bolt 5/16 in. Lock Washer 5/16 in. Flat Washer Electrical Lead 17 mm Flange M8 Hardware Location 6. Bundle and secure the connecting wires using wire ties. Rockwell Automation Publication 7000-UM202H-EN-P - November 2023... -
Page 77: Silicon Controlled Rectifier Powercage Modules
V.SENSE on the gate driver board to the anode side heatsink. A value of 80 kΩ indicates a good sharing resistor. Figure 70 - Snubber Circuit for SCR Rectifier Module Rsn-2 Cs-1 Cs-2 Rsn-1 SPGDB Cathode Anode Rockwell Automation Publication 7000-UM202H-EN-P - November 2023... -
Page 78: Scr Testing
SGCT. Table 7 - SCR Snubber Circuit Resistance and Capacitance Values SCR Rating Sharing Resistance Snubber Resistance Snubber Capacitance 350, 400, 815 A 80 kΩ 60 Ω 0.5 µf Rockwell Automation Publication 7000-UM202H-EN-P - November 2023... -
Page 79: Scr Anode-To-Cathode Resistance
Using an ohmmeter, measure the anode-to-cathode resistance across each SCR in the rectifier bridge, while looking for similar resistance values across each device. Easy access from the anode-to-cathode is available by going from heatsink-to-heatsink (Figure 73). Rockwell Automation Publication 7000-UM202H-EN-P - November 2023... -
Page 80: Scr Sharing Resistance Test
The red wire of the plug is the sharing resistor. Measure the resistance between the red wire of the plug and the heatsink to the left. A value of 80 k- ohms indicates a healthy sharing resistor. Rockwell Automation Publication 7000-UM202H-EN-P - November 2023... -
Page 81: Scr Gate-To-Cathode Resistance
To test an SCR from gate-to-cathode, disconnect the SCR gate leads from the self powered gate driver board and measure the gate-to-cathode resistance on the SCR firing card Phoenix connector. Rockwell Automation Publication 7000-UM202H-EN-P - November 2023... -
Page 82: Snubber Resistance (Scr Device)
PowerCage module under the heatsinks. For each device, there is one test point. To verify the resistance, measure the resistance between the test point and the heatsink above. Rockwell Automation Publication 7000-UM202H-EN-P - November 2023... - Page 83 SCR used. If the resistor is found to be out of tolerance, see page 72 for the snubber resistor assembly replacement procedure. Rockwell Automation Publication 7000-UM202H-EN-P - November 2023...
-
Page 84: Snubber Capacitance (Scr Device)
SCR used. Read the actual snubber capacitor value shown in the table. If the capacitor is out of tolerance, see page 76 for the snubber capacitor replacement procedure. Rockwell Automation Publication 7000-UM202H-EN-P - November 2023... -
Page 85: Replacing Scr And Scr Self-Powered Gate Driver Boards
Examine the pole face before proceeding to ensure that no brush bristles remain. IMPORTANT Too much joint compound may result in contamination of other surfaces leading to system damage. Rockwell Automation Publication 7000-UM202H-EN-P - November 2023... - Page 86 17. Reapply the clamping load as described in Uniform Clamping Pressure on page 18. Connect the control power cable and the fiber optic cables, ensuring that you do not exceed the bend radius. Figure 78 - SCR and SPGDB Assembly Rockwell Automation Publication 7000-UM202H-EN-P - November 2023...
-
Page 87: Uniform Clamping Pressure
4. Torque the heatsink bolts to 13.5 N•m (10 lb•ft) starting with the center heatsink and moving outward alternating left to right. 5. Check the clamp indicating washer. Rockwell Automation Publication 7000-UM202H-EN-P - November 2023... -
Page 88: Checking Clamping Pressure
IMPORTANT Do not adjust the calibration nut located outside the indicating washer at the end of the threaded rod. The rotation of the calibration nut will affect the torque calibration, which is factory- defined. Only adjust the adjustment nut (see Figure 80). Rockwell Automation Publication 7000-UM202H-EN-P - November 2023... -
Page 89: Temperature Sensing
12. Reverse the removal order to replace the heatsink with the new thermal sensor. 13. Follow procedure Uniform Clamping Pressure on page 87 to clamp the heatsinks to a uniform pressure. Rockwell Automation Publication 7000-UM202H-EN-P - November 2023... - Page 90 Insulating Bushing Mounting Screw Thermal Sensor and Cable Assembly Figure 82 - Thermal Sensor Replacement (SPS Board Model) Temperature Feedback Mounting Pad Circuit Board Insulating Bushing Mounting Screw Thermal Sensor and Cable Assembly Rockwell Automation Publication 7000-UM202H-EN-P - November 2023...
-
Page 91: Replacing Heatsinks/Heatpipes
Replacing Heatsinks/ There are three different styles of heatsinks and one type of heatpipe used in Heatpipes PowerFlex 7000 air-cooled drives, depending on thermal requirements: • Aluminum type W heatsinks have a plurality of short internal fins along the internal surfaces •... -
Page 92: Replacing Heatsinks
3. Completely remove the SGCT or SCR from the heatsink that is being replaced (see Replacing the SGCT on page 69 Replacing SCR and SCR Self-Powered Gate Driver Boards (SPGDB) on page 85). Rockwell Automation Publication 7000-UM202H-EN-P - November 2023... -
Page 93: Replacing Heatpipes
10. Install top clamp head glass rod. 11. Set bottom clamp head glass rod to: • 4160V set to 657.26 mm (+0.5 mm, -0.0 mm) • 6600V set to 909.66 mm (+0.5 mm, -0.0 mm) Rockwell Automation Publication 7000-UM202H-EN-P - November 2023... - Page 94 IMPORTANT Do not re-tighten nylon shipping bolts on 6600V drives. They are for shipping purposes only. Figure 85 - Heatpipe PowerCage Module Heatpipe locking nuts Horizontal Fin Support Heatpipe End Position Heatpipe Clamp Head Glass Rods Clamp Head White Heatpipe Retaining Bracket Nylon Shipping Bolt Rockwell Automation Publication 7000-UM202H-EN-P - November 2023...
-
Page 95: Powercage Gasket
PowerCage and heatsink module in order to direct all air movement through the slots of the heatsink. The gasket maintains proper cooling of the SGCTs or SCRs. Figure 86 - PowerCage Gasket Location (Heatsink Model) Power Connection Gasket Resistors Power Connection Housing Rockwell Automation Publication 7000-UM202H-EN-P - November 2023... -
Page 96: Replacing Powercage Gaskets
Apply the cleaner to a paper towel and wipe the surface of the PowerCage module where you will apply the gasket. Liberally spray the surface with distilled water, then wipe dry with a clean paper towel. Rockwell Automation Publication 7000-UM202H-EN-P - November 2023... -
Page 97: Removing The Powercage Module
6. Place the bolts on the outer flange in loosely. Torque bolts alternately on one flange and then the opposite flange to ensure even tightening of the module. Use the suggested torquing sequence shown in Figure Rockwell Automation Publication 7000-UM202H-EN-P - November 2023... - Page 98 The resistor cage can be removed within a heatpipe PowerCage module (Figure 65). (a) The PowerCage module is shown with switching components, heatsinks, and clamps removed for ease of lifting. Rockwell Automation Publication 7000-UM202H-EN-P - November 2023...
-
Page 99: Self-Powered Sgct Power Supply - Sps
300V DC bus 300V DC bus common TP15 20V DC output TP14 20V DC output common The green LED (DS1) on the SPS board indicates that the 20V DC output is within operating specification range. Rockwell Automation Publication 7000-UM202H-EN-P - November 2023... -
Page 100: Testing Equipment
Ensure you have the following equipment available in order to perform testing tasks. • SPS test power harness (part no. 80018-695-51) • Digital multimeter 1. Disconnect the snubber connection to J1 of the SPS board. Rockwell Automation Publication 7000-UM202H-EN-P - November 2023... -
Page 101: Self-Powered Gate Driver Board - Spgdb
The SPGDB receives signals from the drive processor via a light signal transmitted through a fiber optic cable. The power source for the SPGDB is from the SCR snubber network, a Rockwell Automation patented design. This unique design gives the SPGDB the ability to conserve the amount of energy that it supplies to the SCR. -
Page 102: Test Points
Figure 91 - Self-Powered Gate Driver Board TB3 - Test Power Connection OP1, OT1 - Fiber Optic Transmitter and Receiver TB2 - Temperature Sensor Power Connection TB4 - Gate and Cathode Thyristor Connection Status Indicator TB1 - Snubber Connection Rockwell Automation Publication 7000-UM202H-EN-P - November 2023... -
Page 103: Terminal/Connections
13. Measure TP8 to TP3, which should be 0V. 14. Measure TP1 to TP2, which should be 0V. 15. Connect a jumper between TB3-1 and TB3-2 and verify that the voltage at TP6 is +2.2V, +/-100mV. Rockwell Automation Publication 7000-UM202H-EN-P - November 2023... - Page 104 106, there should be a 220 μS, +/-20 μS time between the rising edge of the U4-pin7 pulse and the falling edge of the TP7 signal. Figure 92 - Gating Pulses Figure 93 - SCR Gating Pulses Rockwell Automation Publication 7000-UM202H-EN-P - November 2023...
- Page 105 Chapter 2 Power Component Definition and Maintenance Figure 94 - Expanded SCR Gating Pulse Figure 95 - V-Sense Trigger to SCR Gating Pulse Rockwell Automation Publication 7000-UM202H-EN-P - November 2023...
-
Page 106: Fiber Optic Cabling
The main processor initiates the firing command for the thyristor and transmits the signal to the appropriate gate driver board via the gating fiber optic. Rockwell Automation Publication 7000-UM202H-EN-P - November 2023... -
Page 107: Air Pressure Sensor
The sensor sends a small direct current voltage signal to the control circuits. Rockwell Automation currently uses Ashcroft air pressure sensors. In the event of reduced fan performance or air blockage, the sensor notes the reduced differential pressure and triggers a warning message to the console. -
Page 108: Dc Link Cabinet Components
Chapter 2 Power Component Definition and Maintenance DC Link Cabinet This section describes the DC link components of your PowerFlex 7000 ‘B’ Components frame drive. This section also details a number of regular or recurring maintenance tasks that will keep your drive in peak operating condition. - Page 109 Power Component Definition and Maintenance Figure 98 - DC Link/Fan Cabinet with Fan Control Panel (Heatsink Model) Ground Bus AC/DC Converters Fan Power Disconnect Single Phase Control Power Transformer DC Link Inductor or CMC (Barrier Removed) Rockwell Automation Publication 7000-UM202H-EN-P - November 2023...
- Page 110 Chapter 2 Power Component Definition and Maintenance Figure 99 - DC Link/Fan Cabinet with Panel Removed to Show CMC (Heatpipe Model) Fans Common Mode Choke Rockwell Automation Publication 7000-UM202H-EN-P - November 2023...
- Page 111 Chapter 2 Power Component Definition and Maintenance Figure 100 - DC Link/Fan Cabinet with Panel Removed to show Main Cooling Fan Inlet Ring Rockwell Automation Publication 7000-UM202H-EN-P - November 2023...
-
Page 112: Dc Link Reactor
The link design ensures that it cools with air drawn through its coils. The DC link reactor does not normally require service. In the event of its replacement, however, Rockwell Automation must approve the replacement link. 1. Lock out the all source power to the drive. - Page 113 Interlocking prevents opening the medium voltage door unless the source power is locked out. Fan power must be disconnected using the handle on the right hand side of the LV door to open the LV compartment. Rockwell Automation Publication 7000-UM202H-EN-P - November 2023...
-
Page 114: Cooling Fans
PowerFlex 7000 B frame drives shipped before August 2020 have a Continental/Daltec cooling fan installed above the DC link. PowerFlex 7000 B frame drives shipped before August 2020 have inlet rings that are mounted on cabinet barriers. Clearance needs to be maintained between the rotating impeller and the stationery inlet ring. - Page 115 631 mm 525 mm (24.8 in.) (20.7 in.) To replace the main Ziehl-Abegg main fan assembly, see PowerFlex 7000 Medium Voltage Air-Cooled (B Frame) Installation Instructions, publication 7000-IN007. Follow this procedure to replace the redundant Ziehl-Abegg fan. ATTENTION: Only qualified personnel familiar with PowerFlex 7000 products and associated machinery should plan or implement the installation, startup, and subsequent maintenance of the system.
- Page 116 2. Attach the rigging to the lifting provisions using slings with load-rated hooks or shackles. Angle Must Lifting Provision Location Exceed 30° Lifting Provision Location Cabinet not shown for clarity. Rockwell Automation Publication 7000-UM202H-EN-P - November 2023...
- Page 117 ATTENTION: The main fan assembly power cables must not touch any sharp edges. 3. Remove the main fan power cables from the converter cabinet main fan cable entry point. Main Fan Cable Entry Point Rockwell Automation Publication 7000-UM202H-EN-P - November 2023...
- Page 118 Ensure that the main fan assembly is supported in an upright orientation. If necessary, lower the load to the floor and adjust the rigging lengths to compensate for any unequal weight distribution to achieve an upright orientation. Rockwell Automation Publication 7000-UM202H-EN-P - November 2023...
- Page 119 1. Remove and retain the hardware (6 x M8 bolt, 4 x M8 nut) from two horizontal support brackets. M8 bolt/nut: 25 N•m (18 lb•ft) 2. Remove and retain the hardware (4 x M6 nut) from two vertical support brackets. M6 nut: 10 N•m (7 lb•ft) Rockwell Automation Publication 7000-UM202H-EN-P - November 2023...
- Page 120 7. Loop the slings through the corner posts on the front and rear of the redundant fan assembly. To reduce tension on the rigging and compression to the redundant fan assembly, ensure that the angle between the slings and vertical plane does not exceed 40°. Rockwell Automation Publication 7000-UM202H-EN-P - November 2023...
- Page 121 2. Route the redundant fan assembly power cables along the length of the low voltage wireway to the LV panel entry point. IMPORTANT Use zip ties at several points so the redundant fan assembly power cables do not move. Rockwell Automation Publication 7000-UM202H-EN-P - November 2023...
- Page 122 Refer to your electrical drawings for termination points. Common Mode Choke Cabinet Redundant Fan Viewed from Below Assembly Ground Wire Fan Supply Terminal Redundant Fan Assembly Power Cables 5. Connect the ground wire. Rockwell Automation Publication 7000-UM202H-EN-P - November 2023...
-
Page 123: Replacing Continental/Daltec Fans
Do not support the assembly on the impeller or you may damage the unit. Figure 105 - Fan Removal (Heatsink Model) Fan Motor Mounting Holes Fan Impeller Mounting Bracket Inlet Ring Rockwell Automation Publication 7000-UM202H-EN-P - November 2023... - Page 124 The gap must be at least 6.3 mm (0.25 in.). To adjust the gap space, loosen the hardware connecting the inlet ring to the cabinet plate and adjust the inlet ring as necessary. Rockwell Automation Publication 7000-UM202H-EN-P - November 2023...
-
Page 125: Impeller Maintenance
Separating Tapers Taper Surfaces 1. Record the distance from the end of the motor shaft to the bushing. The new impeller must be installed in the same location. Failure to do so will Rockwell Automation Publication 7000-UM202H-EN-P - November 2023... -
Page 126: Installing Impeller Assembly Onto Motor Shaft
Torque to 10.2 N•m (7.5 lb•ft). 7. Peen the end of the motor shaft at the keyway with a chisel or center punch to prevent the key from falling out of position. Rockwell Automation Publication 7000-UM202H-EN-P - November 2023... -
Page 127: Fan Balance
Move the ring and retighten bolts to eliminate interference. IMPORTANT The fan must not make contact with the inlet ring. 5. Replace access panels and electrical components. Rockwell Automation Publication 7000-UM202H-EN-P - November 2023... -
Page 128: Replacing Air Filters
Then simply rinse in clear clean water, let stand until completely dry and free of moisture, and return to service. Use only Rockwell Automation supplied or approved replacement filters. Replace the filters in the reverse order of its removal. Check that there are no openings to allow foreign matter to enter the drive. - Page 129 Chapter 2 Power Component Definition and Maintenance Figure 109 - Filter replacement Retaining Hardware Filter Figure 110 - Air Flow Pattern for Snubber Cooling (Continental/Daltec Fan shown) Rockwell Automation Publication 7000-UM202H-EN-P - November 2023...
- Page 130 Chapter 2 Power Component Definition and Maintenance Figure 111 - Air Flow through PowerCage Module Rockwell Automation Publication 7000-UM202H-EN-P - November 2023...
-
Page 131: Control Component Definition And Maintenance
5 cycles after control power interruption. If you cannot restore control power during the 5 cycles, the drive performs a controlled shutdown. Figure 112 illustrates the control power distribution for AFE drives with integral starter and/or line reactor. Rockwell Automation Publication 7000-UM202H-EN-P - November 2023... - Page 132 (1) Cosel power supply output is 57V DC, Pioneer power supply (Heatpipe drives only) output is 56V DC. Figure 113 illustrates the control power distribution for AFE drives with remote transformer/starter or integrated line reactor with remote starter. Rockwell Automation Publication 7000-UM202H-EN-P - November 2023...
-
Page 133: Ac/Dc Power Supply
A typical low voltage compartment is shown in Figure 115. (a) Cosel power supply output is 57V DC, Pioneer power supply output (Heatpipe drives only) is 56V DC. Rockwell Automation Publication 7000-UM202H-EN-P - November 2023... - Page 134 Chapter 3 Control Component Definition and Maintenance Figure 115 - Location of AC/DC Pioneer Power Supply on LV Panel (Heatsink Model) AC/DC Power Supply Rockwell Automation Publication 7000-UM202H-EN-P - November 2023...
-
Page 135: Terminal / Connections Descriptions (Pioneer Power Supply)
Terminal / Connections Descriptions (Pioneer Power Supply) The terminal connections are shown in Figure 117. Figure 117 - Terminal Locations on AC/DC (Pioneer) Power Supply Control Signals DC Outputs Single Phase Input FRONT VIEW VIEW Rockwell Automation Publication 7000-UM202H-EN-P - November 2023... -
Page 136: Terminal / Connections Descriptions (Cosel Power Supply)
Terminal / Connections Descriptions (Cosel Power Supply) The terminal connections are shown in Figure 118. Figure 118 - Terminal Locations on 1000W AC/DC Power Supply (Cosel) Single Phase Input FRONT VIEW Outputs Control Signals Rockwell Automation Publication 7000-UM202H-EN-P - November 2023... -
Page 137: Output Calibration
If it is not possible to maintain 56V DC , the power supply may be faulty. (a) 56V DC for Pioneer and Cosel model numbers -XRWAC and earlier. 57V DC for Cosel model numbers -XRWAD and newer. Rockwell Automation Publication 7000-UM202H-EN-P - November 2023... -
Page 138: Power Supply Replacement
AC/DC power supply and the mounting plate(s). 7. Install the new power supply to the drive (Figure 120). 8. Reconnect the terminals to the unit. 9. Reapply control power and verify voltage levels. Rockwell Automation Publication 7000-UM202H-EN-P - November 2023... - Page 139 5.0 N•m (44 in•lb) Figure 121 - Replacing AC/DC Power Supply on LV Panel (Heatpipe Model) Power supply is secured by a mounting bracket held by four M6 taptites to LV mounting plate Rockwell Automation Publication 7000-UM202H-EN-P - November 2023...
-
Page 140: Power Supply Diode Replacement
4. Clean any old thermal grease from the panel using isopropyl alcohol and allow the area to dry completely. 5. Apply thermal grease to the diode. 6. Install new power supply diode. 7. Reconnect the diode wiring removed in step 2. Rockwell Automation Publication 7000-UM202H-EN-P - November 2023... -
Page 141: Ups Option
Figure 122 shows the current configuration of the internal UPS option. Figure 122 - 300W AC/DC Power Supply (Heatsink) 300 W AC/DC Power Supply Hold-up Capacitor Holding Bracket Rockwell Automation Publication 7000-UM202H-EN-P - November 2023... - Page 142 56VDC (a) 56V DC for Pioneer and Cosel model numbers -XRWAC and earlier. 57V DC for Cosel model numbers -XRWAD and newer. Rockwell Automation Publication 7000-UM202H-EN-P - November 2023...
-
Page 143: Replacing The Ups
ATTENTION: Before installing the new UPS, check the battery recharge date on the shipping carton label. If the date has passed and the batteries were never recharged, do not use the UPS. Contact Rockwell Automation. 5. Before installing the new UPS, the internal battery must be connected. -
Page 144: Low Voltage Control Section
Figure 125 - Low Voltage Tub Compartment ANALOG CONTROL BOARD Analog Control Board Tach Feedback Drive Processor DC/DC Circuit Board Module (DPM) Optical Interface Boards Power Supply Rockwell Automation Publication 7000-UM202H-EN-P - November 2023... -
Page 145: Dc/Dc Power Supply
+5V, +/-15V common Power supply ID Pin 0 Power supply ID Pin 1 (a) 56V DC for Pioneer and Cosel model numbers -XRWAC and earlier. 57V DC for Cosel model numbers -XRWAD and newer. Rockwell Automation Publication 7000-UM202H-EN-P - November 2023... - Page 146 +24V_XIO (+24V,2A) +24V,2A/com3 XIO_COMM (com3) 0V/com3 +HECSPWR (+24V,1A) +24V,1A/com2 LCOMM (com2) 0V/com2 –HECSPWR (-24V,1A) -24V,1A/com2 +15V_PWR (+15V,1A) +15V,1A/com1 ACOMM (com1) 0V/com1 –15V_PWR (-15V,1A) -15V,1A/com1 +5V_PWR (+5V,5A) +5V,5A/com1 DGND (com1) 0V/com1 EARTH earth ground Rockwell Automation Publication 7000-UM202H-EN-P - November 2023...
-
Page 147: Replacing A Dc/Dc Power Supply
All wire/terminal connections plug into the circuit boards. This means that changing boards only requires the removal of the plugs, minimizing the chance of mistakes when reconnecting all of the wiring. Rockwell Automation Publication 7000-UM202H-EN-P - November 2023... -
Page 148: Drive Processor Module
Gating Battery Signals Rectifier Gating Signals Interface Module DPM DataPort Primary Secondary Diagnostic test points on the DPM have a voltage output range of -5…+5V. Table 8 identifies test points on the DPM. Rockwell Automation Publication 7000-UM202H-EN-P - November 2023... - Page 149 If the application is running, there are two other possible states for D9 and D11, described below. Table 11 - Alternate D9 and D11 Descriptions State Meaning D9 (Inv) Parameter load timeout D11(Rect) FPGA real-time clock failed Rockwell Automation Publication 7000-UM202H-EN-P - November 2023...
-
Page 150: Replacing The Drive Processor Module
Install firmware in the drive by following the guidelines the installation manual. 11. Program the drive. See publication 7000-TD002. Save the parameters to NVRAM and externally, using the options described earlier in this section. Rockwell Automation Publication 7000-UM202H-EN-P - November 2023... -
Page 151: Analog Control Board (Acb)
The ACB is the hub for all control-level signals external to the drive. The drive routes analog I/O, external fault signals (through the XIO board), DPI communication modules, remote I/O, terminal interface, printers, modem, and other external communication devices through this board. Rockwell Automation Publication 7000-UM202H-EN-P - November 2023... - Page 152 The board also has isolated digital I/O for e-stops, contactor control and status feedback. All of the test points for the currents, system voltages, control voltages, and flux are on these boards. Rockwell Automation Publication 7000-UM202H-EN-P - November 2023...
- Page 153 Motor side DCLINK voltage for bridge #2, VMDC2 ACB-TP11 Vuvs Line voltage synchronous feedback, VSAB ACB-TP12 V2uv Line voltage feedback, 2UV ACB-TP13 V2vw Line voltage feedback, 2VW ACB-TP14 V2wu Line voltage feedback, 2WU Rockwell Automation Publication 7000-UM202H-EN-P - November 2023...
- Page 154 +5V DC power supply ACB-TP61 +15V +15V DC power supply ACB-TP62 -15V -15V DC power supply ACB-TP63 +24V +24V DC power supply ACB-TP64 -24V -24V DC power supply ACB-TP65 24VCOM +/- 24V common Rockwell Automation Publication 7000-UM202H-EN-P - November 2023...
-
Page 155: Status Indicators
The interface module makes all your connections to the ACB. The pin numbers listed on the following pages refer to the IFM pin numbers. Figure 131 - Interface Module (IFM) Even pin numbers Odd pin numbers Connection to ACB (J8) Rockwell Automation Publication 7000-UM202H-EN-P - November 2023... -
Page 156: Analog Inputs And Outputs
Therefore, the PowerFlex 7000 transmitter can drive a receiver with an input resistance up to 625 Ω. -
Page 157: Isolated Process Receiver
The receiver can accept 4-wire transmitters. The figure below shows the recommended connections. Again, the type of shielded cable used is application specific as per the transmitter. Figure 134 - Process Loop Receiver connections IF M User-supplied Power (Sinking) 4-Wire Transmitter Rockwell Automation Publication 7000-UM202H-EN-P - November 2023... -
Page 158: Non-Isolated Process Outputs
The health of this power supply is monitored in the drive. PIN NO. DESCRIPTION ISOLATOR (+24V, 1 A) ISOL_COMM (com4) EARTH Rockwell Automation Publication 7000-UM202H-EN-P - November 2023... -
Page 159: Replacing The Analog Control Board
The board also provides a galvanically isolated 12V/3 W supply to power the attached encoder. You can configure the 20B- ENC-3 encoder interface for 5V operation, however Rockwell Automation recommends operation at 12V. Rockwell Automation Publication 7000-UM202H-EN-P - November 2023... - Page 160 12V/3W galvanically isolated encoder power source. When using absolute encoders, use the 12 single ended inputs. For quadrature encoders, use the six differential inputs. Either encoder with frequencies up to 200 kHz connects to the universal encoder interface. Rockwell Automation Publication 7000-UM202H-EN-P - November 2023...
- Page 161 IFM Pin # Quadrature Encoder Function Absolute Encoder Function ENC_COM ENC_COM A2+ (redundant or dual ENC) A2- (redundant or dual ENC) ENC_COM ENC_COM B2+ (redundant or dual ENC) B2- (redundant or dual ENC) Rockwell Automation Publication 7000-UM202H-EN-P - November 2023...
-
Page 162: Quadrature Encoder Operation
IMPORTANT Consult the factory for availability of dual quadrature encoder options. When the drive switches over to the redundant encoder, it cannot switch back without recycling control power. Rockwell Automation Publication 7000-UM202H-EN-P - November 2023... -
Page 163: Positional Encoder Operations
OFF or vice versa. In the case of Gray code, since only one bit ever changes, the ambiguity error is never more than one count. For this reason, and to reduce inrush currents, Rockwell Automation recommends using Gray code Positional Encoders. -
Page 164: External Input/Output Boards
XIO link A and B ports are interchangeable but it may make wiring easier to follow if you use Link A for “upstream” (closest to the ACB), and Link B for “downstream” (farthest from the ACB). Rockwell Automation Publication 7000-UM202H-EN-P - November 2023... -
Page 165: Replacing The External Input/Output Board
5. Install the new XIO board assembly in the low voltage control cabinet. 6. Reconnect all connections and verify the locations. 7. Apply low voltage power and complete both system and medium voltage tests to ensure the new board functions properly. Rockwell Automation Publication 7000-UM202H-EN-P - November 2023... -
Page 166: Optical Interface Boards (Oib)
OIBC is not implemented on the OIBB and is never used. For more information, see the drawings supplied with your drive. The alarm and trip set points for each of these signals are programmable in software. Rockwell Automation Publication 7000-UM202H-EN-P - November 2023... -
Page 167: Replacing The Optical Interface Board
5. Install the new OIB on the OIBB. Ensure the standoffs snap into place. 6. Reconnect all fiber optic connections and verify the locations. 7. Apply low voltage power and complete gating, system, and medium voltage tests to confirm board performance. Rockwell Automation Publication 7000-UM202H-EN-P - November 2023... - Page 168 Chapter 3 Control Component Definition and Maintenance Figure 141 - OIB Replacement (Mounting Plate Accessible) Optical Interface Boards (OIB) Rockwell Automation Publication 7000-UM202H-EN-P - November 2023...
- Page 169 J8. The remaining connectors on the board complete the electrical connection of the installed OIBs to the DPM. Each OIB can support from one to three OIBs. Figure 142 - Optical Interface Base Board (OIBB) Rockwell Automation Publication 7000-UM202H-EN-P - November 2023...
-
Page 170: Replace The Optical Interface Base Board
OIB B, TX1 Firing Command Signal TP18 DIAG_7 OIB B, RX2 Diagnostic Feedback TP19 CMD_7 OIB B, TX2 Firing Command Signal TP20 DIAG_8 OIB B, RX3 Diagnostic Feedback TP21 CMD_8 OIB B, TX3 Firing Command Signal Rockwell Automation Publication 7000-UM202H-EN-P - November 2023... - Page 171 OIB C Temperature Feedback Signal – There is no provision in the drive TP42 TFB_C for the use of this signal, it is only provided for Rockwell internal testing. TP43 Ground Reference for TP30 – TP42 Rockwell Automation Publication 7000-UM202H-EN-P - November 2023...
- Page 172 Chapter 3 Control Component Definition and Maintenance Notes: Rockwell Automation Publication 7000-UM202H-EN-P - November 2023...
-
Page 173: Preventative Maintenance Schedule
This process really involves only one task: changing or cleaning the air filters. The PowerFlex 7000 drive requires consistent, unrestricted airflow to keep the power devices cool. The air filter is the main source of blockage in the air path. -
Page 174: Physical Checks (No Medium Voltage And No Control Power)
Physical Checks (NO Medium Voltage and NO Control Power) 1. Power connection inspection • Inspect PowerFlex 7000 drive, input/output/bypass contactor sections, and all associated drive components for loose power cable connections and ground cable connections: torque them to the required torque specifications. -
Page 175: Control Power Checks (No Medium Voltage)
5. Save all parameter changes (if any) to NVRAM. 6. Run the application up to full speed/full load, or to desired satisfaction. 7. Capture the drive variables while running, in the highest access level if possible. Rockwell Automation Publication 7000-UM202H-EN-P - November 2023... -
Page 176: Additional Tasks During Preventive Maintenance
2. This information should be communicated to MV product support so future support activities have the latest site information available. • This can be faxed to (519) 740-4756 or e-mailed to MVSupport_Technical@ra.rockwell.com. Rockwell Automation Publication 7000-UM202H-EN-P - November 2023... -
Page 177: Time Estimations
The following is a list of the tools recommended for proper maintenance of the PowerFlex 7000 drive. Not all of the tools may be required for a specific drive preventive procedure, but to complete all of the tasks listed above the following tools would be required. -
Page 178: Overview
No. 30 Torx driver Documentation • PowerFlex 7000 Technical Data (Parameters, Troubleshooting) – Publication 7000-TD002 • PowerFlex 7000 MV Drives Transportation and Handling Procedures – Publication 7000-IN008 • MV 400A Vacuum Contactor, Series D User Manual – publication 1502-UM050 •... - Page 179 Appendix A Preventative Maintenance Schedule Table 20 - PowerFlex 7000 Drive Preventative Maintenance Schedule (Years 0…10) Period Interval (Years) (1) (2) Door Mounted Air Filters Main Cooling Fan Motor RFB/R I Air-Cooling System Redundant Cooling Fan Motor (if supplied) RFB/R I Small Aux.
- Page 180 Appendix A Preventative Maintenance Schedule Table 21 - PowerFlex 7000 Drive Preventative Maintenance Schedule (Years 11…20) Period Interval (Years) (1) (2) Door Mounted Air Filters Main Cooling Fan Motor RFB/R Air-Cooling System Redundant Cooling Fan Motor (if supplied) RFB/R Small Aux. Cooling Fans “Caravel”...
-
Page 181: Overview
Appendix PowerFlex 7000 Drive Spare Part Storage Requirements and Recommendations Overview If equipment containing electrolytic capacitors (for example, power supplies) is stored (unpowered) under normal storage temperatures and conditions, it can be kept for up to 15 years. After 15 years, the electrolyte inside of the capacitors dries because the rubber seals of the capacitor starts to deteriorate. -
Page 182: Control Equipment And Boards
Appendix B PowerFlex 7000 Drive Spare Part Storage Requirements and Recommendations 3. Increase voltage to 50% of the nominal voltage of the energized item, feed the power supply for another 15 minutes. 4. Increase voltage to 75% of the nominal voltage of the energized item, feed the power supply for another 15 minutes. -
Page 183: Sgct/Scr/Sps
Appendix B PowerFlex 7000 Drive Spare Part Storage Requirements and Recommendations SGCT/SCR/SPS Energize with nominal input voltage for 1…2 hours every year of storage. To energize these components: SGCT • Use the AC power source, PS1, and IGDPS power supplies to power up the SGCT boards. -
Page 184: Spare Parts Maintenance Schedule
Appendix B PowerFlex 7000 Drive Spare Part Storage Requirements and Recommendations Spare Parts Maintenance Use the following table to determine the appropriate action per the spare parts Schedule maintenance schedule below. Ch Charging This indicates that the component should be charged to maintain component integrity. -
Page 185: Spare Parts Connection Matrix
(4) Energize the SGCT boards using one of the methods below. a. Assembly of AC power source, PowerFlex 7000 PS1 and IGDPS power supply. b. Assembly of variable DC power source with current limiting function, SPS board, and wire harness provided with the drive. -
Page 186: Power Supply Connection Guidelines
Appendix B PowerFlex 7000 Drive Spare Part Storage Requirements and Recommendations Power Supply Connection Pioneer/Cosel Power Supply Guidelines 1. Connect the AC source to the AC input terminals of Pioneer/Cosel power supply via 13 A circuit breaker. 2. Use 10 AWG (5.3 mm ) wire to connect the devices. -
Page 187: Intellivac Control Module
Appendix B PowerFlex 7000 Drive Spare Part Storage Requirements and Recommendations IntelliVAC Control Module 1. Connect the AC or DC source (120…240V) to the power input terminals of IntelliVAC control module via 2 A circuit breaker. 2. Use 12 AWG (3.3 mm ) wire to connect the devices. -
Page 188: Absopulse Dc/Dc Converter
Appendix B PowerFlex 7000 Drive Spare Part Storage Requirements and Recommendations Absopulse DC/DC Converter There are two methods to connect the Absopulse DC/DC converter. First Method 1. Connect the variable DC source with current limiting function (56V DC/200mA) to the DC input terminals of DC/DC converter. -
Page 189: 1606 Power Supply
Appendix B PowerFlex 7000 Drive Spare Part Storage Requirements and Recommendations 1606 Power Supply 1. Connect the variable AC source to the AC input terminals of 1606 power supply via 2 circuit breaker. 2. Use 12 AWG (3.3 mm ) wire to connect the devices. -
Page 190: Power Components Connection Guidelines
Appendix B PowerFlex 7000 Drive Spare Part Storage Requirements and Recommendations Power Components SGCT – IGDPS Connection Guidelines There are two connection methods for the IGDPS. First Method 1. Connect the AC source to the AC input terminals of Pioneer/Cosel power supply via 13 A circuit breaker. -
Page 191: Sgct - Sps Board
Appendix B PowerFlex 7000 Drive Spare Part Storage Requirements and Recommendations SGCT – SPS Board 1. Connect the variable AC power source 120V or 240V to the test plug of the SPS board. 2. Connect the SPS DC output terminals with the DC input terminals of SGCT. -
Page 192: Scr - Spgdb
Appendix B PowerFlex 7000 Drive Spare Part Storage Requirements and Recommendations SCR - SPGDB 1. Connect the variable DC source with current limiting function (20V DC/100mA) to the test plug. 2. Use 14 AWG (2.1 mm ) wire to connect the devices. -
Page 193: Connection Wires Size
Appendix B PowerFlex 7000 Drive Spare Part Storage Requirements and Recommendations Connection Wires Size Table 23 - PowerFlex 7000 Drive Connection Wire Sizes AWG or MCM Diameter (in.) Diameter (mm) Cross-Sectional Area (mm 0.8660 22.00 380.031 0.8370 21.25 354.695 0.7750 19.67... - Page 194 Appendix B PowerFlex 7000 Drive Spare Part Storage Requirements and Recommendations Notes: Rockwell Automation Publication 7000-UM202H-EN-P - November 2023...
-
Page 195: Torque Requirements For Threaded Fasteners
0.45 Steel 0.43 0.32 0.70 Steel 0.80 Steel 1.00 Steel 1.25 Steel 1.50 Steel 1.75 Steel 2.00 Steel 1/4 in. Steel S.A.E. 5 5/16 in. Steel S.A.E. 2 3/8 in. Steel S.A.E. 2 Rockwell Automation Publication 7000-UM202H-EN-P - November 2023... - Page 196 Appendix C Torque Requirements Notes: Rockwell Automation Publication 7000-UM202H-EN-P - November 2023...
-
Page 197: Overview
Follow this procedure to perform insulation resistance tests on the drive. Failure to comply with this procedure may result in poor test readings and damage to drive control boards. Rockwell Automation Publication 7000-UM202H-EN-P - November 2023... -
Page 198: Insulation Resistance Test Procedure
IMPORTANT Injecting a high voltage on the ground cable during an insulation resistance test will degrade the cable insulation. 3. Disconnect connections between power circuit and low voltage control. (a) Capacitor terminals of the grounding network require a 7/16 in. hex tool. Rockwell Automation Publication 7000-UM202H-EN-P - November 2023... - Page 199 Perform an insulation resistance test at 5 kV for 1 minute and record the result. The test should produce a reading greater than the minimum values listed below. If the test results produced a value lower than these Rockwell Automation Publication 7000-UM202H-EN-P - November 2023...
- Page 200 Failure to connect both ground connections on the voltage sensing board will result in high potential in the low voltage cabinet within the drive that will damage the drive control, and possible cause injury or death to personnel. Rockwell Automation Publication 7000-UM202H-EN-P - November 2023...
- Page 201 For drives that did not originally have the GN connected (or even installed), this is not a concern. Transient Suppression Network c. Re-install the fuses on the TSN. Rockwell Automation Publication 7000-UM202H-EN-P - November 2023...
- Page 202 Appendix D Insulation Resistance Test Notes: Rockwell Automation Publication 7000-UM202H-EN-P - November 2023...
-
Page 203: Air Quality Requirements
Dust coating low voltage circuit boards can also cause failures. Air presented to the PowerFlex 7000 drive must be of a cleanliness expected in a typical industrial control room environment. The drive is intended to operate in conditions with no special precautions to minimize the presence of sand or dust, but not in close proximity to sand or dust sources. -
Page 204: Hazardous Materials
Appendix E Environmental Considerations Hazardous Materials Environmental protection is a top priority for Rockwell Automation. The facility that manufactured this medium voltage drive operates an environmental management system that is certified to the requirements of ISO 14001. As part of this system, this product was reviewed in detail throughout the development process to ensure that environmentally inert materials were used wherever feasible. -
Page 205: In Case Of Fire
These materials should then be sent to local recycling facilities. In addition, all disposal precautions mentioned above must also be taken for those particular materials. Rockwell Automation Publication 7000-UM202H-EN-P - November 2023... - Page 206 Appendix E Environmental Considerations Notes: Rockwell Automation Publication 7000-UM202H-EN-P - November 2023...
- Page 207 • Catalog number explanation • Line and load cable sizes • Torque capabilities These sections moved to PowerFlex 7000 Medium Voltage AC Drives Technical Data, publication 7000-TD010. Removed typical application load torque profile table. This was moved to PowerFlex Medium Voltage AC Drives Selection Guide, publication PFLEX-SG003.
- Page 208 Appendix F History of Changes Notes: Rockwell Automation Publication 7000-UM202H-EN-P - November 2023...
- Page 209 205 cooling technology 16 fire 205 Cosel power supply 136 lithium batteries 204 terminal locations on 1000W AC/DC 136 terminal locations on 600W AC/DC 137 current loop transmitter 156 current transformer replace 44 Rockwell Automation Publication 7000-UM202H-EN-P - November 2023...
- Page 210 (SGCT device) 68 replace 38 snubber resistance (SCR) 82 simplified wiring diagram 37 snubber resistance (SGCT Device) 67 suppressor 35 safe torque off 21 non-isolated process outputs 158 Safety Integrity Level 3 21 Rockwell Automation Publication 7000-UM202H-EN-P - November 2023...
- Page 211 41 field test 41 heatsink 40 operation 39 replace 40 symmetrical gate commutated thyristors. See SGCT temperature sensing 89 replace thermal sensor 89 thermal sensor replace 89 topology 13 torque requirements 195 Rockwell Automation Publication 7000-UM202H-EN-P - November 2023...
- Page 212 Index Notes: Rockwell Automation Publication 7000-UM202H-EN-P - November 2023...
- Page 213 PowerFlex 7000 Medium Voltage AC Drive Air-Cooled (’B’ Frame)—ForGe Control User Manual Rockwell Automation Publication 7000-UM202H-EN-P - November 2023...
- Page 214 At the end of life, this equipment should be collected separately from any unsorted municipal waste. Rockwell Automation maintains current product environmental compliance information on its website at rok.auto/pec. Allen-Bradley, ArcShield, CENTERLINE, Direct-to-Drive, DriveTools, expanding human possibility, IntelliVAC, PanelView, PowerFlex, and Rockwell Automation are trademarks of Rockwell Automation, Inc.
Need help?
Do you have a question about the PowerFlex 7000 and is the answer not in the manual?
Questions and answers