Rockwell Automation Allen-Bradley PowerFlex 755TS Series Hardware Service
With totalforce control
Hide thumbs
Also See for Allen-Bradley PowerFlex 755TS Series:
- Installation instructions manual (100 pages) ,
- Migration manual (46 pages)

Related Manuals for Rockwell Automation Allen-Bradley PowerFlex 755TS Series


Summary of Contents for Rockwell Automation Allen-Bradley PowerFlex 755TS Series
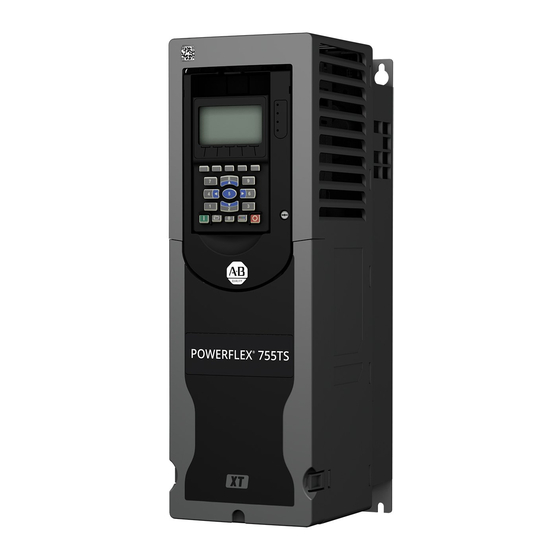
- Page 1 PowerFlex 755TS Products with TotalFORCE Control Catalog Numbers 20G2, 20GE Hardware Service Original Instructions...
- Page 2 If this equipment is used in a manner not specified by the manufacturer, the protection provided by the equipment may be impaired. In no event will Rockwell Automation, Inc. be responsible or liable for indirect or consequential damages resulting from the use or application of this equipment.
-
Page 3: Table Of Contents
Remove the IP54, NEMA/UL Type 12 Cover, Frames 2…5 ..40 Install the IP54, NEMA/UL Type 12 Cover, Frames 2…5 ..41 Rockwell Automation Publication 750-TG101A-EN-P - June 2022... - Page 4 Remove the Backplane Circuit Board, Frames 2…5 ....77 Install the Backplane Circuit Board, Frames 2…5....79 Rockwell Automation Publication 750-TG101A-EN-P - June 2022...
- Page 5 Remove the AC Precharge Circuit Board (400/480V) ... 113 Install the AC Precharge Circuit Board (400/480V) ... . . 118 Rockwell Automation Publication 750-TG101A-EN-P - June 2022...
- Page 6 Remove the Power Interface Circuit Board ....151 Install the Power Interface Circuit Board ..... 160 Rockwell Automation Publication 750-TG101A-EN-P - June 2022...
- Page 7 Index ..........189 Rockwell Automation Publication 750-TG101A-EN-P - June 2022...
- Page 8 Notes: Rockwell Automation Publication 750-TG101A-EN-P - June 2022...
-
Page 9: Preface
Download Firmware, Add-on Download firmware, associated files (such as Add-on Profile, EDS, and DTM), Profile, EDS, and Other Files and access product release notes from the Product Compatibility and Download Center at rok.auto/pcdc. Rockwell Automation Publication 750-TG101A-EN-P - June 2022... -
Page 10: Additional Resources
Ethernet Reference Manual, publication ENET-RM002 Describes basic Ethernet concepts, infrastructure components, and infrastructure features. Provides guidance on how to conduct security assessments, implement Rockwell Automation System Security Design Guidelines Reference Manual, publication SECURE-RM001 products in a secure system, harden the control system, manage user access, and dispose of equipment. -
Page 11: Product Advisories
Component damage can result if ESD control procedures are not followed. In this manual, this image identifies Electrostatic Discharge (ESD) sensitive parts. Take static control precautions when you install an assembly that is identified as ESD sensitive. Rockwell Automation Publication 750-TG101A-EN-P - June 2022... -
Page 12: Remove Power From The System
DC–, DC+ to chassis GND (PE), and DC– to chassis GND (PE). For terminal locations and identification, see Figure 1 on page 13, Figure 2 on page 14, and Figure 3 on page 15. Rockwell Automation Publication 750-TG101A-EN-P - June 2022... - Page 13 Before You Begin Tests, Maintenance, or Repairs Figure 1 - Frames 1…3 Power Terminal Block and PE Ground Locations Frame 1 Frame 2 Frame 3 Item Name R/L1, S/L2, T/L3, BR1, BR2, +DC, –DC, U/T1, V/T2, W/T3 PE Ground Rockwell Automation Publication 750-TG101A-EN-P - June 2022...
- Page 14 Figure 2 - Frames 4 and 5 Power Terminal Block and PE Ground Locations Frame 4 with EMC C2 Ground Plate Shown Frame 5 with EMC C2 Ground Plate Shown Item Name R/L1, S/L2, T/L3, BR1, BR2, +DC, –DC, U/T1, V/T2, W/T3 PE Ground Rockwell Automation Publication 750-TG101A-EN-P - June 2022...
- Page 15 Figure 3 - Frames 6 and 7 Power Terminal Block and PE Ground Locations Frame 6 Frame 7 Item Name +DC and –DC test points +DC, –DC, BR1, BR2 R/L1, S/L2, T/L3, U/T1, V/T2, W/T3 PE Ground Rockwell Automation Publication 750-TG101A-EN-P - June 2022...
-
Page 16: Renewal Kits For Powerflex 755Ts Products With Corrosive Gas
For example, the catalog number for the main control circuit board with XT is SK-RT-MCB1-PF755-XT. Figure 4 - Examples of Protective Covers on Renewal Kits with XT HIM DPI Connector Cover Control Pod Back Plane Circuit Board Connector Cover Rockwell Automation Publication 750-TG101A-EN-P - June 2022... -
Page 17: Dielectric Grease Application
Cables are Installed. Dielectric Grease on Connectors (Grease is Translucent - Shown Shaded for Example Only) Hold Protective Cover by Tab. Remove Only when Used Remove Only when a Torque Accuracy Module is Installed. Rockwell Automation Publication 750-TG101A-EN-P - June 2022... -
Page 18: Inspect And Clean Circuit Board Connectors
PolySi PST-576 non-silicone, dielectric grease to the affected connector. IMPORTANT Only PolySi PST-576 dielectric grease is approved for use on edge connec- tors of circuit boards with XT. Rockwell Automation Publication 750-TG101A-EN-P - June 2022... - Page 19 The chamber is full when a grease escapes through the small holes on the applicator cover. 7. Open the applicator cover and verify that the chamber is full of grease. 8. If the chamber is not full of grease, repeat steps 5…7. Rockwell Automation Publication 750-TG101A-EN-P - June 2022...
- Page 20 11. After use, remove the grease applicator from the grease tube. 12. Replace the cap on the grease tube. 13. By using a clean cloth, wipe the remaining grease out of the applicator tip and close the cover. Rockwell Automation Publication 750-TG101A-EN-P - June 2022...
-
Page 21: Commonly Used Tools
Connected Components Workbench™ software is an application that can be used to upload and download parameter configuration and monitor system parameters. Connected Components Workbench version 15.01 or later is required for use with PowerFlex 755TS products. Rockwell Automation Publication 750-TG101A-EN-P - June 2022... -
Page 22: Hardware Installation Diagrams
0.7 N • (6 lb in) initial torque. The numeric illustration labels are for your assistance. • Drive components do not contain these labels. Figure 7 - Two-point Mounting Initial Sequence Final Sequence Rockwell Automation Publication 750-TG101A-EN-P - June 2022... - Page 23 Figure 8 - Four-point Mounting Initial Sequence Final Sequence Figure 9 - Six-point Mounting Initial Sequence Do not exceed 0.7 N m (6 lb in) on initial torque of all six screws. • • Final Sequence Rockwell Automation Publication 750-TG101A-EN-P - June 2022...
- Page 24 Chapter 1 Before You Begin Tests, Maintenance, or Repairs Notes: Rockwell Automation Publication 750-TG101A-EN-P - June 2022...
-
Page 25: Recommended Preventative Maintenance
755TS products and components for applications that demand the highest levels of machine availability. Recommended Preventative To help achieve the highest level of uptime, Rockwell Automation recommends Maintenance that you follow the maintenance schedule that is provided for your operating environment. -
Page 26: Predictive Maintenance
• Connected Components Workbench • Studio Logix 5000 Designer Figure 10 provides an example of a Predictive Maintenance page for a drive. Figure 10 - Connected Components Workbench - Predictive Maintenance Page Example Rockwell Automation Publication 750-TG101A-EN-P - June 2022... -
Page 27: Maintenance Of Industrial Control Equipment
Allen-Bradley® devices because oil or grease on the pole faces (mated surfaces) of the operating magnet can cause the device to stick in the “ON” mode. Some parts of other devices are factory lubricated – if lubrication during use or Rockwell Automation Publication 750-TG101A-EN-P - June 2022... -
Page 28: Solid-State Devices
Preventative and Predictive Maintenance maintenance of these devices is needed, it is specified in their individual instructions. If in doubt, consult your nearest Rockwell Automation sales office for information. Contacts - Check contacts for excessive wear and dirt accumulation. To remove dirt, clean contacts with a soft cloth. - Page 29 See NEMA Standards Publication No. ICS-2, Part ICS2-302 for procedures. For replacements, use only parts and devices that Rockwell Automation recommends maintaining the integrity of the equipment. Make sure that the parts are properly matched to the model, series, and revision level of the equipment.
- Page 30 Chapter 2 Preventative and Predictive Maintenance Notes: Rockwell Automation Publication 750-TG101A-EN-P - June 2022...
-
Page 31: Component Inspection And Maintenance
• Frame 6, see page 89. • Frame 7, see page 134. 6. For Frames 1…5, inspect the power board. If any components, particularly the resistors, show evidence of burn marks or breakage, replace the drive. Rockwell Automation Publication 750-TG101A-EN-P - June 2022... -
Page 32: Forward And Reverse Biased Igbt/Diode Tests
4. If the product fails the measurements that are identified in Table 1 Table 2, replace the drive. 5. Complete the procedures in Appendix A on page 179 before placing the drive back into service. Rockwell Automation Publication 750-TG101A-EN-P - June 2022... -
Page 33: Frames 1
(for All Enclosure Types) SK-RT-HSFAN1-F12 SK-RT-HSFAN1-F12-XT See page Heatsink Fan SK-RT-HSFAN1-F3A, SK-RT-HSFAN1-F3A-XT, (for IP20, NEMA/UL Open Type and SK-RT-HSFAN1-F3 SK-RT-HSFAN1-F3-XT IP20, NEMA/UL Type 1 Enclosures) SK-RT-HSFAN1-F4 SK-RT-HSFAN1-F4-XT See page SK-RT-HSFAN1-F5A, SK-RT-HSFAN1-F5A-XT, SK-RT-HSFAN1-F5 SK-RT-HSFAN1-F5-XT Rockwell Automation Publication 750-TG101A-EN-P - June 2022... - Page 34 (1) The EMC C3 ground plate and hardware is shipped with the drive from the factory. These renewal kits can be purchased to replace missing or damaged parts for the EMC C3 assembly. For installation instructions, see the PowerFlex 755TS Products with TotalFORCE® Control Installation Instructions, publication 750-IN119. Rockwell Automation Publication 750-TG101A-EN-P - June 2022...
-
Page 35: Remove The Power Terminal Cover, Frames 1
Frame 4 - Open Type Shown M4 x 16 mm T20 or F - 6.4 mm (0.25 in.) 0.23 N•m (2.0 lb•in) NEMA / UL Type 1 Only Rockwell Automation Publication 750-TG101A-EN-P - June 2022... -
Page 36: Install The Power Terminal Cover, Frames 1
Torx screw that secures the cover to the conduit box. Frame 4 - Open Type Shown M4 x 16 mm T20 or F - 6.4 mm (0.25 in.) 0.23 N•m (2.0 lb•in) NEMA / UL Type 1 Only Rockwell Automation Publication 750-TG101A-EN-P - June 2022... -
Page 37: Remove The Ip54, Nema/Ul Type 12 Cover, Frames 2
• Frames 2…4 - Remove the 13 M4 x 16 mm slotted-Torx screws. • Frame 5 - Remove the 20 M4 x 16 mm slotted-Torx screws. Frame 4 Shown (Qty. 13 or 20) Rockwell Automation Publication 750-TG101A-EN-P - June 2022... -
Page 38: Install The Ip54, Nema/Ul Type 12 Cover, Frames 2
T20 or F - 6.4 mm (0.25 in.) 0.12 N•m (1.0 lb•in) 0.23 N•m (2.0 lb•in) 7 mm 7 mm 0.12 N•m (1.0 lb•in) 0.23 N•m (2.0 lb•in) 14 15 Frame 2 Frame 3 Frame 4 Frame 5 Rockwell Automation Publication 750-TG101A-EN-P - June 2022... -
Page 39: Power Terminal Cover Replacement, Frames 1
1. For IP20, NEMA/UL Type 1 installations with a conduit box only, on the inside of the new cover, remove the plastic material from the screw hole. Frame 4 - Type 1 Cover Shown Rockwell Automation Publication 750-TG101A-EN-P - June 2022... -
Page 40: Ip54, Nema/Ul Type 12 Cover Replacement, Frames 2
3. Remove the cover. See Remove the IP54, NEMA/UL Type 12 Cover, Frames 2…5 on page 4. If present, remove any stored PE jumper retainer screws from the PE retainer on the inside of the cover. Rockwell Automation Publication 750-TG101A-EN-P - June 2022... -
Page 41: Install The Ip54, Nema/Ul Type 12 Cover, Frames 2
4. For IP20, NEMA/UL Type 1 enclosures only, insert a screwdriver under the drip hood, press outward to disengage each clip, and lift the cover off the chassis. Retain the drip hood for reuse. Rockwell Automation Publication 750-TG101A-EN-P - June 2022... - Page 42 7. Use a screwdriver to lift the two slotted-tabs on the bottom of the chassis off the brackets. M4 x 16 mm T20 or F - 6.4 mm (0.25 in.) 0.23 N•m (2.0 lb•in) Rockwell Automation Publication 750-TG101A-EN-P - June 2022...
- Page 43 Chapter 4 Frames 1…5 Renewal Kits Installation 8. Rotate the chassis 90°, until the chassis locks in place. 9. Disconnect the HIM DPI circuit board connector from the main control circuit board. Rockwell Automation Publication 750-TG101A-EN-P - June 2022...
-
Page 44: Install The Chassis, Frame 1
Install the Chassis, Frame 1 Follow these steps to install the chassis. 1. At the top of the new chassis, pull outward on the tabs and snap the chassis into place on the drive. Rockwell Automation Publication 750-TG101A-EN-P - June 2022... - Page 45 3. If a HIM and DPI cable is used, remove the protective cover from the HIM and DPI connectors on the chassis. DPI Port 4. Secure the chassis to the drive in the reverse order of removal. Rockwell Automation Publication 750-TG101A-EN-P - June 2022...
-
Page 46: Chassis Replacement, Frames 2
3. For IP20, NEMA/UL Type 1 enclosures only, insert a screwdriver under the drip hood, press outward to disengage each clip, and lift the cover off the chassis. Retain the drip hood for reuse. Frame 4, IP20, NEMA/UL Type 1 Shown Rockwell Automation Publication 750-TG101A-EN-P - June 2022... - Page 47 Disconnect the power wire-harness connector from the stirring fan connector and remove the stirring fan assembly from the chassis. Retain the fan assembly for reuse. c. Push the power wire harness through the hole in the chassis. Frame 4 Shown Rockwell Automation Publication 750-TG101A-EN-P - June 2022...
- Page 48 6. Use a screwdriver to lift the two slotted-tabs on the bottom of the chassis off the brackets. 7. At the top of the drive, lift the chassis off the tabs and remove the chassis. Frame 4 Shown Rockwell Automation Publication 750-TG101A-EN-P - June 2022...
-
Page 49: Install The Chassis, Frames 2
6. If used, disconnect the plug-in terminal block (TB1) on the bottom of the main control board. 7. If an option module is installed, disconnect any I/O wiring terminal blocks (not shown in image). Control Pod Shown Separated from the Drive for Clarity Only. Rockwell Automation Publication 750-TG101A-EN-P - June 2022... - Page 50 9. Remove the #10-16 x 1 in. hexagonal-head screws that secure the flange to the mounting surface and remove the drive and gasket. Discard the gasket. Frame 2 Drive Shown #10-16 x 1 in. 5/16 in. Rockwell Automation Publication 750-TG101A-EN-P - June 2022...
- Page 51 Frames 1…5 Renewal Kits Installation 10. Remove the M4 x 10 mm slotted-Torx screws that secure the flange to the drive chassis and remove the flange. 11. Remove the gasket from the flange and discard. Rockwell Automation Publication 750-TG101A-EN-P - June 2022...
-
Page 52: Install The Flange Gasket, Frames 2
Chapter 4 Frames 1…5 Renewal Kits Installation Install the Flange Gasket, Frames 2…5 Follow these steps to Install the flange gasket. 1. Insert the new gasket and drive into the flange. Rockwell Automation Publication 750-TG101A-EN-P - June 2022... - Page 53 3. To secure the drive to the flange, apply final torque by using the sequence that is shown. M4 x 10 mm T20 or F - 6.4 mm (0.25 in.) 1.8 N m (16.0 lb • • Frame 2 Frame 3 Frame 4 Frame 5 Rockwell Automation Publication 750-TG101A-EN-P - June 2022...
-
Page 54: Control Pod Printed Circuit Board Fan Replacement, Frames 2
Follow theses steps to remove the control pod printed circuit board fan. 1. Review the Product Advisories on page 2. Turn off and lock-out incoming power. See Remove Power from the System on page Rockwell Automation Publication 750-TG101A-EN-P - June 2022... - Page 55 Control Pod Shown Removed from the Drive Chassis for Clarity Only. M3 x 6.4 mm T15 or F - 5 mm (0.19 in.) 0.45 N•m (4.0 lb•in) IP20, NEMA/UL Open Type Frame 2 Drive Shown. Drive Chassis Shown Remove for Clarity Only. Rockwell Automation Publication 750-TG101A-EN-P - June 2022...
-
Page 56: Install The Control Pod Printed Circuit Board Fan, Frames 2
9. Press in on the two tabs on either side of the fan and remove the fan from the chassis. Frame 2 Frame 4 Install the Control Pod Printed Circuit Board Fan, Frames 2…5 Install the control pod printed circuit board fan in the reverse order of removal. Rockwell Automation Publication 750-TG101A-EN-P - June 2022... -
Page 57: Heatsink Fan Replacement, Frames 1
4. Disconnect the fan power wire-harness connector from the connector on the fan and remove the fan. Frame 2 Drive Shown Install the Heatsink Fan, Frames 1…3 Install the heatsink fan in the reverse order of removal. Rockwell Automation Publication 750-TG101A-EN-P - June 2022... -
Page 58: Heatsink Fan Replacement, Frames 4 And 5
4. Disconnect the fan power wire-harness connector from the connector on the fan and remove the fan. Frame 4 Drive Shown Install the Heatsink Fan, Frames 4 and 5 Install the heatsink fan in the reverse order of removal. Rockwell Automation Publication 750-TG101A-EN-P - June 2022... -
Page 59: Stirring Fan Replacement, Frames 4 And 5
Disconnect the power wire harness connector from the stirring fan connector and remove the stirring fan assembly from the chassis. Frame 4 IP20, NEMA/UL Open Type Drive Shown Rockwell Automation Publication 750-TG101A-EN-P - June 2022... -
Page 60: Install The Stirring Fan, Frames 4 And 5
M4 x 35 mm T20 or F - 6.4 mm (0.25 in.) 1.8 N•m (16.0 lb•in) Install the Stirring Fan, Frames 4 and 5 Install the stirring fan in the reverse order of removal. Rockwell Automation Publication 750-TG101A-EN-P - June 2022... -
Page 61: Control Pod Him Cradle Replacement, Frames 2
Control Pod Shown Removed from the Drive Chassis for Clarity Only. M3 x 6.4 mm T15 or F - 5 mm (0.19 in.) 0.45 N•m (4.0 lb•in) IP20, NEMA/UL Open Type Frame 2 Drive Shown. Drive Chassis Shown Remove for Clarity Only. Rockwell Automation Publication 750-TG101A-EN-P - June 2022... - Page 62 Frames 1…5 Renewal Kits Installation 8. Press in on the tabs at the top of the HIM cradle where it connects to the control pod chassis and release the cradle from the chassis. Rockwell Automation Publication 750-TG101A-EN-P - June 2022...
-
Page 63: Install The Control Pod Him Cradle, Frames 2
• Do not remove the protective cover from these connectors on the HIM cradle unless a connection is made during reinstallation: Item Description Item Description HIM connector DPI connector (port 2) Rockwell Automation Publication 750-TG101A-EN-P - June 2022... -
Page 64: Main Control Circuit Board Replacement, Frame 1
6. Use a screwdriver to lift the two slotted-tabs on the bottom of the chassis off the brackets. M4 x 16 mm T20 or F - 6.4 mm (0.25 in.) 0.23 N•m (2.0 lb•in) IP20, NEMA/UL Open Type Frame 1 Drive Shown Rockwell Automation Publication 750-TG101A-EN-P - June 2022... - Page 65 12. If an option module is installed, disconnect any I/O wiring terminal blocks and remove the option module (not shown in this image). IP20, NEMA/UL Open Type Frame 1 Drive Shown Rockwell Automation Publication 750-TG101A-EN-P - June 2022...
- Page 66 IP address. Hardware enable jumper (P7). TB1 becomes an Enable when this jumper ENABLE jumper is removed. SAFETY jumper Safety enable jumper (P8). Removed when safety option is installed. Rockwell Automation Publication 750-TG101A-EN-P - June 2022...
-
Page 67: Install The Main Control Circuit Board, Frame 1
IMPORTANT Circuit boards that are contained in renewal kits with XT contain dielectric grease on the edge connectors, where present. Do not touch or remove the grease from circuit board edge connectors. A non-greased connector can lead to corrosion. Rockwell Automation Publication 750-TG101A-EN-P - June 2022... - Page 68 3. Make any necessary changes to the settings on these main control board selectors or jumpers: • Control switch • Embedded EtherNet/IP address switches • Hardware enable jumper • Safety enable jumper Rockwell Automation Publication 750-TG101A-EN-P - June 2022...
-
Page 69: Main Control Circuit Board Replacement, Frames 2
7. If an option module is installed, disconnect any I/O wiring terminal blocks and remove the option module (not shown in this image). Control Pod Shown Separated from the Drive for Clarity Only. Rockwell Automation Publication 750-TG101A-EN-P - June 2022... - Page 70 Control Pod Shown Removed from the Drive Chassis for Clarity Only. M3 x 6.4 mm T15 or F - 5 mm (0.19 in.) 0.45 N•m (4.0 lb•in) IP20, NEMA/UL Open Type Frame 2 Drive Shown. Drive Chassis Shown Remove for Clarity Only. Rockwell Automation Publication 750-TG101A-EN-P - June 2022...
- Page 71 IP address. Hardware enable jumper (P7). TB1 becomes an Enable when this jumper ENABLE jumper is removed. SAFETY jumper Safety enable jumper (P8). Removed when safety option is installed. Rockwell Automation Publication 750-TG101A-EN-P - June 2022...
-
Page 72: Install The Main Control Circuit Board, Frames 2
IMPORTANT Circuit boards that are contained in renewal kits with XT contain dielectric grease on the edge connectors, where present. Do not touch or remove the grease from circuit board edge connectors. A non-greased connector can lead to corrosion. Rockwell Automation Publication 750-TG101A-EN-P - June 2022... - Page 73 3. Make any necessary changes to the settings on these main control board selectors or jumpers: • Control switch • Embedded EtherNet/IP address switches • Hardware enable jumper • Safety enable jumper Rockwell Automation Publication 750-TG101A-EN-P - June 2022...
-
Page 74: Replacement, Frame 1
Chassis Shown Removed for Clarity Only. Install the Main Control Board to Power Interface Board Ribbon Cable, Frame 1 Install the main control board to power interface board ribbon cable in the reverse order of removal. Rockwell Automation Publication 750-TG101A-EN-P - June 2022... -
Page 75: Replacement, Frames 2
6. Pull the cable through the slot in the side of the control pod chassis. 7. Disconnect the ribbon cable connector from connector J1 on the power circuit board, and remove the ribbon cable from the drive. Frame 2 Shown Rockwell Automation Publication 750-TG101A-EN-P - June 2022... -
Page 76: Ribbon Cable, Frames 2
4. Compress the mounting two posts that secure the backplane circuit board to the control pod chassis, push the posts through the mounting holes on the board, and remove the board. Chassis Not Shown for Clarity Only 4 (Qty. 2) Rockwell Automation Publication 750-TG101A-EN-P - June 2022... -
Page 77: Install The Backplane Circuit Board, Frame 1
Remove Power from the System on page 3. Remove the main control circuit board. See Remove the Main Control Circuit Board, Frames 2…5 on page Retain the main control circuit board for reuse. Rockwell Automation Publication 750-TG101A-EN-P - June 2022... - Page 78 4. Remove the two M4 x 8 mm Torx screws that secure the backplane circuit board to the pod chassis and remove the board. Frame 2 Shown M4 x 8 mm T20 or F - 5 mm (0.19 in.) 2.6 N•m (23.0 lb•in) Rockwell Automation Publication 750-TG101A-EN-P - June 2022...
-
Page 79: Install The Backplane Circuit Board, Frames 2
Protective Covers on Kits with XT on page 16 for details. • Do not remove the protective covers from the connectors on the new backplane circuit boards unless a connection must be made during installation. Rockwell Automation Publication 750-TG101A-EN-P - June 2022... - Page 80 Chapter 4 Frames 1…5 Renewal Kits Installation Notes: Rockwell Automation Publication 750-TG101A-EN-P - June 2022...
-
Page 81: Frame 6 Kits
(for IP00, NEMA/UL Open Type, IP21, NEMA/UL Type 1, SK-RT-STIRFANL1-F6 SK-RT-STIRFANL1-F6-XT See page Flange, NEMA/UL Type 4X/12 Back, and IP54, NEMA/UL Type 12 Enclosures) Flange Gasket (for Flange, NEMA/UL Type 4X/12 Back SK-RT-FG1-F6 — See page Enclosures) Rockwell Automation Publication 750-TG101A-EN-P - June 2022... - Page 82 DC Precharge Circuit Board SK-RT-DCPC-F67 SK-RT-DCPC-F67-XT See page (1) Use for drives installed in an IP54 / UL Type 12 enclosure only. (2) Not used for drives installed in an IP54 / UL Type 12 enclosure. Rockwell Automation Publication 750-TG101A-EN-P - June 2022...
-
Page 83: Remove The Cover
M4 x 8 mm F - 6.4 mm (0.25 in.) or 4 mm hex 2.6 N m (23 lb • • Install the Cover Install the cover in the reverse order of removal. Rockwell Automation Publication 750-TG101A-EN-P - June 2022... -
Page 84: Remove The Protective Guard (Ip54, Nema/Ul Type 12 Enclosure)
M4 x 8 mm F - 6.4 mm (0.25 in.) 2.6 N m (23 lb • • Install the Protective Guard (IP54, NEMA/UL Type 12 Enclosure) Install the protective guard in the reverse order of removal. Rockwell Automation Publication 750-TG101A-EN-P - June 2022... -
Page 85: Control Pod Access Cover Replacement
T15 or F - 6.4 mm (0.25 in.) 0.45 N m (4.0 lb • • Install the Control Pod Access Cover Install the control pod access cover in the reverse order of removal. Rockwell Automation Publication 750-TG101A-EN-P - June 2022... -
Page 86: Cover Replacement
NEMA/UL Type 4X/12 back enclosures, remove the drive cover. See Remove the Cover on page • For IP54, NEMA/UL Type 12 enclosures, open the enclosure door. 4. If a HIM is installed in the cradle, remove the HIM. Rockwell Automation Publication 750-TG101A-EN-P - June 2022... - Page 87 8. Disconnect the HIM wire harness connector from the connector on the main control board. Control Pod Shown Removed from the Drive Chassis for Clarity Only. M3 x 6.4 mm T15 or F - 5 mm (0.19 in.) 0.45 N•m (4.0 lb•in) Rockwell Automation Publication 750-TG101A-EN-P - June 2022...
-
Page 88: Install The Control Pod Him Cradle
• Do not remove the protective cover from these connectors on the HIM cradle unless a connection is made during reinstallation: Item Description Item Description HIM connector DPI connector (port 2) Rockwell Automation Publication 750-TG101A-EN-P - June 2022... -
Page 89: Main Control Circuit Board Replacement
(not shown in this image). Control Pod Shown Separated from the Drive for Clarity Only. M3 x 6.4 mm T15 or F - 5 mm (0.19 in.) 0.45 N•m (4.0 lb•in) Rockwell Automation Publication 750-TG101A-EN-P - June 2022... - Page 90 10. Disconnect the jumper J16 from P16 on the main control circuit board. Retain the jumper for reuse with the new main control board. Control Pod Shown Removed from the Drive Chassis for Clarity Only. Rockwell Automation Publication 750-TG101A-EN-P - June 2022...
- Page 91 IP address. Hardware enable jumper (P7). TB1 becomes an Enable when this jumper ENABLE jumper is removed. SAFETY jumper Safety enable jumper (P8). Removed when safety option is installed. Rockwell Automation Publication 750-TG101A-EN-P - June 2022...
-
Page 92: Install The Main Control Circuit Board
IMPORTANT Circuit boards that are contained in renewal kits with XT contain dielectric grease on the edge connectors, where present. Do not touch or remove the grease from circuit board edge connectors. A non-greased connector can lead to corrosion. Rockwell Automation Publication 750-TG101A-EN-P - June 2022... - Page 93 3. Make any necessary changes to the settings on these main control board selectors or jumpers: • Control switch • Embedded EtherNet/IP address switches • Hardware enable jumper • Safety enable jumper Rockwell Automation Publication 750-TG101A-EN-P - June 2022...
-
Page 94: Main Control Board To Power Interface Board Ribbon Cable
The TAM remains in the drive chassis and connected to the power interface circuit board via a wire harness after the control pod chassis is removed. Control Pod Shown Separated from the Drive for Clarity Only. 4 (Qty. 2) Rockwell Automation Publication 750-TG101A-EN-P - June 2022... -
Page 95: Ribbon Cable
(23.0 lb • • Install the Main Control Board to Power Interface Board Ribbon Cable Install the main control board to power interface board ribbon cable in the reverse order of removal. Rockwell Automation Publication 750-TG101A-EN-P - June 2022... -
Page 96: Backplane Circuit Board Replacement
4. Remove the two M4 x 8 mm Torx screws that secure the backplane circuit board to the pod chassis and remove the board. M4 x 8 mm T20 or F - 5 mm (0.19 in.) 2.6 N•m (23.0 lb•in) Rockwell Automation Publication 750-TG101A-EN-P - June 2022... -
Page 97: Install The Backplane Circuit Board
Remove Power from the System on page 3. For IP54, NEMA/UL Type 12 enclosures, open the enclosure door and remove the protective guard. See Remove the Protective Guard (IP54, NEMA/UL Type 12 Enclosure) on page Rockwell Automation Publication 750-TG101A-EN-P - June 2022... -
Page 98: Install The Heatsink Fan
(23.0 lb • • Install the Heatsink Fan Install the heatsink fan in the reverse order of removal. IMPORTANT Before installation, remove the protective covers from the fan assembly wire harness connectors. Rockwell Automation Publication 750-TG101A-EN-P - June 2022... -
Page 99: Upper Stirring Fan Replacement
4. Reach through the right lower-side of the chassis and disconnect the fan power wire-harness connector P6 from J6 on the power interface circuit board. 5. Pull the two plastic tabs away from the fan assembly and lift the fan out of the chassis. Rockwell Automation Publication 750-TG101A-EN-P - June 2022... -
Page 100: Install The Upper Stirring Fan
• For IP00, NEMA/UL Open Type, IP21, NEMA/UL Type 1, and flange, NEMA/UL Type 4X/12 back enclosures, remove the drive cover. See Remove the Cover on page • For IP54, NEMA/UL Type 12 enclosures, open the enclosure door and remove the protective guard. Rockwell Automation Publication 750-TG101A-EN-P - June 2022... -
Page 101: Install The Lower Stirring Fan Assembly
Install the Lower Stirring Fan Assembly Install the lower stirring fan assembly in the reverse order of removal. IMPORTANT Verify that the PE-A jumper wire harness is reconnected in the same position as before removal. Rockwell Automation Publication 750-TG101A-EN-P - June 2022... -
Page 102: Flange Gasket Replacement
6. If used, disconnect the plug-in terminal block (TB1) on the bottom of the main control board. 7. If an option module is installed, disconnect any I/O wiring terminal blocks (not shown in image). Control Pod Shown Separated from the Drive for Clarity Only. Rockwell Automation Publication 750-TG101A-EN-P - June 2022... - Page 103 Lifting Hardware Not Shown for Clarity Only. M5 x 25 mm 4.5 N m (40.0 lb • • M5 x 0.8 8 mm 4.5 N m (40.0 lb • • Panel Mount Surface Rockwell Automation Publication 750-TG101A-EN-P - June 2022...
- Page 104 • Do not allow personnel or their limbs directly underneath the equipment when lifting or mounting the drive. 12. Lift the drive out of the mounting surface, carefully. 13. Remove and discard the drive-side flange gasket. Lifting Hardware Not Shown for Clarity Only Rockwell Automation Publication 750-TG101A-EN-P - June 2022...
-
Page 105: Install The Flange Gasket
Discard the gasket. M5 x 0.8 8 mm 4.5 N m (40.0 lb • • Install the Flange Gasket Install the flange and gaskets in the reverse order of removal. Rockwell Automation Publication 750-TG101A-EN-P - June 2022... -
Page 106: Power Interface Circuit Board Replacement
Remove the Cover on page • For IP54, NEMA/UL Type 12 enclosures, open the enclosure door and remove the protective guard. See Remove the Protective Guard (IP54, NEMA/UL Type 12 Enclosure) on page Rockwell Automation Publication 750-TG101A-EN-P - June 2022... - Page 107 10. Disconnect the upper stirring fan power wire-harness connector P6 from J6 on the power interface circuit board. 11. For AC input drives, note the PE-A jumper position and remove the PE-A jumper wire from the jumper assembly. Rockwell Automation Publication 750-TG101A-EN-P - June 2022...
- Page 108 Chapter 5 Frame 6 Renewal Kits Installation M4 x 12 mm 2.6 N m (23.0 lb • • PE-B PE-A P6 / P5 9, 10 U, V, W Rockwell Automation Publication 750-TG101A-EN-P - June 2022...
- Page 109 T20 or F - 6.4 mm (0.25 in.) 2.6 N m (23.0 lb • • M4 x 8 mm T20 or F - 6.4 mm (0.25 in.) 2.6 N m (23.0 lb • • Rockwell Automation Publication 750-TG101A-EN-P - June 2022...
- Page 110 18. Disconnect the heatsink-fans power wire harness connector P2 from connector J2 at the bottom of the power interface circuit board. 19. Disconnect the precharge wire harness connector P10 from connector J10 on the AC or DC precharge circuit board. Rockwell Automation Publication 750-TG101A-EN-P - June 2022...
- Page 111 T20 or F - 6.4 mm (0.25 in.) 2.6 N m (23.0 lb • • M4 x 8 mm T20 or F - 6.4 mm (0.25 in.) 2.6 N m (23.0 lb • • Rockwell Automation Publication 750-TG101A-EN-P - June 2022...
-
Page 112: Install The Power Interface Circuit Board
2. Install the power interface circuit board in the reverse order of removal. IMPORTANT Take care to connect the connector on the back of the power interface circuit board to the connector on the top of the gate driver circuit board carefully. Rockwell Automation Publication 750-TG101A-EN-P - June 2022... -
Page 113: Ac Precharge Circuit Board (400/480V) Replacement
Control Pod Shown Separated from the Drive for Clarity Only. 5. Remove the M4 x 12 mm Torx screw that secures the PE-B jumper cover to the capacitor cover and remove the jumper cover. Rockwell Automation Publication 750-TG101A-EN-P - June 2022... - Page 114 11. Note the PE-A jumper position and remove the PE-A jumper wire from the jumper assembly. M4 x 12 mm 2.6 N m (23.0 lb • • PE-B PE-A 9, 10 P6 / P5 U, V, W Rockwell Automation Publication 750-TG101A-EN-P - June 2022...
- Page 115 T20 or F - 6.4 mm (0.25 in.) 2.6 N m (23.0 lb • • M4 x 8 mm T20 or F - 6.4 mm (0.25 in.) 2.6 N m (23.0 lb • • Rockwell Automation Publication 750-TG101A-EN-P - June 2022...
- Page 116 16. If the DC bus bars are installed, remove the two M6 hexagonal nuts that secure the DC bus bars to the laminated bus. 10 mm 5.2 N m (46.0 lb • • +DC Bus Bar –DC Bus Bar Rockwell Automation Publication 750-TG101A-EN-P - June 2022...
- Page 117 18. Remove the nine M4 x 12 mm slotted -Torx screws and remove the board and plastic board support. M4 x 12 mm T20 or F - 6.4 mm (0.25 in.) 2.6 N m (23.0 lb • • Rockwell Automation Publication 750-TG101A-EN-P - June 2022...
-
Page 118: Install The Ac Precharge Circuit Board (400/480V)
Install the AC Precharge Circuit Board (400/480V) Install the AC precharge circuit board. 1. Peel the protective sheet off the back of the circuit board stiffener and apply the stiffener to the capacitor components as shown. Rockwell Automation Publication 750-TG101A-EN-P - June 2022... -
Page 119: Dc Precharge Circuit Board Replacement
Remove the Cover on page • For IP54, NEMA/UL Type 12 enclosures, open the enclosure door and remove the protective guard. See Remove the Protective Guard (IP54, NEMA/UL Type 12 Enclosure) on page Rockwell Automation Publication 750-TG101A-EN-P - June 2022... - Page 120 If used, disconnect the plug-in terminal block (TB1) on the bottom of the main control board. d. If an option module is installed, disconnect any I/O wiring terminal blocks (not shown in image). Control Pod Shown Separated from the Drive for Clarity Only. Rockwell Automation Publication 750-TG101A-EN-P - June 2022...
- Page 121 10. Disconnect the upper stirring fan power wire-harness connector P6 from J6 on the power interface circuit board. M4 x 12 mm 2.6 N m (23.0 lb • • PE-B 9, 10 P6 / P5 U, V, W Rockwell Automation Publication 750-TG101A-EN-P - June 2022...
- Page 122 T20 or F - 6.4 mm (0.25 in.) 2.6 N m (23.0 lb • • M4 x 8 mm T20 or F - 6.4 mm (0.25 in.) 2.6 N m (23.0 lb • • Rockwell Automation Publication 750-TG101A-EN-P - June 2022...
- Page 123 16. Remove the two M6 hexagonal nuts that secure the DC bus bars to the laminated bus. 10 mm 5.2 N m (46.0 lb • • +DC Bus Bar –DC Bus Bar Brake Bus Bar Rockwell Automation Publication 750-TG101A-EN-P - June 2022...
- Page 124 17. Disconnect the SCR wire harness connector P11 from J11 on the DC precharge circuit board. 18. Disconnect the precharge wire harness connector P10 from connector J10 on the DC precharge circuit board. Rockwell Automation Publication 750-TG101A-EN-P - June 2022...
-
Page 125: Install The Dc Precharge Circuit Board
T20 or F - 6.4 mm (0.25 in.) 2.6 N m (23.0 lb • • Install the DC Precharge Circuit Board Install the DC precharge circuit board in the reverse order of removal. Rockwell Automation Publication 750-TG101A-EN-P - June 2022... - Page 126 Chapter 5 Frame 6 Renewal Kits Installation Notes: Rockwell Automation Publication 750-TG101A-EN-P - June 2022...
-
Page 127: Frame 7 Kits
456 A 400V / 415 A 480V Power Interface Circuit Board, SK-RT-PIB1-C477D477 SK-RT-PIB1-C477D477-XT 477 A 400V / 477 A 480V AC Precharge Circuit Board, 400/480V SK-RT-ACPC-CDF7 SK-RT-ACPC-CDF7-XT See page DC Precharge Circuit Board SK-RT-DCPC-F67 SK-RT-DCPC-F67-XT See page Rockwell Automation Publication 750-TG101A-EN-P - June 2022... -
Page 128: Remove The Cover
M4 x 8 mm F - 6.4 mm (0.25 in.) or 4 mm hex 2.6 N m (23 lb • • Install the Cover Install the cover in the reverse order of removal. Rockwell Automation Publication 750-TG101A-EN-P - June 2022... -
Page 129: Remove The Protective Guard (Ip54, Nema/Ul Type 12 Enclosure)
M5 x 12 mm a. 2.6 N m (23.0 lb • • b. 6.0 N•m (53 lb•in) Install the Protective Guard (IP54, NEMA/UL Type 12 Enclosure) Install the protective guard in the reverse order of removal. Rockwell Automation Publication 750-TG101A-EN-P - June 2022... -
Page 130: Control Pod Access Cover Replacement
T15 or F - 6.4 mm (0.25 in.) 0.45 N m (4.0 lb • • Install the Control Pod Access Cover Install the control pod access cover in the reverse order of removal. Rockwell Automation Publication 750-TG101A-EN-P - June 2022... -
Page 131: Cover Replacement
NEMA/UL Type 4X/12 back enclosures, remove the drive cover. See Remove the Cover on page 128. • For IP54, NEMA/UL Type 12 enclosures, open the enclosure door. 4. If a HIM is installed in the cradle, remove the HIM. Rockwell Automation Publication 750-TG101A-EN-P - June 2022... - Page 132 8. Disconnect the HIM wire harness connector from the connector on the main control board. Control Pod Shown Removed from the Drive Chassis for Clarity Only. M3 x 6.4 mm T15 or F - 5 mm (0.19 in.) 0.45 N•m (4.0 lb•in) Rockwell Automation Publication 750-TG101A-EN-P - June 2022...
-
Page 133: Install The Control Pod Him Cradle
• Do not remove the protective cover from these connectors on the HIM cradle unless a connection is made during reinstallation: Item Description Item Description HIM connector DPI connector (port 2) Rockwell Automation Publication 750-TG101A-EN-P - June 2022... -
Page 134: Main Control Circuit Board Replacement
(not shown in this image). Control Pod Shown Separated from the Drive for Clarity Only. M3 x 6.4 mm T15 or F - 5 mm (0.19 in.) 0.45 N•m (4.0 lb•in) Rockwell Automation Publication 750-TG101A-EN-P - June 2022... - Page 135 10. Disconnect the jumper J16 from P16 on the main control circuit board. Retain the jumper for reuse with the new main control board. Control Pod Shown Removed from the Drive Chassis for Clarity Only. Rockwell Automation Publication 750-TG101A-EN-P - June 2022...
- Page 136 IP address. Hardware enable jumper (P7). TB1 becomes an Enable when this jumper ENABLE jumper is removed. SAFETY jumper Safety enable jumper (P8). Removed when safety option is installed. Rockwell Automation Publication 750-TG101A-EN-P - June 2022...
-
Page 137: Install The Main Control Circuit Board
IMPORTANT Circuit boards that are contained in renewal kits with XT contain dielectric grease on the edge connectors, where present. Do not touch or remove the grease from circuit board edge connectors. A non-greased connector can lead to corrosion. Rockwell Automation Publication 750-TG101A-EN-P - June 2022... - Page 138 3. Make any necessary changes to the settings on these main control board selectors or jumpers: • Control switch • Embedded EtherNet/IP address switches • Hardware enable jumper • Safety enable jumper Rockwell Automation Publication 750-TG101A-EN-P - June 2022...
-
Page 139: Main Control Board To Power Interface Board Ribbon Cable
The TAM remains in the drive chassis and connected to the power interface circuit board via a wire harness after the control pod chassis is removed. Control Pod Shown Removed from the Drive Chassis for Clarity Only. 4 (Qty. 2) Rockwell Automation Publication 750-TG101A-EN-P - June 2022... -
Page 140: Install The Main Control Board To Power Interface Board
(23.0 lb • • Install the Main Control Board to Power Interface Board Ribbon Cable Install the main control board to power interface board ribbon cable in the reverse order of removal. Rockwell Automation Publication 750-TG101A-EN-P - June 2022... -
Page 141: Backplane Circuit Board Replacement
Control Pod Shown Removed from the Drive Chassis for Clarity Only. M4 x 8 mm T20 or F - 5 mm (0.19 in.) 2.6 N•m (23.0 lb•in) Rockwell Automation Publication 750-TG101A-EN-P - June 2022... -
Page 142: Install The Backplane Circuit Board
1. Review the Product Advisories on page 2. Turn off and lock-out incoming power. See Remove Power from the System on page 3. For IP54, NEMA/UL Type 12 enclosures, open the enclosure door. Rockwell Automation Publication 750-TG101A-EN-P - June 2022... -
Page 143: Install The Heatsink Fan Assembly
(12.0 lb • • Install the Heatsink Fan Assembly Install the heatsink fan assembly in the reverse order of removal. IMPORTANT Before installation, remove the protective covers from the fan assembly wire harness connectors. Rockwell Automation Publication 750-TG101A-EN-P - June 2022... -
Page 144: Stirring Fan Assembly Replacement
BR1 terminal and remove the bus bar from the drive. M5 x 16 mm 10 mm 5.2 N m (46.0 lb 5.2 N m (46.0 lb • • • • Rockwell Automation Publication 750-TG101A-EN-P - June 2022... -
Page 145: Install The Stirring Fan Assembly
5.2 N m (46.0 lb • • P5 and P6 4.9 N m (43.0 lb • • Install the Stirring Fan Assembly Install the stirring fan assembly in the reverse order of removal. Rockwell Automation Publication 750-TG101A-EN-P - June 2022... -
Page 146: Flange Gasket Replacement
If an option module is installed, disconnect any I/O wiring terminal blocks and remove the option module (not shown in this image). Control Pod Shown Separated from the Drive for Clarity Only. Rockwell Automation Publication 750-TG101A-EN-P - June 2022... - Page 147 8. If installed, disconnect the power wiring from the power terminals. 9. Attach the lifting hardware and equipment to the drive according to this illustration. <45° > 1 / 2 A <45° > 1 / 2 A Rockwell Automation Publication 750-TG101A-EN-P - June 2022...
- Page 148 10. Remove the 12 M5 x 0.8 hexagonal nuts that secure the drive chassis to the flange. 11. Remove the 16 M5 x 25 mm slotted-Torx screws that secure the drive to the flange. Panel Mount Surface Rockwell Automation Publication 750-TG101A-EN-P - June 2022...
- Page 149 • Do not allow personnel or their limbs directly underneath the equipment when lifting or mounting the drive. 12. Lift the drive out of the mounting surface, carefully. 13. Remove and discard the drive-side flange gasket. Lifting Hardware Not Shown for Clarity Only Rockwell Automation Publication 750-TG101A-EN-P - June 2022...
-
Page 150: Install The Flange Gasket
1. Install the M5 x 0.8 hexagonal nuts that secure the drive chassis to the flange in the sequence shown here. 2. Install the M5 x 25 mm slotted-Torx screws that secure the drive chassis to the flange in the sequence shown here. Rockwell Automation Publication 750-TG101A-EN-P - June 2022... -
Page 151: Power Interface Circuit Board Replacement
Cover on page 128. • For IP54, NEMA/UL Type 12 enclosures, open the enclosure and remove the protective guard. See Remove the Protective Guard (IP54, NEMA/UL Type 12 Enclosure) on page 129. Rockwell Automation Publication 750-TG101A-EN-P - June 2022... - Page 152 If an option module is installed, disconnect any I/O wiring terminal blocks and remove the option module (not shown in this image). Control Pod Shown Separated from the Drive for Clarity Only. Rockwell Automation Publication 750-TG101A-EN-P - June 2022...
- Page 153 The TAM remains in the drive chassis and connected to the power interface circuit board via a wire harness after the control pod chassis is removed. M3 x 6.4 mm T15 or F - 5 mm (0.19 in.) 0.45 N•m (4.0 lb•in) 5c (Qty. 2) Rockwell Automation Publication 750-TG101A-EN-P - June 2022...
- Page 154 2.3 N m (20.0 lb • • M6 x 12 mm 2.6 N m (23.0 lb • • Ribbon Cable Shown Removed from the Back of the Control Pod Chassis for Clarity Only. Rockwell Automation Publication 750-TG101A-EN-P - June 2022...
- Page 155 M6 x 16 mm M6 x 16 mm 6.0 N m (53.0 lb 2.6 N m (23.0 lb 6.0 N m (53.0 lb • • • • • • Power Interface Circuit Board Ground Wire Connection Rockwell Automation Publication 750-TG101A-EN-P - June 2022...
- Page 156 (43.0 lb • • M5 x 16 mm 10 mm 5.2 N m (46.0 lb • • 4.9 N m (43.0 lb • • 13 mm 11.3 N m (100.0 lb • • Rockwell Automation Publication 750-TG101A-EN-P - June 2022...
- Page 157 J5 and J6, respectively, on the power interface circuit board (left side of the fan assembly). M6 x 16 mm 5.2 N m (46.0 lb • • P5 and P6 4.9 N m (43.0 lb • • Rockwell Automation Publication 750-TG101A-EN-P - June 2022...
- Page 158 17. Disconnect the PE-B jumper wire from the power interface circuit board (top left). 18. Disconnect the heatsink fan power wire-harness connector P2 from connector J2 on the power interface circuit board (bottom left). PE-B Jumper Wire PE-B OUT PE-B IN Rockwell Automation Publication 750-TG101A-EN-P - June 2022...
- Page 159 19. Disconnect the current transformer wire-harness connector P3 from J3 on the power interface circuit board (mid right). 20. If a torque accuracy module (TAM) is installed, disconnect the wire harness connector P4 from connector J4 on the power interface circuit board. Rockwell Automation Publication 750-TG101A-EN-P - June 2022...
-
Page 160: Install The Power Interface Circuit Board
14-pin connector on the gate drive circuit board. IMPORTANT Be sure to install the power interface circuit board ground wire harness to the control pod support bracket. See step 11 on page for location. Rockwell Automation Publication 750-TG101A-EN-P - June 2022... -
Page 161: Ac Precharge Circuit Board (400/480V) Replacement
If an option module is installed, disconnect any I/O wiring terminal blocks and remove the option module (not shown in image). Control Pod Shown Separated from the Drive for Clarity Only. Rockwell Automation Publication 750-TG101A-EN-P - June 2022... - Page 162 The TAM remains in the drive chassis and connected to the power interface circuit board via a wire harness after the control pod chassis is removed. M3 x 6.4 mm T15 or F - 5 mm (0.19 in.) 0.45 N•m (4.0 lb•in) 5c (Qty. 2) Rockwell Automation Publication 750-TG101A-EN-P - June 2022...
- Page 163 2.3 N m (20.0 lb • • M6 x 12 mm 2.6 N m (23.0 lb • • Ribbon Cable Shown Removed from the Back of the Control Pod Chassis for Clarity Only. Rockwell Automation Publication 750-TG101A-EN-P - June 2022...
- Page 164 • • 10 mm 5.2 N m (46.0 lb • • M5 x 16 mm 4.9 N m (43.0 lb • • M6 x 20 mm 5.2 N m (46.0 lb • • Rockwell Automation Publication 750-TG101A-EN-P - June 2022...
- Page 165 P6 from connectors J5 and J6, respectively, on the power interface circuit board (left side of the fan assembly). M6 x 16 mm 5.2 N m (46.0 lb • • P5 and P6 M5 (2x) 4.9 N m (43.0 lb • • Rockwell Automation Publication 750-TG101A-EN-P - June 2022...
- Page 166 (46.0 lb 4.9 N m (43.0 lb • • • • –DC Bus Bar +DC Bus Bar Loosen Only M6 x 16 mm 5.2 N m (46.0 lb • • Loosen Only Rockwell Automation Publication 750-TG101A-EN-P - June 2022...
- Page 167 M6 x 16 mm 5.2 N m (46.0 lb • • M6 x 20 mm 5.2 N m (46.0 lb • • Rockwell Automation Publication 750-TG101A-EN-P - June 2022...
- Page 168 16. Note the PE-A jumper position and remove the PE-A jumper wire from the jumper assembly on the chassis. 17. Remove the wire harness connector P10 from connector J10 on the right side of the AC precharge circuit board. PE-A: IN or OUT Rockwell Automation Publication 750-TG101A-EN-P - June 2022...
-
Page 169: Install The Ac Precharge Circuit Board (400/480V)
(23.0 lb • • M4 x 12 mm 2.6 N m (23.0 lb • • Install the AC Precharge Circuit Board (400/480V) Install the AC precharge circuit board in the reverse order of removal. Rockwell Automation Publication 750-TG101A-EN-P - June 2022... -
Page 170: Dc Precharge Circuit Board Replacement
If an option module is installed, disconnect any I/O wiring terminal blocks and remove the option module (not shown in this image). Control Pod Shown Separated from the Drive for Clarity Only. Rockwell Automation Publication 750-TG101A-EN-P - June 2022... - Page 171 The TAM remains in the drive chassis and connected to the power interface circuit board via a wire harness after the control pod chassis is removed. M3 x 6.4 mm T15 or F - 5 mm (0.19 in.) 0.45 N•m (4.0 lb•in) 5c (Qty. 2) Rockwell Automation Publication 750-TG101A-EN-P - June 2022...
- Page 172 2.3 N m (20.0 lb • • M6 x 12 mm 2.6 N m (23.0 lb • • Ribbon Cable Shown Removed from the Back of the Control Pod Chassis for Clarity Only. Rockwell Automation Publication 750-TG101A-EN-P - June 2022...
- Page 173 • • 10 mm 5.2 N m (46.0 lb • • M5 x 16 mm 4.9 N m (43.0 lb • • M6 x 20 mm 5.2 N m (46.0 lb • • Rockwell Automation Publication 750-TG101A-EN-P - June 2022...
- Page 174 J5 and J6, respectively, on the power interface circuit board (left side of the fan assembly). M6 x 16 mm 5.2 N m (46.0 lb • • P5 and P6 M5 (2x) 4.9 N m (43.0 lb • • Rockwell Automation Publication 750-TG101A-EN-P - June 2022...
- Page 175 • M5 x 16 mm 4.9 N m (43.0 lb • • Loosen Only +DC Bus Bar –DC Bus Bar M6 x 16 mm 5.2 N m (46.0 lb • • Loosen Only Rockwell Automation Publication 750-TG101A-EN-P - June 2022...
- Page 176 M6 x 16 mm 5.2 N m (46.0 lb • • M6 x 20 mm 5.2 N m (46.0 lb • • Rockwell Automation Publication 750-TG101A-EN-P - June 2022...
- Page 177 22. Remove the IGBT wire harness P11 from connector J1 on the left side of the AC precharge circuit board. 23. Remove the wire harness connector P10 from connector J10 on the right side of the AC precharge circuit board. Rockwell Automation Publication 750-TG101A-EN-P - June 2022...
-
Page 178: Install The Dc Precharge Circuit Board
M4 x 8 mm 2.6 N m (23.0 lb • • Install the DC Precharge Circuit Board Install the DC precharge circuit board in the reverse order of removal. Rockwell Automation Publication 750-TG101A-EN-P - June 2022... -
Page 179: Before You Apply Power To The Drive
I/O wires are connected and properly secured and supported by using cable ties along their entire length when necessary. 6. Continue with No-load DC Bus Voltage and Output Current Measurements on page 180. Rockwell Automation Publication 750-TG101A-EN-P - June 2022... -
Page 180: Load Dc Bus Voltage And Output Current Measurements
10. Stop the system. 11. Reconnect the load to the motor before proceeding with drive startup. For startup information see the PowerFlex Drives with TotalFORCE® Control Programming Manual (firmware revision 10. and later), publication 750-PM101. Rockwell Automation Publication 750-TG101A-EN-P - June 2022... -
Page 181: List Of Drive Schematics
PowerFlex 755TS Frame 5 AC Input Drive PowerFlex 755TS Frame 6 AC Input Drive PowerFlex 755TS Frame 6 DC Input Drive PowerFlex 755TS Frame 7 AC Input Drive PowerFlex 755TS Frame 7 DC Input Drive Rockwell Automation Publication 750-TG101A-EN-P - June 2022... - Page 182 Appendix B Schematics Figure 11 - PowerFlex 755TS Frame 1 AC Input Drive Rockwell Automation Publication 750-TG101A-EN-P - June 2022...
- Page 183 Appendix B Schematics Figure 12 - PowerFlex 755TS Frames 2…4 AC Input Drives ISENSE ISENSE ISENSE Rockwell Automation Publication 750-TG101A-EN-P - June 2022...
- Page 184 Appendix B Schematics Figure 13 - PowerFlex 755TS Frame 5 AC Input Drive ISENSE ISENSE ISENSE Rockwell Automation Publication 750-TG101A-EN-P - June 2022...
- Page 185 Appendix B Schematics Figure 14 - PowerFlex 755TS Frame 6 AC Input Drive Rockwell Automation Publication 750-TG101A-EN-P - June 2022...
- Page 186 Appendix B Schematics Figure 15 - PowerFlex 755TS Frame 6 DC Input Drive Rockwell Automation Publication 750-TG101A-EN-P - June 2022...
- Page 187 Appendix B Schematics Figure 16 - PowerFlex 755TS Frame 7 AC Input Drive Rockwell Automation Publication 750-TG101A-EN-P - June 2022...
- Page 188 Appendix B Schematics Figure 17 - PowerFlex 755TS Frame 7 DC Input Drive Rockwell Automation Publication 750-TG101A-EN-P - June 2022...
-
Page 189: Index
29 install 85 final check remove 85 after maintenance 29 control pod access cover (frame 7) firmware install 130 download 9 remove 130 flange gasket (frame 6) install 105 remove 102 Rockwell Automation Publication 750-TG101A-EN-P - June 2022... - Page 190 151 terminal 28 power terminal block 15 stirring fan replacement 144 frame7 HIM cradle replacement 131 frames 1…3 heatsink fan replacement 57 frames 1…5 power terminal cover replacement 39 Rockwell Automation Publication 750-TG101A-EN-P - June 2022...
- Page 191 38 remove 37 pilot light IP54, NEMA/UL Type 12 cover (frames 2…5) replacement 28 install 41 power board (frames 1…5) remove 40 inspect 31 power interface board (frames 6 and 7) inspect 32 Rockwell Automation Publication 750-TG101A-EN-P - June 2022...
- Page 192 (frame 6) 106 power interface circuit board (frame 7) 151 recommended 21 power terminal cover (frames 1…5) 35 protective guard (frame 6) 84 protective guard (frame 7) 129 Rockwell Automation Publication 750-TG101A-EN-P - June 2022...
- Page 193 Index upload parameters 21 upper stirring fan (frame 6) install 100 remove 99 Rockwell Automation Publication 750-TG101A-EN-P - June 2022...
- Page 194 Index Notes: Rockwell Automation Publication 750-TG101A-EN-P - June 2022...
- Page 195 PowerFlex 755TS Products with TotalFORCE Control Hardware Service Manual Rockwell Automation Publication 750-TG101A-EN-P - June 2022...
- Page 196 At the end of life, this equipment should be collected separately from any unsorted municipal waste. Rockwell Automation maintains current product environmental compliance information on its website at rok.auto/pec. Allen-Bradley, Connected Components Workbench, DPI, expanding human possibility, Kinetix, PowerFlex, Rockwell Automation, Studio 5000 Logix Designer, and TotalFORCE are trademarks of Rockwell Automation, Inc.
Need help?
Do you have a question about the Allen-Bradley PowerFlex 755TS Series and is the answer not in the manual?
Questions and answers
I need the extra components to cover up the line and load on a Powerflex 755TS VFD
An extra component needed to cover the line and load on a Rockwell Automation PowerFlex 755TS VFD is the 20-750-EMC6-F7 EMC C3 option kit or another means of shield termination within the installation.
This answer is automatically generated