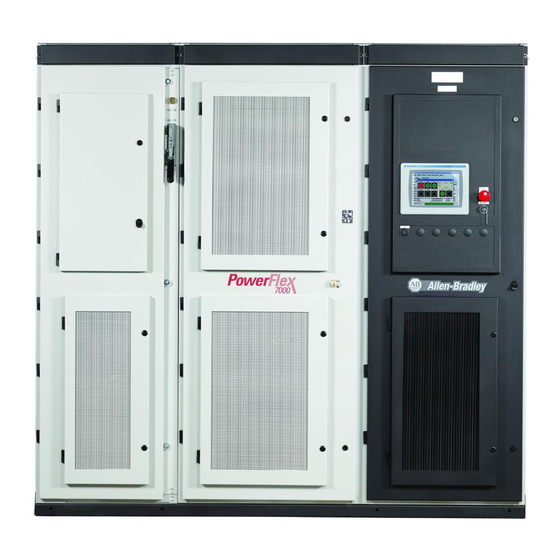
Rockwell Automation Allen-Bradley PowerFlex 7000 User Manual
Medium voltage ac drive liquid-cooled, c frame forge control
Hide thumbs
Also See for Allen-Bradley PowerFlex 7000:
- User manual (228 pages) ,
- Installation instructions manual (28 pages) ,
- User manual (208 pages)

Related Manuals for Rockwell Automation Allen-Bradley PowerFlex 7000


Summary of Contents for Rockwell Automation Allen-Bradley PowerFlex 7000
- Page 1 User Manual Original Instructions PowerFlex 7000 Medium Voltage AC Drive Liquid-Cooled ("C" Frame) - ForGe Control (Using PanelView 550) Bulletin Number 7000L...
- Page 2 If this equipment is used in a manner not specified by the manufacturer, the protection provided by the equipment may be impaired. In no event will Rockwell Automation, Inc. be responsible or liable for indirect or consequential damages resulting from the use or application of this equipment.
-
Page 3: Table Of Contents
Control Wiring Connections ........47 Removal of DC Link Choke Turnbuckle Supports ..54 Rockwell Automation Publication 7000L-UM301F-EN-P - March 2020... - Page 4 Components ..........94 Rockwell Automation Publication 7000L-UM301F-EN-P - March 2020...
- Page 5 View and Reset Alarms ........140 Rockwell Automation Publication 7000L-UM301F-EN-P - March 2020...
- Page 6 Drive Line-up Status........173 Rockwell Automation Publication 7000L-UM301F-EN-P - March 2020...
- Page 7 Drive Application Review........183 Rockwell Automation Drive Line-up Drawings ... . . 183 Electrical System One-line Diagram .
- Page 8 Load Test ........... 259 Rockwell Automation Publication 7000L-UM301F-EN-P - March 2020...
- Page 9 Testing Sharing Resistors........308 Snubber and Sharing Resistor Replacement..... 309 Rockwell Automation Publication 7000L-UM301F-EN-P - March 2020...
- Page 10 System Drain..........345 Rockwell Automation Publication 7000L-UM301F-EN-P - March 2020...
- Page 11 Creating an empty notepad (.txt) file ..... . . 392 Setting up HyperTerminal Connection ....394 Rockwell Automation Publication 7000L-UM301F-EN-P - March 2020...
- Page 12 Appendix D Preventative Maintenance PowerFlex 7000 Maintenance Schedule ......429 Schedule Rockwell Automation Publication 7000L-UM301F-EN-P - March 2020...
-
Page 13: Preface
• Drive-specific Technical Data: additional troubleshooting, parameters, and specification information for MV variable frequency drives Rockwell Automation provides the site- and installation-specific electrical and design information for each drive during the order process cycle. If they are not available on site with the drive, contact Rockwell Automation. -
Page 14: General Precautions
Commissioning Support After installation, Rockwell Automation Medium Voltage Support is responsible for commissioning support and activities in the PowerFlex 7000 product line. Contact Rockwell Automation commissioning services by phone at 519-740- 4100;... -
Page 15: Overview Of Drive
Introduction The PowerFlex® 7000 represents the third generation of medium voltage drives at Rockwell Automation. The PowerFlex 7000 medium voltage AC drive is part of the PowerFlex family of AC drive products. The Allen-Bradley® PowerFlex family of Drives incorporates leading-edge technology, embedded communications, and significant commonality across multiple platforms, networks, operator interface programming and hardware. -
Page 16: Benefits Of The 7000L "C" Frame Liquid-Cooled Drive
– Control hardware for cycling of main / redundant cooling pumps and heat exchanger fans • “Plug and play” Power Cage concept – Central location for easy access to all main power components Rockwell Automation Publication 7000L-UM301F-EN-P - March 2020... -
Page 17: Topology
Figure 1 - AFE Rectifier (4160 Volt) LINE CONVERTER DC LINK MACHINE CONVERTER SGCT’s SGCT’s U (T1) 2U (X1) V (T2) 2V (X2) W (T3) 2W (X3) Rockwell Automation Publication 7000L-UM301F-EN-P - March 2020... -
Page 18: Rectifier Designs
Depending on the topology, the transformer can have up to 15 sets of secondary windings. Elimination of the isolation transformer reduces capital and installation costs, saves on valuable floor space, and increases overall system efficiency. Rockwell Automation Publication 7000L-UM301F-EN-P - March 2020... -
Page 19: Direct-To-Drive" Technology
15 sets of secondary windings. The disadvantages to this method are the high degree of drive and transformer complexity, a very high component count and many interconnecting cables and connection points. This leads to much higher maintenance requirements and lower reliability. Rockwell Automation Publication 7000L-UM301F-EN-P - March 2020... - Page 20 Transformers represent 30 to 50% of a drive system size and 50 to 70% of the system’s weight. This means that there is no interwiring between drive and transformer (for external transformer configurations). This makes the PowerFlex 7000L the simplest to install. Rockwell Automation Publication 7000L-UM301F-EN-P - March 2020...
-
Page 21: Motor Compatibility
Figure 4 - Motor waveforms @ full load, full speed Arms 300.00 200.00 100.00 Motor Current 0.00 -100.00 -200.00 -300.00 Vrms 10.00K 7.50K 5.00K Motor 2.50K Voltage 0.00K -2.50K -5.00K -7.50K -10.00K 100.00 110.00 120.00 130.00 140.00 150.00 TIME (ms) Rockwell Automation Publication 7000L-UM301F-EN-P - March 2020... -
Page 22: Sgct Features And Benefits
4. Reduction of component count, hence improving reliability, cost, and size of the drive. 5. Fail safe failure mode (non-rupture). Figure 5 - SGCT with integrated gate drive (left) and unit cell structure (right) Rockwell Automation Publication 7000L-UM301F-EN-P - March 2020... -
Page 23: Specifications
18 Pulse with separate isolation transformer Rectifier Switch SCR (18 Pulse), SGCT (AFE Rectifier) Rectifier Switch Failure Mode Non-rupture, Non-arc Rectifier Switch Failure Rate (FIT) 50 (SGCT) 100 (SCR) per 1 Billion Hours Operation Rockwell Automation Publication 7000L-UM301F-EN-P - March 2020... - Page 24 (Variable Torque Load) (Constant Torque Load) Typical VFD Efficiency > 97.5% (AFE) > 98% (18 Pulse) Contact Factory for Guaranteed Efficiency of Specific Drive Rating Input Power Factor AFE Rectifier 0.95 minimum, 10...100% Load Rockwell Automation Publication 7000L-UM301F-EN-P - March 2020...
- Page 25 Unpainted Parts (Zinc Plated / Bronze Chromate) Ambient Temperature 0…40 °C (32…104 °F) / 0…50 °C (32…122 °F) - optional Fiber Optic Interface Rectifier – Inverter – Cabinet (Warning / Trip) Door Filter Painted Defuser with Matted Filter Media Rockwell Automation Publication 7000L-UM301F-EN-P - March 2020...
- Page 26 (3) Short-circuit fault rating based on input protection device (contactor or circuit breaker). (4) BIL rating based on altitudes < 1000 m (3300 ft) Refer to factory for derating on altitudes >1000 m. (5) Optional. (6) Under certain conditions, power system analysis will be required. Rockwell Automation Publication 7000L-UM301F-EN-P - March 2020...
-
Page 27: Simplified Electrical Drawings
U (T1) 3U (Y1) 3U (Y1) 3V (Y2) 3V (Y2) V (T2) V (T2) 3W (Y3) 3W (Y3) W (T3) W (T3) 2U (X1) 2U (X1) 2V (X2) 2V (X2) 2W (X3) 2W (X3) Rockwell Automation Publication 7000L-UM301F-EN-P - March 2020... - Page 28 LINE CONVERTER MACHINE CONVERTER MACHINE CONVERTER SGCTs SGCTs SGCTs SGCTs 2U (X1) 2U (X1) U (T1) U (T1) V (T2) V (T2) 2V (X2) 2V (X2) 2W (X3) 2W (X3) W (T3) W (T3) Rockwell Automation Publication 7000L-UM301F-EN-P - March 2020...
-
Page 29: Control Overview
Overview of Drive Chapter 1 Control Overview Figure 10 - PowerFlex 7000L “C” Frame Function Block Diagram Flux Range Inv Flux CurCmd InvTorque CurCmd Rockwell Automation Publication 7000L-UM301F-EN-P - March 2020... -
Page 30: Direct Vector Control
Figure 11 - Control Hardware Layout for PowerFlex 7000 “C” Frame OIBB OIBB – Analog Conditioning Board – Drive Processor Module OIBB – Optical Interface Base Board – External Input/Output – Optical Interface Board Rockwell Automation Publication 7000L-UM301F-EN-P - March 2020... -
Page 31: Operator Interface
Enhanced diagnostic functions are available on the operator interface terminal including separate fault and warning queues in non-volatile RAM (NVRAM), extended fault text strings and on line help, and trend buffers for 16 variables. Rockwell Automation Publication 7000L-UM301F-EN-P - March 2020... - Page 32 Chapter 1 Overview of Drive Notes: Rockwell Automation Publication 7000L-UM301F-EN-P - March 2020...
-
Page 33: Drive Installation
IMPORTANT made to the carrier by the Customer as soon as possible after receipt of the shipment. Rockwell Automation will be glad to give the Customer reasonable assistance in the securing of adjustment for such damage claims. Remove all packing material, wedges, or braces from within the drive. Operate the contactors and relays manually to assure that they operate freely. -
Page 34: Overhead Lifting
4. To reduce the tension on the rigging and the compressive load on the lifting device, do not allow the angle between the lifting cables/chains and vertical to exceed 45 degrees. ATTENTION: Drives may contain heavy equipment that could be adversely affected by tilting. Rockwell Automation Publication 7000L-UM301F-EN-P - March 2020... -
Page 35: Rod Or Pipe Rollers
3. The drive can be rolled to its designated location. Steady the load to prevent tipping. Figure 14 - Rod or Pipe Rollers (50.8 mm x 152.4 mm) Rockwell Automation Publication 7000L-UM301F-EN-P - March 2020... -
Page 36: Fork Lift Trucks
(D) The room in which the equipment is located must allow for full opening of the doors of the equipment, typically 1200 mm (48 inches). Also, allowances have to be made for clearance for fan removal. This fan allowance must be greater than 700 mm (27.5 inches). Rockwell Automation Publication 7000L-UM301F-EN-P - March 2020... -
Page 37: Installation
Position the drive in its desired location. Verify that the drive is on a level surface and that the position of the drive will be vertical when the anchor bolts are installed. Rockwell Automation Publication 7000L-UM301F-EN-P - March 2020... -
Page 38: Joining Shipping Splits
1st SECTION 2nd SECTION The 1st section consists of 5 cabinets. The 2nd section consists of 2 cabinets. Final placement requires that the 1st and 2nd sections are joined at final installation site. Rockwell Automation Publication 7000L-UM301F-EN-P - March 2020... -
Page 39: Connect The Sections
It is not necessary to remove capacitor from position #2. ATTENTION: Capacitors weigh up to 100 kg (220 lb). Use two people to remove the unit from the structure. Rockwell Automation Publication 7000L-UM301F-EN-P - March 2020... - Page 40 4 CPVC unions with strap wrench (1/4 to 1/2 turn past hand tight). Ensure O-ring is seated inside male end of union. Refer to Figure Figure 18 Figure 19. Do not use CPVC primer or cement. Rockwell Automation Publication 7000L-UM301F-EN-P - March 2020...
- Page 41 Figure 17 - CPVC Pipe Splices (Capacitor #2 not shown for clarity) Pipe Splice #2 Pipe Splice #1 Capacitor DC Link Cabinet Choke Cabinet Figure 18 - Typical Strap Wrench (not supplied) used to tighten unions on CPVC pipe splices Rockwell Automation Publication 7000L-UM301F-EN-P - March 2020...
-
Page 42: Connect Power: M+, L+, M-, L- Power Bus
• After cable connections have been made, ensure cable connections to choke stabs are torqued to 50 Nm (37 ft-lb). • Ensure a minimum of 3" (75mm) clearance exists between Medium Voltage Bus field connections (including hardware) and all cabinet sidesheets. Rockwell Automation Publication 7000L-UM301F-EN-P - March 2020... - Page 43 Power Bus (4) pieces; Ground bus (1) shipped disassembled MV Bus (4 pieces) Ground Bus Link (1 piece) Inside DC Link Choke Cabinet Figure 21 - DC Link Choke Cabinet before field power bus connections Rockwell Automation Publication 7000L-UM301F-EN-P - March 2020...
- Page 44 Chapter 2 Drive Installation Figure 22 - DC Link Choke Cabinet after field connections of power bus Figure 23 - Capacitor Cabinet after field connections of power bus Rockwell Automation Publication 7000L-UM301F-EN-P - March 2020...
- Page 45 • Connection points are labeled on bus and DC Link Choke. Connect cables from labeled stabs M+, L+, L-, L+ on DC Link Choke to corresponding labeled stabs M+, L+, M-, L+ on bus. Rockwell Automation Publication 7000L-UM301F-EN-P - March 2020...
- Page 46 • Connect Ground Bus Link from top left of DC Link Choke cabinet to ground bus in adjacent capacitor cabinet by sliding underneath wire duct. Use supplied hardware. Figure 27 - Ground Bus Link Figure 28 - Install Ground Bus Link Rockwell Automation Publication 7000L-UM301F-EN-P - March 2020...
-
Page 47: Control Wiring Connections
Refer to EDs and wiring diagrams supplied with Drive. Contact Rockwell Automation representative for assistance. Final wiring connections to be performed by Rockwell Automation field service representative. 1. Remove the wireway covers located on top of the line and motor filter capacitor sections and the DC Link section. - Page 48 4. Route the 8 gauge black and red twisted pairs of wire and the Belden shielded cables down through the grommeted cutout into the AC\DC power supply section. Figure 32 - Belden Shielded Cables Rockwell Automation Publication 7000L-UM301F-EN-P - March 2020...
- Page 49 6. Route the control wires down through the grommeted cutout into the control power disconnect section (Figure 34). 7. Connect the numbered wires to the corresponding numbered terminal blocks (Figure 35 Figure 38). Figure 34 - Route control wires through grommeted cutout Rockwell Automation Publication 7000L-UM301F-EN-P - March 2020...
- Page 50 Chapter 2 Drive Installation 8. Refer to the electrical drawing and make the above control wiring connections. Figure 35 - 56V DC Connections Figure 36 - AC DC fails Belden Cable Connection Rockwell Automation Publication 7000L-UM301F-EN-P - March 2020...
- Page 51 11. Route the XIO link cable, control power wires and the fiber optic cable down through the wire ways grommeted cutout. 12. Route the XIO link cable, the control power wires into the pump control cabinet through the upper side grommeted cutout. Rockwell Automation Publication 7000L-UM301F-EN-P - March 2020...
- Page 52 15. Connect the control power wires to the control power terminal blocks. Refer to Electrical Drawings for corresponding wire numbers and terminal blocks. 16. Connect the fiber optic cable to the TFB board. Figure 40 - XIO link Cable Rockwell Automation Publication 7000L-UM301F-EN-P - March 2020...
- Page 53 • Use supplied silicone (see Figure 42) to seal between cabinets to prevent moisture or dirt from entering. Join sidesheets with M6 Taptite thread forming screws in holes provided. Figure 42 - Capacitor Cabinet Silicone sealant Rockwell Automation Publication 7000L-UM301F-EN-P - March 2020...
-
Page 54: Removal Of Dc Link Choke Turnbuckle Supports
5/8"-11 hardware. The 5/8" bolts need to be re- installed in their holes in the top of the Drive to prevent the ingress of foreign matter into the enclosures. See Figure Rockwell Automation Publication 7000L-UM301F-EN-P - March 2020... -
Page 55: Shock Indication Labels
Even if the indicators show that no shock was attained, full inspection and verification in accordance with the Commissioning process outlined in Chapter 4 is still essential. Rockwell Automation Publication 7000L-UM301F-EN-P - March 2020... -
Page 56: Installation Of Exhaust Air Hood
Affix assembly to the drive top plate. Tighten all hardware. ATTENTION: Any screws that are accidentally dropped in the equipment must be retrieved as damage or injury may occur. Rockwell Automation Publication 7000L-UM301F-EN-P - March 2020... -
Page 57: Internally Mounted Fans
Rockwell Automation (refer to Figure 46). The customer only needs to install the fan hood. Figure 46 - Fan Hood Installation (Internally Mounted Fans) Fan Hood to be installed on site Internally mounted fans Rockwell Automation Publication 7000L-UM301F-EN-P - March 2020... -
Page 58: Externally Mounted Fans And Fan Hood
Position the fan hood over the fan assembly and fasten with M6 hardware. Figure 47 - Fan Hood Installation (Externally Mounted Fans and Fan Hood) Fan Hood External fans Terminal blocks Rockwell Automation Publication 7000L-UM301F-EN-P - March 2020... -
Page 59: Typical Powerflex 7000L Drive Structure Layout
The control/cabling cabinet comes in two different configurations: • AFE rectifier (Figure • 18 Pulse rectifier (Figure Major Components The following seven diagrams show the typical layout of each cabinet for PowerFlex 7000 “C” Frame Drives. Rockwell Automation Publication 7000L-UM301F-EN-P - March 2020... - Page 60 Chapter 2 Drive Installation Figure 49 - Control and Cabling Cabinet (AFE Rectifier version shown) (with Control Panel removed) Hall-effect Sensor Voltage Sensing Motor Terminals Hall-effect Sensor Surge Arrestors Line Terminals Current Transformer Rockwell Automation Publication 7000L-UM301F-EN-P - March 2020...
- Page 61 Chapter 2 Figure 50 - Control and Cabling Cabinet (18 Pulse version shown) (with Control Panel removed) Motor Terminals Hall Effect Sensor Voltage Sensing Transient Suppression Networks Hall Effect Sensor Line Terminals Current Transformers Rockwell Automation Publication 7000L-UM301F-EN-P - March 2020...
- Page 62 Chapter 2 Drive Installation Figure 51 - Low Voltage Tub Compartment ANALOG CONTROL BOARD Analog Control Board Drive Processor Tach Feedback DC/DC Power Supply Fiber Optic Interface Boards Module (DPM) Circuit Board Rockwell Automation Publication 7000L-UM301F-EN-P - March 2020...
- Page 63 Drive Installation Chapter 2 Figure 52 - Converter Cabinet Components (4160V AFE shown) Ground Bus Inverter Modules Coolant Piping Isolated Gate Drive Power Supplies (IGDPS) Rectifier Modules Rockwell Automation Publication 7000L-UM301F-EN-P - March 2020...
- Page 64 Chapter 2 Drive Installation Figure 53 - Converter Cabinet Components (6600V AFE shown) Ground Bus Inverter Modules Isolated Gate Driver Power Supplies (IGDPS) Rectifier Modules Rockwell Automation Publication 7000L-UM301F-EN-P - March 2020...
- Page 65 Drive Installation Chapter 2 Figure 54 - Capacitor Cabinet Cooling Fan Grounding Network Motor Line Capacitors Line Capacitors Rockwell Automation Publication 7000L-UM301F-EN-P - March 2020...
- Page 66 Chapter 2 Drive Installation Figure 55 - DC Link Inductor Cabinet Power Transformer AC/DC Power Supplies Fuse Blocks Liquid-cooled DC Link Reacotr Cooling Pipes Rockwell Automation Publication 7000L-UM301F-EN-P - March 2020...
- Page 67 Drive Installation Chapter 2 Figure 56 - Pump Cabinet (showing swing-out low voltage panel) Pumping Panel Deionizer Cartridge Swingout Low Voltage Panel Coolant Pumps Rockwell Automation Publication 7000L-UM301F-EN-P - March 2020...
-
Page 68: Iec Component And Device Designation
Either shielded or unshielded cable may be used based on the criteria considered by the distribution system designer and local standards. However, NEC requires shielded cable for installations above 2 kV. Rockwell Automation Publication 7000L-UM301F-EN-P - March 2020... -
Page 69: Cable Insulation
Application and signal examples along with the recommended type of cable for each group are provided. A matrix providing the recommended minimum spacing between different wire groups run in the same tray or separate conduit is also provided. Rockwell Automation Publication 7000L-UM301F-EN-P - March 2020... - Page 70 Note 5: Voltage drop in motor leads may adversely affect motor starting and running performance. Installation and application requirements may dictate that larger wire sizes than indicated in IEC / NEC guidelines are used. Rockwell Automation Publication 7000L-UM301F-EN-P - March 2020...
-
Page 71: Power Cabling Access
The power terminals are now visible. • The installer is responsible for modifying the power cable access plates to suit the requirements. • Note that appropriate connectors must be used to maintain the environmental rating of the enclosure. Rockwell Automation Publication 7000L-UM301F-EN-P - March 2020... - Page 72 Chapter 2 Drive Installation Figure 57 - Swing-out of Low Voltage Compartment Latch Key Interlock Handle Terminal Blocks - Customer (TBC) Rockwell Automation Publication 7000L-UM301F-EN-P - March 2020...
- Page 73 Drive Installation Chapter 2 Figure 58 - Access to Power Terminals Low Voltage Compartment (Open) Low Voltage Door Rockwell Automation Publication 7000L-UM301F-EN-P - March 2020...
-
Page 74: Power Connections
The installer is responsible for ensuring that power connections are made with appropriate torque. (Refer to Torque Requirements for Threaded Fasteners on page 421 (Appendix B).) The drive is supplied with provision for grounding of cable shields and stress cones near the power terminals. Rockwell Automation Publication 7000L-UM301F-EN-P - March 2020... -
Page 75: Liquid Connections
Outlet Coolant Connection Warm Fluid to Heat Echaanger Inlet Coolant Connection Fluid Return from heat Exchanger Piping to Heat Exchanger Routing through right side of cabinet Piping to Heat Exchanger Routing through bottom of cabinet Rockwell Automation Publication 7000L-UM301F-EN-P - March 2020... -
Page 76: Pipe Materials And Layout
Pipe Materials and Layout All material that contacts fluid between the heat exchanger and drive must be either Schedule 80 CPVC or stainless steel. Rockwell Automation recommends using stainless steels AISI 304L or 316L to connect the drives to heat exchangers. -
Page 77: External Piping To The Drive
External Piping to the Drive External Piping Cleaning Rockwell Automation liquid-cooled drive piping and heat exchangers are flushed and cleaned at the factory and piping is capped to prevent contamination. Leave the drive pipe caps installed until final assembly. -
Page 78: Controlled Siphon Into Open-Top Reservoir
Passivation of Stainless Steel Parts, Equipment, and Systems" for additional information. Controlled Siphon into Open- Rockwell Automation recommends this method of pipe routing for pipes and heat exchangers higher than the reservoir coolant level. The reservoir is located in top Reservoir the VFD pump cabinet. - Page 79 • Horizontal vent valve piping for exit and return must be 1.5 or 2 in. mounted at the same level piping Heat Exchanger Ball Check 2 or 3 in. Valve piping Drain Rockwell Automation Publication 7000L-UM301F-EN-P - March 2020...
-
Page 80: Liquid-To-Liquid Heat Exchangers
Exchangers • Pipes through top plate of cabinet • Pipes through bottom plate of cabinet • Pipes through right side of cabinet Removable plates are provided in each of these locations. Rockwell Automation Publication 7000L-UM301F-EN-P - March 2020... - Page 81 Access for connections through top of cabinet Access for connections to heat exchanger through right side of cabinet Liquid-to-Liquid Heat Exchanger Access for connections to heat exchanger through bottom of cabinet Rockwell Automation Publication 7000L-UM301F-EN-P - March 2020...
- Page 82 > 0 <32 6600 37.0 > 0 <32 44.5 > 0 <32 48.5 > 0 <32 54.5 > 0 <32 (1) US Gpm = Gallons per minute (U.S.) (2) L/m = Liters per minute Rockwell Automation Publication 7000L-UM301F-EN-P - March 2020...
-
Page 83: Power And Control Wiring
Radiated noise from nearby relays, solenoids, transformers, non linear loads (such as motor drives) etc. can couple onto signal wires producing undesired pulses. In fact the encoder itself may induce noise into signal lines run adjacent to it. Rockwell Automation Publication 7000L-UM301F-EN-P - March 2020... - Page 84 < 1.0us. If the leading edge of the waveform is distorted it causes the transition time through this region to increase. At some point, the receiver may become unstable and either gain or lose encoder counts. Rockwell Automation Publication 7000L-UM301F-EN-P - March 2020...
- Page 85 POL_QRDNT jumper. If the jumper is installed, then wire all unused inputs to ENC PWR, otherwise use ENC COM. Rockwell Automation Publication 7000L-UM301F-EN-P - March 2020...
-
Page 86: Information Regarding Termination Of Customer Cables
Threaded Fasteners on page 421 (Appendix B) for Torque Values of electrical connections. Figure 69 - Typical Line Cable Terminal Assembly (modified for top cable entry – 18 Pulse) Lug pad oriented for top cable entry Rockwell Automation Publication 7000L-UM301F-EN-P - March 2020... -
Page 87: Grounding Practices
Each AC motor frame must be bonded to grounded building steel within 6 m (20 feet) of its location and tied to the drive’s ground bus via ground wires within Rockwell Automation Publication 7000L-UM301F-EN-P - March 2020... -
Page 88: Grounding Guidelines And Practices For Drive Signal And Safety Grounds
• do not damage the grounding circuit • will not cause undue interference with or damage to protection or metering systems, or cause undue disturbance on power lines. Rockwell Automation Publication 7000L-UM301F-EN-P - March 2020... -
Page 89: Identification Of Types Of Electrical Supplies - Grounded And Ungrounded Systems
It is the responsibility of the installer to ensure that the key interlocking is installed properly to the upstream equipment. Rockwell Automation Publication 7000L-UM301F-EN-P - March 2020... - Page 90 Chapter 2 Drive Installation Notes: Rockwell Automation Publication 7000L-UM301F-EN-P - March 2020...
-
Page 91: Operator Interface
PowerFlex™ Operator interface – References to the operator interface refer to the product consisting of the PanelView 550 interface hardware and the unique software contained within it, which allows it to function with the Medium Voltage Drive. Rockwell Automation Publication 7000L-UM301F-EN-P - March 2020... -
Page 92: Overview
The PanelView software has been replaced with unique software to tailor it to the requirements of the Medium Voltage Drive, and its faceplate has been modified (Figure 72). Figure 72 - PowerFlex 7000 Drive Operator Interface Terminal Rockwell Automation Publication 7000L-UM301F-EN-P - March 2020... -
Page 93: Keypad
Continue to use the up/down cursor keys to move to these additional selections. Rockwell Automation Publication 7000L-UM301F-EN-P - March 2020... -
Page 94: Data Entry Keys
Components Although the data displayed on any particular screen will vary, the general makeup of a screen is the same for all. Figure 73 shows a typical screen and its components. Rockwell Automation Publication 7000L-UM301F-EN-P - March 2020... - Page 95 Under normal conditions this dot will flash at a rate of .5 Hz. During communication errors, the dot will flash at a rate of .1 Hz. Figure 74 - Screen Name & Item Rockwell Automation Publication 7000L-UM301F-EN-P - March 2020...
-
Page 96: Information Windows
If this were to occur, a special window is used to inform you of this. During this time, the operator interface will not respond to any user input, until the task at hand is completed. Rockwell Automation Publication 7000L-UM301F-EN-P - March 2020... -
Page 97: Languange Changing
During this possibly lengthy process, the “Language Changing ...” message is displayed. Rockwell Automation Publication 7000L-UM301F-EN-P - March 2020... -
Page 98: General Operation
'Softkey' will be active. The 'Softkey' will decrement the page number being viewed. F10 - Exit When you are viewing any screen other than the Top Level Menu, this 'Softkey' will return you to the previous screen. Rockwell Automation Publication 7000L-UM301F-EN-P - March 2020... -
Page 99: Operator Interface Power-Up Sequence
The screen identifies the drive product to which the operator interface is attached and its overall state of operation. Four digital meters show four selected parameters located in the drive. A Hobbs meter displays the number of hours that the drive has been running. Rockwell Automation Publication 7000L-UM301F-EN-P - March 2020... -
Page 100: How To
(In this case the name of the Top Level Menu is REV.) This particular help screen contains three pages. To view page two, press the [F8] key. Page 2 is displayed. To return to page 1, press the [F9] key. Rockwell Automation Publication 7000L-UM301F-EN-P - March 2020... -
Page 101: Related Topics
Press the [backspace] key to return to the previous level of help, (i.e. the previous related topic). To exit help completely press [F10] to return to the screen from which help was called. Figure 79 - Help on Related Topic (Softkey) Rockwell Automation Publication 7000L-UM301F-EN-P - March 2020... -
Page 102: Help On Help
[F2] key. This results in the display of the screen shown in Figure In all operations on this screen, the value currently being acted upon is shown in reverse video. Only when the value is in this state, may it be modified. Rockwell Automation Publication 7000L-UM301F-EN-P - March 2020... -
Page 103: Changing Backlight Delay
The backlight delay has been saved. The setting may also be aborted by pressing any of the assigned function keys (other than F1). The function associated with that key will be executed. Figure 82 - Utility Light Rockwell Automation Publication 7000L-UM301F-EN-P - March 2020... -
Page 104: Changing Contrast
To accept the change, press the [enter] key. The new clock setting has been recorded. The setting may also be aborted by pressing any of the assigned function keys (other than F1 and F5). The function associated with that key will be executed. Rockwell Automation Publication 7000L-UM301F-EN-P - March 2020... -
Page 105: Setting Date
You can not set the day of the week. The operator interface will determine the day of the week based on the date that you set in the calendar. Figure 85 - Utility Date Rockwell Automation Publication 7000L-UM301F-EN-P - March 2020... -
Page 106: Selecting Meters
[cursor right] key. (If nothing happens then you have not gained the required access to make changes. Press the [F8] key in order to gain access and refer to Enter/Modify an Access Level on page 116 Rockwell Automation Publication 7000L-UM301F-EN-P - March 2020... - Page 107 Any time prior to this you may cancel all of the changes made after coming to the screen by pressing the [F7] key. The result of selecting the V Line tag for meter 2 (in our example) is shown in Figure 90 after the METERS screen was exited. Rockwell Automation Publication 7000L-UM301F-EN-P - March 2020...
-
Page 108: Viewing Revision Levels
To modify the user definable text string, press the [F8] key. (If nothing happens then you have not gained the required access to make changes. Exit to the Top Level Menu screen and refer to Enter/Modify an Access Level on page 116.) Rockwell Automation Publication 7000L-UM301F-EN-P - March 2020... -
Page 109: Transfer Data In Memory
In order to transfer information from the two forms of memory, press the [F7] key. This displays a new screen (Figure 158) from which all flash memory operations are performed. Refer to the section entitled Flash Memory Transfers on page 148 for instructions on these features. Rockwell Automation Publication 7000L-UM301F-EN-P - March 2020... -
Page 110: Picking An Access Level
If more than one page of groups exist, press the [F8] and [F9] keys to view the other pages. Rockwell Automation Publication 7000L-UM301F-EN-P - March 2020... -
Page 111: Via Name
Selecting via a name is initiated from the SELECT GROUP screen (Figure by pressing the [F7] key. This displays the SELECT LETTER screen shown in Figure Rockwell Automation Publication 7000L-UM301F-EN-P - March 2020... - Page 112 Figure 96 - Selecting via a Letter (Step 1) Figure 97 - Selecting Name via List (Step 2) From the SELECT LETTER screen (Figure 96) the tag may also be selected via a code by pressing the [F5] key. Rockwell Automation Publication 7000L-UM301F-EN-P - March 2020...
-
Page 113: Via Code
If correct, press the [enter] key. If incorrect, immediately repeat the process by typing in another code. If the tag code was not valid, a message indicating such is displayed as in Figure 100. Figure 99 - Valid Tag Code Rockwell Automation Publication 7000L-UM301F-EN-P - March 2020... -
Page 114: Edit Text
• entering a filename The operator interface's keypad does not contain any alpha keys to allow direct input of the characters. This section will describe the operation for which characters may be entered. Rockwell Automation Publication 7000L-UM301F-EN-P - March 2020... - Page 115 The editing operation is completed by pressing the [enter] key. Changes are not permanently made until the screen is exited via the [F10] key. Rockwell Automation Publication 7000L-UM301F-EN-P - March 2020...
-
Page 116: Configure The Drive
In addition to providing the protection, the Access Levels also filter out the amount of information that can be viewed at each level. On any level, other than 'Monitor' , any information that can be viewed may also be modified. Rockwell Automation Publication 7000L-UM301F-EN-P - March 2020... - Page 117 [enter] key. If the correct PIN was entered, the access level of the operator interface will change as shown in Figure 105. If the incorrect value was entered, the operator interface will remain at the current access level. Rockwell Automation Publication 7000L-UM301F-EN-P - March 2020...
- Page 118 PIN value using the data entry keys [0]...[9] followed by the [enter] key. The screen now asks you to verify the new PIN. Type in the new PIN again followed by the [enter] key as shown in Figure 107. Rockwell Automation Publication 7000L-UM301F-EN-P - March 2020...
- Page 119 PIN, incorrectly entered the existing PIN or incorrectly verified the new PIN. Figure 108 - Invalid PIN Figure 109 - Invalid PIN Verification If you were not successful in changing the password, simply start over again by typing in the current password value. Rockwell Automation Publication 7000L-UM301F-EN-P - March 2020...
-
Page 120: Drive Setup
(Figure 111). Refer to Enter/Modify an Access Level on page 116. Figure 110 - Setup Screen Rockwell Automation Publication 7000L-UM301F-EN-P - March 2020... -
Page 121: Language Selection
If this occurs, the operator interface will switch to the new language, if the required language module is loaded. Figure 112 - Language Selection Rockwell Automation Publication 7000L-UM301F-EN-P - March 2020... -
Page 122: Modify Parameters
• the minimum and maximum allowable limits to which the parameter must be set, (e.g. 4000...4160) • the units in which the parameter data is being displayed • the actual value of the parameter contained in the drive Figure 113 - Parameter Data Entry Rockwell Automation Publication 7000L-UM301F-EN-P - March 2020... - Page 123 Prior to this you can modify the new value by repeating the above procedure, or you can cancel the change by pressing the [F7] key. The CANCEL operation returns the new value to that of the actual value. Rockwell Automation Publication 7000L-UM301F-EN-P - March 2020...
-
Page 124: Enumerated Value
(Figure 116). If more options exist then what can be displayed on a single screen, a triangle or inverted triangle symbol will indicate in which direction the list can be expanded (Figure 117). Rockwell Automation Publication 7000L-UM301F-EN-P - March 2020... -
Page 125: Bit Encoded Value
• the name of the parameter for which you are make the changes (i.e. Logic Mask) • the tag code for the parameter (e.g. 241) • the name of the bit currently selected (Adapter 0) • the actual value of the parameter bits contained in the drive. Rockwell Automation Publication 7000L-UM301F-EN-P - March 2020... -
Page 126: Analog Ports
[enter] key. (If nothing happens then you have not gained the required access to make changes. Exit to the SETUP screen and refer to the section entitled Enter/Modify an Access Level on page 116 gain access). Rockwell Automation Publication 7000L-UM301F-EN-P - March 2020... - Page 127 The changes made do not take affect until you press [F10] and exit the screen. Any time prior to this you may cancel all of the changes made after coming to the screen by pressing the [F7] key. Rockwell Automation Publication 7000L-UM301F-EN-P - March 2020...
-
Page 128: Fault Masks
The fault masks can be viewed according to their state by pressing the [F7] key on the FAULTS SETUP screen. This will display the FAULTS OVERVIEW screen, typical of Figure 123 Figure 124. Rockwell Automation Publication 7000L-UM301F-EN-P - March 2020... - Page 129 126). (If nothing happens, you do not have proper access to the drive. Exit to the SETUP screen and refer to the section entitled Enter/Modify an Access Level on page 116 gain access). Rockwell Automation Publication 7000L-UM301F-EN-P - March 2020...
- Page 130 FAULTS SETUP screen. In our example, exiting the FAULTS OVERVIEW screen and returning to the FAULTS SETUP screen now shows the “AC O/V” mask as being ON (Figure 127). Figure 127 - AC O/V Mask is ON Rockwell Automation Publication 7000L-UM301F-EN-P - March 2020...
-
Page 131: User Definable External Text
Figure 129. Refer to the section entitled Edit Text on page 114. When editing is complete, the screen will appear as in Figure 130. Figure 129 - Modify Text Rockwell Automation Publication 7000L-UM301F-EN-P - March 2020... -
Page 132: Plc
Exit to the SETUP screen and refer to the section entitled Enter/Modify an Access Level on page 116 to gain access). Rockwell Automation Publication 7000L-UM301F-EN-P - March 2020... -
Page 133: Xio
To setup the XIO configuration, use the up/down arrow keys on the SETUP screen to select the 'XIO' option and press the enter key Note: This feature is currently inactive and is reserved for future enhancements. Rockwell Automation Publication 7000L-UM301F-EN-P - March 2020... -
Page 134: Message Prompting
Note that the data can still be saved at a later time by accessing the NVRAM screen directly from the Top Level Menu. Refer to Store/Retrieve Configuration (NVRAM) on page 135. Figure 133 - Message Prompt Screen Figure 134 - NVRAM Screen Rockwell Automation Publication 7000L-UM301F-EN-P - March 2020... -
Page 135: Store/Retrieve Configuration (Nvram)
The changes that you have made to the drive data must be saved if you do not want to lose the data when the drive is powered off. To save the changes, press the [F5] key (Figure 136). Rockwell Automation Publication 7000L-UM301F-EN-P - March 2020... -
Page 136: Load
Figure 137 - Load Operation To confirm the operation, press the [F8] key to proceed, or the [F9] key to abort. Loading the data will overwrite the data currently being used by the drive. Rockwell Automation Publication 7000L-UM301F-EN-P - March 2020... -
Page 137: Display Parameters
[cursor down] keys select the group you wish to display and press the [enter] key (Figure 139). Figure 138 - Display Screen Figure 139 - Feature Select Group Chosen Figure 140 - Bit Encoded Parameter Rockwell Automation Publication 7000L-UM301F-EN-P - March 2020... -
Page 138: Custom Group
110. When you have completed the selection process, the selected tag will be assigned to the item, as in Figure 143. To remove a tag from the highlighted item, press the [delete] (Backspace) key. Rockwell Automation Publication 7000L-UM301F-EN-P - March 2020... -
Page 139: View Drive Status
The status of the drive is viewed by pressing the [F7] key from the Top Level Menu. This screen, shown in Figure 144, constantly displays the latest status of the drive. Figure 144 - Status Screen Rockwell Automation Publication 7000L-UM301F-EN-P - March 2020... -
Page 140: View And Reset Alarms
[F8] and [F9] keys to shift to other pages if required. Entries are not removed from the queue until the queue is cleared with the [F7] key. If the queue becomes full, the oldest entries are discarded to make room for newer faults. Rockwell Automation Publication 7000L-UM301F-EN-P - March 2020... -
Page 141: Help For Alarms
Not all alarms will have this additional help text. For those alarms the screen shown in Figure 148 is displayed. Figure 147 - Alarm Help Figure 148 - No Alarm Help Rockwell Automation Publication 7000L-UM301F-EN-P - March 2020... -
Page 142: Request Printouts
• View the results of the Trend You will access the Diagnostic Trend operation from the Top Level Menu by pressing the [F9] key. This results in the display of the screen shown in Figure 150. Rockwell Automation Publication 7000L-UM301F-EN-P - March 2020... - Page 143 To define a trend, press the [F8] key to display the setup screen, shown in Figure 151. Figure 151 - Diagnostic Setup Rockwell Automation Publication 7000L-UM301F-EN-P - March 2020...
-
Page 144: Assigning A Trace
[F2] and [F3] keys respectively. (If nothing happens then you have not gained the required access to make changes. Press the [F8] key and refer to the section entitled Enter/Modify an Access Level on page 116 to gain access). Rockwell Automation Publication 7000L-UM301F-EN-P - March 2020... - Page 145 Press the [Enter] key to accept the value. The value may be edited the same as a value entered from the numeric keypad. Rockwell Automation Publication 7000L-UM301F-EN-P - March 2020...
-
Page 146: Defining Sample Rate And Positioning
When you exit the screen, the trend is started and the screen such as Figure 154 will show the trigger condition and the status. Pressing the [F7] key on the DIAGNOSTICS screen may also start the trend. Figure 154 - Diagnostic Armed Rockwell Automation Publication 7000L-UM301F-EN-P - March 2020... - Page 147 Upon initial entry, the screen will be positioned to the trigger point, shown by the "T ->". To view data either side of the trigger point, press the [F8] and [F9] keys. Rockwell Automation Publication 7000L-UM301F-EN-P - March 2020...
-
Page 148: Flash Memory Transfers
• Save the parameters from the drive on the flash card or in the operator interface. • Download parameters to the drive from a flash card or that previously saved in the operator interface. • Load a language module from the flash card. Rockwell Automation Publication 7000L-UM301F-EN-P - March 2020... -
Page 149: Format Flash Card
(If nothing happens then you have not gained the required access to modify the flash memory. Exit to the TRANSFER screen and refer to the section entitled Enter/Modify an Access Level on page 116 to gain access). Rockwell Automation Publication 7000L-UM301F-EN-P - March 2020... -
Page 150: View A Directory
When the directory is entered from the TRANSFER screen, all files will be shown. When entered from one of the operations screens, only the files that are relevant to the operation being performed will be shown. Rockwell Automation Publication 7000L-UM301F-EN-P - March 2020... -
Page 151: Select A Filename
Press the [F2] key. The filename can now be edited. Refer to the section entitled “Edit Text” for further details. When complete, pressing the [Enter] key will proceed with the operation. Rockwell Automation Publication 7000L-UM301F-EN-P - March 2020... -
Page 152: Loading Programs (Firmware)
For this reason the two LEDs on the back of the operator interface are used as such: • Flashing Green - indicates that all is healthy and the transfer is proceeding. Rockwell Automation Publication 7000L-UM301F-EN-P - March 2020... -
Page 153: Parameter Transfers
Exit to the TRANSFER screen and refer to the section entitled Enter/Modify an Access Level on page 116 to gain access). Within this screen it is possible to perform four different parameter transfers. Rockwell Automation Publication 7000L-UM301F-EN-P - March 2020... -
Page 154: Upload To Operator Interface
It will not affect the parameters stored within the drive’s NVRAM. After parameters have been downloaded you will be prompted to make the new parameters downloaded to the drive permanent. Refer to section “Message Prompting” for further details. Rockwell Automation Publication 7000L-UM301F-EN-P - March 2020... -
Page 155: Upload To Memory Card
The screen will then ask you to confirm the operation. Press the [F8] key to proceed, or the [F9] key to abort. Pressing the [F4] key may restart an aborted transfer or one that failed. To select or enter a different filename, press the [F7] key. Rockwell Automation Publication 7000L-UM301F-EN-P - March 2020... -
Page 156: Parameter File Format
When the filename has been obtained, the TRANSFER: LANGUAGE screen such as that in Figure 167 will be displayed, showing the filename, indicating the operation you are about to perform and showing the current status of the operation. Rockwell Automation Publication 7000L-UM301F-EN-P - March 2020... - Page 157 [F2] key on the TRANSFER:LANGUAGE screen. The screen as in Figure 168 will then ask you to confirm the operation. Press the [F8] key to proceed, or the [F9] key to abort. Figure 168 - Clear Languages Rockwell Automation Publication 7000L-UM301F-EN-P - March 2020...
-
Page 158: System Programming
• Resends: number of times the operator interface had to resend data due to a NACK being sent by the drive. • Timeouts: number of times the operator interface did not receive data from the drive within a specified time period. Rockwell Automation Publication 7000L-UM301F-EN-P - March 2020... -
Page 159: Protocol Analyzer
• the data shown in hexadecimal (Figure 170) • the data shown as a mixture (Figure 171) of: • control characters • printable ASCII characters • hexadecimal data Figure 170 - Hexadecimal displayed Rockwell Automation Publication 7000L-UM301F-EN-P - March 2020... -
Page 160: Print Screen
It is called from any screen (except the PRINTER screen), by pressing the [F10] key and the [cursor left] key at the same time. Rockwell Automation Publication 7000L-UM301F-EN-P - March 2020... - Page 161 [F7] key. The edited segment:offset can be aborted by pressing the [delete] key. To accept the segment:offset value entered, press the [enter] key. The screen will show the data at the entered address, as shown in Figure 174. Rockwell Automation Publication 7000L-UM301F-EN-P - March 2020...
-
Page 162: Database Download
The chart shows the relationship between screens and a particular operation. It also shows the path to reach a particular screen. This chart does not introduce you to the use of the operator interface, however is useful as a reference to the preceding material. Rockwell Automation Publication 7000L-UM301F-EN-P - March 2020... -
Page 163: How Do You Read It
For this example, the symbol T laterally moves to the symbol M that defines a new process in which the selected parameter can be modified. The MODIFY PARAMETER screen is now displayed. Rockwell Automation Publication 7000L-UM301F-EN-P - March 2020... - Page 164 [F8] 'Yes' , the NVRAM screen is entered, from which you can save the data. Exiting the NVRAM screen returns you to the MAINMENU. Pressing the [F10] Exit key on the MESSAGE screen will return you to the DISPLAY GROUP screen. Rockwell Automation Publication 7000L-UM301F-EN-P - March 2020...
- Page 165 Operator Interface Chapter 3 Figure 175 - Menu Hierarchy Rockwell Automation Publication 7000L-UM301F-EN-P - March 2020...
- Page 166 Chapter 3 Operator Interface Figure 176 - Menu Hierarchy (cont’d) Rockwell Automation Publication 7000L-UM301F-EN-P - March 2020...
-
Page 167: Pcmcia Memory Card Installation Data
1. Locate the vertical card slot on the back of the operator interface. See Figure 177. Figure 177 - Rear View of Operator Interface CARD SLOT COMMUNICATION CABLE 2. Position the card vertically so the key slot is facing the right side of the operator interface. Rockwell Automation Publication 7000L-UM301F-EN-P - March 2020... - Page 168 3. Insert the card into the card slot and push until the card is firmly seated. WARNING: Do not force the card into the slot. Forcing the card into the slot may damage the connector pins. Rockwell Automation Publication 7000L-UM301F-EN-P - March 2020...
-
Page 169: Commissioning
Chapter Commissioning Start-up Commissioning Start-up will be performed at the customer’s site. Rockwell Automation requests a minimum of four weeks notice to schedule each start-up. Services The standard Rockwell Automation work hours are between 9:00 AM to 5:00 PM EST, (8 hr/day) Monday through Friday, not including observed holidays. -
Page 170: Commissioning The Drive
ATTENTION: The CMOS devices used on the control circuit boards can be destroyed or damaged by static charges. If personnel will be working near static sensitive devices, they must be appropriately grounded. Rockwell Automation Publication 7000L-UM301F-EN-P - March 2020... -
Page 171: Pre-Commissioning Responsibilities
Any claims for breakage or damage, whether concealed or obvious, are made to the carrier by the customer as soon as possible after receipt of shipment. All packing material, wedges, or braces are removed from the drive. Rockwell Automation Publication 7000L-UM301F-EN-P - March 2020... -
Page 172: Installation / Mounting
Remote I/O Interface is properly configured / active. All 3-phase control wiring is with in specified levels and has been verified for proper rotation, UVW. All single-phase control wiring is within specified levels and has grounded neutrals. Rockwell Automation Publication 7000L-UM301F-EN-P - March 2020... -
Page 173: Power Wiring
NEC, IEC or appropriate local standards. The cable terminations, if stress cones are used, adhere to the appropriate standards. Appropriate cable insulation levels are adhered to, as per Rockwell Automation specifications (refer to tables in Chapter 2 of User Manual for Cable Insulation Requirements). - Page 174 Chapter 4 Commissioning NOTES Rockwell Automation Publication 7000L-UM301F-EN-P - March 2020...
-
Page 175: Commissioning Preparation
Ensure that the contents of this section are reviewed and that the uses of the equipment described within are understood prior to commencing commissioning of the drive. If further support or additional information is required, contact your local Rockwell Automation service office or Medium Voltage Support at (519) 740-4790. Recommended Tools and Equipment Hand Tools •... -
Page 176: Technical Publications
Any additional manual required to configure the drive line-up can be identified Additional Manuals on the Electrical Schematics. The Schematic titled “General Notes” identifies all required Rockwell Automation Publications by publication number. Resources Required to Prior to attempting to commission the drive ensure you have the following: •... -
Page 177: Important Note For Commissioning Engineer
8. Marked-up drawings 9. Summary of issues/failures encountered during commissioning All documents and data files (waveforms, parameter settings, variables, trend data, etc.) submitted by the commissioning engineer must be properly named, labeled and organized. Rockwell Automation Publication 7000L-UM301F-EN-P - March 2020... -
Page 178: Key Steps To Commissioning A Powerflex 7000 Drive
• Save the parameters in NVRAM and also transfer them from Drive to Memory and also print the Drive Setup to your laptop • Start the drive in normal operation, print variables and capture waveforms • Complete commissioning documentation Rockwell Automation Publication 7000L-UM301F-EN-P - March 2020... -
Page 179: Powerflex 7000 "C" Frame Commissioning Datasheets
Chapter 4 PowerFlex 7000 “C” Frame It is imperative for Medium Voltage Product Support division to have the following information filled-out and returned to Rockwell Automation Canada, Commissioning Datasheets Cambridge office immediately upon completion of the drive system commissioning. It is the responsibility of the Field Service Engineer to fill-out the required information and submit the completed documents along with the Field Service Report. -
Page 180: Powerflex 7000 "C" Frame Drive Commissioning Checklist
Power cabling has been torqued per table on page 421 Control reactor wiring has been correctly installed as shown on the Rockwell Automation electrical diagrams Control wiring routing has been examined to ensure that AC, DC and fiber optic wiring are separated from... - Page 181 Verify that all emergency stop devices are functioning correctly Calibrate the analog I/O Verify that the drive cooling fan(s) is/are operating properly Measure input contactor drop out time (2-cycle advance warning needed if input contactor is not part of drive line-up) Rockwell Automation Publication 7000L-UM301F-EN-P - March 2020...
- Page 182 Have the customer sign sign-off documents Provide customer with parameter settings, marked-up drawings, commissioning package, PLC program and Field Report Forward Waveforms, PLC program, modified drawings, Commissioning Package and Field report to Medium Voltage Support group Rockwell Automation Publication 7000L-UM301F-EN-P - March 2020...
-
Page 183: Drive Application Review
Location of Relay and Location of Relays Drawing Location Contactor Contacts References • Customer power and control wiring locations (electrically) • Control and medium voltage power ratings • Fuse ratings and locations (electrically) Rockwell Automation Publication 7000L-UM301F-EN-P - March 2020... -
Page 184: Electrical System One-Line Diagram
Electrical System One-line Diagram Once the Rockwell Automation electrical and dimensional drawings are clearly understood, a copy of the electrical system one-line drawing should be obtained. In studying this drawing, all relevant equipment tag Identification names and number should be identified. -
Page 185: Safety Tests
Refer to local safety guidelines for detailed procedures on how to safely isolate the equipment from hazards. The door to the medium voltage cabinets can only be opened after the lockout and tagout are successfully completed. Rockwell Automation Publication 7000L-UM301F-EN-P - March 2020... -
Page 186: Step Down Transformer Fusing
Inspect for Shipping Damage Prior to continuing verifying the installation of the equipment, open the cabinets to all equipment supplied by Rockwell Automation and inspect each component installed for signs of damage. Any damage claim should be made back to the Medium Voltage Business as soon is it is identified so the damaged components can be replaced as quickly as possible. -
Page 187: Inspect Cabinets For Debris
In drive line-ups supplied with Isolation Transformers, it is important to leave the secondary of the isolation transformer floating so the drive line-up can reference system ground from the upstream distribution transformer. Failure to do so may result in unreliable drive operation. Rockwell Automation Publication 7000L-UM301F-EN-P - March 2020... -
Page 188: Information On Splice Kits
Verify that all connections have proper continuity. Ensure factory jumpers installed and marked with notes “to remove if remote equipment installed” have been removed. Rockwell Automation Publication 7000L-UM301F-EN-P - March 2020... -
Page 189: Liquid-Cooling Connections
1.00 inch NPT female connector. The drawing clearly indicates that the S1 connection is the inlet, and the S2 connection is the outlet. Please refer to page 214 page 220 when commissioning the drive cooling system. Rockwell Automation Publication 7000L-UM301F-EN-P - March 2020... -
Page 190: Service Data
These data sheets will be archived at the factory for future reference. Rockwell Automation Publication 7000L-UM301F-EN-P - March 2020... -
Page 191: Customer Information
Frame: NEMA Type: RTD Type: Bearing: Stator: Excitation (For Synchoronous Motors only) Exciter Type: Volts: Current: Tachometer/Encoder Nameplate Data Tachometer: Position Encoder: Stator Feedback (None): Manufacturer: Model No.: Serial No.: PPR: Gear Ratio: Rockwell Automation Publication 7000L-UM301F-EN-P - March 2020... - Page 192 Temp. Rise: Input Reactor Configuration Manufacturer: Model No.: Serial No.: Line Reactor____ Isolation Transformer___ Voltage mH/KVA/Current: Temp. Rise: Impedance: Primary____ Secondary____ Heat Exchanger Manufacturer: Model No.: Type Volts: Current: Liquid-to-Liquid ___ Liquid-to-Air ___ Rockwell Automation Publication 7000L-UM301F-EN-P - March 2020...
- Page 193 HP/KW: Volts: Phase: FLC: RPM: S.F.: Manufacturer: Model: Frame Size: Drives Source of Control Power UPS: Lighting Panel Number: Other (Specify): Environmental Conditions Air Conditioned: Fan Forced Air: Other (Specify): Other Pertinent Information Rockwell Automation Publication 7000L-UM301F-EN-P - March 2020...
- Page 194 (1) The drive can have more than one of this circuit board. (2) PV Firmware is located on a sticker on the back of the unit. (3) PV Software is located on the main display screen (top-left corner). Rockwell Automation Publication 7000L-UM301F-EN-P - March 2020...
-
Page 195: Control Power Off Tests
Where the input switching device is provided by others, Rockwell Automation will provide a key interlock on the medium voltage compartment of the drive, and a matching interlock for installation by others on the upstream device. -
Page 196: Resistance Checks
Prior to applying control power to the drive, power semiconductor and snubber circuit resistance measurements must be taken. Doing so will ensure that no damage has occurred to the converter section during shipment. The instructions provided below detail how to test the following components: Rockwell Automation Publication 7000L-UM301F-EN-P - March 2020... -
Page 197: Sgct Testing
Snubber Capacitor Snubber Capacitor Snubber Resistors Snubber Resistors Qty. 4 or 5 Qty. 4 or 5 Test Point Test Point Cathode Chill Block Cathode Chill Block Anode Chill Block Anode Chill Block SGCT SGCT Rockwell Automation Publication 7000L-UM301F-EN-P - March 2020... -
Page 198: Sgct Anode-To-Cathode Resistance
An SGCT when not gated on is an open circuit. A healthy device resistance value should be close to the value-sharing resistor, however due to parallel resistances in the firing card, the resistance value will be slightly lower. Rockwell Automation Publication 7000L-UM301F-EN-P - March 2020... -
Page 199: Snubber Resistance (Sgct Device)
SGCT used in either the AFE Rectifier or the inverter. If the resistor is found to be out of tolerance, refer to Component Definition and Maintenance on page 265 (Chapter 5) for detailed instructions on how to replace the snubber resistor assembly. Rockwell Automation Publication 7000L-UM301F-EN-P - March 2020... -
Page 200: Snubber Capacitance (Sgct Device)
Table 7 - SCR Snubber Circuit Resistance and Capacitance Values Drive Rating Sharing Snubber Snubber Resistance Resistance Capacitance 3300 to 6600V 80 kΩ 90 Ω 0.5 μf Rockwell Automation Publication 7000L-UM301F-EN-P - March 2020... -
Page 201: Scr Anode-To-Cathode Resistance
Unlike the SGCT, the SCR uses the snubber circuit to power the self-powered gate driver boards. The resistance measurement taken across each SCR should be consistent; an inconsistent value may indicate a damaged sharing resistor, self- powered gate driver board or SCR. Rockwell Automation Publication 7000L-UM301F-EN-P - March 2020... -
Page 202: Scr Sharing Resistance Test
The red wire of the plug is the sharing resistor. Measure the resistance between the red wire of the plug and the chill block to the left. A value of 80 k-ohms indicates a healthy sharing resistor. Rockwell Automation Publication 7000L-UM301F-EN-P - March 2020... -
Page 203: Scr Gate-To-Cathode Resistance
To test an SCR from gate-to-cathode, disconnect the SCR gate leads from the self powered gate driver board and measure the gate-to-cathode resistance on the SCR firing card Phoenix connector as shown in Figure 188. Rockwell Automation Publication 7000L-UM301F-EN-P - March 2020... -
Page 204: Snubber Resistance (Scr Device)
PowerCage under the chill blocks. For each device, there is one test point. To verify the resistance, measure the resistance between the test point and the chill block above. Rockwell Automation Publication 7000L-UM301F-EN-P - March 2020... -
Page 205: Snubber Capacitance (Scr Device)
Turn the multimeter from the resistance to capacitance measurement mode. Proceed to verify the snubber capacitor by measuring from the test point and the white wire at the 2-pole device snubber plug (labeled snubber). Rockwell Automation Publication 7000L-UM301F-EN-P - March 2020... -
Page 206: Control Power Tests
Although there are a variety of options available to customers that will effect the control power distribution within the drive, the input will always be as illustrated Figure 191. Rockwell Automation Publication 7000L-UM301F-EN-P - March 2020... -
Page 207: Three-Phase Input
If the ratings match the designation on the electrical schematic, it is acceptable to apply control power to the drive by closing CB1 and DS1. Take necessary measures to rectify the control power levels in the event that they do not meet the design specifications. Rockwell Automation Publication 7000L-UM301F-EN-P - March 2020... -
Page 208: Power Supply Tests
A control power transformer (CPT) is supplied only in certain drive configurations. If there is no control transformer supplied in the drive being commissioned, please disregard the following information on setting the control voltage output level. Rockwell Automation Publication 7000L-UM301F-EN-P - March 2020... -
Page 209: Ac/Dc Converter (Ps1)
As the number of devices increases OR to provide a redundant power supply, the number of AC/DC power supplies installed may be more than one. The electrical schematics provided by Rockwell Automation will identify how many AC/DC power supplies have been installed in the application being commissioned. -
Page 210: Dc/Dc Converter (Ps2)
Input Power (+56 V) Table 9 - Plug 2 (P2) – SENSE SIGNAL Terminal Description Value Numbers Table 10 - Plug 3 (P3) – ISOLATOR Terminal Description Value Numbers → ISOLATOR (+24V,1A)--ISOL_COMM (COM4) ±5% Rockwell Automation Publication 7000L-UM301F-EN-P - March 2020... -
Page 211: Sgct Power Supplies (Igdps)
Mounting Plate Black Insulation DC/DC power supply Part ID Label VIEW “2” M6 (H.H.T.R.S.) VIEW “1” SGCT Power Supplies (IGDPS) Note: Refer to Figure 194 Figure 195 for location of IGDPS. Rockwell Automation Publication 7000L-UM301F-EN-P - March 2020... - Page 212 Chapter 4 Commissioning Figure 194 - Converter Cabinet Components (3300/4160V) Ground Bus Inverter Modules Coolant Piping Isolated Gate Drive Power Supplies (IGDPS) Rectifier Modules Rockwell Automation Publication 7000L-UM301F-EN-P - March 2020...
- Page 213 Commissioning Chapter 4 Figure 195 - Converter Cabinet Components (6600V) Ground Bus Inverter Modules Isolated Gate Driver Power Supplies (IGDPS) Rectifier Modules Rockwell Automation Publication 7000L-UM301F-EN-P - March 2020...
-
Page 214: Igdps Board Leds
ATTENTION: The E-Stop button on the drive does not interrupt the 3-phase control power. E-Stop only opens the input contactor providing the Medium Voltage on the drive input. This means that the cooling system will continue to run. Rockwell Automation Publication 7000L-UM301F-EN-P - March 2020... -
Page 215: Heat Exchanger Checks
Ensure these fans are wired properly per the electrical print. On a liquid-to-liquid heat exchanger, process water will be required to transfer heat from the drive coolant. The water temperature, pressure and flow rate are as Rockwell Automation Publication 7000L-UM301F-EN-P - March 2020... -
Page 216: Pumping Cabinet Control Power Checks
Manually activate the fan control relays and ensure each of the fans on the heat exchanger is rotating. Also ensure that the fans have been wired to the correct relays (as specified by factory). Rockwell Automation Publication 7000L-UM301F-EN-P - March 2020... -
Page 217: System Fill
Figure 197 - Cooling Cabinet Overview showing Valve Locations – 1 V9 (if provided) STR1 (if provided) V2 (hidden) (if provided) STR2 V7 drain/fill (if provided) V6 drain/fill Rockwell Automation Publication 7000L-UM301F-EN-P - March 2020... -
Page 218: System Fill And Air Venting
1. Attach transfer pump to drain/fill line (see drain/fill pump in Figure Ensure flow arrow on pump is in correct direction. Figure 199 - Drain/Fill Pump Flow Direction Transfer Pump Rockwell Automation Publication 7000L-UM301F-EN-P - March 2020... - Page 219 WARNING: Air must be purged from the coolant before drive startup or damage to thyristors can result. Figure 200 - Mesh Filters and De-ionizing Cartridge Reservoir Mesh Filters Level Switch (LS) Level Shut Down Low (LSDL) De-ionization Cartridge (DEI1) Rockwell Automation Publication 7000L-UM301F-EN-P - March 2020...
-
Page 220: Normal Operation
Some drive status I/O will be active while performing tests in Gating Test Mode. If the drive I/O is monitored remotely, process control should be notified in advance to avoid confusion. Rockwell Automation Publication 7000L-UM301F-EN-P - March 2020... - Page 221 Now press SETUP [F8] to get to Parameters, and then Enter. You should be on Feature Select, the first group. Press Enter, and then use the down arrow to get to Operating Mode. Rockwell Automation Publication 7000L-UM301F-EN-P - March 2020...
-
Page 222: Scr Firing Test
Plug the AC power connector on the test cable into an appropriate AC source. The other eighteen 3-pin connectors plug into the SCR SPGDB board terminals labeled TB3 – Test Power (see Figure 202 – Self-Power Gate Driver Board Test Rockwell Automation Publication 7000L-UM301F-EN-P - March 2020... - Page 223 ATTENTION: Ensure that the test cable is removed from the drive and that it is taken out of Test Mode prior to applying Medium Voltage. Failure to do so may result in personal injury or equipment damage. Rockwell Automation Publication 7000L-UM301F-EN-P - March 2020...
-
Page 224: Sgct Firing Test
2 seconds, and the pattern will continue. When you reach the end of the first stack of devices, the right device in the middle stack down will fire and the pattern continues right to left until the end of the middle stack is reached. Then Rockwell Automation Publication 7000L-UM301F-EN-P - March 2020... -
Page 225: System Test
The PV550 display screens are given as an example. The actual screen data may differ. Ensure you have Advanced access. Now, from the main screen, press SETUP [F8] to get to Parameters, and then Enter. You should be on Feature Select, the first group. Rockwell Automation Publication 7000L-UM301F-EN-P - March 2020... -
Page 226: Start/Stop Control Circuit
If troubleshooting is required in Rockwell Automation medium voltage switchgear, additional information is available in the following publications: • Publication 1500-UM055, Medium Voltage Controller, Bulletin 1512B, Two-High Cabinet, 400 Amp • User Manual Rockwell Automation Publication 7000L-UM301F-EN-P - March 2020... -
Page 227: Status Indicators
The following information describes how to set up the following drive features: • Analog Inputs – Analog Reference Command Input Scaling (Local, Remote) – Minimum Setting – Maximum Setting – Digital Reference Command Input Scaling (Digital) • Analog Outputs Rockwell Automation Publication 7000L-UM301F-EN-P - March 2020... - Page 228 0. Values that are negative or out of bounds will result in the drive slowing down to minimum speed. Analog Outputs Review the electrical schematics to understand which meters or signals the user expects out of the analog output ports on the ACB Board. Rockwell Automation Publication 7000L-UM301F-EN-P - March 2020...
- Page 229 Press EXIT [F10], go up to Parameters. Press Enter, and then scroll down the list until you reach Analog Outputs. Press Enter, and you will see the same list of available ports and the assigned parameter number, but not the name. Rockwell Automation Publication 7000L-UM301F-EN-P - March 2020...
- Page 230 It is now necessary to calibrate the external 4 to 20 mA signal conditioners. 1. Set a digital multimeter to mA and place it in line with the signal conditioners. If the output of the conditioner is terminated, the meter can be used as a load. Rockwell Automation Publication 7000L-UM301F-EN-P - March 2020...
-
Page 231: Configurable Alarms
18 Pulse drives. The following tests do not need to be performed on AFE rectifier drives unless they incorporate synchronous transfer: • Line Terminal Resistance Measurements • Application of Medium Voltage Power Rockwell Automation Publication 7000L-UM301F-EN-P - March 2020... -
Page 232: Line Terminal Resistance Measurements
Approximately 0 Ω → → Approximately 0 Ω → → Approximately ∞ Ω If the measurement results are not as described above, the interwiring between the isolation transformer and drive needs to be re-inspected. Rockwell Automation Publication 7000L-UM301F-EN-P - March 2020... -
Page 233: Application Of Medium Voltage
(trigger on this waveform) and verify all the other test points using the table above. It is easier to use zero crossings on your oscilloscope as the reference points when checking the phase shifts. Essentially, you are verifying the following relationships: Rockwell Automation Publication 7000L-UM301F-EN-P - March 2020... - Page 234 Figure 205 - CH1 is 2Vuv, CH2 is 2Vvw, CH3 is 2Vwu For 60 Hz systems, 360° = 16.7 ms. For 50 Hz systems, 360° = 20 ms. Refer to Figure 206 for a visual representation of the phasing checks. Rockwell Automation Publication 7000L-UM301F-EN-P - March 2020...
-
Page 235: Dc Current Test
The PV550 display screens are given as an example. The actual screen data may differ. Ensure that you have Service access. From the main screen press SETUP [F8], then press Enter, and press Enter again to access the Feature Select parameter group. Rockwell Automation Publication 7000L-UM301F-EN-P - March 2020... - Page 236 Enter. Enter the number 0.1 pu and then press Enter. Press EXIT [F10] twice and press PREV PG. The value of Alpha Rectifier will be displayed on this screen, as shown below. Rockwell Automation Publication 7000L-UM301F-EN-P - March 2020...
- Page 237 When we are satisfied everything is OK, bring the IDC current down in steps of .1 pu to 0, and then stop the drive. Return to the Feature Select parameter group and change Operating Mode back to Normal. Rockwell Automation Publication 7000L-UM301F-EN-P - March 2020...
-
Page 238: Tuning Procedure
Although the Input Impedance was tuned during factory test, it must be retuned during commissioning because its value is determined by the impedance of the input transformer and harmonic filter (if present). Rockwell Automation Publication 7000L-UM301F-EN-P - March 2020... - Page 239 T DC Link Low - indicates that the measured dc link time constant is less than 0.020 second. The step response of the current regulator should be checked using the manual method described below. Rockwell Automation Publication 7000L-UM301F-EN-P - March 2020...
- Page 240 --------------------------------------------------- - for PWM drives – is the value of input filter capacitor given by Line Filter Cap (P133) 9. The value of input impedance for SCR drives is calculated as follows: Rockwell Automation Publication 7000L-UM301F-EN-P - March 2020...
- Page 241 7. Start the drive. Set parameter Idc Ref Step in Current Control to 0.075pu for AFE rectifier drive and 0.200 pu for SCR drives. The dc link current will step up and down by this amount at regular intervals. Rockwell Automation Publication 7000L-UM301F-EN-P - March 2020...
- Page 242 11. Set parameter Idc Ref Step to zero. The dc link current will return to a steady level given by Idc Test Command. 12. Stop the drive. Set parameters Operating Mode to Normal, and Idc Test Command to 0.000pu. Rockwell Automation Publication 7000L-UM301F-EN-P - March 2020...
-
Page 243: Motor Impedance
Following warnings can occur during this test: R stator High - this is probably caused by extremely long motor cables increasing the apparent stator resistance of the motor. The drive cannot operate with stator resistance greater than 0.50 pu. Rockwell Automation Publication 7000L-UM301F-EN-P - March 2020... -
Page 244: Fluxspeed Regulator [Induction Motors]
Lm Rated, T Rotor, Total Inertia are set to default before starting this tuning again. Flux Regulator The tuning of the flux regulator for an induction motor is determined by three parameters: 1. FlxReg Bandwidth in Flux Control 2. Lm Rated in Motor Model Rockwell Automation Publication 7000L-UM301F-EN-P - March 2020... - Page 245 L Total Leakage in Motor Model are set to the correct value. Ensure that parameters Autotune Spd Cmd and Autotune Trq Stp in Autotune are set to default values. 2. Set parameter Autotune Select in Autotuning to FluxSpeed Reg. Rockwell Automation Publication 7000L-UM301F-EN-P - March 2020...
- Page 246 T Rotor High - indicates that the calculated value of rotor time constant is greater than 5.0 seconds. This is caused by a value of Lm Rated or Rated Motor RPM which is too high. Rockwell Automation Publication 7000L-UM301F-EN-P - March 2020...
- Page 247 To obtain accurate results, the load torque must be steady. 1. Set parameter SpdReg Bandwidth in Speed Control to 1.0 rad/sec. Rockwell Automation Publication 7000L-UM301F-EN-P - March 2020...
- Page 248 Total Inertia is set too high and should be decreased. If the response is too slow, then Total Inertia is set too low and should be increased. Figure 212 - Correctly Tuned Speed Regulator Speed Error 10 ms Rockwell Automation Publication 7000L-UM301F-EN-P - March 2020...
-
Page 249: Fluxspeed Regulator [Synchronous Motors]
1. Temporarily assign variable Autotune Lmd in Autotuning to the analog output used to control the field supply e.g. ACB Port 1. 2. Set the analog output scale parameter e.g. Anlg Out1 Scale in Analog Output to: Rockwell Automation Publication 7000L-UM301F-EN-P - March 2020... - Page 250 Flux Regulator Bandwidth should be set to the default value for almost all applications. Lm Rated, Lmd, T Rotor and Total Inertia are usually unknown and must be measured. Although these motor parameters change with different Rockwell Automation Publication 7000L-UM301F-EN-P - March 2020...
- Page 251 If a position encoder is fitted to the motor, the angle between the measured flux and the encoder zero is measured and parameter Encoder offset is adjusted to align the encoder with the motor flux. Rockwell Automation Publication 7000L-UM301F-EN-P - March 2020...
- Page 252 Inertia High - indicates that the measured total inertia is greater than 20.0 seconds. This warning is intended to draw attention to an unusually high inertia Rockwell Automation Publication 7000L-UM301F-EN-P - March 2020...
-
Page 253: Running The Load
DriveTools, or Hyperterminal as a substitute for recording the data in the table below. This should be forwarded with all commissioning data back to Product Support for future reference. Rockwell Automation Publication 7000L-UM301F-EN-P - March 2020... - Page 254 Chapter 4 Commissioning Rockwell Automation Publication 7000L-UM301F-EN-P - March 2020...
-
Page 255: Capturing Data
Oscilloscope Time Base Waveform Test-Point Waveform Sheet Name Label Ch. 1 10ms/div. 2U Line Voltage V2uv V2uv Input Phasing Ch. 2 2V Line Voltage V2vw V2vw Ch. 3 2W Line Voltage V2wu V2wu Rockwell Automation Publication 7000L-UM301F-EN-P - March 2020... - Page 256 [Ch1: V2uv (red), Ch2: V2vw (yellow), Ch3: V2wu (blue)] Sample waveforms captured on ACB test points showing 20 deg Phase Shift between Master and two Slave Bridges [Ch1-Master: V2uv (red), Ch2-Slave 1: V3uv (yellow), Ch3-Slave 2: V4uv (blue)] Rockwell Automation Publication 7000L-UM301F-EN-P - March 2020...
-
Page 257: Harmonic Analysis
V2uv V2uv Harmonics (Drive Not Ch. 2 Line Current Running) Figure 214 - Sample Waveforms Sample waveforms captured on SCBL test points under Drive Not Running Condition [Ch1: V2uv (red), Ch2: I2u (yellow)] Rockwell Automation Publication 7000L-UM301F-EN-P - March 2020... -
Page 258: Dc Current Test
Idc1 Idc1 Figure 215 - Sample Waveforms: Sample waveforms of DC Test recorded on a AFE Drive Idc Cmd Test = 0.2pu [Ch1- Vdcr1 (yellow) Ch2 – Idc1 (blue) at ACB test points] Rockwell Automation Publication 7000L-UM301F-EN-P - March 2020... -
Page 259: Load Test
Table 16 - Oscilloscope Setting Oscilloscope Time Base Waveform Test-Point Waveform Sheet Name Label Ch. 1 10ms/div. Line Voltage V2uv V2uv [see above] Ch. 2 Line Current Ch. 3 Motor Voltage Ch. 4 Motor Current Rockwell Automation Publication 7000L-UM301F-EN-P - March 2020... - Page 260 (Ch1: Line Voltage, Ch2 - Line Current, Ch3 - Motor Voltage, Ch4 - Motor Current) Sample waveforms recorded on 18 Pulse Drive running at 75% load (Ch1: Line Voltage, Ch2 - Line Current, Ch3 - Motor Voltage, Ch4 - Motor Current) Rockwell Automation Publication 7000L-UM301F-EN-P - March 2020...
-
Page 261: Synchronous Transfer
While simulating a synchronous transfer to determine the best lead angle: • Make sure the Diagnostic Trend has been setup and is armed. • Capture motor voltage at ACB test point “Vuv” & bypass voltage at ACB test point “Vuvs”. Rockwell Automation Publication 7000L-UM301F-EN-P - March 2020... - Page 262 • Save the worksheet as “Synch on Motor 01”, for example. Table 19 - Oscilloscope Setting Oscilloscope Time Base Waveform Test-Point Waveform Label Ch. 1 10ms/div. DC Link Current Idc1 Idc1 Ch. 2 Motor Voltage Ch. 3 Bypass Line Voltage Vuvs Vuvs Rockwell Automation Publication 7000L-UM301F-EN-P - March 2020...
- Page 263 Commissioning Chapter 4 Figure 219 - Sample Waveforms Live Synchronous Transfer Capture (50Hz System) Ch1: Idc1 (yellow), Ch2: Vuv (blue), Ch3: Vuvs (red) Rockwell Automation Publication 7000L-UM301F-EN-P - March 2020...
- Page 264 Chapter 4 Commissioning Notes: Rockwell Automation Publication 7000L-UM301F-EN-P - March 2020...
-
Page 265: Component Definition And Maintenance
Chapter Component Definition and Maintenance Control / Cabling Cabinet Figure 220 - Control and Cabling Cabinet showing LV Control Panel (AFE Rectifier version shown) Components Low Voltage Control Panel Rockwell Automation Publication 7000L-UM301F-EN-P - March 2020... - Page 266 Component Definition and Maintenance Figure 221 - AFE Control and Cabling Cabinet (with LV Control Panel removed) Hall-Effect Sensor Motor Terminals Voltage Sensing Hall-Effect Sensor Current Transformer Line Terminals Surge Arresters Current Transformer Rockwell Automation Publication 7000L-UM301F-EN-P - March 2020...
- Page 267 Component Definition and Maintenance Chapter 5 Figure 222 - 18 Pulse Control and Cabling Cabinet (with LV Control Panel removed) Hall-Effect Sensor Motor Terminals Voltage Sensing Transient Suppression Networks Hall-Effect Sensor Line Terminals Current Transformers Rockwell Automation Publication 7000L-UM301F-EN-P - March 2020...
-
Page 268: Voltage-Sensing Assembly
Failure to do so may result in injury or death. 2. Mark the position of the ribbon cables and wires. Rockwell Automation Publication 7000L-UM301F-EN-P - March 2020... -
Page 269: Input Transient Protection
Input transient protection is provided in two forms: • Transient Suppression Network (TSN), or • Surge Arresters The TSN is optimized for 6P and 18 Pulse rectifier designs. Surge Arresters are optimized for AFE and D2D rectifier designs. Rockwell Automation Publication 7000L-UM301F-EN-P - March 2020... -
Page 270: Transient Suppression Network (Tsn)
This can be seen in Figure 224. Figure 224 - Typical MOV V-I Characteristic Curve Short High Circuit Resistance Voltage Clamping Region Region Region VOLTAGE (VOLTS) CURRENT (AMPERES) - log scale Rockwell Automation Publication 7000L-UM301F-EN-P - March 2020... -
Page 271: Mov Fuse
MOV performance and protection. Do not substitute other fuses without contacting the factory first. Voltage sensing occurs after the MOV fuse, and as a result open fuses will be detected in drive control as a Master or Slave Undervoltage or Unbalance. Rockwell Automation Publication 7000L-UM301F-EN-P - March 2020... -
Page 272: Transient Suppression Network Fuse Replacement
3. To replace the fuse, hold it in position and push firmly until the fuse is seated within the fuse clip. Install fuses so that the rating is visible. Make sure to replace the fuse with another of the same rating. (See IMPORTANT Figure 226 for location.) Rockwell Automation Publication 7000L-UM301F-EN-P - March 2020... -
Page 273: Metal-Oxide Varistor Replacement
Failure to do so may result in injury or death. 2. Observe the locations of the connecting links. 3. Detach the connecting links by removing the screws. 4. Using a screwdriver remove the screws at the base. Rockwell Automation Publication 7000L-UM301F-EN-P - March 2020... -
Page 274: Surge Arresters
Maximum Continuous Operating Voltage (MCOV) rating. There are three Y-connected surge arresters attached to the incoming MV lines. The neutral point of the arresters is connected to the ground bus. Rockwell Automation Publication 7000L-UM301F-EN-P - March 2020... -
Page 275: Operation
When the incoming energy exceeds the handling capability of the arrester and causes arrester failure, the housing is designed to split open to vent without causing damage to any adjacent components. Rockwell Automation Publication 7000L-UM301F-EN-P - March 2020... -
Page 276: Surge Arrester Replacement
7. Replace the surge arrester with an equivalent one (make sure that the voltage rating is the same). 8. Connect the leads to the surge arrester. 9. Surge arrester hardware to be torqued to 28 Nm (21ft/lb). Figure 228 - Surge Arresters Surge Arresters Rockwell Automation Publication 7000L-UM301F-EN-P - March 2020... -
Page 277: Field Test And Care
5. Place the new capacitor and tighten the screws securely. 6. Replace the ring lugs and 6.4-mm (1/4 inch) hardware. (See Figure 229) The maximum torque for the capacitor terminal is 3.4 Nm (30 lb-in). IMPORTANT Rockwell Automation Publication 7000L-UM301F-EN-P - March 2020... - Page 278 Figure 229 - Capacitor in Grounding Network Important ! Torque on capacitor terminals 3.4 N-m (30 lb-in) Loosen screws to release capacitor Figure 230 - Location of Ground Filter in “C” Frame Drive Reactor Transformer Capacitors Resistor Bank Rockwell Automation Publication 7000L-UM301F-EN-P - March 2020...
-
Page 279: Ground Filter Replacement
5. Assemble the new component in the reverse order of disassembly. 6. Reattach the leads strictly adhering to the torque requirements outlined in Figure 229) IMPORTANT The maximum torque for the capacitor terminal is 3.4 Nm (30 lb-in). Rockwell Automation Publication 7000L-UM301F-EN-P - March 2020... -
Page 280: Hall Effect Sensor Replacement
7. Slide the bus bar back into place and secure with the M10 hardware. 8. Fasten the ring lugs on the wires back into place in the correct position. Do not overtighten or you will break the threaded stud. Rockwell Automation Publication 7000L-UM301F-EN-P - March 2020... -
Page 281: Current Transformer Replacement
5. Remove the four screws located in the base of the CT and remove. 6. Replace the CT, ensuring the proper orientation. Fasten the CT securely with the four screws in the base. Rockwell Automation Publication 7000L-UM301F-EN-P - March 2020... -
Page 282: Filter Capacitor Cabinet
The capacitors are equipped with internal “bleeding resistors” to discharge the capacitor and reduce its voltage below 50V in 5 minutes when left disconnected. A typical three-phase capacitor is shown in Figure 235: Rockwell Automation Publication 7000L-UM301F-EN-P - March 2020... - Page 283 Do not reset these faults until you have determined the root cause of the fault. Operating a synchronous transfer system (specifically during the ‘Transfer to Drive’ operation, also known as the de-sync operation) with a non-operational MFC can lead to serious personal injury and/or property damage. Rockwell Automation Publication 7000L-UM301F-EN-P - March 2020...
-
Page 284: Filter Capacitor Replacement
8. There are instruction labels on each capacitor detailing how to tighten the terminal connections. Please refer to these labels. 9. Reinstall the sheet metal that was removed, and complete one final check to ensure connections are secure and correct. Rockwell Automation Publication 7000L-UM301F-EN-P - March 2020... -
Page 285: Testing Filter Capacitors
For a good capacitor, the calculated capacitance value for each of the three readings should be within ±10% of the capacitor nameplate micro-Farad. If it is outside this range then the capacitor must be replaced. Rockwell Automation Publication 7000L-UM301F-EN-P - March 2020... - Page 286 § 1 2 3.14 § ¥ ¥ ¥ 106.95 29.7μF Where, f = frequency of the applied voltage. Similarly, you can calculate the capacitance for the remaining two measurements for L2-N and L3-N. Rockwell Automation Publication 7000L-UM301F-EN-P - March 2020...
-
Page 287: Converter Cabinet Components
Component Definition and Maintenance Chapter 5 Converter Cabinet Components Figure 236 - Converter Cabinet Components (4160V AFE shown) Ground Bus Inverter Modules Coolant Piping Isolated Gate Driver Power Supplies (IGDPS) Rectifier Modules Rockwell Automation Publication 7000L-UM301F-EN-P - March 2020... - Page 288 Chapter 5 Component Definition and Maintenance Figure 237 - Converter Cabinet Components (6600V AFE shown) Ground Bus Inverter Modules Isolated Gate Driver Power Supplies (IGDPS) Rectifier Modules Rockwell Automation Publication 7000L-UM301F-EN-P - March 2020...
-
Page 289: Converter Cabinet
Unlike the air-cooled drive, thermal sensors are not installed on the chill block. The thermal sensor is located in the pump cabinet. PowerCage Assembly A PowerCage™ assembly is a Rockwell Automation patented converter module, consisting of the following elements: • Epoxy resin housing •... - Page 290 Outlet Manifold Clamp Head Inlet Manifold Clamp Base Module Housing Figure 239 - 6-Device PowerCage Matched Set 3 SGCTs Matched Set 3 SGCTs Outlet Manifold Clamp Head Inlet Manifold Module Housing Clamp Base Rockwell Automation Publication 7000L-UM301F-EN-P - March 2020...
-
Page 291: Sgct And Snubber Circuit
The force placed on the SGCTs differs with the size of the device. A 63-mm device (1500A) requires 20 kN. The clamp assembly on the right hand side of the inverter module generates these forces. Rockwell Automation Publication 7000L-UM301F-EN-P - March 2020... -
Page 292: Checking Clamping Pressure
Never rotate the calibration nut located outside the indicating washer IMPORTANT at the end of the threaded rod. The rotation of the calibration nut will affect the torque calibration, which is factory set. Only adjust the adjusting nut. (See Figure 242.) Rockwell Automation Publication 7000L-UM301F-EN-P - March 2020... -
Page 293: Symmetrical Gate Commutated Thyristor Replacement
• 4160V systems use sets of 2 • 6600V systems use sets of 3 SGCTs can be removed and replaced without interrupting the cooling fluid path. To remove SGCTs, the following procedure is to be employed: Rockwell Automation Publication 7000L-UM301F-EN-P - March 2020... - Page 294 3. To remove the SGCT, it is necessary to remove the gate driver power cable and fiber optic cables. Exceeding the minimum bend radius (50 mm [2 in.]) of the fiber optic cables may result in damage. Rockwell Automation Publication 7000L-UM301F-EN-P - March 2020...
- Page 295 SGCTs come in matched sets in systems with more than one device per IMPORTANT leg. When replacing the device, it is necessary to replace all devices in the matched set even if only one has failed. Rockwell Automation Publication 7000L-UM301F-EN-P - March 2020...
-
Page 296: Board Replacement
Gate Driver Power Supply connector (from snubber circuit), the fiber optic cable, and the SCR gate-cathode connection. Exceeding the minimum bend radius (50 mm/2 in.) of the fiber optic cables may result in damage. Rockwell Automation Publication 7000L-UM301F-EN-P - March 2020... - Page 297 Examine the pole face before proceeding to ensure that no brush bristles remain. Too much joint compound may result in contamination of other IMPORTANT surfaces leading to system damage. Rockwell Automation Publication 7000L-UM301F-EN-P - March 2020...
- Page 298 17. Readjust the clamping load as described in Checking Clamping Pressure on page 292. 18. Connect the control power cable and the fiber optic cables, ensuring that the bend radius is not exceeded. Rockwell Automation Publication 7000L-UM301F-EN-P - March 2020...
-
Page 299: Silicon Controlled Rectifier And Scr Self-Powered Gate Driver
Personnel must wear suitable protective personal gear to avoid direct contact with the coolant (ethylene glycol – water mixture). 5. Two flow restrictor clamps per Figure 247 are provided with the spare parts kit of each drive. Rockwell Automation Publication 7000L-UM301F-EN-P - March 2020... - Page 300 Figure 248 - Flow Stopper for Servicing (2 required) 6. Insert the 2 clamps per Figure 249 on the 3/4-inch (19-mm) silicon hoses to isolate flow between the vertical manifolds and the horizontal manifolds of the converter modules. Rockwell Automation Publication 7000L-UM301F-EN-P - March 2020...
- Page 301 251, insert the hose plug on the hose barb of the upper manifold. Insert a M10 bolt in the end of the chill block hose. Note that there may still be limited fluid leakage during this procedure. Rockwell Automation Publication 7000L-UM301F-EN-P - March 2020...
- Page 302 PowerCage per Chill Block Removal and Replacement on page 303. Figure 252 - Cooling System Matched Set 2 SGCTs Matched Set 2 SGCTs Outlet Manifold Clamp Head Inlet Manifold Module Housing Clamp Base Rockwell Automation Publication 7000L-UM301F-EN-P - March 2020...
-
Page 303: Reconnecting The Coolant System To A Powercage Module
A grounding wrist strap is recommended for handling. 3. Detach coolant hoses from upper and lower manifolds. This procedure is more clearly explained in Detachment of Coolant System from PowerCage Modules on page 299. Rockwell Automation Publication 7000L-UM301F-EN-P - March 2020... -
Page 304: Instructions For Inserting Chill Block Assembly
If the stabs are not seated properly in the brackets, damage can occur. Measure the snubber resistance and sharing resistance to ensure that contact has been made. If rear access to the drive is available, remove backplates and visually verify. Rockwell Automation Publication 7000L-UM301F-EN-P - March 2020... -
Page 305: Powercage Removal And Replacement
Torque bolts alternately on one flange and then the opposite flange to ensure even tightening of the module. A suggested sequence for torquing PowerCage bolts is shown in Figure 254. Rockwell Automation Publication 7000L-UM301F-EN-P - March 2020... -
Page 306: Snubber Resistors
The snubber resistors are connected as sets of thick film resistors. The number of resistors depends on the type of the semiconductor and the configuration and frame size of the drive. Rockwell Automation Publication 7000L-UM301F-EN-P - March 2020... -
Page 307: Testing Snubber Resistors
0 Ω for a complete short, but SGCT can fail when partially shorted. Sharing resistors provide equal sharing of the voltage when matched devices are used in series. Sharing resistors in SCR PowerCages provide a diagnostic function. Rockwell Automation Publication 7000L-UM301F-EN-P - March 2020... -
Page 308: Testing Sharing Resistors
The red wire of the plug is the sharing resistor. Measure the resistance between the red wire of the plug and the chill block to the left (the anode chill block). A value of approximately 80 kΩ indicates a healthy sharing resistor. Rockwell Automation Publication 7000L-UM301F-EN-P - March 2020... -
Page 309: Snubber And Sharing Resistor Replacement
The number of snubber resistors varies with the size of drive and application. Shown below is a three-snubber resistor configuration. There can be up to 5 snubber resistors on each chill block. Rockwell Automation Publication 7000L-UM301F-EN-P - March 2020... - Page 310 9. Install the chill block assembly as described in Chill Block Removal and Replacement on page 303. Readjust the clamping load as described in Checking Clamping Pressure on page 292. 10. Verify the snubber and sharing resistances. Rockwell Automation Publication 7000L-UM301F-EN-P - March 2020...
-
Page 311: Snubber Capacitor Replacement
Figure 259 - Rear View of 7000L PowerCage 13 mm Socket M8 Bolt 5/16 in. Lock Washer 5/16 in. Flat Washer Electrical Leads 17 mm Flange M8 Hardware Location 6. Bundle and secure the connecting wires using wire ties. Rockwell Automation Publication 7000L-UM301F-EN-P - March 2020... -
Page 312: Self-Powered Gate Driver Board - Spgdb
The power source for the SPGDB is from the snubber network of the SCR, a patent pending design of Rockwell Automation. This unique design gives the SPGDB the ability to conserve the amount of energy that it supplies to the SCR. This reduces the amount of energy required by the drive to operate, thus making the drive more efficient. -
Page 313: Terminal/Connections Description
TB3-2 – Provides artificial sense voltage signal to allow SPGDB to gate the SCR when in test mode. When the appropriate test power cable is used, P/N 81001- 262-51, this input is shorted to TB3-1 to obtain the sense voltage. Rockwell Automation Publication 7000L-UM301F-EN-P - March 2020... -
Page 314: Testing Procedure For Scr Self-Powered Gate Driver Board
13. Measure TP8 to TP3, which should be 0V. 14. Measure TP1 to TP2, which should be 0V. 15. Connect a jumper between TB3-1 and TB3-2 and verify that the voltage at TP6 is +2.2V, ±100mV. Rockwell Automation Publication 7000L-UM301F-EN-P - March 2020... - Page 315 Note that in Figure 265 there should be a 220 μS, ±20 μS time between the rising edge of the U4-pin7 pulse and the falling edge of the TP7 signal. Figure 261 - Gating pulses Rockwell Automation Publication 7000L-UM301F-EN-P - March 2020...
- Page 316 Chapter 5 Component Definition and Maintenance Figure 262 - SCR gating pulse Figure 263 - Expanded SCR gating pulse Rockwell Automation Publication 7000L-UM301F-EN-P - March 2020...
- Page 317 Component Definition and Maintenance Chapter 5 Figure 264 - V Sense Trigger to SCR gating pulse Figure 265 - Expansion of V Sense Trigger to SCR gating pulse Rockwell Automation Publication 7000L-UM301F-EN-P - March 2020...
-
Page 318: Fiber Optic Cabling
The color codes of the connectors are: • BLACK or GREY – is the transmitting end of the fiber optic. • BLUE – is the receiving end of the fiber optic. Rockwell Automation Publication 7000L-UM301F-EN-P - March 2020... - Page 319 MV power is locked-out. The DC Link is part of the cooling circuit for the PowerFlex 7000L “C” Frame drive, and has 2 inlets and 2 outlets for coolant flow. Rockwell Automation Publication 7000L-UM301F-EN-P - March 2020...
-
Page 320: Dc Link Reactor
6. Remove the hardware that secures the DC Link to the ground channels. 7. Remove the DC Link frame ground connection. 8. Using a lift truck, remove the DC Link from the cabinet. 9. Install the replacement in the reverse order. Rockwell Automation Publication 7000L-UM301F-EN-P - March 2020... - Page 321 The nameplate data must be compared to the old DC Link to ensure that the ratings are appropriate for the drive system. Any changes in the nameplate should be noted since the parameters within the drive will need to be changed. Rockwell Automation Publication 7000L-UM301F-EN-P - March 2020...
-
Page 322: Control Power Components
460V 60Hz Reactor 3-ph 20V Isolated Gate Driver Power Supp ly Figure 269 illustrates the control power distribution for 6-pulse and AFE drives with remote transformer/starter or integrated line reactor with remote starter. Rockwell Automation Publication 7000L-UM301F-EN-P - March 2020... -
Page 323: Ac/Dc Power Supply
Figure 270 - AC/DC Converter Power Supply DC/DC Power Single phase Supply 95-265V ac AC/DC 47-63 Hz Power Supply 0.98PF @1000W or 56V,1000W or 1500W 0.98PF@1500W HV IGDPS Power Supply DC Fail Rockwell Automation Publication 7000L-UM301F-EN-P - March 2020... -
Page 324: Location
The AC/DC power supply is located in the low voltage panel in the far right- hand section of the drive. A typical low voltage compartment is shown in Figure 271. Figure 271 - Location of AC/DC Pioneer Power Supply on Low Voltage Panel AC/DC Power Supplies (Pioneer) Rockwell Automation Publication 7000L-UM301F-EN-P - March 2020... -
Page 325: Terminal / Connections Descriptions
When all adjustments are complete, reconnect the power supply to the circuit and remeasure the output. Readjust if necessary. If it is not possible to maintain 56 V DC, the power supply may be faulty. Rockwell Automation Publication 7000L-UM301F-EN-P - March 2020... -
Page 326: Replacement Procedure
273). 8. Reapply control power and verify voltage levels. Figure 273 - Replacement of AC/DC Power Supply on Low Voltage Panel AC/DC Power Supply Power Supplies (Optional) Power Transformer Fuse Blocks Hold-up Capacitors Rockwell Automation Publication 7000L-UM301F-EN-P - March 2020... -
Page 327: Ups Option
UPS status. The firmware will operate in the same manner with respect to the operation of the drive with an internal or external UPS. Rockwell Automation Publication 7000L-UM301F-EN-P - March 2020... -
Page 328: Ups Replacement Procedure
7. Before reconnecting the mounting bracket, apply control power to the unit and ensure the UPS is programmed for AS400 communication protocol. Refer to the manual that comes with the UPS for instructions. 8. Once this has been confirmed, install the mounting bracket. Rockwell Automation Publication 7000L-UM301F-EN-P - March 2020... -
Page 329: Cooling System
Component Definition and Maintenance Chapter 5 Cooling System Figure 275 - Generic Cooling System Overview Rockwell Automation Publication 7000L-UM301F-EN-P - March 2020... -
Page 330: Cooling Circuit
Ensure that the pumps never run dry, as this will damage the pump seals. Ensure the pumps are not excessively noisy (pumping air pockets) when filling the system. Rockwell Automation Publication 7000L-UM301F-EN-P - March 2020... -
Page 331: Pump Maintenance And Replacement
Damage to the pump seals may result. Refer to pump nameplate for manufacturer's model information. Typical pump seal replacement information is provided at manufacturers websites. Figure 277 - Pump Cabinet Rockwell Automation Publication 7000L-UM301F-EN-P - March 2020... -
Page 332: Pump Replacement With Drive Running
Control Program setup. A pump may be replaced during drive operation by following the instruction sheet PowerFlex 7000C LIQUID COOLED SYSTEM OPERATION attached to the inside of the pump cabinet door. Rockwell Automation Publication 7000L-UM301F-EN-P - March 2020... - Page 333 Isolate power to motor and interchange two motor leads to reverse motor direction. 9. Operate pump for 5 seconds. Ensure pressure gauge shows an increase of pressure with two pumps operating. 10. Place pump selector switch to Auto. Rockwell Automation Publication 7000L-UM301F-EN-P - March 2020...
-
Page 334: Piping, Tubing And Connectors
CPVC. These can not be changed with the drive on-line. All coolant must be drained to replace these parts. Figure 279 - Pressure Indicator and Switch Locations Pressure Switch PS Pressure Indicator PI From P2 From P1 Rockwell Automation Publication 7000L-UM301F-EN-P - March 2020... -
Page 335: Pressure Indicator
The mark C flange will be in upper direction, and mark B flange will be in the bottom direction. 3. First unbolt flange A and B. Unbolt flange C, which is in upper direction, at the end. Rockwell Automation Publication 7000L-UM301F-EN-P - March 2020... -
Page 336: Repair Instructions - Element Testing
4. Lubricate the new element seal and slide it in place over top of the element assembly into position shown in section view. 5. Place new housing gasket in recess of upper housing. Rockwell Automation Publication 7000L-UM301F-EN-P - March 2020... -
Page 337: Heat Exchanger
38 °C (100 °F). The secondary fan will start when the temperature reaches 44 °C (110 °F). Figure 282 - Typical Liquid-to-Air Heat Exchanger Coolant Inlet Coolant Outlet Rockwell Automation Publication 7000L-UM301F-EN-P - March 2020... -
Page 338: Fluid Conductivity
The following are the temperature values for alarm and trip signal: 1. When coolant temperature is greater than 48 °C (120 °F), an alarm signal is initiated. It can only be reset when temperature reaches 38 °C (100 °F). Rockwell Automation Publication 7000L-UM301F-EN-P - March 2020... -
Page 339: De-Ionizing Cartridge And Mesh Filter
The de-ionizing cartridge is a mixed-bed cartridge type, which can be disassembled easily for de-ionizing cartridge replacement. Figure 284 - Deionizer Reservoir Circuit Vent Button Deionizer Cartridge Filter FIL1 Flow Restrictors Reservoir Filter FIL2 Rockwell Automation Publication 7000L-UM301F-EN-P - March 2020... -
Page 340: Replacing The Mesh Filters
3. The filter may be cleaned or replaced, however the de-ionizing cartridge must be discarded and replaced with a new one. Do not recycle the resin cartridge. It has been contaminated with ethylene glycol. Rockwell Automation Publication 7000L-UM301F-EN-P - March 2020... -
Page 341: Reservoir Circuit
3. Open V2 and V3 slowly to avoid a rush of air into the pumps. The air will gradually be purged from the system by flowing through the reservoir. 4. Close valve V1. Rockwell Automation Publication 7000L-UM301F-EN-P - March 2020... -
Page 342: Coolant
Most bacteria and organic materials offer few stepping stones for current, so if the ionized solids and gases are removed, the water becomes relatively non-conductive. Rockwell Automation Publication 7000L-UM301F-EN-P - March 2020... -
Page 343: Maintaining Coolant Ratio
Adjust the freeze temperature of the coolant mixture to -45 °C (-50 °F) using this method. 5. Add either substance in small quantities and measure the freezing temperature after each addition until desired freezing temperature is achieved. Rockwell Automation Publication 7000L-UM301F-EN-P - March 2020... -
Page 344: Leakage Checks
No matter how well you drain the system with the pumps, be aware that there will be liquid in the tubes, manifolds, and chill blocks. This requires special care in Rockwell Automation Publication 7000L-UM301F-EN-P - March 2020... -
Page 345: System Drain
Figure 287 - Low Voltage Compartment Analog Control Board ANALOG CONTROL BOARD Fiber Optic Interface Boards Tach Feedback Circuit Board DC/DC Drive Processor Power Module (DPM) Supply Rockwell Automation Publication 7000L-UM301F-EN-P - March 2020... -
Page 346: Dc/Dc Power Supplydescription
+5V rail. There are two separate +5V outputs, each capable of powering the logic boards. In the event of one failing, the other power supply will be automatically switched in to provide the output power. Rockwell Automation Publication 7000L-UM301F-EN-P - March 2020... -
Page 347: Terminal/Connections Descriptions
+24V_XIO (+24V,2A) +24V,2A/com3 XIO_COMM (com3) 0V/com3 +HECSPWR (+24V,1A) +24V,1A/com2 LCOMM (com2) 0V/com2 –HECSPWR -24V,1A/com2 (-24V,1A) +15V_PWR (+15V,1A) +15V,1A/com1 ACOMM (com1) 0V/com1 –15V_PWR (-15V,1A) -15V,1A/com1 +5V_PWR (+5V,5A) +5V,10A/com1 DGND (com1) 0V/com1 EARTH earth ground Rockwell Automation Publication 7000L-UM301F-EN-P - March 2020... -
Page 348: Replacement Procedure For Dc/Dc Power Supply
Figure 289 - Replacement of DC/DC Power Supply M4 (P.H.M.S.) and nylon shoulder washer Mounting plate Black insulation Part ID label DC/DC power supply VIEW “2” DC Power good indicator light M6 (H.H.T.R.S.) VIEW “1” Rockwell Automation Publication 7000L-UM301F-EN-P - March 2020... -
Page 349: Printed Circuit Board Replacement
SPEE D POT POWER INPUT MONITORING AIR PRESS URE INPUTS GROUND FAULT & ISOLATED & NON-ISOLATED MOTOR DCLINK CMC NEUTRAL ANALOG INPUTS AND LINE CURRENT INPUTS CURRENT CURRENT CURR ENT INPUTS NON-ISOLATED OUTPUTS INPUTS INPUTS Rockwell Automation Publication 7000L-UM301F-EN-P - March 2020... -
Page 350: Drive Processor Module
This module contains the control processors. It is responsible for all the drive control processing and stores all of the parameters used for the drive control. Figure 291 - Drive Processor Module (DPM) Rockwell Automation Publication 7000L-UM301F-EN-P - March 2020... - Page 351 POST – NVRAM Failed 4 Count POST – DPRAM Failed 8 Count FPGA Loading Failed 9 Count POST – USART Failed: 1 Green Count = Port 1 2 Green Count = Port 2 Rockwell Automation Publication 7000L-UM301F-EN-P - March 2020...
-
Page 352: Drive Processor Module Replacement
8. Remove the DIM module from the DPM and plug it on the new DPM before the replacement of DPM. 9. Follow Steps 7 – 3 in reverse to re-install the boards back into the low voltage control cabinet. Rockwell Automation Publication 7000L-UM301F-EN-P - March 2020... - Page 353 NVRAM and then externally to the drive using the options described earlier in this section. Figure 292 - ACB and DPM Replacement Analog Control Board (ACB) ANALOG CONTROL BOARD Rockwell Automation Publication 7000L-UM301F-EN-P - March 2020...
-
Page 354: Acb Analog Control Board
Analog I/O, External Fault signals (through the XIO board), DPI communication modules, Remote I/O, terminal interface, printers, modem, and other external communication devices are routed through this board. Figure 293 - ACB Analog Control Board Rockwell Automation Publication 7000L-UM301F-EN-P - March 2020... - Page 355 AC Motor & Line voltage feedback inputs ACB-J28 Encoder interface ACB-J30 DPM connection, A/D SUB system ACB-J31 DPM connection, DACs serial data ACB-J32 DPM power supply, +5V ACB-J33 DPM connection, Faults & other I/O ACB-J34 DPM connection, Encoder Rockwell Automation Publication 7000L-UM301F-EN-P - March 2020...
- Page 356 Line Voltage Feedback, 4UV TP35 V4vw Line Voltage Feedback, 4VW TP36 V4wu Line Voltage Feedback, 4WU TP37 Line current, CT4U TP38 Line current, CT4W TP39 Vzs4 Zero Sequence Generation Line side, VZS4 (spare one) Rockwell Automation Publication 7000L-UM301F-EN-P - March 2020...
- Page 357 AIN3 Analog Control Input, AIN3 TP74 IPIS Input Isolating Switch TP75 IPCS Input Contactor Status TP76 Input Contactor Command TP77 OPIS Output Isolating Switch TP78 OPCS Output Contactor Status TP79 Output Contactor Command Rockwell Automation Publication 7000L-UM301F-EN-P - March 2020...
-
Page 358: Leds
Analog Inputs and Outputs The PowerFlex 7000 “C” Frame offers one isolated process current loop transmitter and three isolated process current loop receivers, embedded into the control. These are accessible on the ACB. Rockwell Automation Publication 7000L-UM301F-EN-P - March 2020... -
Page 359: Current Loop Transmitter
4-20 mA signal. When configured for voltage input, each channel has an input impedance of 75 Kohms. When used as a current loop input, the transmitter must have a minimum loop compliance of 2 volts to satisfy the 100 Rockwell Automation Publication 7000L-UM301F-EN-P - March 2020... -
Page 360: Non-Isolated Process Outputs
Drive AGND and therefore should be isolated if they are required to drive outside the PowerFlex “C” frame enclosure. Figure 297 - Non-Isolated Configurable Analog Outputs on ACB IFM Pin# FPGA 27,31,35,39 Analog Output 25,29,33,37 28,32,36,40 Rockwell Automation Publication 7000L-UM301F-EN-P - March 2020... -
Page 361: Auxiliary +24V Power Supply
9. Follow Steps 8 – 2 in reverse to reinstall the boards back into the low voltage control cabinet. 10. Apply Low Voltage power and complete a System Test and Medium Voltage tests to ensure the new board functions properly. Rockwell Automation Publication 7000L-UM301F-EN-P - March 2020... -
Page 362: Tachometer Feedback Board
Acceptable outputs are Analog Line Driver or Push Pull. 2. The drive will not operate properly if using single ended Quadrature encoders. Rockwell Automation recommends using differential inputs only for these types of encoders. Single ended outputs are only acceptable for Positional Encoders. - Page 363 “Installed”. The following table describes the functions available. ATTENTION: Removing the Universal Encoder Interface while control power is applied may result in damage to the board. Only remove the board when the control power is Off. Rockwell Automation Publication 7000L-UM301F-EN-P - March 2020...
- Page 364 The connections to the IFM are as follows: Table 26 - Encoder Functions IFM Pin # Quadrature Encoder Function Absolute Encoder Function ENC_COM ENC_COM A2+ (Redundant or Dual ENC) A2- (Redundant or Dual ENC) ENC_COM ENC_COM Rockwell Automation Publication 7000L-UM301F-EN-P - March 2020...
-
Page 365: Quadrature Encoder Operation
Boards shipped from the factory come defaulted to single quadrature encoder configuration. For dual encoder configurations, the primary encoder is wired to pins 1 to 7 on the 1492-IFM20 module. (See Table 26). (1) Consult factory for availability of dual Quadrature Encoder options. Rockwell Automation Publication 7000L-UM301F-EN-P - March 2020... -
Page 366: Positional Encoder Operations
No inversion is done on the input data. 4. Natural Binary, High True. The positional data is simply converted to the serial stream. No inversion or conversion is done on the data. (1) Consult factory for availability of Positional Encoders Rockwell Automation Publication 7000L-UM301F-EN-P - March 2020... -
Page 367: Positional Encoder Guidelines
For example if the Universal Encoder Interface is configured to operate with High True encoders (POL_QRDNT installed), remove it to correct for encoder mounting. Rockwell Automation Publication 7000L-UM301F-EN-P - March 2020... -
Page 368: External Input/Output Boards
Link A is used for “upstream”, that is, closest to the ACB, and Link B is used for “downstream” or farthest from the ACB. LED D1 and display U6 indicate the status of the board. The following table illustrates the possible states for D1. Rockwell Automation Publication 7000L-UM301F-EN-P - March 2020... -
Page 369: External Input/Output Board Replacement
5. Install the new XIO board assembly in the low voltage control cabinet. 6. Reconnect all connections and verify the locations. 7. Apply Low Voltage power and complete a System Test and Medium Voltage tests to ensure the new board functions properly. Rockwell Automation Publication 7000L-UM301F-EN-P - March 2020... -
Page 370: Optical Interface Boards (Oib)
Each OIB board also has input RX7 for a signal from a Temperature Feedback Board. The quantity and location of thermistor connections is dependant on the drive configuration. Typically there is one temperature sensor from the Line Rockwell Automation Publication 7000L-UM301F-EN-P - March 2020... -
Page 371: Optical Interface Board Replacement
6. Reconnect all fiber optic connections and verify the locations. 7. Apply Low Voltage power and complete a Gating Test, System Test and Medium Voltage tests to ensure the new board functions properly. Rockwell Automation Publication 7000L-UM301F-EN-P - March 2020... - Page 372 Chapter 5 Component Definition and Maintenance Figure 303 - OIB Replacement (Mounting Plate Accessible) Optical Interface Boards (OIB) Rockwell Automation Publication 7000L-UM301F-EN-P - March 2020...
-
Page 373: Optical Interface Base Board (Oibb)
J8. The remaining connectors on the board complete the electrical connection of the installed OIBs to the DPM. Each OIB can support from one to three OIBs. Figure 304 - Optical Interface Base Board (OIBB) Rockwell Automation Publication 7000L-UM301F-EN-P - March 2020... -
Page 374: Optical Interface Base Board Test Points
Ground Reference for TP16 – TP28 TP30 DIAG_12 OIB C, RX1 Diagnostic Feedback TP31 CMD_12 OIB C, TX1 Firing Command Signal TP32 DIAG_13 OIB C, RX2 Diagnostic Feedback TP33 CMD_13 OIB C, TX2 Firing Command Signal Rockwell Automation Publication 7000L-UM301F-EN-P - March 2020... -
Page 375: Downloading Firmware
Ensure the parameters are saved to NVRAM, and saved to the Operator Interface Terminal, and saved to any other external source such as the Flash Card, DriveTools, or printed to a hardcopy. Rockwell Automation Publication 7000L-UM301F-EN-P - March 2020... - Page 376 The parameters should now be saved to NVRAM. Press F10 again to EXIT. Figure 306 - Save to NVRAM To save to the Operator Interface Terminal and Flash Card, Press F2 (UTILITY), F7 (TRANSFER), and F4 (PARAMETERS). You should now be on the following screen: Rockwell Automation Publication 7000L-UM301F-EN-P - March 2020...
- Page 377 Press F8 for YES, and the parameters will be transferred to the card. Press F10 to EXIT. Here is a typical pin out of a complete null-modem cable. Essentially, only 3 pins (2, 3 and 5) are all that is required. Rockwell Automation Publication 7000L-UM301F-EN-P - March 2020...
-
Page 378: Powerflex 7000 In Download Mode
There are two status LEDs (D9 and D11) on the DPM, which provides indication of the programming process. The following illustrates the states of the LED: Rockwell Automation Publication 7000L-UM301F-EN-P - March 2020... - Page 379 If you press any Key after this message the PanelView will show “Communication Error”. Connect your PC to the DPM data port J4. Locate the PowerFlex 7000 Medium Voltage Drive firmware file “PF7KFirmware7001_G.exe” and double-click to download the file. Rockwell Automation Publication 7000L-UM301F-EN-P - March 2020...
- Page 380 Firmware and click OK. This will start the process of the downloading of firmware, attempting connection to the drive. The following screen is displayed: Figure 313 - FORGE Download Utility Rockwell Automation Publication 7000L-UM301F-EN-P - March 2020...
-
Page 381: Reloading The Parameters
F8 for YES. The parameters will then be transferred. There are differences between parameters for different revision levels, so you may get some errors, and a Transfer Incomplete message. Rockwell Automation Publication 7000L-UM301F-EN-P - March 2020... -
Page 382: Setting Elapsed Time
8. Remove the laptop and reconnect the Terminal to ACB (Port-J12) and turn on power to the Terminal. 9. After the Terminal is powered up, you should be able to see the actual operating hours on the main screen. Rockwell Automation Publication 7000L-UM301F-EN-P - March 2020... -
Page 383: Downloading The Terminal Firmware
You can rename the file, but keep the filename extension as .FMW. Also, when you are prompted to enter the filename, make sure you enter the correct filename as illustrated in the following example. Rockwell Automation Publication 7000L-UM301F-EN-P - March 2020... -
Page 384: Method
In the PowerFlex 7000 drive with ForGe control, the maximum number of parameters that can be assigned for trending is 16. The length of the trend buffer is 100 samples. Rockwell Automation Publication 7000L-UM301F-EN-P - March 2020... -
Page 385: Diagnostic Setup
You can reset the Alarm or Fault in the drive, but don’t Re-Arm the trend until you print (upload) the trend data into your laptop. Print the Alarm Queue as well, so that you know which alarm or fault condition was detected by the drive. Rockwell Automation Publication 7000L-UM301F-EN-P - March 2020... - Page 386 2. Press F8 [D_SETUP]. The display will change to ‘Diagnostics Setup’ screen as shown in the picture below. Figure 318 - Diagnostics Setup 3. With Trace-1 selected, press Enter key as shown in the picture below. Figure 319 - Trace-1 Rockwell Automation Publication 7000L-UM301F-EN-P - March 2020...
- Page 387 (i.e., we will enter the Code). For this follow the steps outlined below. Figure 320 - Select Group 5. Press F7 [LIST]. The display will change to ‘Select Letter’ screen as shown in the picture below. Figure 321 - Select Letter Rockwell Automation Publication 7000L-UM301F-EN-P - March 2020...
- Page 388 Trace 1. Now, press the down arrow key to move the cursor to Trace 2 and repeat steps 3 – 8 above to assign a parameter to Trace 2. Figure 324 - Diagnostics Setup with Parameters Rockwell Automation Publication 7000L-UM301F-EN-P - March 2020...
- Page 389 Figure 325 - Trigger Condition 12. Press F3 [DATA] key. The cursor moves to the data field. In our example we will enter 8 and then press Enter key. Figure 326 - Data Screen Rockwell Automation Publication 7000L-UM301F-EN-P - March 2020...
- Page 390 ‘Diagnostics’ screen, verify that the Status is ‘Running”, which means the Diagnostic Trend is ready and will capture the data whenever the trigger condition is satisfied. If the Status shows ‘Stopped’ then press F7 [Re-Arm] key. This will change the Status to Running. Rockwell Automation Publication 7000L-UM301F-EN-P - March 2020...
-
Page 391: Printing (Uploading) Data From The Drive
2-3 swapped at one end will also work) Here is a typical pin out of a complete null-modem cable. Essentially, only 3 pins (2, 3 and 5) are all that is required. Rockwell Automation Publication 7000L-UM301F-EN-P - March 2020... -
Page 392: Creating An Empty Notepad (.Txt) File
1. Run NotePad Program (Start → Program → Accessories → Notepad ) Figure 331 - Opening Notepad 2. From the File menu select Save As, as shown below. Figure 332 - Saving in Notepad Rockwell Automation Publication 7000L-UM301F-EN-P - March 2020... - Page 393 Save in at the top of the window. In this example the selected directory is C:\temp. Now, click on Save button. Figure 333 - Enter Filename in Notepad 4. An empty notepad file has been created. So, now close the Notepad program. Rockwell Automation Publication 7000L-UM301F-EN-P - March 2020...
-
Page 394: Setting Up Hyperterminal Connection
OK. Figure 334 - Connection Description 3. Select COM1 from the dropdown list next to ‘Connect Using’ and then click OK, as shown below. Figure 335 - Connect Using Com1 Rockwell Automation Publication 7000L-UM301F-EN-P - March 2020... - Page 395 Figure 337 - Disconnect from HyperTerminal 6. Click Yes. At this point, you will be prompted to save the session. Figure 338 - Save Session Parameters 7. Click Yes to terminate the HyperTerminal program. Rockwell Automation Publication 7000L-UM301F-EN-P - March 2020...
-
Page 396: Uploading The Data From The Drive
Figure 339 - Connection Description - New Connection 3. From the File menu, click Open….At the Open dialog box, locate the HyperTerminal connection you just created in step 2, (e.g. Parameters) and click Open. Figure 340 - Open Parameters file Rockwell Automation Publication 7000L-UM301F-EN-P - March 2020... - Page 397 HyperTerminal now acts as a dummy printer and is waiting for the information to be transmitted from the drive to the laptop. 7. From the drive Terminal, hit F3 (PRINT) at the main screen as shown below: Figure 343 - Terminal Screen Rockwell Automation Publication 7000L-UM301F-EN-P - March 2020...
- Page 398 Example.txt. At your laptop, click on Transfer menu and select Stop option under Capture Text … as shown in the screenshot below. Figure 345 - Stop Capture Text Close the HyperTerminal program and disconnect the laptop from the drive. Rockwell Automation Publication 7000L-UM301F-EN-P - March 2020...
-
Page 399: Printing (Uploading) Control Data
Here is a typical pin out of a complete null-modem cable. Essentially, only 3 pins (2, 3 and 5) are all that is required. Figure 346 - Complete Null-Modem Cable Connect your laptop to the drive using a 9-pin null-modem cable to DPM data port ( J4). Rockwell Automation Publication 7000L-UM301F-EN-P - March 2020... -
Page 400: Set Up Hyperterminal Connection
Figure 347 - Enter Name for New Connection 3. The ‘Connect to’ window will appear as shown below. Select COM1 from the dropdown list next to ‘Connect using’ and then click OK. Figure 348 - Connect to Window Rockwell Automation Publication 7000L-UM301F-EN-P - March 2020... -
Page 401: Printing Control Data
5. Close HyperTerminal program. Click Yes to disconnect and Yes again to save. Printing Control Data 1. Restart HyperTerminal program. 2. At the ‘Connection Description’ window as shown below, click Cancel. Figure 350 - Connection Description, New Connection Rockwell Automation Publication 7000L-UM301F-EN-P - March 2020... - Page 402 Data, select option 4. 6. After selecting the desired option, you need to start the transfer by selecting Receive File … from the Transfer menu as shown below. Figure 352 - Receive File Rockwell Automation Publication 7000L-UM301F-EN-P - March 2020...
-
Page 403: Environmental Considerations
Environmental Hazardous Materials Considerations Environmental protection is a top priority for Rockwell Automation. The facility that manufactured this medium voltage drive operates an environmental management system that is certified to the requirements of ISO 14001. As part of this system, this product was reviewed in detail throughout the development process to ensure that environmentally inert materials were used wherever feasible. - Page 404 (i.e. they will not burn without a sustained external flame). If, however, the drive is subjected to a sustained fire from some other source, some of the polymer materials in the drive will produce toxic gases. As with any fire, Rockwell Automation Publication 7000L-UM301F-EN-P - March 2020...
-
Page 405: Disposal
DI water/glycol solution. It needs to be changed whenever the conductivity warning appears. This occurs when the conductivity increase above 1μS. The DI cartridge cannot be cleaned, it must be replaced. Rockwell Automation Publication 7000L-UM301F-EN-P - March 2020... -
Page 406: Annual Maintenance
Initial Information Gathering Some of the important information to be recorded includes: • Print Drive Setup • Print Fault/Warning Queues • Save Parameters to NVRAM Rockwell Automation Publication 7000L-UM301F-EN-P - March 2020... -
Page 407: Physical Checks
An important component to check for contamination is the heatsink. The fine grooves in the aluminum heatsinks can capture dust and debris. (1) This only needs to recorded if parts have been modified/changed since the last PM activities. Rockwell Automation Publication 7000L-UM301F-EN-P - March 2020... -
Page 408: Control Power Checks (No Medium Voltage)
• Put all equipment in the normal operating mode, and apply medium voltage. • If there were any input or output cables removed, verify the input phasing, and bump the motor for rotation. Rockwell Automation Publication 7000L-UM301F-EN-P - March 2020... -
Page 409: Additional Tasks During Preventive Maintenance
Voltage Readings, Megger Results, Parameters, etc.) • THIS INFORMATION SHOULD BE COMMUNICATED TO MV PRODUCT SUPPORT SO THAT FUTURE SUPPORT ACTIVITIES WILL HAVE THE LATEST SITE INFORMATION AVAILABLE. – This can be faxed to (519) 740-4756 Rockwell Automation Publication 7000L-UM301F-EN-P - March 2020... -
Page 410: Time Estimations
Tools • 100 MHz Oscilloscope with minimum 2 Channels and memory • 5kV DC Megger • Digital Multimeter • Torque Wrench Rockwell Automation Publication 7000L-UM301F-EN-P - March 2020... - Page 411 Materials • Torque Sealer (Yellow) Part number — RU6048 • Electrical Joint Compound ALCOA EJC no. 2 or approved equivalent (for Power Devices) • Aeroshell no. 7 Part number 40025-198-01 (for Vacuum Contactors) Rockwell Automation Publication 7000L-UM301F-EN-P - March 2020...
- Page 412 Chapter 5 Component Definition and Maintenance Rockwell Automation Publication 7000L-UM301F-EN-P - March 2020...
- Page 413 Type 12 w/vents and filters (IP42) – Seismic rated Normal Duty, 0...1000 m Altitude. Maximum 50 °C Ambient Heavy Duty, 0...1000 m Altitude. Maximum 50 °C Ambient Normal Duty, 0...1000 m Altitude. Maximum 20 °C Ambient Custom Configuration (Contact Factory) Rockwell Automation Publication 7000L-UM301F-EN-P - March 2020...
- Page 414 (1) A Control Power Transformer modification must be selected (6, 6B...etc.) to size the transformer. (2) Control Circuit Power is supplied from separate/external source. (3) Three-phase Control Circuit Power is supplied from separate/external source. Rockwell Automation Publication 7000L-UM301F-EN-P - March 2020...
-
Page 415: Powerflex 7000 Drive Selection Explanation
The factory should be contacted for assistance sizing air-cooled drives that require greater than 150% overload. Refer to Table 32 for typical application load torque profiles, to determine which drive overload rating is best suited for your application. Rockwell Automation Publication 7000L-UM301F-EN-P - March 2020... -
Page 416: When Is An Encoder Required
• When installing, the encoder body and electronics must be isolated from ground (options available from the encoder manufacturer to accomplish this). • There are usually limits on encoder cable lengths. Ensure the maximum length is suitable for the application. Rockwell Automation Publication 7000L-UM301F-EN-P - March 2020... -
Page 417: Powerflex 7000 Drive Performance (Torque Capabilities)
100% (1...2 Hz) Steady State Torque 125% (9...75 Hz) 150% (0...60 Hz) 140% (3...60 Hz) Max. Torque Limit 150% 150% 150% (1) Drive will require over-sizing to achieve greater than 100% continuous torque. Rockwell Automation Publication 7000L-UM301F-EN-P - March 2020... -
Page 418: Glossary Of Terms
Damper closed Normal Damper opened Normal CHIPPER (WOOD)— Contact factory starting empty COMPRESSORS Axial-vane, loaded Normal Reciprocating, starting Contact factory unloaded CONVEYORS Armored face Contact factory Belt type, loaded Heavy Drag type Contact factory Rockwell Automation Publication 7000L-UM301F-EN-P - March 2020... - Page 419 Slurry handling, discharge Heavy open Turbine, Centrifugal, deep- Normal well Vane-type, positive Contact factory displacement SEPARATORS, AIR Normal (fan type) (1) PowerFlex 7000 “A” Frame suitable only for normal service duty rating. Rockwell Automation Publication 7000L-UM301F-EN-P - March 2020...
- Page 420 Appendix A Catalog Number Explanation Notes: Rockwell Automation Publication 7000L-UM301F-EN-P - March 2020...
-
Page 421: Torque Requirements
Pitch Material Torque (N•m) Torque (lb•ft) M2.5 0.45 Steel 0.43 0.32 0.70 Steel 0.80 Steel 1.00 Steel 1.25 Steel 1.50 Steel 1.75 Steel 2.00 Steel 1/4" Steel S.A.E. 5 3/8" Steel S.A.E. 2 Rockwell Automation Publication 7000L-UM301F-EN-P - March 2020... - Page 422 Appendix B Torque Requirements for Threaded Fasteners Notes: Rockwell Automation Publication 7000L-UM301F-EN-P - March 2020...
-
Page 423: Drive Meggering
ATTENTION: There exists the possibility of serious or fatal injury to personnel if safety guidelines are not followed. Rockwell Automation Publication 7000L-UM301F-EN-P - March 2020... -
Page 424: Equipment Required
OGN capacitor rather than the grounding bus as the grounding cable is only rated for 600 V. Injecting a high voltage on the ground cable during a Megger test will degrade the cable insulation. Rockwell Automation Publication 7000L-UM301F-EN-P - March 2020... - Page 425 Be sure the Megger is discharged prior to disconnecting it from the equipment. Connect the Megger to the drive following the specific instructions for that model. If the Megger has a lower voltage setting (normally 500V or Rockwell Automation Publication 7000L-UM301F-EN-P - March 2020...
- Page 426 Securely reconnect the two ground conductors on the VSBs. The two ground connections on the VSB provide a reference point for the VSB and enable the low voltage signal to be fed to the SCBs. If the ground Rockwell Automation Publication 7000L-UM301F-EN-P - March 2020...
- Page 427 For drives that did not originally have the OGN connected (or even installed), this is not a concern. Transient Suppression Network Re-install the fuses on the TSN. Rockwell Automation Publication 7000L-UM301F-EN-P - March 2020...
- Page 428 Appendix C Meggering Notes: Rockwell Automation Publication 7000L-UM301F-EN-P - March 2020...
-
Page 429: Powerflex 7000 Maintenance Schedule
Appendix Preventative Maintenance Schedule PowerFlex 7000 Rockwell Automation recognizes that following a defined maintenance schedule will deliver the maximum product availability. By rigorously following this Maintenance Schedule maintenance schedule, you can expect the highest possible uptime. This Annual Preventative Maintenance Program includes a visual inspection of: •... - Page 430 Appendix D Preventative Maintenance Schedule Rockwell Automation PowerFlex 7000 Preventative Maintenance Schedule Period Interval (Years) Liquid-Cooling System Mesh Filters De-ionizing Filter Cartridge All Fittings/Connections/Hose Clamps Redundant Cooling Pump Motors/Pumps Redundant Cooling Pump Motor Seals Thermostatic Valve Element (1)(2) Auxiliary Cooling...
- Page 431 Preventative Maintenance Schedule Appendix D Rockwell Automation PowerFlex 7000 Preventative Maintenance Schedule Period Interval (Years) Liquid-Cooling System Mesh Filters De-ionizing Filter Cartridge All Fittings/Connections/Hose Clamps Redundant Cooling Pump Motors/Pumps Redundant Cooling Pump Motor Seals Thermostatic Valve Element (1)(2) Auxiliary Cooling...
- Page 432 Appendix D Preventative Maintenance Schedule Notes: Rockwell Automation Publication 7000L-UM301F-EN-P - March 2020...
- Page 434 Rockwell Automation maintains current product environmental information on its website at http://www.rockwellautomation.com/rockwellautomation/about-us/sustainability-ethics/product-environmental-compliance.page. Allen-Bradley, Direct-to-Drive, DriveTools, PanelView, PowerCage, PowerFlex, Rockwell Automation, and Rockwell Software are trademarks of Rockwell Automation, Inc. ControlNet, DeviceNet, and EtherNet/IP are trademarks of ODVA, Inc. Trademarks not belonging to Rockwell Automation are property of their respective companies.
Need help?
Do you have a question about the Allen-Bradley PowerFlex 7000 and is the answer not in the manual?
Questions and answers