Table of Contents
Advertisement
Quick Links
Advertisement
Table of Contents

Related Manuals for Avaya IP OFFICE J139


Summary of Contents for Avaya IP OFFICE J139
- Page 1 USER GUIDE AVAYA IP OFFICE J139 | J129...
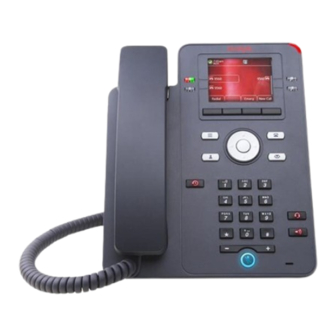
- Page 2 J139 PHONE BUTTONS AND FEATURES 1. Main Menu - Displays the list of options, such as Features, Applications, Settings, Network information, Administration,and About 2. Navigation Cluster - Used to navigate on the Phone screen. • Up and Down arrow keys: to scroll up and down •...
- Page 3 6. Headset - Used to toggle your call from the speaker to headset 7. Speaker - Used to turn on the speaker 8. Handset - Used to receive and make calls 9. Volume - Used to adjust volume of a handset, a speaker,or a ringtone •...
- Page 4 J139 PHONE BUTTONS AND FEATURES (BACK) 1. 5V DC Jack - To connect the power supply 2. Network port - To connect the Ethernet cable 3. PC port - To connect the computer. Note: PC port is disabled when a Wi-Fi network is used 4.
- Page 6 J129 PHONE BUTTONS AND FEATURES 1. Beacon LED - The beacon LED flashes a red light to the upper-right corner of the deskphone, which indicates that you have a voice mail, and incoming call or you are on a call using speakers 2.
- Page 7 4. Navigation arrows and OK - The OK button performs the action of selecting the function assigned to the left most soft key function The navigation arrows performs the action of scrolling through various sections of the phone display 5. Phone - Press the Phone button to move to the phone screen 6.
-
Page 8: Adding A New Contact
SOLUTION LINE Dial 800-416-8000 Option 2 MAKING A CALL WITHOUT DIAL TONE 1. Do one of the following: • Lift the handset • Press Speaker • Press Headset 2. Dial the number you want to call DIALING PROCEDURES • Internal Extensions: Dial three digit extension •... -
Page 9: Placing A Call On Hold
PLACING A CALL ON HOLD 1. To put an active call on hold, press Hold 2. To resume the call, press one of the following: • Resume • OK MANAGING CONFERENCE CALLS ADDING A PERSON TO AN ACTIVE CALL Use this procedure to add participants to an active call to set up a conference call 1. -
Page 10: Dropping The Last Participant From A Conference Call
MANAGING CONFERENCE CALLS (CONT.) DROPPING THE LAST PARTICIPANT FROM A CONFERENCE CALL Use the following procedure to drop the last participant added to the conference call. Once you drop the last added participant, you cannot use the procedure to drop other participants. The phone plays an error tone if you try to use the drop method again. -
Page 11: Adding A Contact From The Recents List
ADDING A NEW CONTACT (CONT.) 4. Use the dial pad to enter the contact’s first and last name in the corresponding fields • Press the number key that corresponds to the letter or number that you want to enter • If the characters are on the same key, pause before entering the next character •... -
Page 12: Editing A Contact
CONTACTS (CONT.) EDITING A CONTACT Up to 250 contacts can be added to your phone 1. Press the Contacts button 2. (Optional) To navigate through Main menu, scroll to the following: a. Applications, and press Select b. Contacts, and press Select 3. -
Page 13: Combining Contacts
CONTACTS (CONT.) COMBINING CONTACTS Use this procedure to merge the phone number of the current contact with the existing local contact 1. Press Contacts 2. (Optional) To navigate through Main menu, scroll to the following: a. Applications, and press Select b. -
Page 14: Call Parking
CALL PARKING With the Call Parking feature, you can put an active call on hold and resume the call from any other phone in your organization. The administrator must activate this feature in your phone to park a call in your extension. -
Page 15: Call Forward
CALL FORWARD With the Call Forward feature, you can divert incoming calls to another number. The following are Call Forward types: • Call Forward: Forwards all incoming calls to another number • Call Forward Busy: Forwards incoming calls to another number if you are on a call •... -
Page 16: Making An Attended Transfer
CALL FORWARD (CONT.) FORWARDING A CALL TO ANOTHER EXTENSION (CONT.) 6. Press one of the following: • Save • OK The phone generates a confirmation tone and returns to the Features menu 7. To disable any of the Call Forward feature, go to the respective screen and press one of the following: •... -
Page 17: Making An Unattended Transfer
MAKING AN UNATTENDED TRANSFER Use this procedure to transfer an active call without establishing a call with the call-transfer recipient 1. While on a call, press Transfer 2. The phone displays the Enter transfer destination screen 3. Do one of the following: •... -
Page 18: Managing Call History
MAKING BLIND TRANSFER (CONT.) 6. To transfer a call to an attended recipient, do the following: a. Press Talk b. The first call is put on hold, and the call-transfer recipient’s phone starts ringing c. After the recipient answers your call, press Complete MANAGING CALL HISTORY MAKING A CALL FROM CALL HISTORY 1. -
Page 19: Deleting A Call Record From Call History
3. Select the number that you want to view 4. Press Details 5. The phone displays the details of the selected call DELETING A CALL RECORD FROM CALL HISTORY 1. Press Recents 2. (Optional) To navigate through Main menu, scroll to the following: a. - Page 20 NOTES...
- Page 21 NOTES...
- Page 22 NOTES...
- Page 23 NOTES...
- Page 24 877.892.4900 | INFO@OPTUSINC.COM | OPTUSINC.COM...
Need help?
Do you have a question about the IP OFFICE J139 and is the answer not in the manual?
Questions and answers