Advertisement
Quick Links
Advertisement

Related Manuals for Avaya J139


Summary of Contents for Avaya J139
- Page 1 QUICK GUIDE J139 DESKTOP PHONE...
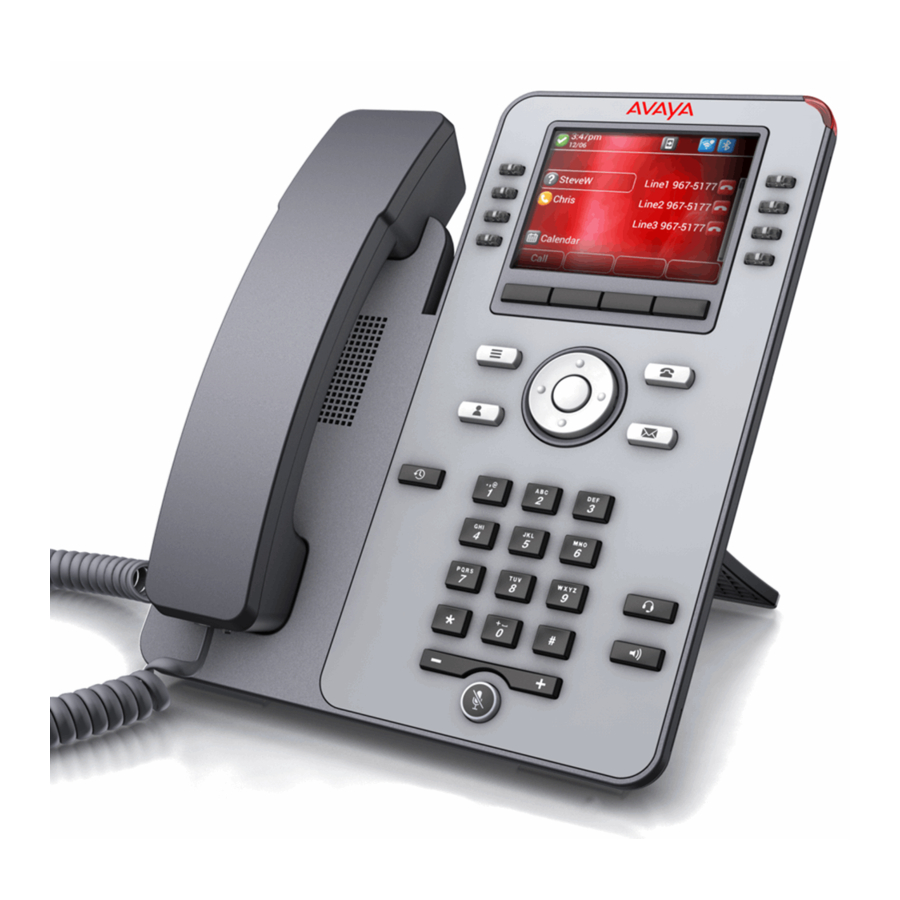
- Page 2 Description The Avaya IP Phone J139 provides a modern, connected, personalized experience. It addresses the need for secure, reliable voice communications for both large enterprises and small and medium-sized companies. It is well suited for users that need only the most commonly used voice features like Hold, Transfer, Conference, Forward, and Call Park / UnPark.
- Page 3 ▪ (+): To increase the volume. 15. (2,15) —see below. ▪ (-): To decrease the volume. 16. Phone key—Displays the Phone screen. 10. Mute Button—Used to mute and unmute the outgoing audio. © 2020 Avaya Inc. All Rights Reserved.
- Page 4 1. 5V DC Jack—To connect the power supply. 4. Headset Jack—To connect the headset. 2. Network port—To connect the Ethernet cable. 5. Handset Jack To connect the handset. To connect the Avaya J139 IP Phone to the © 2020 Avaya Inc. All Rights Reserved.
- Page 5 Instructions Avaya Cloud Office, you must first connect the device to the network and power it up. Once the device is boots up, it will obtain an IP address from your network. If your router has PoE port available, connect the J139 ethernet port to your router.
- Page 6 Avaya.com © 2020 Avaya Inc. All Rights Reserved.
Need help?
Do you have a question about the J139 and is the answer not in the manual?
Questions and answers