
Related Manuals for Metrohm 942 Extension Module Vario


Summary of Contents for Metrohm 942 Extension Module Vario
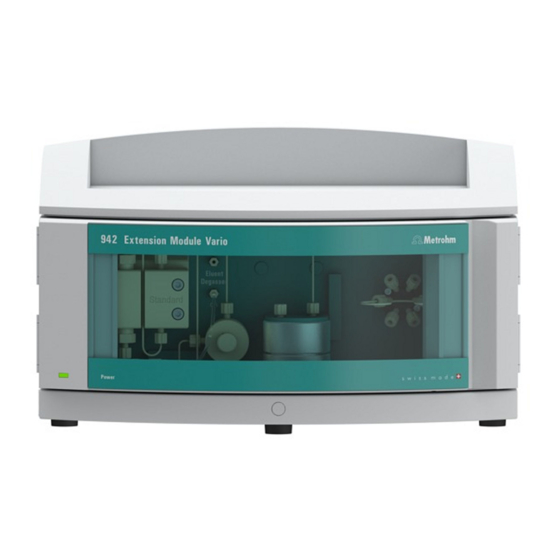
- Page 1 942 Extension Module Vario 942 Extension Module Vario ONE/Deg Manual 8.942.8006EN / v5 / 2023-08-31...
- Page 3 Metrohm AG CH-9100 Herisau Switzerland +41 71 353 85 85 info@metrohm.com www.metrohm.com 942 Extension Module Vario 942 Extension Module Vario ONE/Deg 2.942.1060 Manual 8.942.8006EN / v5 / 2023-08-31...
- Page 4 Disclaimer Deficiencies arising from circumstances that are not the responsibility of Metrohm, such as improper storage or improper use, etc., are expressly excluded from the warranty. Unauthorized modifications to the product (e.g. conversions or attachments) exclude any liability on the part of the manufacturer for resulting damage and its consequences.
-
Page 5: Table Of Contents
Connecting the vacuum pump(s) ........... 20 Installing the high-pressure pump ........22 Installing an inline filter ............. 23 Installing the pulsation absorber ........23 Injection valve ..............24 3.10 Connecting an Extension Module ........26 4 Start-up 942 Extension Module Vario ONE/Deg (2.942.1060) ■■■■■■■■... - Page 6 Problems and their solutions ..........51 7 Technical specifications Reference conditions ............53 Ambient conditions ............53 Housing ................53 Weight ................. 53 Eluent degasser ..............54 Injection valve ..............54 Interfaces ................54 8 Displaying accessories Index ■■■■■■■■ 942 Extension Module Vario ONE/Deg (2.942.1060)
- Page 7 Removing the piston cartridge from the pump head ......40 Figure 18 Inserting the piston seal into the tool ..........41 Figure 19 Parts of the piston cartridge ............42 Figure 20 Inline filter – Removing the filter ............46 942 Extension Module Vario ONE/Deg (2.942.1060) ■■■■■■■■...
-
Page 9: Introduction
944 Professional UV/VIS Detector Vario. The 942 Extension Module Vario is operated using MagIC Net software, just like the IC device. If a 942 Extension Module Vario is connected to a 940 Professional IC Vario device, MagIC Net automatically detects the 942 Extension Module Vario and checks its functional capability. -
Page 10: Intended Use
Intended use The 942 Extension Module Vario ONE/Deg expands an IC system by an additional analysis channel. This device is suitable for processing chemicals and flammable samples. -
Page 11: Symbols And Conventions
This symbol draws attention to a possible biological hazard. WARNING Warning of optical radiation CAUTION This symbol draws attention to possible damage to instruments or instrument parts. NOTICE This symbol highlights additional information and tips. 942 Extension Module Vario ONE/Deg (2.942.1060) ■■■■■■■■... -
Page 12: Safety Instructions
The electrical safety when working with the instrument is ensured as part of the international standard IEC 61010. WARNING Only personnel qualified by Metrohm are authorized to carry out service work on electronic components. WARNING Never open the housing of the instrument. The instrument could be damaged by this. -
Page 13: Tubing And Capillary Connections
This product is covered by European Directive 2012/19/EU, WEEE – Waste Electrical and Electronic Equipment. The correct disposal of your old instrument will help to prevent negative effects on the environment and public health. 942 Extension Module Vario ONE/Deg (2.942.1060) ■■■■■■■■... - Page 14 1.4 Safety instructions ■■■■■■■■■■■■■■■■■■■■■■ More details about the disposal of your old instrument can be obtained from your local authorities, from waste disposal companies or from your local dealer. ■■■■■■■■ 942 Extension Module Vario ONE/Deg (2.942.1060)
-
Page 15: Overview Of The Device
See Chapter 3.5. Inline filter Injection valve See Chapter 3.7. See Chapter 3.9. Pulsation absorber Purge valve See Chapter 3.8. See Chapter 3.6. Coupling (6.2744.230) Standby indicator For connecting the eluent aspiration tubing. 942 Extension Module Vario ONE/Deg (2.942.1060) ■■■■■■■■... -
Page 16: Rear
For connecting additional degassing cham- For extracting the air from the vacuum bers in extension modules. chamber. Labeled Exhaust. Transport locking screws For securing the high-pressure pump and the vacuum pump when transporting the instrument. ■■■■■■■■ 942 Extension Module Vario ONE/Deg (2.942.1060) -
Page 17: Extension Module And 940 Professional Ic Vario
2 Overview of the device Extension Module and 940 Professional IC Vario The 942 Extension Module Vario units are fitted directly to the 940 Pro- fessional IC Vario and connected to it via the connection cable provided. Extension modules have no power supply of their own, but rather draw the electricity they require from the instrument to which they are connected. - Page 18 If this is not possible, extension modules that are farther apart have to be connected together using a longer connecting cable (6.2156.070). ■■■■■■■■ 942 Extension Module Vario ONE/Deg (2.942.1060)
-
Page 19: Installation
1 Remove all of the transport locking screws with the hex key. Store the transport locking screws in a safe place. Reinsert the transport locking screws each time you transport the instrument a significant dis- tance. 942 Extension Module Vario ONE/Deg (2.942.1060) ■■■■■■■■... -
Page 20: Base Tray And Bottle Holder
The bottle holder and base tray must be removed or set up if one of the following instruments is to be mounted on or under a 940 Professional IC Vario: One or more 942 Extension Module Vario ■ Or another instrument with the same-sized footprint ■... -
Page 21: Figure 4 Removing The Base Tray
All of the cable connections on the rear have been disconnected. ■ There are no loose parts in the instrument. ■ The instrument is lying on its side, and the bottom surface is visible. ■ 942 Extension Module Vario ONE/Deg (2.942.1060) ■■■■■■■■... -
Page 22: Figure 5 Mounting The Base Tray
■ Drainage tubing is disconnected from the drainage tubing connection ■ of the bottle holder. The capillaries are removed from the guide ducts between the instru- ■ ment and the bottle holder. Accessories ■■■■■■■■ 942 Extension Module Vario ONE/Deg (2.942.1060) -
Page 23: Figure 6 Removing The Bottle Holder
Stack other instruments in the required order. Mount the bottle holder (6.2061.100) onto the topmost instrument on the stack. Mounting the bottle holder Prerequisite The instrument is switched off. ■ Accessories 3 mm hex key (6.2621.100) ■ 942 Extension Module Vario ONE/Deg (2.942.1060) ■■■■■■■■... -
Page 24: Figure 7 Mounting The Bottle Holder
5 If one of the instruments in the stack is equipped with a leak sensor connection socket, connect the leak sensor (see manual of the IC instrument). 6 Restore any capillary connections that may have been removed. ■■■■■■■■ 942 Extension Module Vario ONE/Deg (2.942.1060) -
Page 25: Connecting The Eluent Bottle
(6.2744.210) accessory set: Start by pushing the tubing weighting onto the loose end of the ■ eluent aspiration tubing. Then push the clamping screw onto the loose end of the eluent ■ aspiration tubing. 942 Extension Module Vario ONE/Deg (2.942.1060) ■■■■■■■■... -
Page 26: Figure 9 Installing The Tubing Weighting And Aspiration Filter
The end of the tubing should reach approximately to the center of the aspiration filter. Tighten the aspiration filter to the filter holder. ■ Figure 9 Installing the tubing weighting and aspiration filter ■■■■■■■■ 942 Extension Module Vario ONE/Deg (2.942.1060) - Page 27 For all other eluents: only with cotton. ■ Remove the plastic cover from the large opening of the adsorber ■ tube. Fill the adsorber tube and close it again using the plastic cover. 942 Extension Module Vario ONE/Deg (2.942.1060) ■■■■■■■■...
-
Page 28: Connecting The Eluent Degasser
IC tubing set for second Extension Module (6.5332.000), consisting of ■ two pieces of M6 FEP tubing (6.1805.050) and one M6 T connector (6.1808.060) This tubing set is available as part of the optional accessories. FEP tubing (6.1805.060) ■ ■■■■■■■■ 942 Extension Module Vario ONE/Deg (2.942.1060) -
Page 29: Figure 10 Connecting The Vacuum Pump
942 Extension Module Vario. 1 Connect one end of the FEP tubing (6.1805.050) (10-2) to the to Vacuum connector of the 942 Extension Module Vario. Connect the other end of the FEP tubing to the T connector (6.1808.060) (10-1). -
Page 30: Installing The High-Pressure Pump
■ The purge valve used for bleeding the pump head. ■ Figure 11 High-pressure pump with purge valve Pump head Purge valve The high-pressure pump is completely connected. No installation work is required. ■■■■■■■■ 942 Extension Module Vario ONE/Deg (2.942.1060) -
Page 31: Installing An Inline Filter
Figure 12 Pulsation absorber Connection capillary PEEK pressure screws, short Connection to inline filter. (6.2744.070) Pulsation absorber (6.2620.150) Holder for pulsation absorber Connection capillary Connection to injection valve. 942 Extension Module Vario ONE/Deg (2.942.1060) ■■■■■■■■... -
Page 32: Injection Valve
Which sample loop do I need? Application Sample loop Cation determination 20 µL Anion determination with suppression 20 µL Anion determination without suppression 100 µL MiPT, MiPuT 250 µL MiPCT, MiPCT-ME Preconcentration column ■■■■■■■■ 942 Extension Module Vario ONE/Deg (2.942.1060) -
Page 33: Figure 13 Exchanging The Sample Loop
NOTE Observe a dead-volume-free installation of the sample loop . 1 Removing the existing sample loop Loosen the pressure screws (6.2744.010) at Port 3 and Port 6. ■ Remove the sample loop. ■ 942 Extension Module Vario ONE/Deg (2.942.1060) ■■■■■■■■... -
Page 34: Connecting An Extension Module
Connecting an Extension Module to another Extension Module 1 Plug the connecting cable (6.2156.060) or the longer connecting cable (6.2156.070) into the In connection socket on the second Extension Module and tighten it in place. ■■■■■■■■ 942 Extension Module Vario ONE/Deg (2.942.1060) - Page 35 ■■■■■■■■■■■■■■■■■■■■■■ 3 Installation 2 Plug the other end of the connecting cable into the Out connection socket on the first Extension Module and tighten it in place. 942 Extension Module Vario ONE/Deg (2.942.1060) ■■■■■■■■...
-
Page 36: Start-Up
■■■■■■■■■■■■■■■■■■■■■■ 4 Start-up The 942 Extension Module Vario ONE/Deg is put into operation together with the IC device. The following preconditions must be met before initial start-up: The eluent bottle is filled and connected. ■ The 942 Extension Module Vario ONE/Deg is connected to the 940 ■... -
Page 37: Operation And Maintenance
"p.a.". They may be diluted only by using ultrapure water (resistance > 18.2 MΩ*cm). (These specifications apply generally for all reagents used in ion chromatography.) Newly manufactured eluents always need to be microfiltered (0.45 µm fil- ter). 942 Extension Module Vario ONE/Deg (2.942.1060) ■■■■■■■■... -
Page 38: Changing The Eluent
For this step, you need the following accessories: Wrench (6.2621.050) ■ Loosening the connecting tubing Loosen the clamping screws with the wrench. ■ Unscrew the clamping screws by hand and pull them out of the ■ connector. ■■■■■■■■ 942 Extension Module Vario ONE/Deg (2.942.1060) -
Page 39: Notes On Operating The High-Pressure Pump
In order to protect the pump seals, ensure that the pump is never oper- ■ ated dry. Therefore ensure that the eluent supply is correctly connected and that there is enough eluent in the eluent bottle each time before turning on the pump. 942 Extension Module Vario ONE/Deg (2.942.1060) ■■■■■■■■... -
Page 40: Servicing The High-Pressure Pump
■■■■■■■■■■■■■■■■■■■■■■ Servicing the high-pressure pump NOTE You can find a video sequence for this task in the Multimedia Guide IC Maintenance or on the Internet at http://ic-help.metrohm.com/. Figure 14 High-pressure pump – Parts Pressure screw, short (6.2744.070) Outlet valve holder Fastened to the outlet valve holder. - Page 41 You can find brief video sequences on the following maintenance steps on the Internet at http://ic-help.metrohm.com/. Servicing the outlet valve and inlet valve Accessories For this step, you need the following accessories: Adjustable wrench (6.2621.000) ■ 942 Extension Module Vario ONE/Deg (2.942.1060) ■■■■■■■■...
- Page 42 RBS™ solution or acetone. The rinsing solution may only come out at the valve exit. The outlet valve must be replaced if it is still clogged after cleaning. ■■■■■■■■ 942 Extension Module Vario ONE/Deg (2.942.1060)
- Page 43 ¾ turn using the adjustable wrench (3). Tighten the connection capillary to the auxiliary piston back onto ■ the outlet valve holder. 942 Extension Module Vario ONE/Deg (2.942.1060) ■■■■■■■■...
- Page 44 RBS™ solution or acetone. The rinsing solution may only come out at the valve exit. The inlet valve must be replaced if it is still clogged after cleaning. ■■■■■■■■ 942 Extension Module Vario ONE/Deg (2.942.1060)
- Page 45 For this step, you need the following accessories: 4 mm hex key (6.2621.030) ■ Removing the pump head Prerequisites: Is the high-pressure pump switched off? ■ Has the pressure been released? ■ Is the instrument switched off? ■ 942 Extension Module Vario ONE/Deg (2.942.1060) ■■■■■■■■...
- Page 46 Servicing the piston Carry out the following work on both pistons in turn. Servicing a piston consists of the following tasks: Replace the piston seal. Clean or replace the zirconium oxide piston. Reinstall the piston. ■■■■■■■■ 942 Extension Module Vario ONE/Deg (2.942.1060)
-
Page 47: Figure 15 High-Pressure Pump - Cross-Section
(16-2) for inserting the new piston seal. Figure 16 Tool for piston seal (6.2617.010) Sleeve Spare part For this step, you need a new piston seal (6.2741.020). 942 Extension Module Vario ONE/Deg (2.942.1060) ■■■■■■■■... -
Page 48: Figure 17 Removing The Piston Cartridge From The Pump Head
Avoid touching the sealing surface in the pump head with the tool! Only screw the tip (16-1) of the tool for the piston seal far enough into the piston seal that the seal can be pulled out. ■■■■■■■■ 942 Extension Module Vario ONE/Deg (2.942.1060) -
Page 49: Figure 18 Inserting The Piston Seal Into The Tool
The pump head has been removed (see "Removing the pump head", ■ page 37). The piston cartridge is removed (see "Replacing the piston seal", page ■ 40). For this task, you need the following accessories: Zirconium oxide piston (6.2824.070) ■ 942 Extension Module Vario ONE/Deg (2.942.1060) ■■■■■■■■... -
Page 50: Figure 19 Parts Of The Piston Cartridge
The zirconium oxide piston must be replaced if it is heavily contaminated or scratched. ■■■■■■■■ 942 Extension Module Vario ONE/Deg (2.942.1060) - Page 51 15°. Clean the second piston cartridge in the same way. Mounting the pump head Accessories For this step, you need the following accessories: 4 mm hex key (6.2621.030) ■ 942 Extension Module Vario ONE/Deg (2.942.1060) ■■■■■■■■...
- Page 52 The bore hole with the greatest depth must therefore be aligned with the longest bolt. Push the pump head onto the four fastening bolts (1). ■ Tighten the four fastening screws using the hex key (6.2621.030) ■ alternating crosswise. ■■■■■■■■ 942 Extension Module Vario ONE/Deg (2.942.1060)
-
Page 53: Servicing The Inline Filter
Servicing the inline filter NOTE You can find a video sequence for this task in the Multimedia Guide IC Maintenance or on the Internet at http://ic-help.metrohm.com/. Maintenance interval The filter must be replaced at least every 3 months; it may need to be replaced more frequently, depending on the application. -
Page 54: Figure 20 Inline Filter - Removing The Filter
3 Unscrewing the filter screw Use two adjustable wrenches (6.2621.000) to loosen the filter screw (20-2) from the filter housing (20-1) and unscrew it by hand. 4 Removing the filter Remove the old filter (20-3) using tweezers. ■■■■■■■■ 942 Extension Module Vario ONE/Deg (2.942.1060) - Page 55 4 Rinsing the inline filter Dismantle the guard column (if present) and the separation col- ■ umn and replace with a coupling (6.2744.040). Rinse the instrument with eluent. ■ Reinsert the columns after 10 minutes. ■ 942 Extension Module Vario ONE/Deg (2.942.1060) ■■■■■■■■...
-
Page 56: Servicing The Pulsation Absorber
If the concentration of the sample is too high, the sample should be diluted before feeding (see manual on the IC Equipment for Sample Dilu- tion). For an overview of all Metrohm inline sample preparation methods go to the following website: http://misp.metrohm.com. Rinsing the sample path... - Page 57 Sample B to the measurement from Sample A. This ratio can be modified by varying the rinsing time, allowing you to determine the rinsing time required for the applica- tion. 942 Extension Module Vario ONE/Deg (2.942.1060) ■■■■■■■■...
-
Page 58: Injection Valve
5.10 Injection valve ■■■■■■■■■■■■■■■■■■■■■■ 5.10 Injection valve Maintenance on the injection valve is best performed by specialist person- nel from Metrohm during annual service. ■■■■■■■■ 942 Extension Module Vario ONE/Deg (2.942.1060) -
Page 59: Troubleshooting
The pressure in the The inline filter Replace the filter (6.2821.130) . system markedly (6.2821.120) is blocked. increases. Have the valve cleaned (by a Metrohm service Injection valve – blocked. engineer). The retention times The eluent contains gas Purge the high-pressure pump . - Page 60 Request Metrohm Service. Vacuum is not being Eluent degasser – Vacuum Seal the Vacuum connector tightly with a ■ built connection on the rear of threaded stopper (6.1446.040). the instrument is not (tightly) sealed. ■■■■■■■■ 942 Extension Module Vario ONE/Deg (2.942.1060)
-
Page 61: Technical Specifications
365 mm Height 131 mm Depth 380 mm Material of base Polyurethane hard foam (PUR) with flame retardation for fire class tray, housing and UL94V0, CFC-free, coated bottle holder Weight 2.942.0500 11.80 kg 942 Extension Module Vario ONE/Deg (2.942.1060) ■■■■■■■■... -
Page 62: Eluent Degasser
1 15-pin D-sub plug (male) Connection to the ion chromatograph or to another Extension Module. 1 15-pin D-sub plug (female) Connection to another Extension Module or to an 891 Professional Analog Out (optional). ■■■■■■■■ 942 Extension Module Vario ONE/Deg (2.942.1060) -
Page 63: Displaying Accessories
■■■■■■■■■■■■■■■■■■■■■■ 8 Displaying accessories 8 Displaying accessories Up-to-date information on the scope of delivery and on optional accesso- ries can be found on the Metrohm website. 1 Searching for a product on the website Go to https://www.metrohm.com. ■ Click on ■... -
Page 64: Index
Eluent degasser Valve Oil ..........48 Technical specifications ..54 See also "Injection valve" ..24 Overview of the device ....7 Extension Module Connect ......26 Piston of the high-pressure pump ..........33 ■■■■■■■■ 942 Extension Module Vario ONE/Deg (2.942.1060)
Need help?
Do you have a question about the 942 Extension Module Vario and is the answer not in the manual?
Questions and answers