Table of Contents
Advertisement
Quick Links
Advertisement
Table of Contents

Related Manuals for Metrohm 941


Summary of Contents for Metrohm 941
- Page 1 941 Eluent Production Module Manual 8.941.8001EN / 2020-01-08...
- Page 3 Metrohm AG CH-9100 Herisau Switzerland Phone +41 71 353 85 85 Fax +41 71 353 89 01 info@metrohm.com www.metrohm.com 941 Eluent Production Module Manual 8.941.8001EN / 2020-01-08...
- Page 4 Technical Communication Metrohm AG CH-9100 Herisau techcom@metrohm.com This documentation is protected by copyright. All rights reserved. This documentation has been prepared with great care. However, errors can never be entirely ruled out. Please send comments regarding possible errors to the address above.
-
Page 5: Table Of Contents
Connecting the instrument ..........29 4.7.1 Connecting the instrument to the ion chromatograph ... 29 4.7.2 Connecting the instrument to the power grid ......29 5 Operation 6 Operation and maintenance Care ..................32 ■■■■■■■■ 941 Eluent Production Module (2.941.0010) - Page 6 Reference conditions ............35 Ambient temperature ............35 Level sensor ................ 35 Housing ................36 Weight ................. 36 Dosino .................. 36 Dosing unit ................36 Power connection ............... 36 Interfaces ................37 9 Accessories Index ■■■■■■■■ 941 Eluent Production Module (2.941.0010)
- Page 7 Installing the ultrapure water canister cap without level sensor ..22 Figure 12 Installing the ultrapure water canister cap with level sensor ..... 23 Figure 13 Installing an ELGA PURELAB flex ............25 Figure 14 Connecting the Dosino ..............27 ■■■■■■■■ 941 Eluent Production Module (2.941.0010)
-
Page 9: Introduction
A level sensor for the eluent bottle is indispensable for the automated pro- duction of eluent and is contained in the scope of delivery of the 941 Elu- ent Production Module. However, we recommend using level sensors to also monitor the bottle with the concentrate and the ultrapure water con- tainer. -
Page 10: About The Documentation
This symbol draws attention to a possible hazard due to heat or hot instrument parts. WARNING This symbol draws attention to a possible biological hazard. CAUTION This symbol draws attention to possible damage to instruments or instrument parts. ■■■■■■■■ 941 Eluent Production Module (2.941.0010) -
Page 11: Safety Instructions
The electrical safety when working with the instrument is ensured as part of the international standard IEC 61010. WARNING Only personnel qualified by Metrohm are authorized to carry out service work on electronic components. WARNING Never open the housing of the instrument. The instrument could be damaged by this. -
Page 12: Tubing And Capillary Connections
This product is covered by European Directive 2012/19/EU, WEEE – Waste Electrical and Electronic Equipment. The correct disposal of your old instrument will help to prevent negative effects on the environment and public health. ■■■■■■■■ 941 Eluent Production Module (2.941.0010) - Page 13 ■■■■■■■■■■■■■■■■■■■■■■ 1 Introduction More details about the disposal of your old instrument can be obtained from your local authorities, from waste disposal companies or from your local dealer. ■■■■■■■■ 941 Eluent Production Module (2.941.0010)
-
Page 14: Overview Of The Instrument
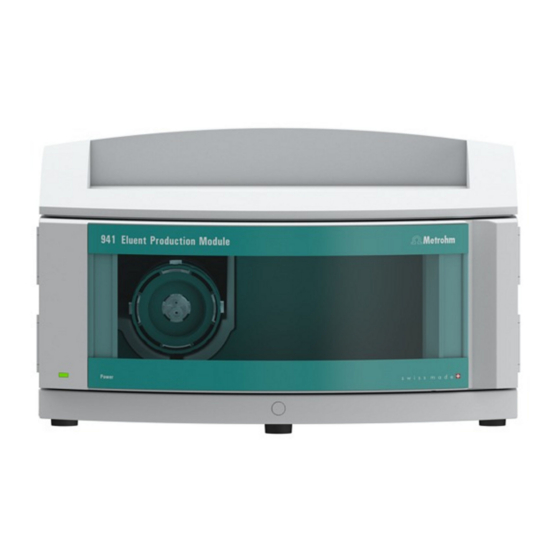
2 Overview of the instrument Front Figure 1 Front Dosino holder Receptacle for a Dosino. Standby indicator. Cable duct Conduit to the rear of the instrument. For feeding through tubing and the Dosino cable. ■■■■■■■■ 941 Eluent Production Module (2.941.0010) -
Page 15: Rear
Labeled MSB 2, MSB 3 and MSB 4. Level sensor sockets Type plate 4 sockets for connecting level sensor cables (6.2151.060). Cable duct Conduit to the front of the instrument. For feeding through tubing and the Dosino cable. ■■■■■■■■ 941 Eluent Production Module (2.941.0010) -
Page 16: System Overview
Processor (left), the ion chromatograph (middle) and the 941 Eluent Pro- duction Module (right). The 941 Eluent Production Module consists of a housing with a built-in Level Control. A Dosino with a 50 mL dosing unit, the canister for ultra-... - Page 17 Sensors with long measuring sensors warn when the liquid container is ■ empty (EMPTY sensor). Sensors with measuring sensors of different lengths are available for 1 L bottles, 2 L bottles and for 10 L canisters. ■■■■■■■■ 941 Eluent Production Module (2.941.0010)
-
Page 18: Installation
4.1.3 Location The 941 Eluent Production Module can be placed directly onto the 940 Professional IC Vario. To accomplish this, the bottle holder of the ion chro- matograph has to be removed and placed onto the 941 Eluent Production Module (see chapter 4.2.2.2, page 13). -
Page 19: Mounting Base Tray And Bottle Holder (Optional)
■ The capillaries are removed from the guide ducts between the instru- ■ ment and the base tray. There are no loose parts in the instrument. ■ Accessories 3 mm hex key (6.2621.100) ■ ■■■■■■■■ 941 Eluent Production Module (2.941.0010) -
Page 20: Figure 3 Removing The Base Tray
All of the cable connections on the rear have been disconnected. ■ There are no loose parts in the instrument. ■ The instrument is lying on its side, and the bottom surface is visible. ■ Accessories 3 mm hex key (6.2621.100) ■ ■■■■■■■■ 941 Eluent Production Module (2.941.0010) -
Page 21: Figure 4 Mounting The Base Tray
Drainage tubing is disconnected from the drainage tubing connection ■ of the bottle holder. The capillaries are removed from the guide ducts between the instru- ■ ment and the bottle holder. Accessories 3 mm hex key (6.2621.100) ■ ■■■■■■■■ 941 Eluent Production Module (2.941.0010) -
Page 22: Figure 5 Removing The Bottle Holder
Stack other instruments in the required order. Mount the bottle holder (6.2061.100) onto the topmost instrument on the stack. Mounting the bottle holder Prerequisite The instrument is switched off. ■ Accessories 3 mm hex key (6.2621.100) ■ ■■■■■■■■ 941 Eluent Production Module (2.941.0010) -
Page 23: Figure 6 Mounting The Bottle Holder
5 If one of the instruments in the stack is equipped with a leak sensor connection socket, connect the leak sensor (see manual of the IC instrument). 6 Restore any capillary connections that may have been removed. ■■■■■■■■ 941 Eluent Production Module (2.941.0010) -
Page 24: Connecting The Eluent Bottle
3 Insert the two measuring sensors from the inside into the two open- ings for measuring sensors. Assembling the bottle cap Accessories For this step you need: Eluent bottle (6.1608.070) from the accessories set of the ion chro- ■ matograph. ■■■■■■■■ 941 Eluent Production Module (2.941.0010) -
Page 25: Figure 8 Installing The Eluent Bottle Cap With Level Sensor
Fasten the capillary connection to the ion chromatograph to the M8 opening. Start by pushing the M8 tubing nipple over the end of the aspira- ■ tion tubing, followed by the O-ring. Temporarily secure the eluent aspiration tubing in the M8 open- ■ ing. ■■■■■■■■ 941 Eluent Production Module (2.941.0010) - Page 26 10 cm around the cable and the tubings as close as possible to the bottle cap. 6 Attaching the bottle cap Screw the bottle cap to the eluent bottle and install the eluent bottle on the bottle holder of the ion chromatograph. ■■■■■■■■ 941 Eluent Production Module (2.941.0010)
-
Page 27: Connecting The Concentrate Bottle
3 Mounting the adsorber Fill the adsorber tube with adsorber material and cotton (for anion eluents) or only with cotton (for cation eluents) and insert it into the large opening. Secure in place with an SGJ clip. ■■■■■■■■ 941 Eluent Production Module (2.941.0010) -
Page 28: Figure 10 Installing The Concentrate Bottle Cap With Level Sensor
EMPTY sensor (6.2769.110 for 2 L bottle or 6.2769.100 for 1 L bottle ■ or 6.2769.120 for 10 L canister) Level sensor cable (6.2151.060) ■ FEP tubing (6.1805.530), is contained in the accessories of the 941 Elu- ■ ent Production Module. Figure 10 Installing the concentrate bottle cap with level sensor... - Page 29 Tie a piece of spiral band with a length of approx. 10 cm around the cable and the tubings as close as possible to the bottle cap. 7 Attaching the bottle cap Screw the bottle cap onto the concentrate bottle. ■■■■■■■■ 941 Eluent Production Module (2.941.0010)
-
Page 30: Connecting The Ultrapure Water Container
1 Connecting the FEP tubing Fasten the tubing connection to the Dosino to the M6 opening. Insert the FEP aspiration tubing into the M6 opening. ■ Screw the FEP tubing into the M6 opening. ■ ■■■■■■■■ 941 Eluent Production Module (2.941.0010) -
Page 31: Figure 12 Installing The Ultrapure Water Canister Cap With Level Sensor
EMPTY sensor for 10 L canister (6.2769.120) ■ Figure 12 Installing the ultrapure water canister cap with level sensor 1 Inserting the measuring sensor Insert the two measuring sensors from the inside into the two open- ings for measuring sensors. ■■■■■■■■ 941 Eluent Production Module (2.941.0010) - Page 32 Tie a piece of spiral band with a length of approx. 10 cm around the cable and the tubings as close as possible to the bottle cap. 7 Attaching the bottle cap Screw the bottle cap onto the canister. ■■■■■■■■ 941 Eluent Production Module (2.941.0010)
-
Page 33: Connecting An Elga Purelab Flex
4 Installation 4.5.2 Connecting an ELGA PURELAB flex The 941 Eluent Production Module can also be connected directly to an ELGA PURELAB flex water purification system, as an alternative to the ultrapure water canister. The ELGA PURELAB flex is not included in the scope of delivery and has to be ordered separately. -
Page 34: Installing The Dosino
For this step you need the following accessories: 800 Dosino (2.800.0010) with dosing unit 50 mL (6.3032.250) ■ attached The three FEP tubings connected to the bottles, ■ one additional FEP tubing (6.1805.530) Adapter Dosino port 4 (6.1808.280) ■ ■■■■■■■■ 941 Eluent Production Module (2.941.0010) -
Page 35: Figure 14 Connecting The Dosino
1 Connecting the concentrate bottle Push the FEP tubing attached to the concentrate bottle through ■ the cable conduit from the rear to the front of the 941 Eluent Pro- duction Module. Screw the FEP tubing onto Port 1 of the Dosino. - Page 36 3 Connecting the eluent bottle Push the FEP tubing attached to the eluent bottle through the ■ cable conduit from the rear to the front of the 941 Eluent Produc- tion Module. Screw the FEP tubing onto port 3 of the Dosino.
-
Page 37: Connecting The Instrument
Unplug the power plug immediately if you suspect that moisture has ■ gotten inside the instrument. Only personnel who have been issued Metrohm qualifications may ■ perform service and repair work on electrical and electronic parts. Connecting the power cord... - Page 38 NOTICE Do not use a not permitted power cord! 1 Plugging in the power cord Plug the power cord into the instrument's power socket. ■ Connect the power cord to the power grid. ■ ■■■■■■■■ 941 Eluent Production Module (2.941.0010)
-
Page 39: Operation
5 Operation 5 Operation The instrument is operated via MagIC Net software only. Additional infor- mation on operating MagIC Net can be found in the document "MagIC Net Tutorial" or in the software's online help. ■■■■■■■■ 941 Eluent Production Module (2.941.0010) -
Page 40: Operation And Maintenance
This is the only way to prevent extreme damage to the instru- ment electronics. In such cases, Metrohm Service must be informed. Spilled chemicals and solvents should be removed immediately. In particu- lar, the plug connections should be protected from contamination. -
Page 41: Dosino
Information regarding operation and maintenance of the dosing unit can be found in the manual for the 807 Dosing Unit. NOTICE Please read the chapter "Operation and maintenance" in the manual for the 807 Dosing Unit and follow the instructions described in it. ■■■■■■■■ 941 Eluent Production Module (2.941.0010) -
Page 42: Troubleshooting
Information regarding troubleshooting for the dosing unit can be found in the manual for the 807 Dosing Unit. NOTICE Read the "Troubleshooting" chapter in the manual for the 807 Dosing Unit and follow the instructions described in it. ■■■■■■■■ 941 Eluent Production Module (2.941.0010) -
Page 43: Technical Specifications
+5 - +45 C° at a maximum of 85% humidity Nominal function range Storage –20 - +60 °C Transport –40 - +60 °C Level sensor Measuring inputs Switching 1 µS threshold Measurement Approx. 1.7 kHz frequency ■■■■■■■■ 941 Eluent Production Module (2.941.0010) -
Page 44: Housing
807 Dosing Unit. Power connection Required supply 100 - 240 V ± 10% (autosensing) voltage Required fre- 50 - 60 Hz ± 3% quency Power consump- 45 W maximum tion Fuse Electronic overload protection ■■■■■■■■ 941 Eluent Production Module (2.941.0010) -
Page 45: Interfaces
1 8-pin Mini DIN socket for a connecting cable to a computer or an ion chromatograph for controlling the instrument. Number 2 type A USB sockets for connecting Metrohm instruments or USB peripheral devices of other manufacturers. Number 3 Mini DIN sockets (8-pin) for connecting Dosinos (MSB 1 is used inter- nally). -
Page 46: Accessories
Downloading the accessories list 1 Enter https://www.metrohm.com/ into your Internet browser. 2 Enter the article number (e.g. 2.941.0010) into the search field. The search result is displayed. 3 Click on the product. Detailed information regarding the product is shown on various tabs. -
Page 47: Index
Connector (Controller) ....29 Connect ......25 Controller ......... 37 Material ........36 MSB ......... 37 Dimensions ......36 Door ........32 Power connection ..29, 30, 36 Dosino Power consumption ....36 Install ......... 26 ■■■■■■■■ 941 Eluent Production Module (2.941.0010)
Need help?
Do you have a question about the 941 and is the answer not in the manual?
Questions and answers