
Related Manuals for ESAB ROBUSTFEED EDGE


Summary of Contents for ESAB ROBUSTFEED EDGE
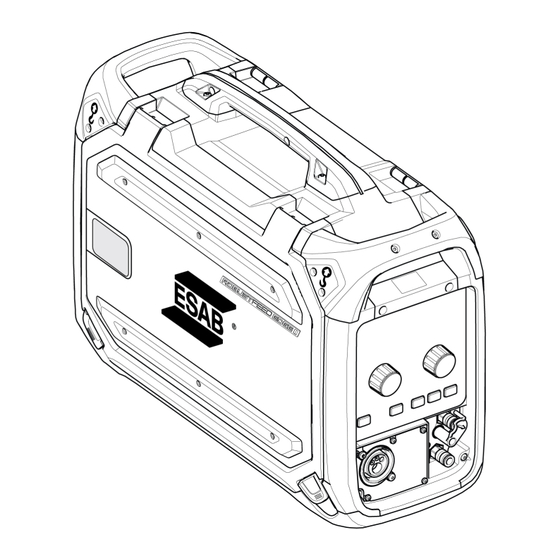
- Page 1 ROBUSTFEED EDGE Instruction manual Valid for: Serial number: OP138YY-XXXXXX 0463 786 001 US 20230227...
-
Page 2: Table Of Contents
JOBs ..........6.4.1 Setting up a new JOB in the internal control panel ......................6.4.2 Copy a JOB ..........6.4.3 Setting up a new job in the external control panel 0463 786 001 - 2 - © ESAB AB 2023... - Page 3 ......................9.16 No coolant flow ....................... 9.17 Gas pressure fault ....................... 9.18 Gas flow fault ........................9.19 USB fault ....................9.20 Software runtime fault ........................ 9.21 External stop ........................ TROUBLESHOOTING 0463 786 001 - 3 - © ESAB AB 2023...
- Page 4 ORDERING SPARE PARTS ..................... CALIBRATION AND VALIDATION ..............12.1 Measurement methods and tolerances ............12.2 Requirements, specifications and standards ..........................WIRING DIAGRAM ......................... ORDERING NUMBERS ............................WEAR PARTS ............................. ACCESSORIES 0463 786 001 - 4 - © ESAB AB 2023...
-
Page 5: Safety
5. Hot sparks or metal can lodge in rolled up sleeves, trouser cuffs, or pockets. Sleeves and collars should be kept buttoned and open pockets eliminated from the front of the clothing. 0463 786 001 - 5 - © ESAB AB 2023... - Page 6 8. Put on dry, hole-free gloves before turning on the power. 9. Turn off the power, before removing your gloves. 10. Refer to ANSI/ASC Standard Z49.1 for specific grounding recommendations. Do not mistake the work lead for a earth cable. 0463 786 001 - 6 - © ESAB AB 2023...
- Page 7 (California Health & Safety Code §25249.5 et seq.) CYLINDER HANDLING Cylinders, if mishandled, can rupture and violently release gas. A sudden rupture of cylinder valve or relief device can injure or kill. Therefore: 0463 786 001 - 7 - © ESAB AB 2023...
- Page 8 5. Keep all safety devices and cabinet covers in position and in good repair. 6. Use equipment only for its intended purpose. Do not modify it in any manner. 0463 786 001 - 8 - © ESAB AB 2023...
-
Page 9: User Responsibility
Devices" User responsibility Users of ESAB equipment have the ultimate responsibility for ensuring that anyone who works on or near the equipment observes all the relevant safety precautions. Safety precautions must meet the requirements that apply to this type of equipment. The following recommendations should be observed, in addition to the standard regulations that apply to the workplace. - Page 10 If equipped with ESAB cooler Use ESAB approved coolant only. Non-approved coolant might damage the equipment and jeopardize product safety. In case of such damage, all warranty undertakings from ESAB cease to apply. For ordering information, see the "ACCESSORIES" chapter in the instruction manual.
-
Page 11: California Proposition 65 Warning
This product is solely intended for arc welding. ESAB has an assortment of welding accessories and personal protection equipment for purchase. For ordering information contact your local ESAB dealer or visit us on our website. California proposition 65 warning WARNING! Welding or cutting equipment produces fumes or gases which contain chemicals known in the State of California to cause birth defects and, in some cases, cancer. -
Page 12: Introduction
The wire feed unit can be placed on a trolley, suspended above the workplace or on the floor (standing up or laying down and with or without a wheel set). ESAB accessories for the product can be found in the "ACCESSORIES" chapter of this manual. Equipment RobustFeed Edge is supplied with: •... -
Page 13: Technical Data
Transport and storage temperature -40° to +176°F (-40° to +80°C) Shielding gas All types intended for GMAW welding Shielding gas Gas flow range for RobustFeed Edge BX 11–74 CFH (5–35 l/min) Gas pressure for RobustFeed Edge CX 43–73 PSI (3–5 bar) Coolant... -
Page 14: Installation
Risk of crushing when lifting the wire feeder. Protect yourself and warn bystanders of the risk. CAUTION! To avoid personal injury and damage to the equipment, lift using the methods and attachment points detailed below. 0463 786 001 - 14 - © ESAB AB 2023... - Page 15 The 40 kg / 90 lb. approved weight consists of wire feeder plus accessories (standard feeder weight is 17.5 kg / 38.6 lb., for all weights see the TECHNICAL DATA chapter). 0463 786 001 - 15 - © ESAB AB 2023...
-
Page 16: Operation
To prevent the reel from sliding off the brake hub, lock the reel in place by tightening the brake hub nut. NOTE! Replace the brake hub nut and the brake hub sleeve if they are worn out and don't lock properly. 0463 786 001 - 16 - © ESAB AB 2023... -
Page 17: Recommended Maximum Current Values For Connection Cables Set
The gas cylinder should be equipped with a pressure regulator. Set the pressure regulator in the range of 3–5 bar (43–73 psi). The pressure should not exceed 5 bar (73 psi) and the flow should be adjusted on the internal control panel. 0463 786 001 - 17 - © ESAB AB 2023... -
Page 18: Connections And Control Devices
The right and left side doors of the wire feed unit must be closed and locked when welding and/or wire feeding occurs. Never weld or feed the wire unless both doors are closed. 0463 786 001 - 18 - © ESAB AB 2023... -
Page 19: Cooling Liquid Connection
Cooling liquid connection ELP (ESAB Logic Pump) The cooling unit is equipped with a detection system called ELP (ESAB Logic Pump) which checks that the coolant hoses are connected. When a liquid-cooled torch is connected, cooling starts. When connecting a liquid-cooled welding torch, the main power supply switch of the power source must be in the OFF position. -
Page 20: Changing And Loading Wire
1) Open the left door of the wire feeder. 2) Unlock the feed rollers to be exchanged, by rotating the roller quick lock (A) for each roller. 0463 786 001 - 20 - © ESAB AB 2023... -
Page 21: Changing The Wire Guides
1) Unlock the inlet wire guide quick lock (A) by folding it out. 2) Remove the inlet wire guide (B). 3) Fit the correct inlet wire guide (according to the WEAR PARTS appendix). 0463 786 001 - 21 - © ESAB AB 2023... -
Page 22: 5.11.2 Middle Wire Guide
6) Lock the new outlet wire guide into place using the wire guide quick lock (A). 7) Reattach the second pair of feed rollers and reapply the roller pressure (see the "Changing feed rollers" section). 0463 786 001 - 22 - © ESAB AB 2023... -
Page 23: Roller Pressure
(mm) Pressure setting Wire material Fe, Ss Tensioner unit 1 Tensioner unit 2 3–3.5 Cored Tensioner unit 1 Tensioner unit 2 2.5–3 Tensioner unit 1 1–1.5 Tensioner unit 2 2–3 0463 786 001 - 23 - © ESAB AB 2023... -
Page 24: Wear Parts Storage Compartment
1. Inlet wire guide 4. Feed rollers (×4 pcs.) 2. Middle wire guide 5. Contact tips for the welding torch (×4 pcs.) 3. Outlet wire guide 0463 786 001 - 24 - © ESAB AB 2023... -
Page 25: Attaching The Wheel Kit
M12 screws, washers and nuts, using a tightening torque of 40 ±4 Nm (354 ±35.4 in. lb). The fixed wheels at the rear end should be positioned parallel to the frame. 5.14.2 Wire feed unit in vertical position 0463 786 001 - 25 - © ESAB AB 2023... -
Page 26: 5.14.3 Wire Feed Unit In Horizontal Position
5.14.3 Wire feed unit in horizontal position NOTE! In order to attach the wire feeder to the wheel kit in the horizontal position, the two bumpers on the wire feeder door must be removed. 0463 786 001 - 26 - © ESAB AB 2023... -
Page 27: Attaching Both The Wheel Kit And The Torch Strain Relief Accessory
Ensure that the two distance washers are inserted between the wheel kit and the wire feeder. Fasten the wheel kit and the torch strain relief to the wire feeder using the two screw joints located closer to the front end of the wire feeder. 0463 786 001 - 27 - © ESAB AB 2023... -
Page 28: Marathon Pac™ Installation
5 OPERATION 5.16 Marathon Pac™ installation 0463 786 001 - 28 - © ESAB AB 2023... - Page 29 5 OPERATION 0463 786 001 - 29 - © ESAB AB 2023...
-
Page 30: Control Panel
10. Scales voltage and arc length 5. Trigger modes – 2T / 4T 11. Display – shows set or measured value (wire feed speed / amperage) 6. Weld mode selection button 0463 786 001 - 30 - © ESAB AB 2023... -
Page 31: Led Indicators Description
To achieve a good welding result, the arc voltage is a crucial factor. In GMAW welding, the power source is prepared to sense the arc voltage in the wire feeder. Prerequisite for this functionality is that an ESAB wire feeder and an ESAB interconnection cable is used. -
Page 32: Push Encoder Knobs
For more information, see section "Front panel functionality." 6.1.3 Buttons 2T / 4T button (5) This button is used for changing between 2-stroke and 4-stroke mode in GMAW applications. 0463 786 001 - 32 - © ESAB AB 2023... - Page 33 The respective LEDs will be lit in green once the current JOB is saved and activated. If the JOB contains any previous weld setting parameters, it will be replaced with the new weld setting parameters. 0463 786 001 - 33 - © ESAB AB 2023...
-
Page 34: Internal Control Panel
Gas purge occurs without voltage or wire feed start. Wire inch button (6) Wire inching is used to feed wire without welding voltage being applied. The wire is fed as long as the button is pressed. 0463 786 001 - 34 - © ESAB AB 2023... -
Page 35: Menu Selection
(1, 2 and 3) in the external control panel. 6.4.1 Setting up a new JOB in the internal control panel 1) Press the material button and select the desired material parameters by turning the push encoder knob. 0463 786 001 - 35 - © ESAB AB 2023... - Page 36 3) Press the gas button and select the desired gas by turning the push encoder knob. 4) Press the weld mode selection button and select the desired application by turning the push encoder knob. 0463 786 001 - 36 - © ESAB AB 2023...
- Page 37 5) If the material, dimension or gas option is changed after welding mode selection, synergic line error for the current welding selection may pop up. 6) Navigate to the Menu button and select JOBs. 0463 786 001 - 37 - © ESAB AB 2023...
- Page 38 8) To edit the jobs, select the pre-saved job and navigate to more (on the bottom left). 9) Select the Edit settings to edit the job parameters. 0463 786 001 - 38 - © ESAB AB 2023...
- Page 39 6 CONTROL PANEL 10)Navigate to Edit limits and enable the Activate limits option to vary the limits. 0463 786 001 - 39 - © ESAB AB 2023...
-
Page 40: Copy A Job
3) Select the desired job number and press the save button on the top left to copy or duplicate. NOTE! While saving a job, if the existing job number with pre-saved data is selected. It will overwrite the new weld parameters. 0463 786 001 - 40 - © ESAB AB 2023... -
Page 41: Setting Up A New Job In The External Control Panel
6 CONTROL PANEL 6.4.3 Setting up a new job in the external control panel 1) Select the desired welding application. 0463 786 001 - 41 - © ESAB AB 2023... -
Page 42: Tools
The error symbol is represented in red, resulting in the stoppage of a current weld. The error log will have history errors and active errors. Pressing the push button for the corresponding error will show the incident description and time. 0463 786 001 - 42 - © ESAB AB 2023... -
Page 43: Operator Management
Admin has the option of enabling and disabling the login required function. NFC card not required NFC card required Admin has authorization to give limited or full access to the system operators. 0463 786 001 - 43 - © ESAB AB 2023... - Page 44 Functions such as gas purge and wire inching can be accessible in the internal control panel. The symbol appears in the internal control panel when the system is locked. 0463 786 001 - 44 - © ESAB AB 2023...
-
Page 45: System Settings
During ongoing welding with 4-stroke, the welding torch trigger is released. To change a job, press the trigger and release it quickly. 6.6.4 Torch remote configuration The ESAB CX torch remote can be configured by any one of the following functions: 1. JOBs 2. Voltage/Arc length 3. Wire feed speed 4. -
Page 46: Languages
6 CONTROL PANEL 6.6.5 Languages This function enables the user to choose the language of the display. To choose the desired language, navigate to Menu » System settings » Languages 0463 786 001 - 46 - © ESAB AB 2023... -
Page 47: Unit Of Measurement
To use the wire feeder in the horizontal position, the external control panel may be rotated 90°. 1) Remove the two screws for the control panel and remove the panel. 2) Disconnect the panel harness. 0463 786 001 - 47 - © ESAB AB 2023... - Page 48 6 CONTROL PANEL 3) Rotate the control panel 90° counter-clockwise. 4) Attach the control panel, ensuring that the small tabs are in the correct position. 5) Fasten the screws. 0463 786 001 - 48 - © ESAB AB 2023...
-
Page 49: Welding
115% Gas pre-flow 0.0–25.0 0.1 s Gas post-flow 0.0–25.0 1.5 s Creep start ON/OFF ARC ON Crater fill ON/OFF Crater fill time 0.0–10.0 2.5 s Crater fill V 8.0–44.0 14.5 V / 0.0 V offset 0463 786 001 - 49 - © ESAB AB 2023... -
Page 50: Setting Range For Pulse
Job limits ON/OFF Depends on the selected synergic line. 7.1.3 Setting range for SPEED Parameter Setting step Unit Range Default Voltage 8.0–44.0 8.0 V Voltage offset -9.9 – +9.9 0.0 offset 0463 786 001 - 50 - © ESAB AB 2023... -
Page 51: Function Explanations For Settings
This is an estimated value of current to be delivered during welding. The condition of the distance from the contact tip to the workpiece will affect the correspondence between the estimated value and the actual measured amperage value during welding. 0463 786 001 - 51 - © ESAB AB 2023... - Page 52 Too long a burnback time results in a shorter stick out, with increased risk of the arc striking back to the contact tip. 0463 786 001 - 52 - © ESAB AB 2023...
-
Page 53: Smaw Welding
Air is supplied so that the melted material is blown away. When the Gouging application is selected, there is a 5 s delay to protect from unintentional arc strike. 0463 786 001 - 53 - © ESAB AB 2023... -
Page 54: Function Explanations For Settings
A higher voltage produces a wider weld pool, with better penetration into the workpiece. The voltage is set in the Measure screen and Weld Data Setting or Fast Mode menus. 0463 786 001 - 54 - © ESAB AB 2023... -
Page 55: Maintenance
The wear parts of the welding torch should be cleaned and replaced at regular intervals in order to achieve trouble-free wire feed. Regularly blow the wire guide clean and clean the contact tip. 0463 786 001 - 55 - © ESAB AB 2023... -
Page 56: Event Codes
This event code is displayed due to one of the following: • 205 - Mains over/under voltage or phase error. Make sure that the supply voltage is stable. Restart the system. 0463 786 001 - 56 - © ESAB AB 2023... -
Page 57: Temperature Fault
Check the torque tension in the break hub. Make sure that the wire feed speed control is dust free and rotate. Acknowledge by pressing any buttons on the control panel. Contact service technician to check drive motor. 0463 786 001 - 57 - © ESAB AB 2023... -
Page 58: Communication Fault
Internal memory fault This event code is displayed due to one of the following: • 018 - Partition data storage warning. Make sure that network connection is stable with WeldCloud and acknowledge. 0463 786 001 - 58 - © ESAB AB 2023... -
Page 59: Memory Fault
Check the coolant hose connections and acknowledge. Gas pressure fault This event code is displayed due to one of the following: • 631 - Gas input pressure warning/error. Check gas input pressure. 0463 786 001 - 59 - © ESAB AB 2023... -
Page 60: Gas Flow Fault
This event code is displayed due to one of the following: • 736 - Fieldbus quickstop. • 736 - Fieldbus superquickstop. Acknowledge by pressing any buttons on the control panel. Restart. 0463 786 001 - 60 - © ESAB AB 2023... -
Page 61: Troubleshooting
Clean the liners and other mechanical parts of the wire feed wire feed mechanism. mechanism using pressurized air. Clean and adjust the roller pressure as per the table on the decal on the left side door. 0463 786 001 - 61 - © ESAB AB 2023... -
Page 62: Ordering Spare Parts
Spare parts and wear parts can be ordered through your nearest ESAB dealer, see the back cover of this document. When ordering, please state product type, serial number, designation and spare part number in accordance with the spare parts list. -
Page 63: Calibration And Validation
(TRMS, RMS or rectified arithmetic mean), significantly larger deviations are to be expected! The ESAB Warrior Edge 500 welding power source presents the measured value in rectified arithmetic mean and should therefore not show any significant differences compared to other ESAB welding equipment, due to the measurement method. -
Page 64: Wiring Diagram
APPENDIX APPENDIX WIRING DIAGRAM 0463 786 001 - 64 - © ESAB AB 2023... -
Page 65: Ordering Numbers
* here. Make sure to use a manual with a serial number or software version that corresponds with the product, see the front page of the manual. Technical documentation is available on the Internet at: www.esab.com 0463 786 001 - 65 - © ESAB AB 2023... -
Page 66: Wear Parts
0446 080 882 0.040–1/16 in. (2 mm) 0445 830 883 (Tweco) 0445 830 882 (Euro) Wire diameter 1.8–2.4 mm 0445 822 002 0446 080 883 0.070–3/32 in. (3 mm) 0445 830 884 (Tweco) 0463 786 001 - 66 - © ESAB AB 2023... - Page 67 0445 850 051 0445 850 052 Inlet wire guide Middle wire guide Outlet wire guide 0445 830 885 (Euro) 0445 822 001 0446 080 881 (2 mm) 0445 830 886 (Tweco) 0463 786 001 - 67 - © ESAB AB 2023...
-
Page 68: Accessories
Guide pin extension kit For the feeder assembled with the wheel kit 0446 120 882 Tweco 4 connector including front plate F102 440 880 Quick connector Marathon Pac™ 0446 082 880 Torch strain relief 0463 786 001 - 68 - © ESAB AB 2023... - Page 69 0446 310 985 25 m (82 ft) 0446 310 986 35 m (115 ft) 0446 310 987 50 m (164 ft) Interconnection cable with pre-assembled strain relief, Liquid cooled, 95 mm 0463 786 001 - 69 - © ESAB AB 2023...
- Page 70 10 m (33 ft) 0446 310 993 15 m (49 ft) 0446 310 994 20 m (66 ft) 0446 310 995 25 m (82 ft) 0446 310 996 35 m (115 ft) 0463 786 001 - 70 - © ESAB AB 2023...
- Page 71 APPENDIX 0463 786 001 - 71 - © ESAB AB 2023...
- Page 72 For contact information visit http://esab.com ESAB AB, Lindholmsallén 9, Box 8004, 402 77 Gothenburg, Sweden, Phone +46 (0) 31 50 90 00 manuals.esab.com...
Need help?
Do you have a question about the ROBUSTFEED EDGE and is the answer not in the manual?
Questions and answers