
Related Manuals for Flashforge Adventurer 3 Pro 2


Summary of Contents for Flashforge Adventurer 3 Pro 2
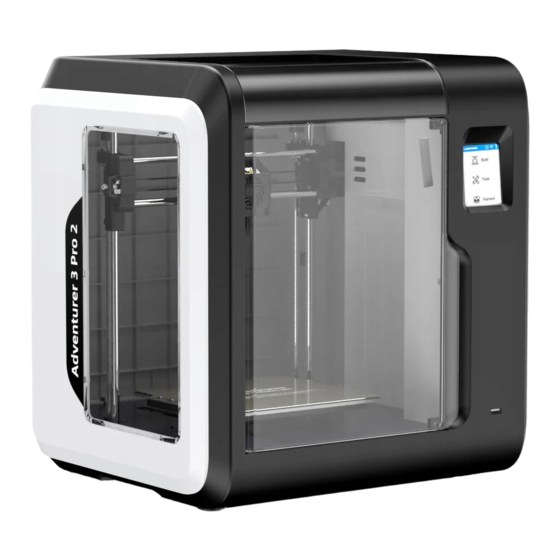
- Page 1 EN-A03 Adventurer 3 Pro 2 This guide is only applicable to FLASHFORGE Adventurer 3 Pro 2 3D Printer.
- Page 2 Scan the QR code to view the unboxing video.
-
Page 3: Table Of Contents
CONTENTS Preface Notice Terms Chapter 1: Adventurer 3 Pro 2 1.1 - Components Introduction 1.2 - Parameters Chapter 2: Operating 2.1 - Unpacking 2.2 - Accessories 2.3 - PEI Build Plate Installation 2.4 - Printing 2.4.1 - Software Installation 2.4.2 - Equipment Preparation 2.4.2.1 - Leveling and Calibration... -
Page 4: Preface
Flashforge Adventurer 3 Pro 2. Even if you are familiar with earlier Flashforge machines or 3D printing technology, we still recommend you to read this guide, as there is lots of important information about the Adventurer 3 Pro 2 for you to get a better 3D experience. -
Page 5: Chapter 1: Adventurer 3 Pro
Keep the printer out of children and untrained people’s reach. Electrical Safety Always use the printer with a properly grounded outlet. Do not refit Adventurer 3 Pro 2 plug. Do not use the printer in damp or wet locations. Do not expose the printer to burning sun. - Page 6 35cm. Device storage temperature: RT 0-40 ℃ Filament Requirements Please make sure you use the Flashforge filament or the filament from the brands accepted by Flashforge. Nozzle clogging and damage may be caused by non-Flashforge filament due to inappropriate material properties.
- Page 7 FCC Warning This device complies with part 15 of the FCC Rules. Operation is subject to the following two conditions: (1) This device may not cause harmful interference, and (2) this device must accept any interference received, including interference that may cause undesired operation. Changes or modifications not expressly approved by the party responsible for compliance could void the user’s authority to operate the equipment.
- Page 8 Terms Build Plate The surface on which the Adventurer 3 Pro 2 builds an object The black tape that covers Adventurer 3 Pro 2’s build plate so Build Tape that the object can stick to the build plate well The dimensions of the space into which 3D prints can be Build Volume produced.
-
Page 9: Components Introduction
Chapter 1: Adventurer 3 Pro 2 1.1 Components Introduction 1. Filament guide tube 2. Filament guide tube joint 3. Extruder base 4. Cooling fan 5. Removable nozzle 6. Extruder cables 7. Clip 8. Led light 9. Air guide duct 10. Front door 11. -
Page 10: Parameters
1.2 Parameters Name Adventurer 3 Pro 2 Number of Extruder 1, Removable Print Technology Fused Filament Fabrication [FFF] Screen Size 2.8”color Touch Screen Build Volume 150*150*150 mm Layer Thickness 0.1-0.4 mm Build Accuracy ± 0.2 mm Positioning Accuracy Z-axis 0.0025mm; XY-axis 0.011 mm Filament Diameter 1.75 mm [±... -
Page 11: Chapter 2: Operating
Chapter 2: Operation 2.1 Unpacking 1. Open the box. 2. Take out the wrapping paper box on the top. 3. Be careful! Filament and power cable 4. Take out the printer from the box, are all placed inside the wrapping and remove the bubble wrap around paper box. - Page 12 Build 6. Click [Tools]-[Setting] in turn to enter pages like this, Tools turn to page two, and click [Move]. Filament Network Preheat Status Language Move Camera Setting About Calibration Homing Filament Check 7. Click the UP arrow in the 8. Open the front door, take out the paper page to raise the extruder box inside the printer, and printer unpacking for removing the bottom...
-
Page 13: Accessories
2.2 Accessories 3D Printer Filament Power Cable After-Sales Service Card Quick Start Guide 0.6-265 Nozzle Screwdriver Unclogging Pin Tool Allen Wrench Grease Leveling Card PEI Flexible Build Plate Glue Stick... -
Page 14: Pei Build Plate Installation
2.3 PEI Build Plate Installation Note Both sides are available. The gold PEI side can be used to print PLA/PLA-CF/PETG-CF High-Speed PLA. The other side can be used to print PETG/High-Speed PETG. Please choose according to the printing material. 1. Manually pull the platform base inside the machine outward slightly to a suitable position. -
Page 15: Printing
2.4 Printing 3D printing process is as follows: (1). Obtain the 3D file; (2). Download and install the slicing software; (3). Prepare the equipment; (leveling, calibration and filament loading); (4). Start printing (model file slicing, transmission and printing). 2.4.1 Software Installation Find the FlashPrint software installation package in the USB flash drive, and select the corresponding system version for installation. - Page 16 1. Click [Start] and the machine starts pre-calibration. The first point is to calibrate the initial distance between the nozzle and the platform. Click the Up and Down arrows to adjust the Z-axis deviation value; Insert a leveling card between the nozzle and the platform. If it cannot be inserted, it means that the nozzle and the platform are too close.
-
Page 17: Flilament Loading
0.00 Completed For specific operation, you can refer to the video. The link path is as follows: Flashforge's Official Website(www.flashforge.com)- Support- Video Center - select [Operation Videos] - [Adventurer 3 Pro2]. Scan the QR code to view the video. 2.4.2.2 Flilament Loading 1. - Page 18 2. Put the spool of filament on the spool holder and close the filament cover. Mind the loading direction of filament. Make sure it is clockwise as the picture shows. 3. Tap [Filament]. 4. Tap [Load] and the extruder starts heating. Load Build /240℃...
- Page 19 6. Loading is completed when there is filament coming /240℃ out of the nozzle. Then tap [OK]. Press OK when new color appears...
-
Page 20: Model File Transfer
Choose a network ChinaNet-AnCr ChinaNet-AnCr TP-LINK_EDC2 TP-LINK_EDC2 QS_1234 QS_1234 3. Open the FlashPrint software, click the icon at the bottom left corner of the interface to select the [Machine Type], select [Adventurer 3 Pro 2]. Then click [Print] - [Connect Machine]. - Page 21 4. For the connection method, you can choose to fill in the IP address of the printer or choose automatic scanning in the pop-up dialog box. Click [Tools] - [About] and turn to the second page, and there is the IP address. Click to connect when finishing the input.
- Page 22 6. After slicing is completed, click [Send To Printer]. Then the printer starts preparatory work such as preheating, and automatically starts printing after it is ready.
- Page 23 Method 2: Cloud Connection Use the cloud connection to process printing operation. * See Section 2.4.4.1 for the usage of FlashCloud. FlashCloud Network Preheat Wi-Fi Hot spot PolarCloud Setting About Cloud Ethernet FlashCloud PolarCloud Account: Printer Name: Flashforge PIN: Registration Code: ABCDEF Save...
-
Page 24: Printing
2.4.4 Printing 6.62 GB Build 1. Tap [Build], and choose the file path: Printer internal Not Available memory, USB stick, or Cloud. Tools No Job Filament 20mm_Box-P ... Ship-PLA.gx 2. Choose the model file, 0 h 10 min on its right to start 0.70 M 20mm_Box- printing;... -
Page 25: Flashcloud Printing
2.4.4.1 FlashCloud Printing Login E-mail Password FlashCloud: Cloud.sz3dp.com Remember Password 1. Register your FlashCloud account. After Login completing the activation via email, log in Forgot password Register FlashCloud with your account. 2. After logging into your FlashCloud account, click [My Printer] - [Add printer]. FlashCloud The current printer is empty. - Page 26 Register code Type State My Printer Flashforge ABCDEF Adventurer 3 Pro 2 Idle My Model My Job Model Library 5. Choose a model from the model library or upload your own model [.stl file], click [Print], and enter the editing interface to edit the model.
-
Page 27: Polar Cloud Printing
7. Finally, click [Start], and the selected printer will automatically start the print job. FlashCloud Home Flashforge My Printer Time Remaining My Model My Job Model Library 21℃/0℃ 21℃/0℃ Closed Nomal Start Cancel 2.4.4.2 Polar Cloud Printing 1. Register your Polar Cloud account. - Page 28 3. Connect the Adventurer 3 Pro 2 to the Internet. Choose the appropriate network connection mode in the network interface to connect the network [see Section 2.5.2.1 for the connection method]. 4. Connect the Adventurer 3 Pro 2 to the Polar Cloud. PolarCloud Enter the cloud connection interface Account: [click Tools >...
- Page 29 6. Click [Explore] in the menu bar at the top of the home page of the website, and then click [Objects]. 7. Click [MY OBJECTS], then click [UPLOAD] to upload the model. 8. Drag and drop the model file to be uploaded to the box area or click the box area to select the model to be uploaded, and then click [UPLOAD] to upload the model.
- Page 30 9. Click [PRINT]. 10. Click [START], and the printer will start downloading cloud jobs, and then start printing after the download is finished.
-
Page 31: Model Removal
2.4.5 Model Removal As shown in the picture, grasp the handles on both sides of the platform directly with both hands, and pull outwards to remove the build platform. When printing is completed, the extruder and build plate may still Notice be hot. -
Page 32: Filament Change
2.4.6 Filament Change 1. Tap [Filament] - [Change], and the extruder starts 2. Open the filament cover. preheating. Load /240℃ Heating extruder... Change Cancel 3. Pull out the filament as 4. Insert the new filament into the filament intake the picture below shows. and push the filament into the feeding wheel until resistance is sensed. -
Page 33: User Interface Introduction
2.5 User Interface Introduction Note: The interface layout may change whenever there is an upgrade of firmware. The functions below are only for demonstration purposes. 2.5.1 Build 1. Tap [Build]. 2. Choose the print file reading path. Read the print file from: The local memory card The USB stick The Cloud... - Page 34 File details: Including the file picture, time needed, and filament needed. Build: To begin printing the file. Copy: To copy files from the USB flash drive to the printer's memory or copy files from the printer's memory to the USB flash drive. Delete: To delete the print file.
-
Page 35: Tools
2.5.2 Tools Network: To connect the printer to your PC or the Internet. Preheat: To preheat the extruder and build plate. Setting: To implement relevant function setups. About: Information about the printer. 2.5.2.1 Network Wi-Fi ON/OFF: To turn on/off the Wi-Fi connection. Wi-Fi connection: To connect your printer with your PC via a stable Wi-Fi signal. - Page 36 Hotspot To set your printer as a WLAN hotspot. Turn on/off the WLAN hotspot. Hotspot setting: To set the hotspot name and password. Input the hotspot name with numbers, characters and symbols. Tap to save the name and password. Ethernet Connection To connect your printer with your PC via the network cable.
- Page 37 Cloud Connection 1. Turn on the Wi-Fi or Ethernet connection, and connect the printer to Internet successfully. 2. Tap [Tools] - Tap [Network] - Tap [Cloud] on the printer. 3. Turn on the Cloud Connection function. 4. Register your cloud account and set your setting on https://cloud.sz3dp.com with the registration code on the printer’s touch screen, or register your cloud account on http://polar3d.com to set your polar3d account and pin code.
-
Page 38: Preheat
2.5.2.2 Preheat ON/OFF: Turn ON/OFF the preheating of the extruder or platform. , and you can set the preheating temperature. Long press , and the temperature will change faster. Extruder/Platform preheating interface It contains the actual temperature, target temperature and heating progress. Maximum extruder heating temperature: 265 ℃... -
Page 39: Setting
2.5.2.3 Setting Setting interface Status Language Calibration Homing Move Camera Filament Check Buzzer Factory Reset Update Extruder Nozzle Check Auto Calibration Network Preheat Status Language Move Camera Setting About Calibration Homing Filament Check Buzzer Factory Reset NozzleCheck AutoCalibration Update Extruder... - Page 40 Status It displays the real-time Status Language coordinates of X-axis, Y-axis, Z-axis and the real-time temperature of the extruder Calibration Home and platform. Language Choose the target language. Status Language Calibration Home Calibration Up arrow: The extruder will rise, away from the platform. Down arrow: The extruder will descend, close to the platform.
- Page 41 Calibration: Extruder Calibration: Click on [Calibration] to start pre-calibration. The first point is to calibrate the initial distance between the extruder and the platform [see z-axis deviation value]. Click on the up and down arrows to adjust the Z-axis deviation value. You can also feel if there is slight resistance by pulling A4 paper or leveling card between them to decide the appropriate distance.
- Page 42 Camera: Turn on or turn off the camera. Move Camera For more details about Camera, please refer to Chapter 2.6. Filament Check Filament check: To turn on/off the filament check. When enabled, a prompt will pop up when Move Camera Move Camera filament is used up or...
-
Page 43: About
Here shows the basic information about the printer. Notice: When contacting after-sales support, please provide the Serial No., which is displayed in the [About] interface, to our after-sales engineers. Machine Type: Firmware Version: Wi-Fi Mac Adventurer 3 Pro 2 v1.03-1.1 02:00:00:00:11:66 Serial No.: Build Volume: 123456... -
Page 44: Filament
2.5.3 Filament Load The extruder is heated up to the target temperature. After heating is completed, insert the filament into the filament intake until some resistance is sensed (push the filament into the feeding wheel). Loading is completed when there is filament coming out of the nozzle. Load /240℃... -
Page 45: Camera Instructions
2.6 Camera Instructions How to Use the Camera The use of Adventurer 3 Pro 2's camera is introduced as follows. 1. Tap [Tools] - [Setting] - [Camera], and then turn on the camera. Build Network Preheat Move Camera Tools Setting... -
Page 46: Flashcloud Camera Use
Login 2.6.1 FlashCloud Camera Use E-mail 1. Register your FlashCloud account. After completing the activation via email, log Password in FlashCloud with your account. Remember Password FlashCloud website: http://cloud.sz3dp.com Login Forgot password Register 2. After logging into your FlashCloud account, click [My Printer] - [Add printer]. FlashCloud The current printer is empty. - Page 47 Add printer Name Register code Type State My Printer Flashforge XXXXXX Adventurer 3 Pro 2 Offline My Model My Job Model Library 5. Click the camera icon pointed by the arrow. ad3 pro 2 6. The camera begins to work.
-
Page 48: Polar Cloud Camera Use
2.6.2 Polar Cloud Camera Use 1. Register your Polar Cloud account. Visit www.polar3D.com to register the account. 2. Query the Polar Cloud PIN code. [1]. After completing the Polar Cloud registration and logging into your account, click the icon on the top right corner and click [Settings]. [2]. - Page 49 3. Connect Adventurer 3 Pro 2 to the Internet. Choose the proper connecting way in the Network interface [the details of connection methods can be found in the previous chapter]. 4. Connect Adventurer 3 Pro 2 to the Polar Cloud.
-
Page 50: Cloud-Based Camera Control
2.6.3 Cloud-Based Camera Control 1. Connect to Polar Cloud The user can turn on or turn off the camera through Polar Cloud. Click [Tools] - [Network] - [Cloud] - [PolarCloud], enter the Polar Cloud setting interface, fill in the account and PIN code, and click to connect to Polar Cloud. - Page 51 [2]. Find the PIN Code in the page. Location Biography Website URL http://www.example.com/profile Email + ADD Email PIN Code XXXX 2. Open or close the camera though the cloud. [1]. After successfully enabling the camera function, click the camera image on the home page to enter the interface shown above.
-
Page 52: Error Handling
Notice a. When in the intranet [that is, the printer and computer are connected to the same router], Polar Cloud displays video streams and the printing status in real time. When in the extranet, only pictures are displayed (a picture is sent per 20s when printing; a picture is sent per 60s when idle). -
Page 53: Chapter 3: Q&A
Chapter 3: Q&A Q1. How to solve if the nozzle is clogged? Method 1: Tap [Preheat], heat up the extruder to 240℃. After heating is completed, press the air tube joint and pull out the filament guide tube. Check whether the filament is bended or filament tip is not smooth. - Page 54 Q9: Can we use filaments of other brands which are not produced by Flashforge ? Adventurer 3 Pro 2 generally supports ABS and PLA filaments, but the material formula of each brand varies. Adventurer 3 Pro 2 has tested out the default parameters such as the optimal temperature and filament extrusion according to the properties of Flashforge ABS and PLA...
- Page 55 Q10. Is Adventurer 3 Pro 2 compatible with all kinds of AC power input ? Adventurer 3 Pro 2 is equipped with a built-in 24V/6.5A power supply, suitable for 110V-240V input voltage. Q11. Can Adventurer 3 Pro 2 automatically shut down after finishing printing? Q12.
- Page 56 Q21. After inserting the USB flash drive, the print files can not be found. How to solve it? The format of the USB flash drive is incorrect. Adventurer 3 Pro 2 only supports FAT32 file system. Please format the USB flash drive into FAT32 format.
-
Page 57: Chapter 4: Help And Support
FlashForge team is on standby and ready to help you with any challenges you may have with your Adventurer 3 Pro 2. If the issues or questions are not covered in this User Guide, you can seek for solutions on our official website or contact us via telephone. - Page 58 Follow us Zhejiang Flashforge 3D Technology Co., Ltd. Address: No.518 XianYuan Road, Jinhua City, Zhejiang Province, China Service Hotline: +86 579 82273989 support@flashforge.com...
Need help?
Do you have a question about the Adventurer 3 Pro 2 and is the answer not in the manual?
Questions and answers