Table of Contents
Advertisement
EN/CN - A01
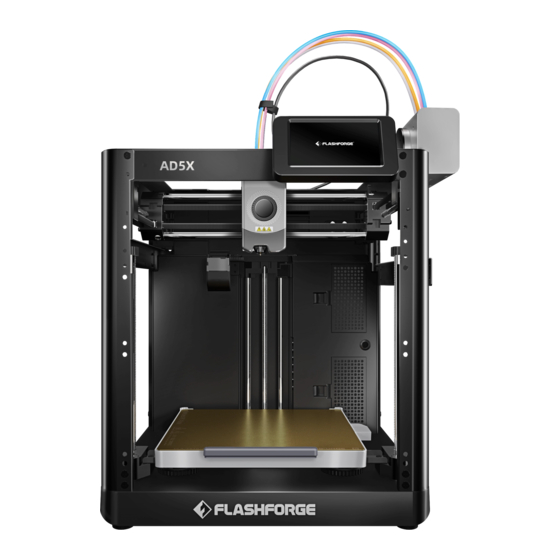
AD5X User Guide
用户使用手册
Safety Notice
安全提示
1. Please refer to this Guide for initial printer setup.
2. Hot! Avoid touching the heating nozzle in operation.
3. Moving parts in the printer may cause injuries. Do not wear
gloves or other sources of entanglement in operation.
1. 请参照本指南完成打印机的初始准备。
2. 高温危险!打印机喷嘴在工作时会被加热,操作时请避免接触!
3. 可动部件可能会造成卷入挤压和切割伤害。操作机器时请不要
佩戴手套或缠绕物。
Do not power on the printer until installation is completed.
请勿在打印机安装完成之前通电。
Advertisement
Chapters
Table of Contents

Related Manuals for Flashforge AD5X


Summary of Contents for Flashforge AD5X
- Page 1 EN/CN - A01 AD5X User Guide 用户使用手册 1. Please refer to this Guide for initial printer setup. 2. Hot! Avoid touching the heating nozzle in operation. 3. Moving parts in the printer may cause injuries. Do not wear gloves or other sources of entanglement in operation.
- Page 2 For more product information, please visit our official website. www.flashforge.com - [Support]...
-
Page 3: Table Of Contents
CONTENTS Notice 1. Equipment Introduction 1.1 Printer Components 1.2 Printer Parameters 2. Software Introduction 2.1 Flash Maker Instructions 2.2 Slicing Software Instructions 3. Load and Configure Filaments for IFS 4. Unload/Change Filament 5. Network Connection 5.1 Wireless Network Connection 5.2 Wired Network Connection 6. -
Page 4: Notice
Exposure to sunlight will accelerate the aging of plastic parts. Make sure to only use the power cord provided by Flashforge. Do not use the equipment during thunderstorms. Please turn off the equipment and unplug it if it is not in use for a long time. - Page 5 LEGAL STATEMENT Users are not authorized to make any modifications to this User Guide. Flashforge shall not be held responsible for any safety incidents resulting from the disassembly or modification of the equipment by the customer. No one is allowed to modify or translate this Guide without Flashforge's permission.
-
Page 6: Equipment Introduction
1.Equipment Introduction 1.1 Printer Components 1. Extruder 2. Display Screen 3. Build Plate 4. 4-in-1 Guide Tube 5. Extruder Cable 6. USB Port 7. IFS Module 8. Spool Holder 9. Cable Clip 10. IFS Connection Cable 11. Waste Outlet 12. Ethernet Port 13. -
Page 7: Printer Parameters
1.2 Printer Parameters Device Name AD5X Extruder Quantity Printing Precision ±0.1mm (testing based on 100mm cubes) Positioning Accuracy X/Y-axis: 0.0125mm, Z-axis: 0.0025mm Layer Thickness 0.1-0.4mm Build Volume 220 x 220 x 220mm Nozzle Diameter 0.4mm (default), 0.25/0.6/0.8mm (optional) Printing Speed... -
Page 8: Software Introduction
QR code. QR Code Note By default, the device name is set to "AD5X", and its location is set to "Group A" upon factory settings. You can modify the name and location on the printer's information interface as needed. -
Page 9: Slicing Software Instructions
Before reading the brief instructions, please ensure you have reviewed the Quick Note Start Guide and completed the first print. Before printing 3D model files, you need to configure slicing presets for the corresponding printer. Recommended slicing software: Orca-Flashforge. Pre-printing Steps: Download and Import the sliced file via... - Page 10 Orca-Flashforge allows you to log in with your Flashforge account, bind your device, and remotely send files and monitor your device. Download Instructions Orca-Flashforge: Download Orca-Flashforge from: https://flashforge.com/blogs/download-software/software. 1. Open the installed Orca-Flashforge. 2. Setup Wizard: Follow the setup wizard prompts for selecting your region, machine type, and materials.
- Page 11 3. Account Login/Register: Log in to Orca-Flashforge using your Flashforge account. If you don't have an account, register one using your mobile phone number. (Note: Flash Maker and Orca-Flashforge share the same account.) 4. Create or open a project for slicing. You can select the machine type, material, and recommended parameters in the printer, filament, and process bars.
- Page 12 6. You can remotely monitor the printing progress and pause/stop printing when necessary on the device interface. (Note: Real-time monitoring is only available with a camera installed and activated. AD5X does not come with a camera by default.) Tip: For details and tutorials on software usage, please refer to Flashforge WiKi. (https://wiki.flashforge.com/en/home)
-
Page 13: Load And Configure Filaments For Ifs
3. Load and Configure Filaments for IFS Please use the dedicated filament spool holders with the IFS module. These Note holders feature a reverse rewinding mechanism to prevent tangling. Please make sure the installed spool holder number, the installation position number, and the configured IFS channel number are consistent. - Page 14 2. After loading the filaments, please manually configure the filament information. Click on the corresponding filament channel, and then click [ ] to select the corresponding filament type and color. Click [Ok]. Note: The device can only print if the filament type of the sliced file matches the configured (actually loaded) filament type.
-
Page 15: Unload/Change Filament
4. Unload/Change Filament 1. If the filament has not entered the extruder feed roller, you can manually pull it out. 2. If the current filament is still inside the extruder, click [ ] - [ ]. The filament will retract to the top of the guide tube. -
Page 16: Wired Network Connection
2. Turn on the Wi-Fi switch, and tap to connect to the corresponding wireless network. Once connected successfully, the network will be marked, and an [ ] icon will appear at the top right corner of the screen. 5.2 Wired Network Connection 1. -
Page 17: Print
After successfully connecting the printer to the network, open Orca-Flashforge. After finishing slicing, click [Print plate] in the menu, and select the connected AD5X to send the print job. Before transferring the file, please connect the printer to a network (either wireless or wired) and bind the printer to the slicing software. - Page 18 3. After connecting the printer to the slicing software, you can click [Print plate] after slicing, select the corresponding printer, and then click [Send]. Note For multi-color printing, filament information needs to be configured manually. Click the corresponding channel and select the filament in the matching or similar color. (Once the IFS information is configured on the device, the slicing software can retrieve the IFS information from that device, as shown below:) Note...
-
Page 19: Print Via Usb
4. Before sending the print job, please confirm in the pop-up window that each selected channel for the colors matches your needs. If the channel info shows "?" , it indicates that the filament on the device has not been configured. If the channel info is blank, it means that no filament is installed in that channel on the device. - Page 20 3. Click the box on the left, and then select the desired filament channel from the right. You can select a channel multiple times. If no filament matches the color specified in the file, you can either place the specified filament in the IFS channel or select a filament with similar properties and a close color match.
-
Page 21: Model Removal After Printing
6.3 Model Removal After Printing When printing is completed, the nozzle and build plate may still be at a high Note temperature. It is recommended to allow them to cool down before removing the model. After printing is completed, directly take out the flexible steel plate and bend the platform to remove the model. -
Page 22: Other Functions
Instructions: Click [ ] - [ ] to enter the leveling and calibration interface. Choose [Leveling] or [Vibration compensation], click [Start], and the printer will automatically perform the corresponding operation. (Note: Before calibration, ensure there are no foreign objects on the platform or at the nozzle tip.) Note on when to perform PID calibration: This can be performed after replacing the nozzle or when the nozzle temperature is abnormal. -
Page 23: Maintenance
The Exclude Objects feature is related to the slicing software settings. To enable this Note feature, you need to check [Exclude objects] in the slicing software, as shown below. Power Loss Recovery. After a power outage, the printer will display a pop-up prompt when power is restored. If you select [Yes], the printer will resume printing the unfinished model. -
Page 24: Q&A
4. Please promptly clear any filament or foreign objects from the lead screw. For detailed maintenance instructions, please refer to Flashforge Wiki. 9. Q&A Q1. What to do if the nozzle is clogged? Troubleshooting Step 1: Manually press the handle at the extruder, cut off the filament, then remove the guide tube and check if the filament tip is flat. - Page 25 3. Release the heatsink clip. 4. Finally, remove the nozzle. When reinstalling the nozzle, ensure it is properly aligned and securely fastened. Install the silicone sleeve back into place. After replacing the nozzle, it's crucial to perform a nozzle temperature calibration and bed leveling. Q3.
- Page 26 Q6. Can filaments from other brands be used? Yes. You can use filaments from other brands, but certain parameter adjustments are required due to slight temperature differences in different filaments. Q7. What to do if your print is warping or not adhering well? Solution 1: Increase the bed temperature to improve adhesion between the bed and your print.
-
Page 27: Help And Support
Many questions are answered at Flashforge's English official website - www.flashforge.com. Flashforge customer support team can be reached by phone from 8:00 AM to 5:00 PM, from Monday to Saturday. In case you contact us during off-duty time, your inquiry will be answered the next working day immediately. - Page 28 更多产品相关资料您可以登陆闪铸官网查看。 www.sz3dp.com - [技术支持]...
- Page 29 目录 注意事项 第一章 设备简介 1.1 - 部件介绍 1.2 - 设备参数 第二章 软件介绍 2.1 - APP应用-Flash Maker 2.2 - 配套切片软件简要 第三章 给IFS上料并配置耗材信息 第四章 退出/更换材料 第五章 网络链接 5.1 无线网络连接 5.2 有线网络连接接 第六章 打印 6.1 - WI-FI传输文件打印 6.2 - U盘打印 6.3 - 打印后模型移除 第七章...
- Page 30 注意事项 安全提示:请确保认真阅读以下安全提示 注意: 每台3D打印机在出厂前都经过打印测试,若设备喷头存在耗材残留或打印平台有轻微划 痕,都属正常现象,不影响使用。 工作环境安全 请确保设备的工作台面干净整洁。 请确保设备工作时远离可燃性气体、液体及灰尘。设备运行产生的高温有可能会与可燃性气 体、液体及空气中的粉尘发生反应从而引发火灾。 儿童及未经培训的人员请勿单独操作设备。 用电操作安全 请务必将设备接地,切勿改装设备的插头。未接地/未正确接地/改装插头必然会增加漏电 风险。 请勿将设备暴露在潮湿或暴晒的环境中:潮湿的环境会增加漏电的风险,暴晒会加速设备 的塑件老化。 请勿滥用电源线,务必使用闪铸集团提供的电源线。 切勿在雷雨天气使用设备。 如长时间不使用设备,请关闭设备并拔下电源线插头。 个人操作安全 在设备运行时,请勿触碰喷头、平台等位置! 在打印完成时,请勿触碰喷头、平台,以免高温烫伤或机械损伤! 在操作设备时,请勿穿戴围巾、口罩、手套、珠宝装饰等容易卷入设备的物件! 请勿在饮酒、服药之后操作设备! 设备使用提示 保持设备内部整洁,切勿将金属物体掉入打印平台底部的滑槽内。 请及时清理丝料碎屑,建议在设备外进行操作。 自行对该设备进行任何改装将自动失去保修保障。 请在设备进丝操作时,喷头和平台的距离至少保持50mm的距离。距离过近可能会造成喷头 堵塞。 请在通风的环境下操作设备。 请勿利用该设备进行违法犯罪的活动。 请勿利用该设备制作食物储存类产品。 请勿将打印模型放入口腔。...
- Page 31 设备运行环境要求 室内温度在15-30℃为宜;湿度在20%-70%为宜。 设备放置要求 设备需要被放置于干燥通风的环境中。设备前后左右四周必须预留至少20cm的空间距离。 存储温度在0-40℃为宜。 设备兼容耗材要求 在使用该设备时,建议使用闪铸提供或指定的耗材。如使用非闪铸提供耗材,材料特性有所 差异,打印参数可能需要调整。 耗材存储要求 耗材拆封后请保持储存环境干燥,无尘,建议配套干燥盒存储。 法律申明 用户无权对此使用手册进行任何修改。 客户若自行拆装或改造设备造成任何安全事故,闪铸集团概不负责。未经闪铸集团允许, 任何人不得对该手册进行修改或翻译。本手册受版权保护,闪铸集团对本手册保留最终 解释权。 第一版(2024年10月) @Copyright 2024浙江闪铸集团有限公司版权所有...
-
Page 32: 第一章 设备简介
第一章 设备简介 1.1 部件介绍 1. 喷头 2. 显示屏 3. 打印平台 4.四合一导丝管 5.喷头线 6.USB接口 7.IFS组件 8. 耗材架 9.压线扣 10.IFS模块连接线 11.排料口 12. 网线接口 13. 电源开关 14. 电源接口... -
Page 33: 设备参数
1.2 设备参数 设备名称 AD5X 喷头数量 打印精度 ±0.1mm [以100mm方块为测试基准] 定位精度 X/Y轴:0.0125mm, Z轴:0.0025mm 层厚度 0.1-0.4mm 打印尺寸 220 x 220 x 220mm 喷嘴口径 0.4mm默认[0.6/0.8/0.25mm可选] 打印速度 10-300mm/s 最大加速度 20000mm/s² 最大移动速度 600mm/s 最高喷头温度 300℃ 电 源 输入:AC 100~120V/200~240V,50/60Hz,650W 设备尺寸 363 x 363 x 413mm [不含显示屏、不含耗材支架] 363 x 402 x 448mm [含显示屏、不含料盘支架]... -
Page 34: 第二章 软件介绍
第二章 软件介绍 2.1 APP应用-Flash Maker 1. 扫码(右图)或通过手机应用商城下载 Flash Maker手机应用,注册您的闪铸账号 并登录。 2. 点击打印机主页【 】-【 】打开 WiFi开连接网络。 3. 点击主页【 】进入设备信息页, 点击【我的账号】打开打印机二维码。 QR Code 特别提示: 设备出厂时默认设备名称为AD5X,位置默认为Group A。 您可以根据实际使用情况在打印机【设备信息】界面修改设备名称和位置。 只有安装摄像头并打开该功能才能看到实时监控画面。 APP不支持仅局域网模式下连接。... -
Page 35: 配套切片软件简要
4. 用Flash Maker手机应用扫描打印机屏幕上 的二维码,将打印机与您的账号绑定。 2.2 配套切片软件简要说明 注意事项 阅读软件简要说明前,请确认已查看快速启动指南,并已经完成第一次开机打印。 三维模型文件打印前需要先进行对应机器的切片预设才能进行打印。 推荐使用切片软件: Orca-Flashforge。 打印前置步骤为: 将切片文件通过 使用切片软件将 U盘导入或网络 获得3维文件 下载安装 文件转化为机器 传输到设备中 ( STEP/STL/ 切片软件 可识别的文件 进行打印 OBJ/3MF ) Orca-Flashforge * 图中仅用一种机型示意使用步骤讲解... - Page 36 Orca-flashforge 可使用您的闪铸账号登陆,可与设备进行绑定,可远程发送文件并监控设备。 下载地址 Orca-flashforge下载地址:https://www.sz3dp.com/download-center。 1.打开安装好的Orca-Flashforge软件。 2. 配置向导。 首次使用软件根据配置向导提示选择您所在的登录地区以及对应机型及使用材料。(注:您可以 勾选列表中全部机型及材料类型,以便后续在切片中选择。)...
- Page 37 3. 账号登录/注册。 使用您的闪铸账号登录Orca-Flashforge,如果没有账户,请进行手机注册。(注:Flash Maker和Orca-Flashforge使用同一账号。) 4. 新建或打开一个项目并进行切片,您可以在打印机、耗材丝、工艺的配置栏里选择显示对应机型、 材料及推荐参数。 选择机型 选择材料 5. 完成切片后,选择打印机并发送打印。...
- Page 38 多色打印时,需要手动配置材料信息,点击对应通道,选择对应或相似颜色的材料 注意事项 (当设备端已经配置好IFS 材料信息后,切片软件可读取到该设备对应IFS 的信息。) 如图所示。 6. 在“设备”界面,对您的打印进程进行远程监控,并可在需要时暂停/停止打印。(注:只有安装 并打开摄像头,才可以看到实时监控画面,AD5X出厂默认未装摄像头。) 提 示 更多软件相关的详细信息和使用教程请访问闪铸官方WiKi查阅。 (https://wiki.flashforge.com/en/home)...
-
Page 39: 第三章 给Ifs上料并配置耗材信息
第三章 给IFS上料并配置耗材信息 使用IFS 时需配合专有的耗材支架;该耗材架具有反向回卷功能,以防止缠绕; 注意事项 安装支架、安装位置位号、安装IFS材料输入通道三者请按序号一一对应安装。 安装方向需如图所示。 将耗材支架向下扣入卡扣的卡槽内 注意数字标朝内 1. 耗材丝料走线方向如下图所示。 耗材进料时将4个耗材分别插入1-2-3-4 进料口,穿过送丝轮,设备将检测到丝料,并逐个自动送入导 管内;待丝料都输送到导管入口处则表示输送完成。 在使用IFS 时完成以上进料即可以直接进行打印。... - Page 40 2. 材料装载后,请手动配置材料信息。点击对应材料通道,点击【 】按钮,选择对应的材料类型以 及相同或者相似的颜色。点击【确认】。 注:切片文件与编辑设置的材料(即为实际装载)的材料类型一致时,设备才可打印。 注意事项 *拓展进料: 不使用IFS时( 注:即断开IFS 信号线时,单独耗材模式才可被使用,当连接IFS 信号线时,设备默认识别 使用IFS),用户可以点击丝料,在屏幕上选择单独进丝的按钮进行进丝(操作方式与IFS相同) *本设备默认使用IFS 进料方式。...
-
Page 41: 第四章 退出/更换材料
第四章 退出/更换材料 1. 未进入喷头送丝轮的耗材,即可手动抽出耗材。 2. 若当前耗材仍在喷头内部,点击 按钮;耗材将回退到导丝管上方,若当前耗材从喷头回退 以后,即可手动抽出耗材。 第五章 网络连接 5.1 无线网络连接 1. 点击 进入网络连接界面。... -
Page 42: 有线网络连接接
2. 打开Wi-Fi开关,点击连接对应无线网络,连接成功后相应网络会被标记,并在屏幕右上角 出现 图标。 5.2 有线网络连接 1. 选择以太网,根据屏幕提示将网线插入设备背部的网线接口。 2. 连接成功后有线网络会显示已连接,屏幕右上角出现 图标。... -
Page 43: 第六章 打印
第六章 打印 6.1 WI-FI传输文件打印 打印机连接网络成功后,打开Orca-Flashforge,切片完成后,点击菜单中的打印按钮,选择 已连接设备AD5X发送打印。传输文件前需先将打印机连接网络(可使用无线网络或者有线 网络),将设备与切片软件进行绑定操作;打印机连接的网络和电脑连接的网络必须在同一局域网 中,否则无法连接成功。打印机连接有2种模式:外网模式与局域网模式。 1. 外网模式下打印机连接前需要先登陆/注册闪铸账号;(若手机APP 已经绑定并连接设备, 切片软件登陆账户后,则自动显示已连接的设备),若手机APP 未连接绑定,则可以在 设备页面点击【+】打开搜索列表, 选择连接的机器。 2. 局域网模式下连接打印机需打开打印机 【网络模式】-【局域网模式】,切片软件在设备页点击【+】 找到对应打印机。 选择相应打印机并输入打印机上的设备ID完成连接。... - Page 44 3. 设备连接切片软件之后,可在切片后点击打印单盘,选择对应的打印机,点击发送。 注意事项 多色打印时,需要手动配置材料信息,点击对应通道,选择对应或相似颜色的材料(当设备端已经配置好IFS 材料信息后,切片软件可读取到该设备对应IFS 的信息。) 如图所示: 注意事项 注意:切片软件里耗材丝中每个颜色前的数字只是耗材的顺序编号,和IFS通道序号没有关系。...
-
Page 45: U盘打印
4. 在发送打印任务前注意在弹窗页面确认一下每个颜色选择的通道是否符合自己预期。若通道信息是 “?”,说明设备上的耗材尚未配置耗材信息,若通道信息是“空”,说明设备上该通道未安装耗材 (注意要确保该槽位的耗材与切片材料种类一致)。 6.2 U盘打印 1. 在切片软件中选择【导出单盘打印文件】,此选项文件格式为3mf 格式。将切片好的文件保存至U盘, 将U盘插入设备,选择对应文件打印。 2. 点击【下一步】可配置IFS 的通道,用户可手动改变实际所需打印的耗材选项。可以在屏幕上手动选择 每个颜色对应的通道。... - Page 46 3. 选中左边的框,然后从右边选择需要打印的耗材通道。可重复选择通道。如果没有耗材与文件中指 定的颜色匹配,您可以将指定的耗材放置在IFS通道中,或者选择具有相同属性和接近颜色匹配耗材。 配置材料通道后,可点击打印。如果打印切片时选择的材料和IFS上的耗材种类不一致,则无法选择该 耗材打印。 例如下图:用PLA切片的打印文件,可以选择2/3号通道的PLA进行打印,但无法选择4号通道的ABS。 注意事项 当导入到U 盘的文件为gcode 格式,将无法再次手动修改通道。仅支持3mf 格式二次修改。 *说明: 红框(最左侧):显示的为切片软件所配置的耗材类型与颜色。 蓝框(中间):用户点击可手动修改对应实际装配的耗材盘。选中该栏后,点击绿色框里对应实际通 道装载的丝料。选中后将映射到打印材料。 绿色框(最右侧栏):设备端,实际装载的材料信息。 4. 对应关系可参见【指南】。...
-
Page 47: 打印后模型移除
6.3 打印后模型移除 打印完成时,喷嘴和打印平台可能仍处于高温状态,建议冷却后再进行取模型操作! 注意事项 打印完成后直接取出平台柔性钢板,弯折平台即可取下模型。二次打印时,请确保平台无残余丝料。 模型移除建议: 1. 请将平台板拿到设备外部再进行移除,否则模型碎屑容易留在设备腔体内,建议保持腔体清洁。 2. 建议使用刮刀取下TPU或其他柔性材料打印的模型,使用刮刀进行此操作将确保您可以从面板上剥离 柔性模型,而不会对模型造成损坏。 第七章 打印机其他功能介绍 因固件会不定期升级,界面请以实际显示页面为准。 注意事项 7.1 调平校准 首次开机引导会执行一次设备校准。后续使用过程中根据情况选择调平或振动补偿。 关于何时需执行调平的说明: 若是持续只打印PLA 材料时,可以只执行一次自动调平,无需进行每次打印前调平,做一次调平有利于 提升打印成功率。 若涉及打印材料类型的切换,例如从PLA 材料切换到ABS 材料打印,需要执行每次打印前调平。 若平台与喷嘴距离过远(粘附不住)或者过紧(丝料不吐出)时请执行自动调平。 每次更换新的打印平台板或者打印喷嘴后,都需执行自动调平,务必注意更换喷嘴后要进行调平,否则会 有喷头撞断的风险。 关于何时需执行振动补偿的说明: 打印模型振纹明显。 调节同步带松紧后。 设备长时间未使用,重新启用。... -
Page 48: 其他功能设置
操作说明: 点击 进入调平校准页面,选择[调平]或[振动补偿],点击[开始]按钮,设备将自动进行相应校 准操作。(注意事项:校准开始前,请确保平台以及喷嘴尖部无异物残留。) 关于何时执行PID校准的说明:更换新喷嘴或发现喷嘴温度异常时可执行该校准。 7.2 其他功能设置 在设备信息界面中可开启或关闭声音、丝料检测功能以及进行固件升级。 丝料检测功能开启时,设备 将会在打印中途丝料用完时停止打印。 在无线网络连接时,点击固件升级可查看当前版本以及检测是否有新固件版本,并进行在线固件升级。 打印机名称和设备位置:用户可自定义修改设备名称和位置。对应方便管理,位置的修改可帮助用户管 理设备摆放位置作为区分;用户可以自定义组别A/B/C,对应也将显示在app 和切片软件中,可用于筛选。 打印零件跳过功能。 打印多模型时发现单个零件打印损坏时,可以点击【 】按钮,选中对应损坏的模型,进行跳过。 后续的打印将不再打印损坏的模型,继续打印其他模型。... -
Page 49: 第八章 维护
2. PEI 膜贴板适合打印PLA/TPU可以不使用胶水,打印PETG 建议配合胶水使用。该板子可额外购买。 3. PC 贴纸平台板适合打印PC/ABS/ASA。该板子可额外购买。 4. 平台板涂胶水后可使用水清洗。 5. 平台板若沾染油污,可使用洗洁精清洗。 6. 平台板若长期使用后有较大形变,建议更换新的平台板。 8.2 喷嘴的使用建议 1. 建议一个喷嘴组件对应同类材料使用。尤其是纤维增强材料与PETG, 不可与其他材料混用,若混用材 料容易引起堵头,降低喷头使用寿命。 2. 使用同个喷嘴打印不同耗材,更换的耗材打印温度低于当前喷头内耗材的打印温度,需要使用更高温 的设置来进行吐丝,进行内部丝料的清洗。 3. 需要更换的耗材打印温度高于当前喷头内耗材的打印温度,直接用新耗材进丝即可。 4. 清洗喷嘴内残余丝料,可多次进丝,或手动通针疏通挤出残留丝料。 5. 更换新的喷嘴组件后,请重新进行调平操作。 8.3 设备一般维护 1. 打印每累计1000小时,请对设备关键部件进行保养:X轴,Y轴和Z轴的光轴请用无尘布或者无尘纸擦 拭干净。 2. Z轴丝杆油污清理干净后请均匀涂抹附带或者可替代的润滑脂。 3. 为了防止耗材受潮断裂在导丝管产生故障,打印机待机超过两天的,请将耗材从机器退出并密封防潮 储存。 4. 请及时清理缠绕在丝杆上的丝料或者异物。 维护指南请查看Flashforge wiki。... -
Page 50: 第九章 Q&A
第九章 Q&A Q1. 喷嘴堵头怎么办? 排查1:手动按压喷头处的把手,切断丝料,然后拔出导丝管,查看丝料头部是否平整。若不是,剪平 整后将导丝管与丝料装入喷头,再点击进丝查看。 排查2:拆卸下喷头,查看喷头处丝料是否堵住。 Q2. 如何更换喷嘴? 喷头内部有丝料时,请先退出丝料,或者手动切断丝料。然后按以下步骤操作: 1. 先取下喷头前壳。 2. 再取下保温硅胶套。 3. 打开散热器固定扣。 4. 最后取下喷嘴。 重新安装回喷头时需要注意喷嘴对位,是否扣紧,并且装回保温硅胶套。喷嘴更换完成之后,需要执行 一次喷嘴温度校准以及调平校准。... - Page 51 Q3. 更换喷嘴后需要调平校准吗? 需要执行自动调平。喷头安装可能会产生微小误差,为保证打印质量,建议进行调平校准。设备每次打 印前默认勾选调平操作。需要进行一次新喷嘴的温度校准。 Q4.点击打印模型,喷头运动,但打印一开始就没有出丝怎么办? 1. 观察导丝管,确认丝料是否已进入喷头,若无,请再点击进丝按钮,直至丝料从喷头中吐出。 2. 查看喷头是否堵头,若是,解决方案请查看Q1。 Q5. 打印时发现喷嘴与平台相对位置过高(远离平台)或过低(顶到平台) 怎么办?如何调整? 请先确认打印平台是否安装到位以及喷嘴上是否有过多残料,若存在以上问题请先处理上述问题,然后 进入设置页面,选择调平选项,执行自动调平或开启打印前自动调平。若调平后,发现是整体幅面上由 于喷嘴与平台距离过近或者过远而导致的打印不良,可在打印首层时,点击界面的 图标,进行z 轴 补偿 平台距离过远,点击向上箭头,平台距离过近,则点击向下箭头。 Q6. 可以使用其他品牌的耗材吗? 可以使用其他品牌耗材,但由于不同材料参数温度略有区别,需要经过参数调整配置。...
- Page 52 Q7. 打印模型发生翘边或粘不牢现象怎么办? 方案1:增加平台温度可有效缓解此问题,高温可增加平台与模型的粘附力。 方案2:模型切片时选择添加帽檐(brim)可有效缓解此问题。 方案3:涂抹胶水。 方案4:清洗平台板,去除油污。 方案5:确认平台是否放平。可使用调平校准功能。 Q8. 插入U盘后找不到打印文件,屏幕显示全为文件夹怎么办? U盘格式不正确,设备支持FAT32格式的文件系统,请将U盘格式化成FAT32格式。 Q9. Wi-Fi连接不上怎么办? 1. 请检查Wi-Fi名称是否含有特殊字符,如果有,请修改之后再次尝试。 2. 请检查密码是否含有特殊字符,如果有,请修改之后再次尝试。 Q10. 更新固件注意事项。 请不要在下载或更新固件时断电断网,防止更新失败。 Q11. 为什么开机屏幕白屏? 如果听到开机声音,请更换屏幕或者排线;否则请联系售后人员。...
-
Page 53: 第十章 帮助与支持
第十章 帮助与支持 闪铸专业的售后服务人员及业务员随时为您待命,非常乐意为您解决在您使用过程中遇到的任何 问题。如果您无法从用户手册中找到答案,您可以进入我们的官方网站来搜索问题的解决方案, 或者 通过电话联系我们。 在我们的官网中可以找到一些常见问题的说明和解决方法。您的许多问题都可以在闪铸集团中文 官方网站www.sz3dp.com得到解决。 您可以在周一到周六上午8:00到下午5:00通过电话来联系闪铸售后团队,为您解决问题。如果您 在下班时间联系我们,闪铸将在下个工作日的第一时间给您反馈。若造成不便,我们万分抱歉。 由于更换不同的丝料,会有少量杂质残留在喷头中造成喷头堵塞,疏通后即可,不属于 提 示 质量问题。若用户使用时存在该问题,请联系售后,并在售后的指导下完成疏通工作。 售后服务热线:400-886-6023 邮箱:support@flashforge.com 公司地址: 浙江省杭州市西湖区文二路328号华星发展大厦B座2-3楼 提示:联系售后时,请提供产品序列号,即打印机背部的条形码 S/N: FFAD******... - Page 54 Zhejiang Flashforge 3D Technology Co., Ltd. Address: Floors 2 & 3, Building B, Huaxing Development Building, No.328 Wen'er Road, Xihu District, Hangzhou City, Zhejiang Province, China Service: support@flashforge.com Suggestions and Complaints: mkt2@flashforge.com Web: flashforge.com | enterprise.flashforge.com 浙江闪铸集团有限公司 地址:浙江省杭州市西湖区文二路328号华星发展大厦B座2-3楼 服务热线:400 8866 023 建议与投诉:mkt2@flashforge.com...
Need help?
Do you have a question about the AD5X and is the answer not in the manual?
Questions and answers