Table of Contents
Advertisement
Quick Links
Advertisement
Table of Contents

Subscribe to Our Youtube Channel
Related Manuals for Insportline Xbike Cube IN 20146


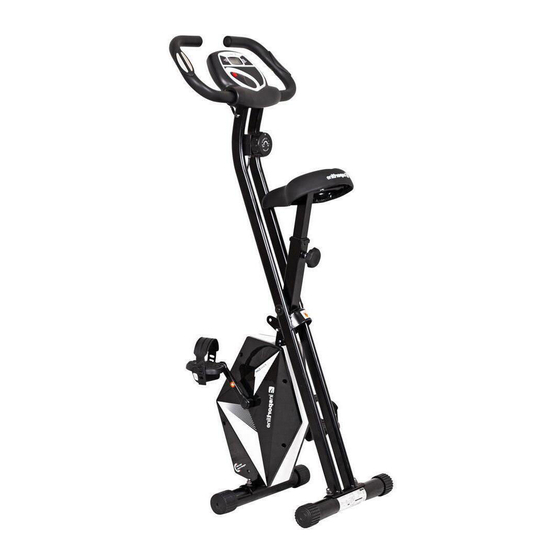
Summary of Contents for Insportline Xbike Cube IN 20146
- Page 1 USER MANUAL – EN IN 20146 Folding exercise bike inSPORTline Xbike Cube...
-
Page 2: Table Of Contents
CONTENTS SAFETY INSTRUCTIONS ........................3 IMPORTANT NOTES ..........................3 PRODUCT DESCRIPTION ........................4 ASSEMBLY ............................. 5 CONSOLE ............................... 8 DIAGRAM ..............................9 PARTS LIST ............................10 USE ............................... 11 EXERCISING INSTRUCTIONS ......................11 CORRECT BODY POSTURE ....................... 12 MAINTENANCE ............................ 12 STORAGE ............................. -
Page 3: Safety Instructions
SAFETY INSTRUCTIONS • Read the manual carefully before first use and keep it for future references. • To ensure the best safety of the exerciser, regularly check it on damages and worn parts. • If you pass on this exerciser to another person or if you allow another person to use it, make sure that that person is familiar with the content and instructions in these instructions. -
Page 4: Product Description
contents of the delivery is complete by referring to the parts list of the assembly and operating instructions. • Be sure to set up the exerciser in a dry and even place and always protect it from humidity. If you wish to protect the place particularly against pressure points, contamination, etc., it is recommended to put a suitable, non-slip mat under the exerciser. -
Page 5: Assembly
Stabilizers Sensor cable Screw Left crank Seat Right crank Left pedal Arc washer Right pedal Lock pin ASSEMBLY 1 / 2 – Front and rear support tube – 3 – Seat post – 1 pcs 4 – Handlebars – 1 pcs 1 pcs 5 –... - Page 6 STEP 1 Remove the 4 washers (18) and nuts (19) from the stabilizers (5). Pull out the locking pin (10) and adjust the front support rod (1) and rear support rod (2) to the correct position. Then return the locking pin (10) to the front support bar (1).
- Page 7 STEP 3 Attach the saddle (7) to the seat post (3) using 3 washers (11) and nuts (12) attached to the back of the saddle (7). Attach the seat post (3) to the main frame and secure with the hand screw (14). STEP 4 Remove the screws (6) from the handles (4).
-
Page 8: Console
CONSOLE TIME: Display training time, maximum value 99:59 SPEED: Display speed in km/h DISTANCE: Display distance in km, maximum value 999.9 km CALORIES: Display calories burned ODO: Display total distance, maximum value 9999 km PULSE: Range from 40 – 240 beats per minute As soon as the console detects movement, it begins to record and display data. -
Page 9: Diagram
DIAGRAM... -
Page 10: Parts List
PARTS LIST Name Qty. Name Qty. Front support tube Screws Rear support tube Free wheel Seat post Flat washer Handlebars Screws Stabilizers Screws Screws Belt Seat Screws Pedal L Pedal R Screws Lock pin Screws Flat washer Sensor holder Nylon nut Console Hand knob Sensor cable... -
Page 11: Use
Lower sensor cable Wrench Allen key L5 Exercise on the exercise bike is based on very simple movements, but you will surely fall in love with them. Thanks to simplicity of the exercise on the exercise bike in can be done by elderly people. Prior to exercise, it is necessary to adjust the height of the saddle. -
Page 12: Correct Body Posture
Touching your toes Slowly bend your back from hips. Keep your back and arms relaxed while stretching downwards to your toes. Do it as far as you are able and hold the position for 15 seconds. Bend your knees slightly. Upper thigh Lean against a wall with one hand. -
Page 13: Important Notice
IMPORTANT NOTICE • This exercise bike comes with standard safety regulations and is only suitable for home use. Any other use is prohibited and may be dangerous to users. We are not responsible for any injury caused by improper and forbidden use of the machine. •... - Page 14 The Seller provides the Buyer a 24 months Warranty for Goods Quality, unless otherwise specified in the Certificate of Warranty, Invoice, Bill of Delivery or other documents related to the Goods. The legal warranty period provided to the Consumer is not affected. By the Warranty for Goods Quality, the Seller guarantees that the delivered Goods shall be, for a certain period of time, suitable for regular or contracted use, and that the Goods shall maintain its regular or contracted features.
- Page 15 26847264 VAT ID: CZ26847264 Phone: +420 556 300 970 E-mail: eshop@insportline.cz reklamace@insportline.cz servis@insportline.cz Web: www.inSPORTline.cz inSPORTline s.r.o. Headquaters, warranty & service center: Električná 6471, Trenčín 911 01, SK CRN: 36311723 VAT ID: SK2020177082 Phone: +421(0)326 526 701 E-mail: objednavky@insportline.cz reklamacie@insportline.cz servis@insportline.cz...
Need help?
Do you have a question about the Xbike Cube IN 20146 and is the answer not in the manual?
Questions and answers