Table of Contents
Advertisement
Quick Links
Advertisement
Table of Contents

Related Manuals for Insportline inCondi S800i


Summary of Contents for Insportline inCondi S800i
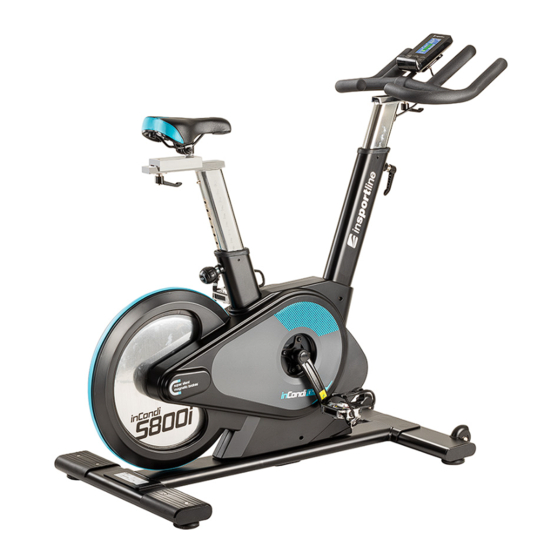
- Page 1 USER MANUAL – EN IN 20068 Indoor Bike inSPORTline inCondi S800i...
-
Page 2: Table Of Contents
CONTENTS SAFETY INSTRUCTIONS ........................3 IMPORTANT NOTES ..........................3 PARTS LIST ............................4 DIAGRAM ..............................7 ASSEMBLY ............................. 8 CONSOLE ............................. 10 USE ............................... 14 CORRECT BODY POSTURE ....................... 15 EXERCISE INSTRUCTIONS ........................ 15 MAINTENANCE ............................ 16 STORAGE ............................. 17 IMPORTANT NOTICE ........................... -
Page 3: Safety Instructions
SAFETY INSTRUCTIONS • To ensure the best safety of the exerciser, regularly check it on damages and worn parts. • If you pass on this exerciser to another person or if you allow another person to use it, make sure that that person is familiar with the content and instructions in these instructions. •... -
Page 4: Parts List
contents of the delivery are complete by referring to the parts list of the assembly and operating instructions. • Be sure to set up the exerciser in a dry and even place and always protect it from humidity. If you wish to protect the place particularly against pressure points, contamination, etc., it is recommended to put a suitable, non-slip mat under the exerciser. - Page 5 Screw M6*54 Φ16* Φ6 Gasket L shaped knob M10*25 Flat washer 1 M8*16 L shaped knob M12*1,25 Screw 3 M8*16 M12*1,25 Φ28*6,5 Crank end cap Knob 1 M16*35 Φ10* Φ6,2*8,5 Sleeve Left crank 170*15 Screw 4 M3*6 Bearings 6004ZZ Right crank 170*15 Φ5 Spring washer 1...
- Page 6 Screw 10 M6*20 Breaking system Magnet 28*20*3 Φ25* Φ20,2*48,2 Fixing rod Sleeve 45*25*9 End cap 100*50*2 Nut 1 M20*1,0 Holder Console SM2531 Screw 3 M5*8 Sensor P=350 Kabel 1 L=850 mm, 9P Φ6 Flat washer 3 Kabel 3 L= 950 mm, 9 P Motor cable L= 150 mm, 9P Screw 3...
-
Page 7: Diagram
DIAGRAM... -
Page 8: Assembly
ASSEMBLY • Make sure you have enough free space for assembly. • Make sure you have all the necessary tools. • Make sure you have all the parts. STEP 1 Secure the front stabilizer (15) to the main frame (16) with 2 washers (5) and 2 screws (3). Secure the rear stabilizer (4) to the main frame (16) with 2 washers (5) and 2 screws (3). - Page 9 STEP 3 Loosen the knob (24) and attach the handlebar post (17) to the main frame (16) and secure with the knob (24). Then fasten the handlebars (18) to the handlebar post with the screws (26) and the knob (19). WARNING: Tighten the handlebar properly.
-
Page 10: Console
STEP 4 Attach the pedals (1L and 1R) are marked L - Left, R - Right. Attach the right pedal to the right crank clockwise, attach the left pedal to the left crank counterclockwise. You can adjust the device resistance using the console. CONSOLE Display TIME... - Page 11 PROGRAM X4 beginner program selection, X4 advanced and X4 sports CARDIO Target heart rate BUTTONS Increase load Settings navigation DOWN Decrease load Settings navigation MODE Confirm selection RESET Total Reset: Hold for 2 seconds, the console will restart Return: Returns to the main menu START / STOP Start / Stop program RECOVERY...
- Page 12 PROGRAM SELECTION In standby mode, use the UP and DOWN buttons to select: Manual - Beginner - Advance - Sports - Cardio. If you press START without setting, the console starts and starts counting. MANUAL MODE Use the UP and DOWN navigation buttons to select Manual and press MODE to confirm. Use the UP and DOWN navigation keys to set TIME, DISTANCE, CALORIES, PULSE, and confirm with MODE.
- Page 13 ADVANCE MODE Use the UP and DOWN navigation buttons to select ADVANCE MODE and press MODE to confirm. Use the UP and DOWN navigation buttons to select ADVANCE MODE 1-4 (Pic. 8) and confirm with MODE. Use the UP and DOWN navigation buttons to set the time and start the program with START / STOP. Use UP and DOWN to adjust the load.
-
Page 14: Use
Pic. 11 Pic. 12 USB CONNECTION The console has a USB connector that can be used to charge your phone. iCONSOLE APPLICATION The console includes a built-in Bluetooth module. Download iCONSOLE + App to your mobile or tablet from App store or Google play. Turn on Bluetooth on your smart device and pair with your console. -
Page 15: Correct Body Posture
The basis of exercising on a bicycle is that the legs are moving on a specific elliptical path. This movement is very similar to cycling. When doing exercise on a bicycle, you just sit on the saddle with the right height, keep your feet firmly in the pedals, hold the ergonomically shaped handles and exercise. -
Page 16: Maintenance
Hamstring stretched Sit and outstretch your right leg. Rest the sole of your left foot against the inside of your right tight. Stretch out your right arm along your right leg as far as you can. Hold for 15 seconds and relax. Repeat all with your left leg and left arm Inside upper thigh Sit on the floor and place your feet together. -
Page 17: Storage
STORAGE Keep the indoor bike in a clean and dry environment. Make sure the power switch is turned off and the indoor bike is not plugged into the power socket. IMPORTANT NOTICE • This indoor bike comes with standard safety regulations. Any other use is prohibited and may be dangerous to users. - Page 18 Warranty Conditions Warranty Period The Seller provides the Buyer a 24 months Warranty for Goods Quality, unless otherwise specified in the Certificate of Warranty, Invoice, Bill of Delivery or other documents related to the Goods. The legal warranty period provided to the Consumer is not affected. By the Warranty for Goods Quality, the Seller guarantees that the delivered Goods shall be, for a certain period of time, suitable for regular or contracted use, and that the Goods shall maintain its regular or contracted features.
Need help?
Do you have a question about the inCondi S800i and is the answer not in the manual?
Questions and answers