W&H Lexa MN-111 Instructions For Use Manual
Hide thumbs
Also See for Lexa MN-111:
- Troubleshooting manual (22 pages) ,
- Instructions for use manual (104 pages)
Table of Contents
Advertisement
Advertisement
Table of Contents

Subscribe to Our Youtube Channel
Related Manuals for W&H Lexa MN-111


Summary of Contents for W&H Lexa MN-111
- Page 1 Instructions for Use MN-111 - ENG - Rev14 MN-111...
-
Page 3: Table Of Contents
Table of contents Conformity Traceability options (optional) Symbols and messages Hide/Unhide a cycle Introduction Managing printers About this manual Printer selection (optional) Use restrictions Label printer selection (optional) Label printer usage (optional) Safety information Safety warnings Label content description Responsibility Sterilization cycles Getting started Load maintenance and preparation... - Page 4 Troubleshooting Emergency door opening Technical data Sterilization programs Sterilization program phases Technical data Recommendations for validation Diagrams Water quality Accessories, spare parts, consumables Authorized W&H service partners Documentation forms W&H installation check-list Lexa | Instructions for Use | MN-111 ENG Rev14 | 03/04/2023 | © W&H Sterilization Srl...
-
Page 5: Conformity
Conformity CONFORMITY TO EUROPEAN AND AMERICAN REGULATIONS, Standards STANDARDS AND DIRECTIVES Description Directives Sterilizer conforms with the following Regulations, Standards and Directives: Table-top steam sterilizers ANSI/AAMI ST55 Standards IEC 61010-1 Safety requirements for electrical equipment for measurement, Description control and laboratory use, general requirements Directives IEC 61010-2- Safety requirements for electrical equipment for measurement,... -
Page 6: Symbols And Messages
Symbols and messages SAFETY SYMBOLS USED IN THIS MANUAL WARNING: indicates a hazardous situation that, if not avoided, could CAUTION: indicates a hazardous situation that, if not avoided, could result in death or serious injury. result in minor or moderate injury. Related to a sterilizer, these warnings indicate hazardous situations that could result in non-sterile conditions (e.g. - Page 7 Storage Manufacturer OFF (supply) IEC 60417- 5008 Transportation IN-position of bistable push Unique Device Identification control IEC 60417-5268 Medical Device Only for MDR devices Health industry bar code in OUT- position of bistable accordance with HIBC Serial Number push control IEC 60417- Standard 5269 Small Steam Sterilizer...
-
Page 8: Introduction
Introduction Contact customer service in the event the manual is unavailable. If CONTENTS the device is transferred, always attach the manual for the new This section deals with the following subjects: owner. About this manual MANUAL CONTENT Use restrictions This manual contains the Instructions for Use and for maintenance of the following sterilizer versions: MN-111 100–125 V ac About this manual... -
Page 9: Use Restrictions
Introduction The information contained in this document is subject to change without prior notice. Use restrictions INTENDED USE For Medical Device in accordance with Regulation EU 2017/745: The small steam sterilizers are intended for the sterilization of invasive and non-invasive medical devices. The devices are intended for professional use by trained people only. - Page 10 Introduction Key program features, including sterilization time, temperature and Type of Load Sterilization Sterilization Drying Time recommended load type are listed in the following table: Program and Load Temperature Time (recommended) weight Type of Load Sterilization Sterilization Drying Time Textiles, up to 30 minutes 250 °F 30 minutes...
- Page 11 Introduction USER QUALIFICATION The users who may operate the sterilizer are the following. User Competences qualification Head of the Legally responsible for: the efficiency of the hygiene protocol in place clinic/practice the sterilization process the operators' training and training documentation the correct operation and maintenance of the equipment Trained Regularly attend the training for operating and using the...
-
Page 12: Safety Information
Safety information CONTENTS ELECTRICAL RISKS This section deals with the following subjects: Do not pour water or any other liquids over the sterilizer (risk of electrical short circuits). Safety warnings Switch off the sterilizer and unplug the mains Responsibility cable before inspecting, carrying out maintenance or servicing the sterilizer. - Page 13 Safety information To further protect the device and minimize successful cyber-attacks, TAMPERING the following precautions have been taken: Do not remove the name plate or labels from the access to the device operating system is not possible (user the sterilizer. access to the operating system is disabled);...
-
Page 14: Responsibility
Safety information Responsibility USER RESPONSIBILITY The user is responsible for the proper installation, the correct use and maintenance of the sterilizer in accordance with these Instructions for Use. The safety devices of the sterilizer are impaired when the product itself is not installed, used and serviced in accordance with these Instructions for Use. -
Page 15: Getting Started
Getting started CONTENTS Unpacking This section deals with the following subjects: Unpacking UNPACK THE STERILIZER Handling CAUTION! Heavy product. The sterilizer must be removed Product description from the box and transported by two authorized technicians. Installing the sterilizer Weight: 105.8 lbs (48 kg) Operating the sterilizer User interface menu Sterilizer setup... - Page 16 Getting started WARNINGS CONTENTS OF THE PACKAGING Notice: check the external conditions of the box and the sterilizer. In case of any damage, immediately contact the dealer or shipping agent that has carried out the transport. Keep the packaging for shipping or transporting the sterilizer in the future.
- Page 17 Getting started Power cord Emergency door opening tool This manual, declaration of conformity, warranty card, work test report ITEMS NOT PROVIDED WITH THE STERILIZER The following items are not provided: Water container to capture waste water during manual tank Drain tube USB pen drive loaded with draining (volume larger than 1.84 gal (7 l)).
-
Page 18: Handling
Getting started Handling HOW TO RELOCATE THE STERILIZER Before transport: Completely drain both water tanks (see "Draining the used and clean water tank" on page 67). Allow the sterilization chamber to cool down. Use original packaging when shipping or transporting the sterilizer. -
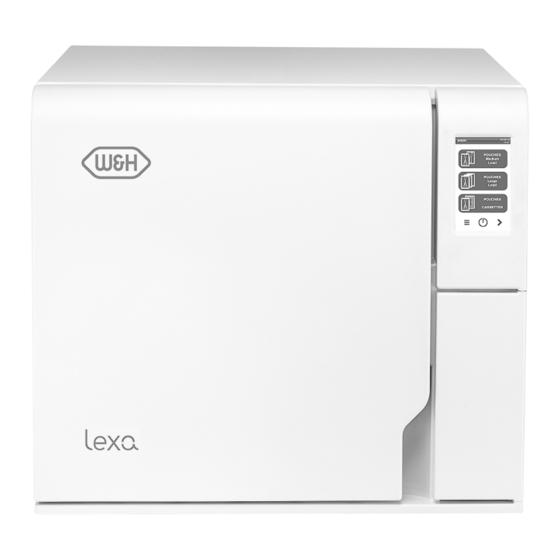
Page 19: Product Description
Getting started Product description FRONT VIEW Part Description Chamber door Clean water tank Door locking system Touch screen Service door Sterilization chamber Safety thermostat reset HEPA filter Door gasket Lexa | Instructions for Use | MN-111 ENG Rev14 | 03/04/2023 | © W&H Sterilization Srl... - Page 20 Getting started COMPONENTS BEHIND THE SERVICE DOOR Part Description Mains switch USB port Emergency door opening tool Identification label Used water drain connection (grey) Clean water drain connection (blue) Drain tube release buttons Port for emergency door opening tool Lexa | Instructions for Use | MN-111 ENG Rev14 | 03/04/2023 | © W&H Sterilization Srl...
- Page 21 Getting started REAR VIEW Part Description LAN port (KIT) USB port Pressure safety valve cover Used water drain (optional) Water supply inlet (optional) Condenser grid Power cord guides Power cord socket Lexa | Instructions for Use | MN-111 ENG Rev14 | 03/04/2023 | © W&H Sterilization Srl...
- Page 22 Getting started CHAMBER ACCESSORIES Part Description Tray Chamber rack. It can host trays or cassettes inserted horizontally or vertically. Lexa | Instructions for Use | MN-111 ENG Rev14 | 03/04/2023 | © W&H Sterilization Srl...
-
Page 23: Installing The Sterilizer
Getting started Installing the sterilizer Clearance requirements to ensure proper air circulation: LOCATION REQUIREMENTS Notice: Do not place the sterilizer so that it is difficult to operate the controls behind the service door. Do not place the sterilizer so that it is difficult to disconnect the power cord. - Page 24 Getting started WATER CONNECTIONS FILLING THE CLEAN WATER TANK The sterilizer clean water tank can be filled manually by the user or Notice: automatically with a water supply system . The water supply system Before carrying out the following steps, make sure that the sterilizer must deliver demineralized or distilled water meeting the has completed the cycle in progress.
- Page 25 Getting started Press the push-button on top of the DRAINING THE USED AND CLEAN WATER TANKS quick connector to dislodge the Notice: drain tube. Before carrying out the following steps, make sure that the sterilizer has completed the cycle in progress. Always wear appropriate PPE during use of the sterilizer (e.g.
- Page 26 Getting started LAN CONNECTION (OPTIONAL) INSTALLING THE STERILIZER WARNING! In case of sterilizer malfunctions immediately unplug the sterilizer and call for service. Do not attempt to repair the sterilizer by yourself. Notice: Please ensure that all installation requirements are met before plugging the sterilizer.
-
Page 27: Operating The Sterilizer
Getting started Operating the sterilizer HOMEPAGE DESCRIPTION Part Description POWER THE STERILIZER ON/OFF Title/purpose of the screen, or the cycle number and the Press the power switch behind current date and time. the service door: once Available cycles and tests. switched ON, the visual indicator on the power switch Additional buttons used to... -
Page 28: User Interface Menu
Getting started User interface menu DEVICE SETTINGS MENU FUNCTIONS Icon Label Function MAIN MENU FUNCTIONS Device Opens the pages to set the device. Icon Label Function Menu Opens the menu. Language Sets device language. System Info Shows the system information. Date &... - Page 29 Getting started Icon Label Function Icon Label Function Cycle Exclusion Remote Data Sets the cycles menu. Only with a network connection set. Opens the page Storage to manage the remote storage. Settings Measurement Only with a network connection set. Sets the Sets the unit of measure (temperature, water Units parameters of the network location.
- Page 30 Getting started TRACEABILITY MENU FUNCTIONS Icon Function Label Icon Function Label EliTrace Allows to manage the instrument database. Cycle History Shows all the sterilization cycles and tests and prints reports and labels. Optional, activated with an activation code. Label Printer Enables/disables the printing of the labels.
- Page 31 Getting started Icon Label Function Icon Label Function Calibration Adjusts the label printer to the edge of the label. System Installs and upload the software. Update Test Prints a test label. Printer Selects the printer model connected to the sterilizer. The icon appears disabled if the printer/Ethernet cable/Wi-Fi dongle key is not connected.
- Page 32 Getting started COMMON COMMANDS AND ICONS Icon Function Icon Function Icon Function Gives information about the current Aborts the action/function. Moves to the previous screen function. Enters/exits the standby mode. without confirming/making any changes nor saving any parameters. Moves to the previous/next screen. Indicates that the option is ON and Opens the homepage.
- Page 33 Getting started Icon Function Increases/decreases the value. Indicates that the option is active/not active. Indicates that the option is enabled/disabled. Show an animation about the replacement procedure. Lexa | Instructions for Use | MN-111 ENG Rev14 | 03/04/2023 | © W&H Sterilization Srl...
-
Page 34: Sterilizer Setup
Getting started Sterilizer setup SET THE STERILIZER NAME To change the sterilizer name that appears in the cycle reports: GUIDED CONFIGURATION On the homepage, tap > > > At the first start- up of the sterilizer, the Guided Configuration Tap the text box: a keyboard appears. procedure automatically appears;... -
Page 35: Iodent
Getting started On the homepage, tap > > > ioDent If the connection is through the Ethernet cable, tap : the TCP/IP screen appears. DESCRIPTION It allows to save the data securely and automatically on the cloud If the connection is through Wi-Fi dongle key, tap : after a and it ensures intelligent and networked reprocessing of while, the sterilizer shows the available networks found. -
Page 36: Elitrace (Optional)
Getting started EliTrace (optional) PIN MANAGEMENT PIN “0000” is assigned as default to each new user. It has to be changed at the first login. When the PIN is reset the default value FUNCTION AVAILABILITY “0000” is reassigned. To access the EliTrace functions the EliTrace activation code must be entered. -
Page 37: Usb Pen Drive
Getting started USB pen drive Standby mode DESCRIPTION DESCRIPTION A USB pen drive is available to be installed in order to automatically When in Standby mode, the sterilizer display remains dark and the record all the sterilization cycle reports. The USB pen drive can be sterilizer chamber is not heated to save energy. -
Page 38: Administrator
Administrator CONTENTS ADD A USER This section deals with the following subjects: On the homepage, tap > > > User management (optional) Tap your user name. Traceability options (optional) Enter the PIN and tap to confirm. Hide/Unhide a cycle Tap the text box: a keyboard appears. User management (optional) Enter the new user name and tap to confirm. -
Page 39: Traceability Options (Optional)
Administrator Traceability options (optional) DELETE A USER On the homepage, tap > > > FUNCTION AVAILABILITY Tap your user name. To access the user management functions a special code must be entered. The special code is required only at the first access to the Enter the PIN and tap to confirm. -
Page 40: Hide/Unhide A Cycle
Administrator Hide/Unhide a cycle WHO CAN HIDE/UNHIDE A CYCLE Only a user with administrator rights can hide a cycle or make it available to users on the homepage. HIDE/UNHIDE A CYCLE On the homepage tap > > > Tap your user name. Enter your PIN and tap to confirm. -
Page 41: Managing Printers
Managing printers CONTENTS Label printer selection (optional) This section deals with the following subjects: FUNCTION AVAILABILITY Printer selection (optional) The first time you access the Label Printer ( ) menu, you will be Label printer selection (optional) requested to enter an activaction code. To require the activation Label printer usage (optional) code, please refer to the activation code instructions provided with Label content description... -
Page 42: Label Printer Usage (Optional)
Managing printers Depending on the LAN connection, take note of the Ethernet or SELECT AND CALIBRATE A LOCAL LABEL PRINTER Wi-Fi IP address. On the homepage, tap > > > Do not switch OFF the sterilizer until the whole procedure is : ... - Page 43 Managing printers code, please refer to the activation code instructions provided with SET THE MANUAL LABEL PRINTING the label printer. The manual printing option permits the user at the beginning of a sterilization cycle to set manually the number of labels to print. AUTOMATIC PRINTING OPTION On the homepage, tap >...
-
Page 44: Label Content Description
Managing printers Label content description STRUCTURE Part Description Sterilizer model Serial number Software release Traceability code (alphanumerical and bar code) Depending on the traceability settings, this field may contain one of the Released following elements: the user who released the cycle the user who started the cycle the sterilizer ID Cycle... -
Page 45: Sterilization Cycles
Sterilization cycles CONTENTS DENTAL HANDPIECE EXTERNAL DISINFECTION This section deals with the following subjects: This procedure reduces the risk of infection during cleaning and maintenance of the dental handpieces. Load maintenance and preparation Wear protective gloves during disinfection. Typical loads Avoid using abrasive disinfectants (pH-value 2.5 –... - Page 46 Sterilization cycles DENTAL HANDPIECE EXTERNAL CLEANING CORRECT LOAD PLACEMENT This procedure involves the removal of residues (blood, dentine, WARNING! Do not overload trays and the chamber. Adhere etc.) that adhere to critical areas such as spray outlets, light ports, to the maximum load weight limits (see "Sterilization knurling etc.
- Page 47 Sterilization cycles PARTIAL LOAD Load type Placement If the chamber is just partially loaded, place the load in such a way On trays allowing adequate space in-between Pouched items that the space in-between the trays is maximized. Spread items bags. Ensure that packs do not touch the walls of evenly on multiple trays.
-
Page 48: Typical Loads
Sterilization cycles Typical loads Prepare the sterilizer EXAMPLES WARNINGS An example of a typical load used during the tests performed by Notice: use only distilled or demineralized water (see "Water quality" W&H is reported below: on page 95 for technical requirements). Do not add any chemical / additive to the water. -
Page 49: Sterilization Cycle Management
Sterilization cycles Turn the sterilizer ON: after the initialization the homepage Sterilization cycle management appears. RUN A STERILIZATION CYCLE GENERAL RECOMMENDATIONS Note: if the user management and the label printer functions are enabled, Follow these recommendations to obtain the most from the drying: you might be requested to enter your PIN code during the following Ensure the paper side of the sterilization bags faces up, and procedure. -
Page 50: Monthly
Sterilization cycles On the homepage, tap the desired cycle. STERILIZATION CYCLE MONITORING Even if the sterilization process is automatically monitored by the to display further cycles on the next page, if any. software and the values of temperature, pressure and duration are Check the cycle requirements. - Page 51 Sterilization cycles Standard version On the homepage, tap the cycle and Tap Start cycle at. 269.6 °F (132 °C) cycles 249.8 °F (121 °C) cycles Duration If you want to change the start time, tap the time or the date: a (minutes) settings page opens.
- Page 52 Sterilization cycles to increase the minutes or decrease them. STERILIZATION CYCLE PAGE Following are the information displayed while a cycle is running: Note: for the minimum value of the drying time for each cycle see Sterilization cycles. Part Description to confirm and go back to the previous page. If Remember next time is selected, this becomes the new fixed Sterilization cycle name value.
- Page 53 Sterilization cycles END OF A STERILIZATION CYCLE STOP A STERILIZATION CYCLE When a cycle is successfully finished, the "Cycle completed" WARNING! You can stop the cycle at any time. Instruments message appears on the screen. To end the cycle: must not be considered sterile if this occurs before the DRY phase.
-
Page 54: Unloading
Sterilization cycles Note: water could be present in the chamber when opening the door. To STORED REPORT FORMAT prevent spilling place a towel below the chamber door. The summarized reports are stored in HTML format and the analytical reports in SCL format. All parameters are recorded every second. MESSAGES OF A STOPPED STERILIZATION CYCLE Following are the messages: WHAT HAPPENS WITH UNSAVED CYCLES... - Page 55 Sterilization cycles PRINT OR SAVE A CYCLE REPORT ON THE USB PEN DRIVE SAVE ALL THE CYCLE REPORTS ON THE USB PEN DRIVE The number of reports that can be saved on the USB pen drive On the homepage, tap >...
- Page 56 Sterilization cycles SET THE REMOTE FOLDER FOR SAVING THE REPORTS TEST THE DATA STORAGE To activate the remote storage and set the necessary parameters do Note: the test function is available only if the remote data storage is enabled. See "Set the remote folder for saving the reports" above. the following: On the homepage, tap >...
- Page 57 Sterilization cycles CYCLE REPORT STRUCTURE Data Description Following the structure of a cycle report: Sterilizer brand and model Serial Number Sterilizer serial number SW version Software version number Local ID Surgery – practice – doctor name Cycle type Name of the executed cycle Cycle log number Cycle counter Exposure temp...
- Page 58 Sterilization cycles Data Description Sterilization Exposure time MINT: Min. temperature Summary MAX T: Max. temperature MIN P: Min. pressure MAX P: Max. pressure F0 value Drying Phase Phase: Exhausting drying phase. See "Sterilization program phases" on page 89 Time: phase duration Partial: xxxxxxx T [F°]: maximum temperature P [psi] : maximum pressure...
-
Page 59: Maintenance
Maintenance CONTENTS Notice: follow the instructions in this chapter when carrying out any maintenance on the sterilizer. This section deals with the following subjects: Warnings for maintenance operations User maintenance User maintenance Monthly or 50-cycle maintenance 1200-cycle or yearly maintenance MAINTENANCE BY THE USER Extraordinary maintenance Frequency... - Page 60 Maintenance : even if the maximum cycle number is not reached, it is recommended to REPLACE THE CONSUMABLE BEFORE THE MAINTENANCE DUE replace the consumable parts every year, or if they appear worn or DATE damaged, or if the filters are clogged or discolored. If you replace the consumables before the request of replacement appears, you should manually reset the counters through the EXPIRED MAINTENANCE...
-
Page 61: Monthly Or 50-Cycle Maintenance
Maintenance Monthly or 50-cycle maintenance CLEANING THE DOOR GASKET AND THE CHAMBER FACE SIDE Proceed as follows: Clean the door gasket and the outer edge of the chamber with a non-abrasive cloth moistened with clean water. Notice: do not use abrasive products, cutting tools or sharp objects. Rinse with clean water. - Page 62 Maintenance CLEANING THE CHAMBER AND THE CHAMBER ACCESSORIES Proceed as follows: Remove the trays and the chamber rack. Clean the chamber with a damp sponge and a mild detergent solution paying attention not to bend or damage the temperature probe inside the sterilizer chamber. Rinse with water.
- Page 63 Maintenance CLEANING THE CHAMBER FILTERS Proceed as follows: Allow the sterilization chamber to cool down. Empty the sterilizer chamber by removing the trays and the rack. Remove the filters at the bottom of the chamber (bottom/center) by unscrewing them. Rinse the filters with tap water. Insert the filters in their original position, screwing them into place.
-
Page 64: 1200-Cycle Or Yearly Maintenance
Maintenance 1200-cycle or yearly maintenance REPLACING THE DOOR GASKET Notice: the door gasket needs to be replaced every 1200 sterilization cycles or once a year, whichever come first. A replacement message alerts when replacement is due. If the consumables is replaced prior to the message, you have to reset the consumable cycle counter. Proceed as follows: Open the chamber door. - Page 65 Maintenance Insert the new seal and press first up and down. Press left and right. Make sure the door gasket is seated evenly. Lexa | Instructions for Use | MN-111 ENG Rev14 | 03/04/2023 | © W&H Sterilization Srl...
- Page 66 Maintenance REPLACING THE HEPA FILTER Notice: the HEPA filter needs to be replaced every 1200 sterilization cycles or once a year, whichever come first. A replacement message alerts when replacement is due. If the consumables is replaced prior to the message, you have to reset the consumable cycle counter. Proceed as follows: Open the sterilizer door.
-
Page 67: Extraordinary Maintenance
Maintenance Extraordinary maintenance DRAINING THE USED AND CLEAN WATER TANK If you left accidentally the tanks full for more than seven days or if you plan not to use the sterilizer for at least seven days, you have to drain the tanks. -
Page 68: Disposal
Maintenance Disposal DISPOSAL RESPONSIBILITY Separate the various components according to the materials they are made of Drop the sterilizer with a company that specializes on the recycling of related products Do not abandon the sterilizer in unsecured places Always refer to current/applicable laws and rules in the country of use The same instructions apply to disposal of all used consumable parts. -
Page 69: Diagnostics
Diagnostics CONTENTS This section deals with the following subjects: Errors Troubleshooting Emergency door opening Errors CHECKS AND ACTIONS Notice: for any error not listed in this table, contact technical service. Code Description Actions Load cannot be considered sterile. See "End of a sterilization cycle" on page 53 Repeat the cycle. - Page 70 Diagnostics Code Description Actions Wait before opening the chamber door. Allow the sterilization chamber to cool down. Repeat the cycle. If the problem persists, contact technical service. Switch the sterilizer OFF and ON. Clean the chamber and the chamber furniture from residuals of detergents, disinfectants and other chemicals.
- Page 71 Diagnostics Code Description Actions Clean water error (bad quality, clean tank low level, high consumption of water). Repeat the cycle. If the problem persists, contact technical service. Drain and/or refill the clean water tank. Check the door gasket. Clean or replace it if necessary. Check if there are hurdles on the door locking area (chamber rack, loads, objects, …).
- Page 72 Diagnostics MESSAGES AND ALERTS Notice: for any error not listed in this table, contact technical service. Message/Alert Description Action Fill clean water tank. There is not enough water in the tank to perform a Fill the water tank as requested. cycle.
- Page 73 Diagnostics Message/Alert Description Action Door Gasket replacement is due. These messages advise that one consumable must Replace the consumable and tap to reset the counter (See "Maintenance" on be replaced. page 59). Do you want to replace it now? If you don't replace the consumable, press Have you replaced the door In this case, you may still use the sterilizer but the message will appear again after gasket?
-
Page 74: Troubleshooting
Diagnostics Troubleshooting ERROR PAGE During the sterilization cycle, the sterilizer is continuously monitored by a control system. If an anomaly is detected, the cycle is aborted MANAGING ERRORS automatically, and the sterilizer starts a reset phase. If during a sterilization cycle an error occurs do the following: The following page appears: Wait until the OPEN button appears. - Page 75 Diagnostics WARNING MESSAGES Message Description Load not The load is not sterile. sterile WARNING! Do not use items on patients! Drying The load might be wet. interrupted WARNING! Wet items are for immediate use only! Lexa | Instructions for Use | MN-111 ENG Rev14 | 03/04/2023 | © W&H Sterilization Srl...
- Page 76 Diagnostics RESET THE SAFETY THERMOSTAT The sterilizer is fitted with a safety thermostat to prevent it from overheating. If the safety thermostat operates because of too high temperatures, the error 240 or a timeout error is displayed. The thermostat must be reset manually. Proceed as follows: Switch the sterilizer OFF and remove the mains cable.
- Page 77 Diagnostics TROUBLESHOOTING TABLE Note: if your problem is not resolved, call your authorized service provider. Notice: before sending the sterilizer for technical service, remove the mains cable, empty both water tanks and use the original or appropriate packaging. Problem Possible cause Solutions The sterilizer remains switched The mains switch or network circuit breaker is OFF.
- Page 78 Diagnostics Problem Possible cause Solutions Corrosion or spots on Tap water on instruments when placed in the Ensure that instruments are dry before they are placed in the sterilizer. instruments. sterilizer. Use of water of poor quality or water containing Drain both water tanks.
- Page 79 Diagnostics Problem Possible cause Solutions When the sterilizer is connected Water fill system not connected. Connect the water fill system to the sterilizer. See "Water quality" on page 95 to an automated water supply When the water fill system attempted to fill the Since water tank filling is attempted only once in-between cycle execution, this event system: there is no clean water in tank, water was temporarily unavailable.
-
Page 80: Emergency Door Opening
Diagnostics Emergency door opening WARNING ABOUT OPENING THE DOOR IN EMERGENCY WARNING! High pressure. Risk of explosion, jet of hot steam, sudden opening of the door. Carry out the following procedure only if necessary and only when NO RESIDUAL PRESSURE IS IN THE CHAMBER. Any attempt to open the door while the unit is still hot or under pressure could expose the operator and the surrounding personnel to serious risk. - Page 81 Diagnostics Remove the power connection (back side). Release the chamber pressure through the ring of the safety valve (sterilizer rear side) or wait three hours until the pressure has naturally decreased to the environment pressure. Extract the opening tool placed behind the service door. Remove the cap.
- Page 82 Diagnostics Insert the opening tool into the hole and then turn it counterclockwise until the door is unlocked (proceed slowly until it stops). Lexa | Instructions for Use | MN-111 ENG Rev14 | 03/04/2023 | © W&H Sterilization Srl...
-
Page 83: Technical Data
Technical data CONTENTS This section deals with the following subjects: Sterilization programs Sterilization program phases Technical data Recommendations for validation Diagrams Water quality Accessories, spare parts, consumables Authorized W&H service partners Sterilization programs WARNINGS WARNING! For your safety and for the safety of your patients: Never process objects different from those specified in the cycle program table and never exceed the maximum load weight limits specified in it. - Page 84 Technical data STANDARD STERILIZATION PROGRAMS The sterilizer offers six preset FDA cleared sterilization programs that comply with the American National Standard ANSI/AAMI ST55. Sterilization Load example Program Recommended use Temperature Pouches Medium Instruments and dental handpieces, up to 3 lbs (1.4 kg). 40 pouched instruments (probes, explorers, 270 °F Load...
- Page 85 Technical data Sterilization Load example Program Recommended use Temperature Textiles, up to 4.4 lbs (2 kg), or instruments and dental handpieces requiring low 65 pouched instruments (probes, explorers, Low Temperature 250 °F temperature, up to 5 lbs (2.3 kg). mirrors, etc.), (121 °C) Pouches, wrapped, unwrapped and naked.
- Page 86 Technical data STERILIZATION PROGRAM OPTIONS (200–240 V AC VERSION) WARNING! The sterility of items processed unwrapped is compromised on exposure to non-sterile environments. Ensure that items are dry when removed from the sterilizer. If the default drying time is not adequate for the load to be sterilized, additional drying time can be added (see "Sterilization cycle management"...
- Page 87 Technical data Pouches Medium Pouches Large Pouches & Wrapped Wrapped Unwrapped Low Temperature Load Load Cassettes Cassettes Pouched, wrapped instruments and Load type dental handpieces Unwrapped instruments and dental handpieces Wrapped cassettes Unwrapped cassettes Textiles instruments: instruments: instruments: instruments: instruments: instruments: Maximum load weight (excluding trays) 18 lb (8.1 kg)
- Page 88 Technical data Pouches Medium Pouches Large Pouches & Wrapped Wrapped Unwrapped Low Temperature Load Load Cassettes Cassettes Class S Class S Class S Class S Class S Class S Sterilization program type according EN 13060 Sterilization time (minutes) Drying time (minutes) Range: 8-99' Range: 25–99' Range: 30–99'...
-
Page 89: Sterilization Program Phases
Technical data Sterilization program phases LEGEND OF THE STERILIZATION PROGRAM PHASES Following is the description of the sterilization phases. Code Phase Description Pre-heating Pre-heating of the sterilizer steam generator and chamber. This phase is not considered a part of the cycle. phase HEA1 Heating... - Page 90 Technical data HIGH TEMPERATURE PRESSURE PROFILE All programs with the sterilization phase at 270 °F (132 °C) feature the same basic pressure profile 270 °F (132 °C). The duration of the drying phase differ between the various programs. Lexa | Instructions for Use | MN-111 ENG Rev14 | 03/04/2023 | © W&H Sterilization Srl...
- Page 91 Technical data LOW TEMPERATURE PRESSURE PROFILE Low Temperature sterilization program features the following pressure profile 250°F (121 °C). Lexa | Instructions for Use | MN-111 ENG Rev14 | 03/04/2023 | © W&H Sterilization Srl...
-
Page 92: Technical Data
Technical data Technical data From -4 °F to +140 °F (from -20 °C to +60 °C) / 0–90 % (with empty Storage temperature / rel. humidity tanks) Max altitude 3000 m asl WATER SUPPLY SYSTEM 8.7 psi (0.6 bar) Min. atmospheric pressure Temperature max. -
Page 93: Recommendations For Validation
Technical data DISTILLED OR DEMINERALIZED WATER See the Test instructions service book (conductivity : < 10μS/cm, Water quality Total Dissolved Solids: < 6.5 ppm) Average water 0.17 to 0.2 gal/cycle (0.65 to 0.75 litres/cycle) consumption Tank volume Clean water 1.7 gal (6.4 l) Min. -
Page 94: Diagrams
Technical data Diagrams CONNECTION DIAGRAMS Data communication Water system (*): for water requirements see "Water quality" on the next page. Lexa | Instructions for Use | MN-111 ENG Rev14 | 03/04/2023 | © W&H Sterilization Srl... -
Page 95: Water Quality
Technical data Water quality capable of handling higher levels of hardness. Note 4: for boiler-treated steam, most boilers are treated to maintain a pH of 7.5 or 8.5. Any treatment of water that goes into boilers should be in FEED WATER SPECIFICATIONS (ANSI/AAMI AND AAMI TIR34) accordance with the sterilizer and boiler manufacturers' written IFU. -
Page 96: Accessories, Spare Parts, Consumables
Technical data Accessories, spare parts, consumables Picture Part Part number Drain tube S230903X Note: use only accessories, spare parts and consumables recommended by W&H. Note: before purchasing, check that the accessories fulfill all applicable standards in the country of use. Mains cable (125 V) U380119X U380120X... - Page 97 Technical data Picture Part Part number Picture Part Part number Serial printer 19721108 Multidem resin cartridge A812016X USB adapter for serial printer A801503X Osmo water demineralizer (220 V) 19721134 19721109 Label printer (label printer only) Osmo water demineralizer (110 V) 19721135 Wi-Fi dongle key 19721137...
-
Page 98: Authorized W&H Service Partners
Technical data OPTIONAL KITS ACTIVATION CODES Notice: The kits must be installed by service technicians authorized Activation code Description Part number by the manufacturer. EliTrace Activates theEliTrace function. 19730018 Picture Part Part number Auto-fill kit with valve X051302X Authorized W&H service partners A list and a map with your nearest W&H service partner are available at www.wh.com. -
Page 99: Documentation Forms
Documentation forms CONTENTS Question Answer This section deals with the following subjects: Completeness of the Instructions for Use W&H installation check-list Were all sections of the Instructions for Use of the sterilizer covered and explained during the in-service? Workplace suitability W&H installation check-list Is the allocated countertop for the sterilizer levelled and flat? Yes Are the recommended ventilation indications of the allocated... - Page 100 Documentation forms Question Answer Question Answer Have you shown the Head of the clinic/practice how to Check manually abort a cycle? Have you executed a Pouches & Wrapped Cassettes 270 °F Have you shown the Head of the clinic/practice the (132 °C) with the tray rack and trays inserted? maintenance program and procedures? Are all connections to the sterilizer well positioned and...
- Page 101 Documentation forms ADDRESSES FOR SENDING THE INSTALLATION CHECK-LIST Send a copy of the installation check-list duly filled-in to both of the following addresses: +43 6274 6236-55 Fax: Ignaz-Glaser-Straße 53, Postfach 1 Mail 5111 Bürmoos Austria Lexa | Instructions for Use | MN-111 ENG Rev14 | 03/04/2023 | © W&H Sterilization Srl...
- Page 102 MN-111 W&H Sterilization Srl Instructions for Use via Bolgara, 2 Brusaporto (BG) Rev14 Italy 03/04/2023 www.wh.com Subject to changes +39 035 66 63 000...
Need help?
Do you have a question about the Lexa MN-111 and is the answer not in the manual?
Questions and answers
can you use speed clean on autoclave