Daikin Altherma ERLQ004CAV3 Installer's Reference Manual
Hide thumbs
Also See for Altherma ERLQ004CAV3:
- Installation manuals (12 pages) ,
- Installation manual (14 pages) ,
- Installer's reference manual (120 pages)

Related Manuals for Daikin Altherma ERLQ004CAV3


Summary of Contents for Daikin Altherma ERLQ004CAV3
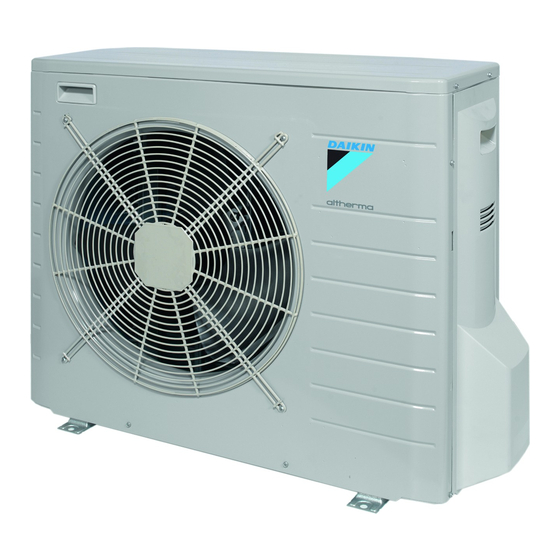
- Page 1 Installer reference guide Daikin Altherma low temperature split ERLQ004-006-008CA EHVH04S18CA3VF Installer reference guide English EHVH08S18CA3VF Daikin Altherma low temperature split...
-
Page 2: Table Of Contents
To finish the outdoor unit installation ......41 6.1.3 Installation site requirements of the indoor unit ..21 7.7.2 To close the outdoor unit ..........41 Preparing refrigerant piping ............21 Finishing the indoor unit installation .......... 41 6.2.1 Refrigerant piping requirements........21 7.8.1 To fix the user interface cover to the indoor unit..41 6.2.2 Refrigerant piping insulation ........21 7.8.2 To close the indoor unit..........41 Preparing water piping............... 21 6.3.1 Water circuit requirements .......... 21 Installer reference guide ERLQ004~008CA + EHVH04+08S18CA3VF Daikin Altherma low temperature split 4P3662261 – 2014.01... - Page 3 12.2 Solving problems based on symptoms........66 12.2.1 Symptom: The unit is NOT heating as expected ..66 12.2.2 Symptom: The compressor does NOT start (space heating or domestic water heating)......66 12.2.3 Symptom: The pump is making noise (cavitation) ..67 12.2.4 Symptom: The pressure relief valve opens....67 12.2.5 Symptom: The water pressure relief valve leaks ..67 12.2.6 Symptom: The space is NOT sufficiently heated at low outdoor temperatures ........... 67 12.2.7 Symptom: The pressure at the tapping point is temporarily unusual high..........68 12.2.8 Symptom: Decoration panels are pushed away due to a swollen tank ............68 ERLQ004~008CA + EHVH04+08S18CA3VF Installer reference guide Daikin Altherma low temperature split 4P3662261 – 2014.01...
-
Page 4: About The Documentation
Only use Installer Preparation of the Digital files on http:// accessories, optional equipment and spare parts made or reference installation, technical www.daikineurope.com/ approved by Daikin. guide specifications, good supportandmanuals/ practices, reference data, productinformation/. WARNING … Make sure installation, testing and applied materials Addendum Additional info about how... -
Page 5: Installation Site
▪ Toxic gas may be produced if refrigerant gas comes components box is connected securely. into contact with fire. ▪ Make sure all covers are closed before starting up the WARNING unit. Always recover the refrigerants. Do NOT release them directly into the environment. Use a vacuum pump to evacuate the installation. ERLQ004~008CA + EHVH04+08S18CA3VF Installer reference guide Daikin Altherma low temperature split 4P3662261 – 2014.01... -
Page 6: About The Box
▪ At delivery, the unit must be checked for damage. Any damage 1 Lift the outdoor unit. must be reported immediately to the carrier’s claims agent. CAUTION ▪ Bring the packed unit as close as possible to its final installation position to prevent damage during transport. Only handle the outdoor unit as follows: Outdoor unit 3.1.1 To unpack the outdoor unit 57kg 2 Remove the accessories at the bottom of the package. Outdoor unit installation manual Fluorinated greenhouse gases label Multilingual fluorinated greenhouse gases label Unit mounting plate Indoor unit 3.2.1 To unpack the indoor unit Installer reference guide ERLQ004~008CA + EHVH04+08S18CA3VF Daikin Altherma low temperature split 4P3662261 – 2014.01... -
Page 7: To Remove The Accessories From The Indoor Unit
3 Remove the accessories. Code Explanation 1× 1× 1× 1× European split outdoor pair heat pump Low water temperature – ambient zone: −10~ −20°C Refrigerant R410A Capacity class: 1× 2× 1× ▪ 004=4.5 kW ▪ 006=6 kW ▪ 008=7.5 kW Series General safety precautions Addendum book for optional equipment 1~, 230 V, 50 Hz Indoor unit installation manual Operation manual 4.1.2 User interface kit: user interface, 4 fixing screws, 2 plugs Identification label: Indoor unit Shutoff valve User interface cover Location 4 Reinstall the top panel. ERLQ004~008CA + EHVH04+08S18CA3VF Installer reference guide Daikin Altherma low temperature split 4P3662261 – 2014.01... -
Page 8: Possible Combinations Of Units And Options
It is recommended to install this option in colder regions with temperature sensor. possible low ambient temperatures or heavy snowfall. As an option the remote indoor sensor can be installed to measure For installation instructions, see the installation manual of the the room temperature on another location. outdoor unit. For installation instructions, see the installation manual of the remote indoor sensor and addendum book for optional equipment. INFORMATION ▪ The remote indoor sensor can only be used in case the user interface is configured with room thermostat functionality. ▪ You can only connect either the remote indoor sensor or the remote outdoor sensor. Installer reference guide ERLQ004~008CA + EHVH04+08S18CA3VF Daikin Altherma low temperature split 4P3662261 – 2014.01... -
Page 9: Possible Combinations Of Indoor Unit And Outdoor
PC. It gives the possibility to upload different language files to the user interface and indoor parameters to the indoor unit. For the available language files, contact your local dealer. The software and corresponding operating instructions are available on Daikin Extranet. For installation instructions, see the installation manual of the PC cable. 4.2.3 Possible combinations of indoor unit and outdoor unit Indoor unit... -
Page 10: Application Guidelines
▪ Stable room temperature matching the desired temperature system (higher comfort) ▪ Less ON/OFF cycles (more quiet, higher comfort and higher The Daikin heat pump system supplies leaving water to heat efficiency) emitters in one or more rooms. ▪ Lowest possible leaving water temperature (higher efficiency) Because the system offers a wide flexibility to control the ▪... - Page 11 ▪ #: [A.2.2.4] convector can only send a ▪ Space heating is provided by: ▪ Code: [C05] thermo ON/OFF condition. ▪ The under floor heating Benefits ▪ The heat pump convectors ▪ Wireless. The Daikin external room thermostat is available in a Setup wireless version. ▪ Efficiency. Although the external room thermostat only sends ON/ OFF signals, it is specifically designed for the heat pump system. Heat pump convectors Setup Main leaving water temperature zone One single room Remote controller of the heat pump convectors...
-
Page 12: Multiple Rooms - One Lwt Zone
Setting Value Unit temperature control: 2 (RT control): Unit operation is decided based on the ambient ▪ #: [A.2.1.7] temperature of the user interface. ▪ Code: [C07] Number of water temperature 0 (1 LWT zone): Main zones: ▪ #: [A.2.1.8] ▪ Code: [702] Benefits ▪ Cost effective. Main leaving water temperature zone Room 1 ▪ Easy. Same installation as for one room, but with thermostatic Room 2 valves. Remote controller of the heat pump convectors Installer reference guide ERLQ004~008CA + EHVH04+08S18CA3VF Daikin Altherma low temperature split 4P3662261 – 2014.01... -
Page 13: Multiple Rooms - Two Lwt Zones
▪ The user interface connected to the indoor unit decides the space convectors must be set to match the indoor unit. operation mode. INFORMATION ▪ The heating demand signals of each heat pump convector are connected in parallel to the digital input on the indoor unit (X2M/1 To increase comfort and performance, Daikin recommends and X2M/4). The indoor unit will only supply leaving water to install the valve kit option EKVKHPC on each heat pump temperature when there is an actual demand. convector. INFORMATION Configuration To increase comfort and performance, Daikin recommends... -
Page 14: Setting Up An Auxiliary Heat Source For Space Heating
▪ Other rooms = external room thermostat functionality Number of water temperature 1 (2 LWT zones): Main + zones: additional ▪ #: [A.2.1.8] ▪ Code: [702] In case of heat pump convectors: 1 (Thermo ON/OFF): When the used external room thermostat or External room thermostat for the heat pump convector can only additional zone: send a thermo ON/OFF ▪ #: [A.2.2.5] condition. ▪ Code: [C06] Shutoff valve output Set to follow the thermo demand of the main zone. At the mixing valve station Set the desired main leaving water temperature. Installer reference guide ERLQ004~008CA + EHVH04+08S18CA3VF Daikin Altherma low temperature split 4P3662261 – 2014.01... - Page 15 Heat exchanger coil 1 2 3 4 FHL1...3 Under floor heating NOTICE ▪ Make sure the auxiliary boiler and its integration in the system complies with applicable legislation. Boiler thermostat input ▪ Daikin is NOT responsible for incorrect or unsafe Auxiliary contact (normal closed) Heating demand room thermostat (optional) situations in the auxiliary boiler system. Auxiliary relay for activation of indoor unit (field supply) Auxiliary relay for activation of boiler (field supply) ▪ Make sure the return water to the heat pump does NOT exceed Indoor Indoor unit...
-
Page 16: Setting Up The Domestic Hot Water Tank
55°C (50°C if outdoor temperature is low). The electrical resistance integrated in the heat pump can higher this ▪ To heat up the DHW tank to the desired DHW tank temperature, temperature. However, this consumes more energy. Daikin you can use the following energy sources: recommends to set the desired DHW tank temperature below ▪ Thermodynamic cycle of the heat pump 55°C to avoid using the electrical resistance. -
Page 17: Dhw Pump For Instant Hot Water
*3V ▪ You can read out the energy data: connected to a singlephase ▪ Per month grid) ▪ Per year INFORMATION The calculated produced heat and consumed energy are an estimation, the accuracy cannot be guaranteed. 5.5.1 Produced heat ▪ The produced heat is calculated internally based on: ▪ The leaving and entering water temperature ▪ The flow rate ▪ Setup and configuration: No additional equipment needed. ERLQ004~008CA + EHVH04+08S18CA3VF Installer reference guide Daikin Altherma low temperature split 4P3662261 – 2014.01... -
Page 18: Preferential Kwh Rate Power Supply
Power limitation is also useful in combination with an energy power consumption. You only need to set the number of pulses management system. of each power meter. The power or current of the entire Daikin system is limited ▪ See "5.5.4 Preferential kWh rate power supply" on page 18 for dynamically by digital inputs (maximum four steps). Each power an example with two power meters. -
Page 19: Power Limitation Process
▪ That is NOT affected by outside air or air draught because of, Actual power input for example, door opening/closing Setup ▪ If this is NOT possible, Daikin recommends to connect a remote ▪ Demand PCB (option EKRP1AHTA) needed. indoor sensor (option KRCS011). ▪ Maximum four digital inputs are used to activate the ▪... -
Page 20: Preparation
▪ In heavy snowfall areas it is very important to select an installation site where the snow will NOT affect the unit. If lateral snowfall is possible, make sure that the heat exchanger coil is NOT affected by the snow. If necessary, install a snow cover or shed and a pedestal. Baffle plate Prevailing wind direction Air outlet Installer reference guide ERLQ004~008CA + EHVH04+08S18CA3VF Daikin Altherma low temperature split 4P3662261 – 2014.01... -
Page 21: Installation Site Requirements Of The Indoor Unit
▪ Use piping with annealed temper grade, in function of the pipe diameter. ▪ The minimal pipe thickness should comply with applicable legislation. The minimal pipe thickness for R410A piping must be in accordance with the following table. FHL1 Pipe for… Outer diameter Pipe thickness (Ø) FHL2 FHL3 Ø Liquid 6.4 mm (1/4") ≥0.8 mm Outdoor unit Indoor unit 15.9 mm (5/8") ≥1.0 mm Heat exchanger Backup heater Pump Stop valve Motorised 3way valve Motorised 2way valve (field supply) Collector ERLQ004~008CA + EHVH04+08S18CA3VF Installer reference guide Daikin Altherma low temperature split 4P3662261 – 2014.01... -
Page 22: Formula To Calculate The Expansion Vessel Pre-Pressure
▪ Only use clean pipes In critical processes, or in rooms with a high heat load, ▪ Hold the pipe end downwards when removing burrs. extra water might be required. ▪ Cover the pipe end when inserting it through a wall, to prevent NOTICE dust and/or particles entering the pipe. When circulation in each space heating loop is controlled ▪ Use a decent thread sealant to seal connections. by remotecontrolled valves, it is important that a minimum ▪ For safety reasons, it is NOT allowed to add any kind of glycol to water flow of 15 l/min is guaranteed, even if all the valves the water circuit. are closed. Installer reference guide ERLQ004~008CA + EHVH04+08S18CA3VF Daikin Altherma low temperature split 4P3662261 – 2014.01... -
Page 23: Changing The Prepressure Of The Expansion Vessel
>7 m Do the following: The expansion vessel of the indoor unit is too ▪ Increase the pre small for the installation. pressure. In this case, it is ▪ Check if the water recommended to install volume does an extra vessel outside exceed the maximum the unit. allowed water volume. This is the height difference (m) between the highest point of the water circuit and the indoor unit. If the indoor unit is at the highest point of the installation, the installation height is 0 m. ERLQ004~008CA + EHVH04+08S18CA3VF Installer reference guide Daikin Altherma low temperature split 4P3662261 – 2014.01... -
Page 24: Preparing Electrical Wiring
58 0 1 5 0 1 5 0 1 5 0 1 5 0 During preferential kWh rate power supply During preferential kWh rate power supply activation, power supply is NOT interrupted. activation, power supply is interrupted The outdoor unit is turned off by the control. immediately or after some time by the electricity company. In this case, the indoor Remark: The electricity company must always unit must be powered by a separate normal allow the power consumption of the indoor power supply. unit. Normal power supply Preferential kWh rate power supply Power supply for outdoor unit Power supply and interconnection cable to indoor unit Power supply for backup heater Preferential kWh rate power supply (voltage free contact) Normal kWh rate power supply (to power the indoor unit PCB in the event of power supply interruption of the preferential kWh rate power supply) 6.4.4 The following illustration shows the required field wiring. Overview of electrical connections for external and internal actuators Installer reference guide ERLQ004~008CA + EHVH04+08S18CA3VF Daikin Altherma low temperature split 4P3662261 – 2014.01... -
Page 25: Installation
User interface Optional equipment Room thermostat 3 or 4 100 mA Outdoor ambient temperature sensor Indoor ambient temperature sensor Heat pump convector 100 mA Field supplied components 100 mA(b) Shutoff valve Electricity meter 2 (per meter) Domestic hot water pump Alarm output Changeover to external heat source control Space cool/heat operation control Power consumption 2 (per input digital inputs signal) Refer to name plate on outdoor unit. Minimum cable section 0.75 mm². Cable section 2.5 mm². Cable section 0.75 mm² till 1.25 mm²; maximum length: 50 m. Voltagefree contact shall ensure the minimum applicable load of 15 V DC, 10 mA. Cable section 0.75 mm² till 1.25 mm²; maximum length: 500 m. Applicable for both single user interface and dual use interface connection. ERLQ004~008CA + EHVH04+08S18CA3VF Installer reference guide Daikin Altherma low temperature split 4P3662261 – 2014.01... -
Page 26: To Open The Indoor Unit
If the unit is installed directly on the floor, prepare 4 sets of M8 or M10 anchor bolts, nuts and washers (field supply) as follows: INFORMATION The maximum height of the upper protruding part of the bolts is 15 mm. (mm) 7.1.3 To open the switch box cover of the indoor unit In order to guarantee good operation of the unit in areas with risk of snowfall, a minimum of 10 cm needs to be assured below the bottom plate of the unit. It is recommended to construct a pedestal with the same height as the maximum snowfall height. On this pedestal it is then recommended to install the EKFT008CA option kit to guarantee the minimum space of 10 cm below the bottom plate of the unit. (mm) Maximum snowfall height EKFT008CA option kit Installer reference guide ERLQ004~008CA + EHVH04+08S18CA3VF Daikin Altherma low temperature split 4P3662261 – 2014.01... -
Page 27: To Prepare Drain Work
▪ If you install the unit on a frame, install a waterproof plate within 150 mm of the underside of the unit in order to prevent the invasion of water in the unit and to avoid the drain water dripping (see the following illustration). NOTICE If the drain holes of the outdoor unit are blocked up, provide space of at least 300 mm below the outdoor unit. An additional drain pan kit (EKDP008CA) can be used to gather the drain water. The drain pan kit consists of: (mm) Maximum snowfall height EKFT008CA option kit Drain pan Ubeams ERLQ004~008CA + EHVH04+08S18CA3VF Installer reference guide Daikin Altherma low temperature split 4P3662261 – 2014.01... -
Page 28: To Install The Outdoor Unit
3 Adjust the height of the leveling feet to compensate for floor over irregularities. The maximum allowed deviation is 1°. ≤1° In case the unit is installed in places where strong wind can tilt the unit, take following measure: 1 Prepare 2 cables as indicated in the following illustration (field supply). 2 Place the 2 cables over the outdoor unit. 3 Insert a rubber sheet between the cables and the outdoor unit to prevent the cable from scratching the paint (field supply). 4 Attach the cable’s ends. Tighten those ends. Installer reference guide ERLQ004~008CA + EHVH04+08S18CA3VF Daikin Altherma low temperature split 4P3662261 – 2014.01... -
Page 29: Connecting The Refrigerant Piping
Tighten 3 or 4 turns by hand, before R410A (clutch (Ridgid-type) (Imperial-type) tightening firmly. type) 0~0.5 mm 1.0~1.5 mm 1.5~2.0 mm 5 Check that the flaring is properly made. ▪ Always use two wrenches together when loosening a flare nut. ▪ Always use a spanner and torque wrench together to tighten the flare nut when connecting the piping. This to prevent nut cracking and leaks. Flare’s inner surface must be flawless. The pipe end must be evenly flared in a perfect circle. Make sure the flare nut is lifted. ERLQ004~008CA + EHVH04+08S18CA3VF Installer reference guide Daikin Altherma low temperature split 4P3662261 – 2014.01... -
Page 30: To Braze The Pipe End
For the tightening torque, refer to the table in chapter "7.4.6 To handle the stem cap" on page 30. ▪ Check for refrigerant leaks after tightening the service port cap. 7.4.8 To connect the refrigerant piping to the outdoor unit 1 Connect the liquid refrigerant connection from the indoor unit to the liquid stop valve of the outdoor unit. Spanner Torque wrench ▪ When it is expected that the operating pressure will be low (e.g. when cooling will be performed while the outside air temperature is low), sufficiently seal the flare nut in the stop valve on the gas line with silicon sealant to prevent freezing. Installer reference guide ERLQ004~008CA + EHVH04+08S18CA3VF Daikin Altherma low temperature split 4P3662261 – 2014.01... -
Page 31: To Connect The Refrigerant Piping To The Indoor Unit
Liquid stop valve absolute). 1 Vacuum the system until the pressure on the manifold indicates NOTICE −0.1 MPa (−1 bar). 2 Leave as is for 45 minutes and check the pressure: Use this vacuum pump for R410A exclusively. Using the same pump for other refrigerants may damage the pump Then… If the pressure… and the unit. Does not change There is no moisture in the system. This procedure is finished. Increases There is moisture in the system. Go to the next step. ERLQ004~008CA + EHVH04+08S18CA3VF Installer reference guide Daikin Altherma low temperature split 4P3662261 – 2014.01... -
Page 32: To Determine The Additional Refrigerant Amount
▪ When charging refrigerant, always use protective gloves and safety glasses. CAUTION Do NOT charge the refrigerant more than the specified amount, to avoid compressor breakdown. Other guidelines: ▪ Only use tools exclusively for R410A to ensure pressure resistance and to prevent foreign materials from entering into the system. ▪ Charge the liquid refrigerant as follows: Then A siphon tube is present Charge with the cylinder upright. (i.e., the cylinder is marked with "Liquid filling siphon attached") Installer reference guide ERLQ004~008CA + EHVH04+08S18CA3VF Daikin Altherma low temperature split 4P3662261 – 2014.01... -
Page 33: Connecting The Water Piping
To avoid damage to the surroundings in case of water leakage, it is recommended to close the cold water inlet stop valves during periods of absence. 2 Screw the indoor unit nuts on the shutoff valves. 3 Connect the domestic hot water in and out pipes to the indoor unit. Pressure relief blowout The blow out should be connected to an appropriate drain according to the applicable legislation. It is recommended to use a tundish. ERLQ004~008CA + EHVH04+08S18CA3VF Installer reference guide Daikin Altherma low temperature split 4P3662261 – 2014.01... -
Page 34: To Fill The Water Circuit
If the temperature is higher than 30°C and the humidity is higher than RH 80%, the thickness of the sealing materials should be at least 20 mm to prevent condensation on the surface of the sealing. 7.5.6 To connect the recirculation piping 1 Loosen and remove the screws at the bottom of the unit. 2 Slide the front panel of the unit downwards and remove it. 3 Loosen and remove the 4 screws that fix the top panel. 4 Remove the top panel from the unit. 10 Reattach the insulation, expansion vessel and casing. Installer reference guide ERLQ004~008CA + EHVH04+08S18CA3VF Daikin Altherma low temperature split 4P3662261 – 2014.01... -
Page 35: Connecting The Electrical Wiring
7.6.2 To connect the electrical wiring on the outdoor unit 1 Remove the 2 switch box cover screws. 2 Remove the switch box cover. Stranded conductor wire Round crimpstyle terminal ▪ Use the following methods for installing wires: Wire type Installation method Single core wire AA´ A´ a Curled single core wire 3 Strip insulation (20 mm) from the wires. b Screw c Flat washer Stranded conductor wire with round Strip wire end to this point crimpstyle terminal Excessive strip length may cause electrical shock or leakage. 4 Open the wire clamp. a Terminal 5 Connect the interconnection cable and power supply as follows: b Screw c Flat washer ERLQ004~008CA + EHVH04+08S18CA3VF Installer reference guide Daikin Altherma low temperature split 4P3662261 – 2014.01... -
Page 36: To Connect The Electrical Wiring On The Indoor Unit
4 Fix the cable with cable ties to the cable tie mountings to ensure strain relief and to make sure that it does NOT come in contact with the piping and sharp edges. Routing Possible cables (depending on unit type and installed options) ▪ User interface Low voltage ▪ Power consumption digital inputs (field supply) ▪ Outdoor ambient temperature sensor (option) ▪ Indoor ambient temperature sensor (option) ▪ Electrical meters (field supply) ▪ Interconnection cable High voltage power supply ▪ Normal kWh rate power supply ▪ Preferential kWh rate power supply ▪ Power supply for backup heater Installer reference guide ERLQ004~008CA + EHVH04+08S18CA3VF Daikin Altherma low temperature split 4P3662261 – 2014.01... -
Page 37: To Connect The Main Power Supply
1 Connect the backup heater power supply. Use a single pole 1 2 3 fuse for F1B. Legend: see illustration below. Backup heater Connections to Connections to type terminals backup heater power supply In case of preferential kWh rate power supply 3 kW 1~ 230 V — X19A (*3V) X6YB 30 31 X6YA Special remark for fuses: 1 2 3 2 Fix the cable with cable ties to the cable tie mountings. ERLQ004~008CA + EHVH04+08S18CA3VF Installer reference guide Daikin Altherma low temperature split 4P3662261 – 2014.01... -
Page 38: To Connect The User Interface
K2M/1 ∞ Example measure resistance between K1M/1 and K5M/13: 1 3 5 13 1 3 5 13 2 4 6 14 2 4 6 14 NOTICE Ω Ω Be careful NOT to distort the shape of the backside of the user interface by overtightening the mounting screws. 3 Cut off a 2 wire conductor. 1 3 5 13 4 Connect the wires to the user interface as shown below. 2 4 6 14 Installer reference guide ERLQ004~008CA + EHVH04+08S18CA3VF Daikin Altherma low temperature split 4P3662261 – 2014.01... -
Page 39: To Connect The Shutoff Valve
NOTICE etc. Secure the wiring to the front part of the casing using the The PCB is mounted in the faceplate of the user interface. wiring retainer and clamp. Be careful NOT to damage it. 4 Reinstall the faceplate onto the wallplate. 2 Fix the wallplate of the user interface to the wall. NOTICE 3 Connect the wires to the user interface as shown below Be careful NOT to pinch the wiring when attaching the From the rear frontplate to the unit. 7.6.7 To connect the shutoff valve 1 Connect the valve control cable to the appropriate terminals as shown in the illustration below. NOTICE Wiring is different for a NC (normal closed) valve and a NO (normal open) valve. From the left 2 Fix the cable with cable ties to the cable tie mountings. ERLQ004~008CA + EHVH04+08S18CA3VF Installer reference guide Daikin Altherma low temperature split 4P3662261 – 2014.01... -
Page 40: To Connect The Electrical Meters
X1 X2 X3 X4 Installation of EKRP1HB is required. 2 Fix the cable with cable ties to the cable tie mountings. 2 Fix the cable with cable ties to the cable tie mountings. 7.6.10 To connect the alarm output 7.6.13 To connect the power consumption digital 1 Connect the alarm output cable to the appropriate terminals as inputs shown in the illustration below. 1 Connect the power consumption digital inputs cable to the appropriate terminals as shown in the illustration below. Installation of EKRP1HB is required. 2 Fix the cable with cable ties to the cable tie mountings. Installation of EKRP1AHTA is required. 2 Fix the cable with cable ties to the cable tie mountings. Installer reference guide ERLQ004~008CA + EHVH04+08S18CA3VF Daikin Altherma low temperature split 4P3662261 – 2014.01... -
Page 41: Finishing The Outdoor Unit Installation
Then in the table explained below, the bread crumb is set as N/A (not applicable). 8.1.1 To connect the PC cable to the switch box Prerequisite: The EKPCCAB kit is required. 1 Connect the cable with USB connection to your PC. 2 Connect the plug of the cable to X10A on A1P of the switch box of the indoor unit. X10A 3 Mount the front panel to the indoor unit. 7.8.2 To close the indoor unit 3 Pay special attention to the position of the plug! 1 Close the switch box cover. 2 Reinstall the top plate. 3 Reinstall the front panel. NOTICE When closing the indoor unit cover, make sure that the tightening torque does NOT exceed 4.1 N•m. ERLQ004~008CA + EHVH04+08S18CA3VF Installer reference guide Daikin Altherma low temperature split 4P3662261 – 2014.01... -
Page 42: To Access The Most Used Commands
This user interface is now the INFORMATION main user interface. An additional 0digit is added to the first part of the setting INFORMATION when you access the codes in the overview settings. During the quick wizard, the second user interface displays Example: [101]: "1" will result in "01". Busy and will NOT be possible to operate. 3 The quick wizard will guide you. Overview settings 4 For proper operation of the system, the local data on the two user interfaces must be the same. If this is NOT the case, both user interfaces will display: Confirm Adjust Scroll 3 Go to the corresponding second part of the setting by using the and button. Installer reference guide ERLQ004~008CA + EHVH04+08S18CA3VF Daikin Altherma low temperature split 4P3662261 – 2014.01... -
Page 43: To Copy The Language Set From The First To The Second User Interface
▪ 1 (Ext RT control): Unit operation is decided by the external thermostat or Language equivalent (e.g. heat pump convector). Select the desired language ▪ 2 (RT control): Unit operation is decided based on the ambient temperature of the user interface. Confirm Adjust ERLQ004~008CA + EHVH04+08S18CA3VF Installer reference guide Daikin Altherma low temperature split 4P3662261 – 2014.01... - Page 44 ▪ 0 (Continuous): Continuous pump temperature zone. operation, regardless of thermo ON or OFF condition. Remark: continuous pump operation requires more energy than sample or request pump operation. ▪ a: Space heating control (user ▪ a: Main LWT zone interface) continued >> ▪ b: OFF ▪ c: On ▪ d: Pump operation continued >> Installer reference guide ERLQ004~008CA + EHVH04+08S18CA3VF Daikin Altherma low temperature split 4P3662261 – 2014.01...
-
Page 45: Quick Wizard: Options
No further water temperature control. settings are needed. See also illustrations below. Domestic hot water pump installed for… Disinfection Instant hot water ▪ a: Space heating control (user interface) ▪ b: OFF ▪ c: On Indoor unit Tank ▪ d: Heating demand (by ext RT or Domestic hot water pump Heater element Nonreturn valve ▪ e: Pump operation Shower Cold water ERLQ004~008CA + EHVH04+08S18CA3VF Installer reference guide Daikin Altherma low temperature split 4P3662261 – 2014.01... - Page 46 Remark: For some functionality, the temperature sensor in the outdoor unit is still used. ▪ 2 (Room sensor): Installed. The temperature sensor in the user interface is NOT used anymore. Remark: This value has only meaning in room thermostat control. Installer reference guide ERLQ004~008CA + EHVH04+08S18CA3VF Daikin Altherma low temperature split 4P3662261 – 2014.01...
-
Page 47: Quick Wizard: Capacities (Energy Metering)
[102] by a maximum of 10°C. [1-02] [103] See the user reference guide and/or operation manual for more [1-03] details about this function. [1-00] [1-01] ▪ T : Target leaving water temperature (main) ▪ T : Outdoor temperature continued >> ERLQ004~008CA + EHVH04+08S18CA3VF Installer reference guide Daikin Altherma low temperature split 4P3662261 – 2014.01... - Page 48 : Target leaving water temperature leaving water temperature is: (main) ▪ NOT weatherdependent (i.e. does ▪ T : Outdoor temperature NOT depend on the outdoor continued >> ambient temperature) ▪ fixed in time (i.e., NOT scheduled) ▪ Weather dep. The desired leaving water temperature is: ▪ weatherdependent (i.e. depends on the outdoor ambient temperature) ▪ fixed in time (i.e., NOT scheduled) continued >> Installer reference guide ERLQ004~008CA + EHVH04+08S18CA3VF Daikin Altherma low temperature split 4P3662261 – 2014.01...
-
Page 49: Domestic Hot Water Control
Moreover, with the modulation turned on, the desired leaving water temperature is lowered or raised in function of the desired room temperature and the difference between the actual and the desired room temperature. This results in: ERLQ004~008CA + EHVH04+08S18CA3VF Installer reference guide Daikin Altherma low temperature split 4P3662261 – 2014.01... -
Page 50: Contact/Helpdesk Number
Preset values make it easy to use the same value in the schedule or temperature for 4 persons compared to 3 to adjust the desired leaving water temperature according to the persons. 0~20°C (default: 17°C) room temperature (see modulation). If you later want to change the [A.4.3.2.5] 5 persons value, you only have to do it in one place. Depending on whether the The increment of the desired tank desired leaving water temperature is weather dependent or not, the temperature for 5 persons compared to 4 absolute desired leaving water temperature should be specified or persons. 0~20°C (default: 1°C) the desired shift values. [A.4.3.2.6] 6 persons The increment of the desired tank temperature for 6 persons compared to 5 persons. 0~20°C (default: 1°C) Installer reference guide ERLQ004~008CA + EHVH04+08S18CA3VF Daikin Altherma low temperature split 4P3662261 – 2014.01... - Page 51 R=4°C (−2°C<T <2°C) (depending on the heat emitter), such situations can be avoided. ▪ 3 (enabled) L=2°C, R=8°C (−4°C<T <4°C) Example: Set the minimum leaving water temperature to 28°C to avoid NOT to be able to heat up the room: leaving water ▪ 4 (enabled) L=4°C, temperatures must be sufficiently higher than the room temperatures R=8°C (−4°C<T <4°C) (in heating). ERLQ004~008CA + EHVH04+08S18CA3VF Installer reference guide Daikin Altherma low temperature split 4P3662261 – 2014.01...
- Page 52 0.5°C. The actual room temperature is Thermo On/OFF: the valve closes, depending on [F0B] when there displayed with an accuracy of 0.1°C. is no heating demand from the main zone. Enable this setting to: Room temperature hysteresis ▪ avoid leaving water supply to the heat emitters in the main LWT zone (through the mixing valve station) when there is request from ONLY applicable in case of room thermostat control. The hysteresis the additional LWT zone. band around the desired room temperature is settable. Daikin advises NOT to change the room temperature hysteresis as it is set ▪ activate the On/OFF pump of the mixing valve station ONLY when for an optimal use of the system. there is demand. See "5 Application guidelines" on page 10. Code Description [A.3.1.1.6.1] [F0B] The shutoff valve: [ 9-0C ] ▪...
-
Page 53: Domestic Hot Water Control: Advanced
(according to the weather dependent curve). During weather dependent operation, the end user cannot adjust the desired tank temperature on the user interface. ERLQ004~008CA + EHVH04+08S18CA3VF Installer reference guide Daikin Altherma low temperature split 4P3662261 – 2014.01... - Page 54 This maximum [5-03] [4-02] [F-01] allowable hot water temperature shall be selected according to the applicable legislation. Ambient (outdoor) temperature Time CAUTION Antirecycle time Maximum running current Be sure that the disinfection function start time [A.4.4.3] with defined duration [A.4.4.5] is NOT interrupted by possible domestic hot water demand. Installer reference guide ERLQ004~008CA + EHVH04+08S18CA3VF Daikin Altherma low temperature split 4P3662261 – 2014.01...
-
Page 55: Heat Source Settings
Make sure to observe all rules mentioned in application operation. This setting is only overruled when backup heating is guideline 5 when bivalent operation function is enabled. required during defrost operation or malfunctioning of the outdoor Daikin shall NOT be held liable for any damage resulting unit (when [A.5.1.2] [406] is enabled). from failure to observe this rule. Code... -
Page 56: System Settings
When power returns after a power supply failure, the auto restart 3031 X2M) and the backup heater is function reapplies the remote controller settings at the time of the NOT connected to the preferential kWh power failure. Therefore, Daikin recommends to always enable the rate power supply. function. If the preferential kWh rate power supply is of the type that power Do NOT use 1 or 3. - Page 57 6 minutes after forced defrost operation was [A.6.3.3] [505] Value: Only applicable in case of full enabled, the outdoor unit ignored the forced defrost request. time power limitation mode. Code Description 0~50 A, step 1 A (default: 50 A) [A.6.6] Do you want to start a defrost operation? [A.6.3.4] [509] Value: Only applicable in case of full ▪ OK time power limitation mode. ▪ Cancel 0~20 kW, step 0.5 kW (default: 20 kW) Amp. limits for DI: Only applicable in case of power limitation mode based on digital inputs and based on current values. [A.6.3.5.1] [505] Limit DI1 0~50 A, step 1 A (default: 50 A) [A.6.3.5.2] [506] Limit DI2 0~50 A, step 1 A (default: 50 A) ERLQ004~008CA + EHVH04+08S18CA3VF Installer reference guide Daikin Altherma low temperature split 4P3662261 – 2014.01...
- Page 58 Pump operation during flow abnormality [F09] defines whether the pump stops at flow abnormality or allow to continue operation when flow abnormality occurs. This functionality is only valid in specific conditions where it is preferable to keep the pump active when T <4°C (pump will be activated for 10 minutes and deactivated after 10 minutes). Daikin shall NOT be held liable for any damage resulting this functionality. Code Description [F09] Pump continue operation when flow...
-
Page 59: Menu Structure: Overview
Backlit LCD time Allowed operation mode User profile Unit of measurement Available home pages [7.3] Set schedules Room temp. LWT main LWT additional Tank temp. Quiet mode DHW pump [7.4] Preset values Room temperature LWT main Tank temperature Quiet level ERLQ004~008CA + EHVH04+08S18CA3VF Installer reference guide Daikin Altherma low temperature split 4P3662261 – 2014.01... -
Page 60: Menu Structure: Overview Installer Settings
Amp. value [A.7] Commissioning kW value Test run Amp. limits for DI UFH screed dryout kW limits for DI Air purge Priority Actuator test run INFORMATION Solar kit and bottom plate heater settings are shown but NOT applicable for this unit. Settings shall NOT be used or changed. Installer reference guide ERLQ004~008CA + EHVH04+08S18CA3VF Daikin Altherma low temperature split 4P3662261 – 2014.01... -
Page 61: Commissioning
> Start air purge and press to start the air purge function. insulated. The correct pipe size is installed and the pipes are Result: The manual air purge starts and the following screen appears. properly insulated. There is NO water leak inside the indoor unit. The shutoff valves are properly installed and fully open. ERLQ004~008CA + EHVH04+08S18CA3VF Installer reference guide Daikin Altherma low temperature split 4P3662261 – 2014.01... -
Page 62: To Perform An Automatic Air Purge
1 Go to [A.7.1]: > Installer settings > Commissioning > Test run. 2 Select a test and press . Example: Heating. 3 Select OK and press Result: The test run starts. It stops automatically when done (±30 min). To stop it manually, press , select OK and press Installer reference guide ERLQ004~008CA + EHVH04+08S18CA3VF Daikin Altherma low temperature split 4P3662261 – 2014.01... -
Page 63: Underfloor Heating Screed Dryout
4 To delete a step, set the duration to "–" by pressing last executed step. 5 Press to save the schedule. 6 Modify and restart the execution of the program. INFORMATION It is important that there is no empty step in the program. Handover to the user The schedule will stop when a blank step is programmed OR when 20 consecutive steps have been executed. Once the test run is finished and the unit operates properly, please make sure the following is clear for the user: ERLQ004~008CA + EHVH04+08S18CA3VF Installer reference guide Daikin Altherma low temperature split 4P3662261 – 2014.01... -
Page 64: Maintenance And Service
▪ Dirty water coming out of the relief valve: Check the following at least once a year: ▪ open the valve until the discharged water does not contain dirt anymore ▪ Water pressure ▪ flush and clean the complete tank, including the piping between ▪ Water filter the relief valve and cold water inlet. ▪ Water pressure relief valve To make sure this water originates from the tank, check after a tank ▪ Relief valve hose heat up cycle. ▪ Pressure relief valve of the domestic hot water tank It is recommended to do this maintenance more frequently. ▪ Switch box ▪ Descaling ▪ Chemical disinfection ▪ Anode Water pressure Check whether the water pressure is above 1 bar. If it is lower, add water. Water filter Clean the water filter. Installer reference guide ERLQ004~008CA + EHVH04+08S18CA3VF Daikin Altherma low temperature split 4P3662261 – 2014.01... -
Page 65: To Drain The Domestic Hot Water Tank
The heat exchanger of the outdoor unit can get blocked up due to dust, dirt, leaves, etc. It is recommended to clean the heat exchanger yearly. A blocked heat exchanger can lead to too low pressure or too high pressure leading to worse performance. ERLQ004~008CA + EHVH04+08S18CA3VF Installer reference guide Daikin Altherma low temperature split 4P3662261 – 2014.01... -
Page 66: Troubleshooting
Possible causes Corrective action The unit must start up out of its If the water temperature is too operation range (the water low, the unit uses the backup temperature is too low) heater to reach the minimum water temperature first (15°C). Check and make sure that: ▪ The power supply to the backup heater is correctly wired. ▪ The backup heater thermal protector is NOT activated. ▪ The backup heater contactors are NOT broken. If the problem persists after you have conducted all of the above checks, contact your dealer. Installer reference guide ERLQ004~008CA + EHVH04+08S18CA3VF Daikin Altherma low temperature split 4P3662261 – 2014.01... -
Page 67: Symptom: The Pump Is Making Noise (Cavitation)
The backup heater equilibrium Increase the “equilibrium page 23). temperature has not been temperature” to activate the The water circuit head is too high The water circuit head is the configured correctly backup heater operation at a difference in height between the higher outdoor temperature. Go indoor unit and the highest point of the water circuit. If the indoor ▪ [A.5.1.4] > Installer settings > unit is located at the highest Heat sources > Backup heater point of the installation, the > Equilibrium temp. OR installation height is considered 0 m. The maximum water circuit ▪ [A.8] > Installer settings > head is 10 m. Overview settings [500] Check the installation requirements. ERLQ004~008CA + EHVH04+08S18CA3VF Installer reference guide Daikin Altherma low temperature split 4P3662261 – 2014.01... -
Page 68: Symptom: The Pressure At The Tapping Point Is Temporarily Unusual High
Large domestic hot water tapping When the Domestic hot water > Please contact your dealer. happened recently before the Setpoint mode > Reheat or programmed startup of the Reheat + sched. is selected, it is disinfection function recommended to program the OU: Malfunction of outdoor startup the disinfection function unit fan motor. Please contact at least 4 hours later than the last your dealer. expected large hot water tapping. This startup can be set by OU: Power input overvoltage. installer settings (disinfection Please contact your dealer. function). When the Domestic hot water > OU: Cool/heat switchover Setpoint mode > Scheduled only is selected, it is recommended to problem. program a Storage eco 3 hours Please contact your dealer. before the scheduled startup of the disinfection function to OU: Voltage/current sensor preheat the tank. problem. Please contact your dealer. OU: Malfunction of high pressure switch (HPS) Please contact your dealer. Installer reference guide ERLQ004~008CA + EHVH04+08S18CA3VF Daikin Altherma low temperature split 4P3662261 – 2014.01... - Page 69 OU: Malfunction of inverter Please contact your dealer. radiating fin temperature rise. Heat exchanger temperature Please contact your dealer. sensor problem. OU: Inverter instantaneous Please contact your dealer. overcurrent (DC). Returning water temperature Please contact your dealer. sensor problem. OU: Malfunction of radiating Please contact your dealer. fin temperature sensor. User interface Please contact your dealer. communication problem. OU: Shortage of refrigerant. Please contact your dealer. Indoor/outdoor unit communication problem. OU: Defect of power supply voltage. Abnormal increase tank Please contact your dealer. temperature. OU: Transmission malfunction between main CPU INV CPU. Tank temperature sensor Please contact your dealer. problem. OU: Indoor/outdoor combination Please contact your dealer. problem. Power reset required. ERLQ004~008CA + EHVH04+08S18CA3VF Installer reference guide Daikin Altherma low temperature split 4P3662261 – 2014.01...
-
Page 70: Disposal
This startup can be set by installer settings (disinfection function). ▪ When the Domestic hot water > Setpoint mode > Scheduled only is selected, it is recommended to program a Storage eco 3 hours before the scheduled startup of the disinfection function to preheat the tank. Installer reference guide ERLQ004~008CA + EHVH04+08S18CA3VF Daikin Altherma low temperature split 4P3662261 – 2014.01... -
Page 71: Glossary
Equipment made or approved by Daikin that can be combined with the product according to the instructions in the accompanying documentation. Field supply Equipment not made by Daikin that can be combined with the product according to the instructions in the accompanying documentation. ERLQ004~008CA + EHVH04+08S18CA3VF Installer reference guide... -
Page 72: Technical Data
IN CASE OF REMOVING STOP VALVE COVER NAME PLATE TERMINAL STRIP OUTDOOR AIR TEMPERATURE BRAND NAME LABEL WIRING INLET WITH EARTH TERMINAL THERMISTOR LIQUID STOP VALVE (Ø6.4 CuT) SERVICE PORT GAS STOP VALVE (Ø15.9 CuT) 3TW60814-1B Installer reference guide ERLQ004~008CA + EHVH04+08S18CA3VF Daikin Altherma low temperature split 4P3662261 – 2014.01... -
Page 73: Dimensions And Service Space: Indoor Unit
15 Technical data 15.1.2 Dimensions and service space: Indoor unit 3D087616-1 Gas pipe connection Ø15.9 mm Liquid pipe connection Ø6.35 mm Pressure gauge Safety valve Drain valve water circuit Air purge Stop valve with fill valve (included accessory) Water filter Water IN connection 11/4" female British standard pipe thread Water OUT connection 11/4" female British standard pipe thread Tank IN connection 1" female British standard pipe thread Tank OUT connection 1" female British standard pipe thread Control wiring intake (Ø24 mm) Power supply wiring intake (Ø24 mm) Levelling feet User interface (included accessory) Drain valve tank circuit Recirculation connection G 1/2" female ERLQ004~008CA + EHVH04+08S18CA3VF Installer reference guide Daikin Altherma low temperature split 4P3662261 – 2014.01... - Page 74 15 Technical data Hole for recirculation piping or option wiring (Ø62 mm) Drain outlet (unit+safety valve) Flowthrough vessel (12 l) Note 1: Typical field installation is according to local and national regulations. Installer reference guide ERLQ004~008CA + EHVH04+08S18CA3VF Daikin Altherma low temperature split 4P3662261 – 2014.01...
- Page 75 15 Technical data MIN. 500 3D078541 ERLQ004~008CA + EHVH04+08S18CA3VF Installer reference guide Daikin Altherma low temperature split 4P3662261 – 2014.01...
-
Page 76: Components
15 Technical data 15.2 Components 15.2.1 Components: Outdoor unit Switch box main PCB (inverter and control PCB) Terminal communication and power supply Service PCB 4way valve Electronic expansion valve (main) Accumulator Compressor Liquid stop valve Gas stop valve Service port Fan motor Heat exchanger 15.2.2 Components: Switch box (outdoor unit) Service PCB Terminal communication cable Terminal power supply cable Earth connection Wire clamp Installer reference guide ERLQ004~008CA + EHVH04+08S18CA3VF Daikin Altherma low temperature split 4P3662261 – 2014.01... -
Page 77: Components: Indoor Unit
Remaining air in the water circuit will be automatically or blockage of the heat exchanger. removed via the air purge valve. Heat exchanger 3way valve Water pump Controls whether the water is used for space heating, or the Circulates the water in the water circuit. domestic hot water tank. Thermistors User interface (accessory) Determines the water and refrigerant temperature at various Flowthrough vessel points in the circuit. Drain flexible pressure relief valve Drain caps Air valve Tank thermistors Domestic hot water tank drain valve Empties the full tank. Switch box Contains the main electronic and electrical parts of the indoor unit. ERLQ004~008CA + EHVH04+08S18CA3VF Installer reference guide Daikin Altherma low temperature split 4P3662261 – 2014.01... -
Page 78: Components: Switch Box (Indoor Unit)
The components in the switch box are accessible by removing the switch box cover. 15.2.4 Components: Switch box (indoor unit) X6YB X6YA Pump PCB A7P (Inverter PCB) Backup heater thermal protector Q1L Transformer TR1 Backup heater contactors K1M, K2M and K5M Connectors X6YA/X6YB/X6Y Backup heater circuit breaker F1B Terminal block X2M (high voltage) Terminal block X1M (to outdoor unit) Cable tie mountings Digital I/O PCB A4P (only for installations with solar kit or digital I/O PCB kit) Demand PCB for power limitation Terminal block X5M (low voltage) Main PCB A1P PCB fuse FU1 Installer reference guide ERLQ004~008CA + EHVH04+08S18CA3VF Daikin Altherma low temperature split 4P3662261 – 2014.01... -
Page 79: Piping Diagram
12.7CuT 12.7CuT HIGH PRESSURE P > SWITCH FIELD PIPING 12.7CuT (6.4 CuT) 6.4CuT LIQUID STOP VALVE MUFFLER MUFFLER 12.7CuT FIELD PIPING 7.9CuT (15.9 CuT) GAS STOP VALVE DISCHARGE PIPE WITH SERVICE PORT THERMISTOR ACCUMULATOR COMPRESSOR 3TW60815-1 ERLQ004~008CA + EHVH04+08S18CA3VF Installer reference guide Daikin Altherma low temperature split 4P3662261 – 2014.01... -
Page 80: Piping Diagram: Indoor Unit
SCREW CONNECTION Inlet water thermistor Refrigerant liquid side thermistor Outlet water backup heater thermistor FLARE CONNECTION QUICK COUPLING Outlet water heat exchanger thermistor THERMISTOR DESCRIPTION FLANGE CONNECTION SPINNED PIPE BRAZED CONNECTION PINCHED PIPE 3D077572-1A page 2 Installer reference guide ERLQ004~008CA + EHVH04+08S18CA3VF Daikin Altherma low temperature split 4P3662261 – 2014.01... -
Page 81: Wiring Diagram
PRESSURE SWITCH (HIGH) INTERIGENT POWER MODULE PRINTED CIRCUIT BOARD (SERVICE) TERMINAL STRIP FIXED PLATE NOTES: REFER TO PURCHASING SPECIFICATION AS303002, UNLESS OTHERWISE SPECIFIED THIS DRAWING WAS DRAWN ON CAD SYSTEM 3TW60816-1A SIZE: LENGTH 140 x WIDTH 230. ERLQ004~008CA + EHVH04+08S18CA3VF Installer reference guide Daikin Altherma low temperature split 4P3662261 – 2014.01... - Page 82 LED A, LED B Pilot lamp X11A, X12A Connector Compressor motor X1M, X2M Terminal strip Compressor fan Electronic expansion valve MR30, MRM306, Magnetic relay Reversing solenoid valve coil MRM307, MR4 Z1C~Z4C Ferrite core MRM10, MRM20 Magnetic relay Field wiring MR30_A~MR30_B Connector Terminal strip Neutral Connector PCB1 Printed circuit board (main) Terminal PCB2 Printed circuit board (inverter) Protective earth PCB3 Printed circuit board (service) Black Q1DI Earth leakage circuit breaker Blue Overload protector Installer reference guide ERLQ004~008CA + EHVH04+08S18CA3VF Daikin Altherma low temperature split 4P3662261 – 2014.01...
- Page 83 15 Technical data Brown Green Orange Purple White Yellow ERLQ004~008CA + EHVH04+08S18CA3VF Installer reference guide Daikin Altherma low temperature split 4P3662261 – 2014.01...
-
Page 84: Wiring Diagram: Indoor Unit
Ext. thermistor Heat pump convector Add LWT: * : optional On/OFF thermostat (wired) (*) : standard for *HV*, optional for *HB* On/OFF thermostat (wireless) # : field supply Ext. thermistor Heat pump convector 4D077028 page 1 Installer reference guide ERLQ004~008CA + EHVH04+08S18CA3VF Daikin Altherma low temperature split 4P3662261 – 2014.01... - Page 85 Min. load 20 mA - 5 V DC Only for demand PCB option only for EKBPHT* only if no EKBPHT* Options: bottom plate heater OR On/OFF output Only for digital I/O PCB option 4D077028 page 3 ERLQ004~008CA + EHVH04+08S18CA3VF Installer reference guide Daikin Altherma low temperature split 4P3662261 – 2014.01...
- Page 86 Backup heater element (2 kW) Inlet water thermistor Backup heater element (3 kW) (*) Domestic hot water thermistor Booster heater (3 kW) External indoor or outdoor ambient thermistor Overcurrent fuse backup heater R1H (A3P) Humidity sensor Overcurrent fuse booster heater Preferential kWh rate power supply contact Thermal fuse backup heater Electrical meter pulse input 1 F1U, F2U Fuse 5 A 250 V for digital I/O PCB Electrical meter pulse input 2 Fuse T 6.3 A 250 V for PCB S6S~S9S Digital power limitation inputs PHC1 Optocoupler input circuit SS1 (A4P) Selector switch K1M, K2M Contactor backup heater T1R (A7P) Rectifier bridge (not applicable) Contactor booster heater Power supply transformer Safety contactor backup heater (only for *9W) Terminal strip Relay on PCB Connector Installer reference guide ERLQ004~008CA + EHVH04+08S18CA3VF Daikin Altherma low temperature split 4P3662261 – 2014.01...
- Page 87 (only for *9W) User installed options User installed options Bottom plate heater Bottom plate heater Domestic hot water tank Domestic hot water tank Domestic hot water tank with Domestic hot water tank with solar connection solar connection Remote user interface Remote user interface Ext. indoor thermistor Extended indoor thermistor Ext outdoor thermistor Extended outdoor thermistor Digital I/O PCB Digital I/O PCB Demand PCB Demand PCB Solar pump and control station Solar pump and control station Main LWT Main leaving water temperature On/OFF thermostat (wired) On/OFF thermostat (wired) On/OFF thermostat (wireless) On/OFF thermostat (wireless) Ext. thermistor Extended thermistor Heat pump convector Heat pump convector Add LWT Additional leaving water temperature ERLQ004~008CA + EHVH04+08S18CA3VF Installer reference guide Daikin Altherma low temperature split 4P3662261 – 2014.01...
- Page 88 15 Technical data Electrical connection diagram Daikin Altherma For more details please check unit wiring Power supply Standard parts Only for normal power supply installation Notes: 5 or 3 core unit power supply: 400 V or 230 V + earth - In case of signal cable: keep minimum distance to power cables >5 cm...
- Page 89 3 / 6 6 / 9 3 / 6 6 / 9 configuration Regular kWh rate power supply Electrical 3~ balanced meter type 3~ unbalanced Benefit kWh rate power supply Electrical 3~ balanced meter type 3~ unbalanced 4D078288 ERLQ004~008CA + EHVH04+08S18CA3VF Installer reference guide Daikin Altherma low temperature split 4P3662261 – 2014.01...
-
Page 90: Technical Specifications
59 kg Packing Material EPS, carton Weight 3 kg Heat exchanger Specifications Length 845 mm Nr. of rows Fin pitch 1.8 mm Nr. of passes — Face area — Nr. of stages Tube type HiXa(8) Type WF fin Treatment Anticorrosion treatment (PE) Type Propeller Quantity Air flow rate (nominal at Heating — 230 V) Discharge direction Horizontal Motor Quantity Output Installer reference guide ERLQ004~008CA + EHVH04+08S18CA3VF Daikin Altherma low temperature split 4P3662261 – 2014.01... - Page 91 Flare connection Diameter (OD) Ø15.9 mm Drain Quantity Type hole Diameter (OD) 1× Ø15 mm + 1× Ø20 mm Piping length Minimum 3 m Maximum 30 m Equivalent — Chargeless — Additional refrigerant charge 0.02 kg/m IF >10 m Maximum height difference between outdoor unit and 20 m indoor unit Defrost method Reverse cycle Defrost control Sensor for outdoor heat exchanger temperature Capacity control method Inverter controlled Standard accessories Item Installation manual Quality See operation range drawing. (*) Range increase by support backup heater. The sound pressure level is measured via a microphone at a certain distance from the unit. It is a relative value depending on the distance and acoustic environment. Refer to the sound spectrum drawing for more information. ERLQ004~008CA + EHVH04+08S18CA3VF Installer reference guide Daikin Altherma low temperature split 4P3662261 – 2014.01...
- Page 92 Wiring connections For power supply Quantity Remark — For connection with indoor Quantity Remark Earth wire European/International Technical Standard setting the limits for harmonic currents produced by equipment connected to public lowvoltage systems with input current >16 A and ≤75 A per phase. See figure A. Figure A: Starting current Daikin inverter controlled compressor starting current always less then or equal to maximal running current. Running current Time Maximum Example 1 Example 2 Standard on/off compressor starting current to maximum running current Running current Time Maximum Example 1 Example 2...
-
Page 93: Technical Specifications: Indoor Unit
Volume 10 l Maximum water pressure 3 bar Prepressure 1 bar Water filter Diameter perforations Material Copper + brass + stainless steel Main components tank Tank Water volume 180 l Material Stainless steel (EN1.4521) Maximum temperature 65°C Maximum pressure 10 bar Insulation material Corrosion protection Anode Heatloss 1.4 kWh/24 h Heat exchanger Quantity Material Stainless steel (EN1.4521) Surface 1.9 m Internal coil volume 8.9 l 3way valve Flow factor space heating/tank heating 13/8 m ERLQ004~008CA + EHVH04+08S18CA3VF Installer reference guide Daikin Altherma low temperature split 4P3662261 – 2014.01... - Page 94 Nominal flow (heating) 42 dBa Sound pressure Nominal flow (heating) 28 dBa Operation range Ambient Space heating –25~25°C Domestic hot water –25~35°C Water side Space heating 15~55°C (10) Domestic hot water 25~60°C Heatloss according to EN12897. Ambient temperature 35°C – leaving water evaporator 7°C (DT=5°C). DB/WB 7°C/6°C – leaving water condenser 35°C (DT=5°C). The sound pressure level is measured via a microphone at 1 m from the unit. It is a relative value, depending on the distance and acoustic environment. The sound pressure level mentioned is valid for pump medium speed – 0 external static pressure/medium speed – nominal flow/ high speed – nominal flow. 15°C~25°C: backup heater only, no heat pump operation during commissioning.. Including piping, plate heat exchanger, and backup heater/excluding expansion vessel. Value mentioned is connection after ball valves. It is the same as the connection at the unit (G 11/4" female). Ambient temperature 35°C – leaving water evaporator 18°C (DT=5°C). For details, see operation range drawing. (10) For outdoor units: >55°C backup heater only, no heat pump operation. (11) Minimum flow is mentioned for heat pump operation. To allow backup heater to operate safely, a higher minimum flow is required: 12 l/min. (12) Refer to operation range for details. (13) DB/WB 7°C/6°C – leaving water condenser 45°C (DT=5°C). Installer reference guide ERLQ004~008CA + EHVH04+08S18CA3VF Daikin Altherma low temperature split 4P3662261 – 2014.01...
- Page 95 Type of wires Minimum 0.75 mm For connection with A3P Quantity of wires Note (3) Type of wires Note Note For connection with M2S Quantity of wires (3) Type of wires Note Note For connection with optional FWXV (demand input Quantity of wires and output) Type of wires 100 mA, minimum 0.75 mm Above mentioned power supply of the hydrobox is for the backup heater only. The switch box and pump of the hydrobox are supplied via the outdoor unit. Select diameter and type according to national and local regulations. For more details of the voltage range and current refer to the installation manual. Voltage: 230 V / maximum current: 100 mA / minimum 0.75 mm Depends on thermostat type, refer to the installation manual. Note 10: Backup heater (*3V), minimum time delay between stages. 1 min 10 min Capacity Stage 1 Time ERLQ004~008CA + EHVH04+08S18CA3VF Installer reference guide Daikin Altherma low temperature split 4P3662261 – 2014.01...
-
Page 96: Operation Range
Operation range 15.6.1 Operation range: Heating A (°C DB) –15 –20 –25 B (°C) 15 18 25 30 45 50 55 3TW60813-1B_page 2 Outdoor temperature Leaving condenser water temperature Outdoor unit operation is possible if setpoint ≥ 2 5°C. Only backup heater operation (no outdoor unit operation) Operation of outdoor unit, but no guarantee of capacity. (If outdoor temperature < – 2 0°C or < – 2 5°C outdoor unit will stop)(Indoor unit and backup heater operation will continue) Installer reference guide ERLQ004~008CA + EHVH04+08S18CA3VF Daikin Altherma low temperature split 4P3662261 – 2014.01... -
Page 97: Operation Range: Domestic Hot Water
A (°C DB) –15 –20 –25 45 50 B (°C) 3TW60813-2C_page 2 Only for ERLQ006CAV3+ERLQ008CAV3 A (°C DB) –15 –20 –25 B (°C) 3TW60813-2C_page 2 Outdoor temperature Domestic hot water temperature Only backup heater operation. Operation of outdoor unit, but no guarantee of capacity. (If outdoor temperature < – 2 0°C or < – 2 5°C outdoor unit will stop)(Indoor unit and backup heater operation will continue) ERLQ004~008CA + EHVH04+08S18CA3VF Installer reference guide Daikin Altherma low temperature split 4P3662261 – 2014.01... -
Page 98: Esp Curve
A (kPa) B (l/min) Only for EHVH08S18CA3VF A (kPa) B (l/min) External static pressure available at space heating/cooling circuit Water flow rate: water flow through space heating/cooling circuit Note 1: Selecting a flow outside the area of operation can cause damage or malfunction of the unit. See also minimum and maximum allow water flow range in the technical specifications. Note 2: Water quality MUST be according to EN directive EC98/83EC. Installer reference guide ERLQ004~008CA + EHVH04+08S18CA3VF Daikin Altherma low temperature split 4P3662261 – 2014.01... -
Page 99: Field Settings Table
Field settings table Applicable indoor units EHVH04S18CA3VF EHVH08S18CA3VF Notes 4P366223-1 - 2014.02... - Page 101 Installer setting at variance with Field settings table default value Breadcrumb Field code Setting name Range, step Date Value Default value User settings └─ Preset values └─ Room temperature 7.4.1.1 Comfort (heating) [3-07]~[3-06], step: A.3.2.4 21°C 7.4.1.2 Eco (heating) [3-07]~[3-06], step: A.3.2.4 19°C └─...
- Page 102 Installer setting at variance with Field settings table default value Breadcrumb Field code Setting name Range, step Date Value Default value A.3.1.1.3 [1-02] Set weather-dependent heating Leaving water value for low ambient temp. for 25~55°C, step: 1°C LWT main zone heating WD curve. 35°C A.3.1.1.3 [1-03]...
- Page 103 Installer setting at variance with Field settings table default value Breadcrumb Field code Setting name Range, step Date Value Default value └─ Auto restart A.6.1 [3-00] 0: No 1: Yes └─ Preferential kWh rate A.6.2.1 [D-00] Allowed heaters 0: None 2: BUH only A.6.2.2 [D-05]...
- Page 104 Installer setting at variance with Field settings table default value Breadcrumb Field code Setting name Range, step Date Value Default value A.8.31 [2-09] Adjust the offset on the measured room temperature -5~5°C, step: 0,5°C 0°C A.8.32 [2-0A] Adjust the offset on the measured room temperature -5~5°C, step: 0,5°C 0°C A.8.33...
- Page 105 Installer setting at variance with Field settings table default value Breadcrumb Field code Setting name Range, step Date Value Default value A.8.95 [8-07] A.8.96 [8-08] A.8.97 [8-09] What is the desired comfort main LWT in heating? [9-01]~[9-00], step: 1°C 35°C A.8.98 [8-0A] What is the desired eco main LWT in heating?
- Page 106 Installer setting at variance with Field settings table default value Breadcrumb Field code Setting name Range, step Date Value Default value A.8.152 [F-01] A.8.153 [F-02] A.8.154 [F-03] A.8.155 [F-04] A.8.156 [F-05] A.8.157 [F-06] A.8.158 [F-09] Pump operation during flow abnormality. 0: Disabled 1: Enabled A.8.159...
- Page 108 4P3662261 2014.01...
Need help?
Do you have a question about the Altherma ERLQ004CAV3 and is the answer not in the manual?
Questions and answers