Table of Contents
Advertisement
Quick Links
Advertisement
Table of Contents

Related Manuals for Aztech Easy Start


Summary of Contents for Aztech Easy Start
- Page 1 ADSL2+ 4-Port Ethernet USB Wireless-G Router - Easy Start Page 1 of 46...
-
Page 2: Table Of Contents
ADSL2+ 4-Port Ethernet USB Wireless-G Router - Easy Start Table of Contents Preliminary Pages Page Table of Contents .........................2 Chapter 1 – Introduction ....................7 Minimum Requirements..............7 ADSL Router Package ..............8 ADSL Router Overview ..............9 1.3.1 Front Indicators ................9 1.3.2 Back Panel ..................10 Typical Wireless-G Router Connection .........11... - Page 3 ADSL2+ 4-Port Ethernet USB Wireless-G Router - Easy Start Chapter 7 – Setup Wireless-G Router via Websetup Wizard ........40 Chapter 8 – Maintenance....................45 Maintenance Concepts..............45 Preventive Maintenance ..............45 Preventive or Scheduled Maintenance (PM) Tasks......45 PM or Scheduled Maintenance Tasks ..........46 PM Tools &...
- Page 4 ADSL2+ 4-Port Ethernet USB Wireless-G Router - Easy Start Declaration Of Conformity Marking by the above symbol indicates compliance with the Essential Requirements of the R&TTE Directive of the European Union (1999/5/EC). This equipment meets the following conformance standards: EN300 328, EN301 489-17, EN60950 Countries of Operation and Conditions of Use in the European Community This device intends to be operated in all countries of the European Community.
- Page 5 ADSL2+ 4-Port Ethernet USB Wireless-G Router - Easy Start Radio Frequency Interference Warnings & Instructions (FCC ID: I38-DSL600EWR) This equipment has been tested and found to comply with the limits for a Class B digital device, pursuant to Part 15 of the FCC Rules. These limits are designed to provide reasonable protection against harmful interference in a residential installation.
- Page 6 ADSL2+ 4-Port Ethernet USB Wireless-G Router - Easy Start Safety Summary Messages WARNING HIGH VOLTAGE is used in the equipment. Make sure equipment is properly grounded BEFORE opening. Failure to observe safety precautions may result in electric shock to user.
-
Page 7: Chapter 1 - Introduction
ADSL2+ 4-Port Ethernet USB Wireless-G Router - Easy Start Chapter 1 – Introduction Thank you for purchase our 4-Port Ethernet USB Wireless-G ADSL2+ Router. The Wireless 4- Port Router allows you to share high-speed broadband connection with multiple PC using a single device wired or wireless. -
Page 8: Adsl Router Package
ADSL2+ 4-Port Ethernet USB Wireless-G Router - Easy Start ADSL Router Package ig 1-1 below shows the ADSL Router Package. For any missing items, please contact your dealer immediately. ireless Router Easy Start Manual Utility CD Cat 5 Ethernet Straight Cable... -
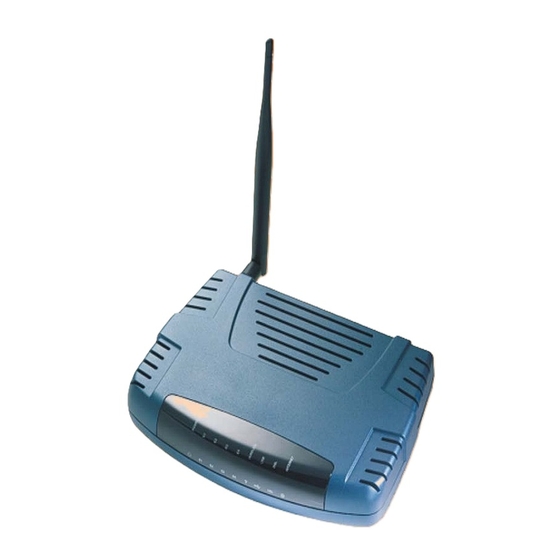
Page 9: Adsl Router Overview
ADSL2+ 4-Port Ethernet USB Wireless-G Router - Easy Start ADSL Router Overview 1.3.1 Front Indicators Fig 1-2 shows the front indicators of the ADSL Router. Figure 1-2 : Front Indicators LED Name Status & Meaning 1. Pow Lights up when power is supplied to the ADSL Router. -
Page 10: 1.3.2 Back Panel
ADSL2+ 4-Port Ethernet USB Wireless-G Router - Easy Start 1.3.2 Back Panel Fig 1-3 shows the back panel indicators of the ADSL Router. Figure 1-3 : Back Panel Indicators Label Description 1. DSL Connect the telephone jack (RJ-11) to your Telephone Wall Socket (DSL line). -
Page 11: Typical Wireless-G Router Connection
ADSL2+ 4-Port Ethernet USB Wireless-G Router - Easy Start Typical Wireless-G Router Connection Fig 1-4 below shows up to 4 PCs connections. Computers or Notebooks with Ethernet Network Cards. ADSL Router Computers or Notebooks with Wireless PC cards or USB Clients. - Page 12 ADSL2+ 4-Port Ethernet USB Wireless-G Router - Easy Start Computers or Notebooks with Ethernet Network Cards, Ethernet Switches or Hubs Computers or Notebooks with Wireless PC cards or USB Clients. Figure 1-5 : More than 4 PCs Connection NOTE: With the Auto MDI/MDIX feature, both cross and straight UTP cable can be utilized.
-
Page 13: Chapter 2 - Connecting The Adsl Router To Your Pc / Notebook
ADSL2+ 4-Port Ethernet USB Wireless-G Router - Easy Start Chapter 2 - Connecting the ADSL Router to Your PC / Notebook WARNING ! Power off your Computer/Notebook or/and any connected devices before connecting to the ADSL Router! Connecting to the Ethernet Connect your computer(s)/notebook(s) to the Wireless-G ADSL Router as illustrated. -
Page 14: Connecting To The Adsl Line
ADSL2+ 4-Port Ethernet USB Wireless-G Router - Easy Start Connecting to the ADSL Line Fig 1-7 shows the connection of the ADSL Router to the ADSL Line. Back View of ADSL Router Telephone Wall Socket Telephone Cable Figure 1-7 : Connecting to the ADSL Line Fig 1-8 shows the connection of the ADSL Router Line and Telephone set. -
Page 15: Checking Your Connections
ADSL2+ 4-Port Ethernet USB Wireless-G Router - Easy Start Checking Your Connections NOTE: Please check your connections before proceeding. Ensure all connections are carefully plugged in as shown in Fig 1-9. Back view of ADSL Router To your Power Outlet... -
Page 16: Chapter 3 - Configuring Your Ethernet Network Card
ADSL2+ 4-Port Ethernet USB Wireless-G Router - Easy Start Chapter 3 – Configuring Your Ethernet Network Card If your computer/notebook is connected to the Ethernet Port of the ADSL Router, proceed with the following instructions. If your computer/notebook is connected to the USB Port of the ADSL Router, proceed with Chapter 4. -
Page 17: For Windows ® 2000 / Windows ® Xp
ADSL2+ 4-Port Ethernet USB Wireless-G Router - Easy Start 4. Click the IP Address tab. 5. Select the option Obtain an IP address automatically and click OK to save the settings. See Fig 1-12 Figure 1-12 : TCP/IP Properties 6. Ensure that your ADSL Router is powered ON. - Page 18 ADSL2+ 4-Port Ethernet USB Wireless-G Router - Easy Start NOTE: This is important especially if you have more than one Local Area Connection icons displayed at the Network and Dial-up Connections / Network Connections window. Ensure that you have selected the correct one.
-
Page 19: Chapter 4 - Installing Your Usb Driver
ADSL2+ 4-Port Ethernet USB Wireless-G Router - Easy Start Chapter 4 - Installing your USB Driver Setup utility will install the USB driver automatically. If it fails to install, follow the steps below for USB installation. Proceed with this section ONLY if your computer/notebook is connected to the USB Port of your ADSL Router. - Page 20 ADSL2+ 4-Port Ethernet USB Wireless-G Router - Easy Start 5. Select on CD-ROM drives option and click Next. See Fig 1-17. Figure 1-17: CD-ROM Selection NOTE: Depending on your system’s configuration, you may be prompted for your Windows CD-ROM during installation.
-
Page 21: For Windows ® Me
ADSL2+ 4-Port Ethernet USB Wireless-G Router - Easy Start For Windows ® Me Proceed with the steps below: 1. Power ON your computer to start the Windows Operating System. 2. Place the Installation CD into your CD-ROM Drive. 3. At the following prompt, select Specify the location of the driver (Advanced) option and click Next. -
Page 22: For Windows® 2000
ADSL2+ 4-Port Ethernet USB Wireless-G Router - Easy Start 5. Click Next again to proceed installation with the indicated driver. 6. Click Finish to complete the USB driver installation. 7. Restart your system when prompted. 8. Proceed to Chapter 5. -
Page 23: For Windows ® Xp
ADSL2+ 4-Port Ethernet USB Wireless-G Router - Easy Start 5. Click CD-ROM drive option and click Next. 6. At the next prompt, click Next to proceed installation with the indicated driver. 7. You may be prompted with Digital Signature Not Found dialog box during installation. - Page 24 ADSL2+ 4-Port Ethernet USB Wireless-G Router - Easy Start 4. Select Search removable media option and click on Next. See Fig 1-23. Figure 1-23 : Search removable media 5. You may be prompted with Hardware Installation dialog box. (This happens when Windows detects your driver as a new version).
-
Page 25: For Mac ® Os 10.2 & Above
ADSL2+ 4-Port Ethernet USB Wireless-G Router - Easy Start For Mac ® OS 10.2 & above Proceed with the steps below: 1. Power on your computer to start Mac OS X (V10.2 & above). 2. Place the Installation CD into your CD-ROM Drive. - Page 26 ADSL2+ 4-Port Ethernet USB Wireless-G Router - Easy Start 5. Installation program will start. Click Continue to proceed with the installation. See Fig 1-27. Figure 1-27 : Installation program 6. Select a destination disk to install the software. Click Continue to proceed with the installation.
- Page 27 ADSL2+ 4-Port Ethernet USB Wireless-G Router - Easy Start 7. Click Install to perform the installation. See Fig 1-29. Figure 1-29 : Easy Install 8. The system will prompt you to restart your computer when installation is completed. Click Continue Installation to proceed. See Fig 1-30.
- Page 28 ADSL2+ 4-Port Ethernet USB Wireless-G Router - Easy Start 9. Click Restart to finish installing the software. See Fig 1-31. Figure 1-31 : Software installed successfully 10. The system will bootup upon restart. Select System Preferences from the dock. Select Network to choose the network adaptor connected to the router.
- Page 29 ADSL2+ 4-Port Ethernet USB Wireless-G Router - Easy Start 11. Select Ethernet Adaptor (enXX) as your adaptor under Show option. Your IP Address, subnet mask, router IP should appear. See Fig 1-33. Figure 1-33 : Network settings 12. Proceed to Chapter 7.
-
Page 30: Chapter 5 - Configuring Your Internet Browser
ADSL2+ 4-Port Ethernet USB Wireless-G Router - Easy Start Chapter 5 – Configuring Your Internet Browser Microsoft® Internet Explorer™ (based on IE 5.5) 1. From your Windows desktop, double-click on your Internet Explorer icon to launch your Browser. 2. From the Menu, click Tools and select Internet Options.. -
Page 31: Chapter 6 - Router Setup Utility
ADSL2+ 4-Port Ethernet USB Wireless-G Router - Easy Start Chapter 6 – Router Setup Utility (For Windows 98 SE/ ME/ 2000/ XP Users Only) NOTE: This chapter is for Windows User only. Please use the Setup Utility Installation CD provided to setup the USB driver, Internet connection and wireless Access Point. - Page 32 ADSL2+ 4-Port Ethernet USB Wireless-G Router - Easy Start Upon clicking “ADSL2+ WirelessG 802.11g Router”, the Welcome wizard screen will appear. If you are setting up your Wireless-G Router for the first time, please click “Setup Wizard” to setup your DSL router. See Fig 1-35.
- Page 33 ADSL2+ 4-Port Ethernet USB Wireless-G Router - Easy Start Setup Wizard will proceed to install the USB driver. Plug in USB cable when prompted (For Windows XP Professional x64 Edition, refer to Chapter 6.2). If you are using Ethernet cable, click “Cancel”.
- Page 34 ADSL2+ 4-Port Ethernet USB Wireless-G Router - Easy Start You need to enter the Username, Password, VPI and VCI provided by your ISP to connect to the Internet (please contact your ISP if you are not aware of the details for VPI, VCI Username and password).
- Page 35 ADSL2+ 4-Port Ethernet USB Wireless-G Router - Easy Start NOTE: For better security, you may choose to hide the SSID of your wireless-G router from broadcasting to available clients. However you must manually set your wireless client with the same SSID.
- Page 36 ADSL2+ 4-Port Ethernet USB Wireless-G Router - Easy Start The setup is complete and you are now able to browse the Internet. Click on the cube to browse the Internet. Click Exit to close the setup utility. See Fig 1-43.
-
Page 37: Microsoft® Windows Xp Professional X64 Edition
ADSL2+ 4-Port Ethernet USB Wireless-G Router - Easy Start Microsoft® Windows XP Professional x64 Edition Upon plugging in your USB cable at the system’s prompt, a Found New Hardware Wizard dialog box will appear. Select No, not this time and click Next. See Fig 1-44. - Page 38 ADSL2+ 4-Port Ethernet USB Wireless-G Router - Easy Start Please wait until the wizard installs the USB driver. See Fig 1-46. Figure 1-46 : Installation in progress You may be prompted with Hardware Installation dialog box. (This happens when Windows detects your driver as a new version).
- Page 39 ADSL2+ 4-Port Ethernet USB Wireless-G Router - Easy Start After installation of USB driver has completed, click Finish. See Fig 1-48. Figure 1-48 : Installation Complete Setup utility will resume to check your router and DSL connection, and try to connect to the Internet.
-
Page 40: Chapter 7 - Setup Wireless-G Router Via Websetup Wizard
ADSL2+ 4-Port Ethernet USB Wireless-G Router - Easy Start Chapter 7 – Setup Wireless-G Router via Websetup Wizard a) From your Internet Browser, key in 192.168.1.1 or login.router at the address bar and hit <Enter> . See Fig 1-49. Figure 1-49 : Logging-In Upon Login successfully, the Setup Wizard page will be displayed. - Page 41 ADSL2+ 4-Port Ethernet USB Wireless-G Router - Easy Start You need to enter the Username, Password, VPI and VCI provided by the ISP. Click on Next. See Fig 1-51. Enter These Fields Click Here Figure 1-51 : Account Set-Up You can enter the SSID or let the setup wizard auto-generate a SSID by clicking on ‘Generate SSID’.
- Page 42 ADSL2+ 4-Port Ethernet USB Wireless-G Router - Easy Start You can enable wireless security, auto-generate a 64 bit or128 bit encryption key. Click on Next. See Fig 1-53. Click Here Figure 1-53 : Wireless LAN Security You are able to select the ‘Enable Authentication’, key in a new password and set an ‘Idle Timeout’...
- Page 43 ADSL2+ 4-Port Ethernet USB Wireless-G Router - Easy Start You are able to view the summary and check through all the information you have entered. It is advisable to either Save or print out the Summary information entered into your wireless client.
- Page 44 ADSL2+ 4-Port Ethernet USB Wireless-G Router - Easy Start Upon successful connection to the Internet, this page will be displayed. See Fig 1-57. User@Ispname Figure 1-57 : Successful Connection Page 44 of 46...
-
Page 45: Chapter 8 - Maintenance
ADSL2+ 4-Port Ethernet USB Wireless-G Router - Easy Start Chapter 8 – Maintenance This section explains the maintenance concepts and provides instructions on preventive maintenance necessary to ensure that the system and equipment are maintained at its optimum operating condition. -
Page 46: Pm Or Scheduled Maintenance Tasks
ADSL2+ 4-Port Ethernet USB Wireless-G Router - Easy Start PM or Scheduled Maintenance Tasks PM tasks are to be performed at intervals recommended as in Table 1-1. When performing PM cleaning tasks: a) Use a lint-free, non-abrasive cloth to perform cleaning – DO NOT use any solvent, abrasive cleaning agents or tissue paper.
Need help?
Do you have a question about the Easy Start and is the answer not in the manual?
Questions and answers