Table of Contents
Advertisement
Advertisement
Table of Contents

Related Manuals for Aztech 4-Port Wireless N Router


Summary of Contents for Aztech 4-Port Wireless N Router
- Page 1 4-Port Wireless N Router...
- Page 2 User Manual 2007 Copyright. All rights reserved. Version 1.0 No part of this document may be reproduced, republished, or retransmitted in any form or by any means whatsoever, whether electronically or mechanically, including, but not limited to, by way of photocopying, recording, information recording, or through retrieval systems without the express written permission.
-
Page 3: Table Of Contents
User Manual Contents About the Router......................5 Requirements....................6 Package Contents ..................6 Device Design ....................7 Getting Started......................9 Planning Your Network ................10 Remove or Disable Conflicts ..............11 Internet Sharing, Proxy, and Security Applications..........11 Configuring TCP/IP Settings ...................12 Configuring Internet Properties ................12 Removing Temporary Internet Files ..............13 Setup the Device .................. - Page 4 User Manual LAN Clients ......................32 Wireless ..................... 33 Basic Settings ......................33 Security Settings .....................35 Detailed Settings.....................38 Wireless Access Control ..................39 WDS Settings ......................40 WPS Settings ......................41 RADIUS Settings ......................42 Wireless Clients.......................42 Routing...................... 43 Route Settings......................43 Dynamic Routing.....................44 Static Routing......................45 Security...................... 46 Port Forwarding ......................46 IP Filtering .......................47 MAC Filtering......................48...
-
Page 5: About The Router
User Manual About the Router Your router offers an easy way of integrating your computer and other network devices into a single network. Here are some of the benefits you can obtain from using the router in your home or office: Top Notch Security Your router utilizes built-in firewall security to block service attacks. -
Page 6: Requirements
User Manual Requirements Your computer must meet the following minimum requirements. Any operating system can be used Internet Explorer 4.0 or Netscape Navigator 3.02 233MHz processor CD-ROM Drive Ethernet network adapter An active Internet account Package Contents Package contents are listed below. For any missing items, please contact your dealer immediately. -
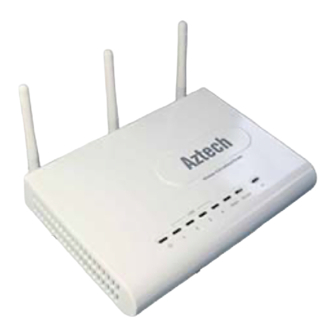
Page 7: Device Design
User Manual Device Design Label Action Description POWER No power is supplied to the device Steady light Connected to an AC power supply No modem connection Steady light Connected to an active modem at 100 Mb (Green) Blinking light Transmitting/Receiving data at 100 Mbps (Green) Steady light Connected to an active modem at 10 Mb... - Page 8 User Manual ETHERNET 1-4 No Ethernet connection Steady light Connected to an active Ethernet device at 100 Mbps (Green) Blinking light Transmitting/Receiving data at 100 Mbps (Green) Steady light Connected to an active Ethernet device at 10 Mbps (Orange) Blinking light Transmitting/Receiving data at 10 Mbps (Orange) WLAN...
-
Page 9: Getting Started
User Manual Getting Started Setting up the device is easy. The flowchart below provides an outline of the steps needed to complete the installation. Brief descriptions appear beside each step. Detailed instructions are provided in the subsequent pages. Plan your Network Remove/Disable You may need to check some setting or disable some application... -
Page 10: Planning Your Network
User Manual Planning Your Network Before moving ahead to setup your network, it is a good idea to draw out a network diagram to help identify your network devices and plan out how to connect these devices. The illustration below is an example of a network diagram. To create a network diagram: For wireless devices, identify the wireless devices you want to include in the network... -
Page 11: Remove Or Disable Conflicts
User Manual Remove or Disable Conflicts To make sure the router installation moves on smoothly, you need to remove or disable conflicts that may interfere the installation. Probable conflicts may include: Internet sharing applications Proxy software Security software TCP/IP settings Internet properties Temporary Internet files Internet Sharing, Proxy, and Security Applications... -
Page 12: Configuring Tcp/Ip Settings
User Manual Configuring TCP/IP Settings Check if your computer uses the default TCP/IP settings. To check the TCP/IP properties: 1. Click the Start button, and then click Run. This opens the Run dialog box. 2. Type control ncpa.cpl, and then click OK. This opens the Network Connections in your computer. -
Page 13: Removing Temporary Internet Files
User Manual Removing Temporary Internet Files Temporary Internet files are files from Web sites that are stored in your computer. Delete these files to clean the cache and remove footprints left by the Web pages you visited. To remove temporary Internet files: 1. -
Page 14: Setup The Device
User Manual Setup the Device When installing the router, find an area where there are enough electrical outlets for the router, the main computer, and your other computer devices. To setup the router: a. Use an Ethernet cable to connect a modem to the WAN port. b. -
Page 15: Connecting To The Internet
User Manual Connecting to the Internet To connect to the Internet, use the Web Manager’s Setup Wizard. Note: To connect to the Internet, make sure that your router is connected to a modem and you have an active Internet service account. To connect to the Internet via the Web Interface: 1. - Page 16 User Manual 5. In Step 1, type the new Web Manager password twice and then click Next. 6. In Step 2, you can enable the Time zone settings. Select a time zone, NTP server, and then click Next. Page 16 of 57...
- Page 17 7. In Step 3, select a WAN access type, and then click Next. 8. In Step 4, type the new Wireless Network Name, change the basic settings, and aztech then click Next. The default Wireless Network Name is . You can replace this with your own network name.
- Page 18 User Manual 9. In Step 5, configure the Wireless Security settings, and then click Finished. 10. Click OK. After you click OK, the router will save the new settings and then try to establish a connection with your Internet service provider. To verify if your connection has been successful, click Home under the Basic Menu.
-
Page 19: Connecting Wireless Devices
User Manual Connecting Wireless Devices After you setup the device settings through the main computer, you can connect other devices with wireless capabilities. Wireless devices relieve you from the task of laying out cables and allow you to use the Internet connection from your router. To the connect with wireless devices: 1. -
Page 20: About The Web Manager
User Manual About the Web Manager The Web Manager is used to configure the router settings. Accessing the Web Manager To access the Web Manager: 1. Open a browser. 2. Enter the router’s IP Address. The default IP Address is 192.168.1.254. This opens the Log In Authentication page. -
Page 21: Basic Menu
User Manual Basic Menu The options for the Basic Menu include: Home Setup Wizard Home The Home page provides a one-page summary about the Connection Information, Router Information, Local Network Information, and Wireless Network settings. Home Connection Information The Connection Information pane gives you an idea about the status of your Internet connection. -
Page 22: Setup Wizard
User Manual Router Information This pane provides all the necessary information to determine the firmware version, LAN MAC Address, WAN MAC Address, and NAT status. Local Network Information The Local Network pane displays the current IP address of the router. It also provides the DHCP status, DHCP Range, and Ethernet status. - Page 23 User Manual 3. In the Step 1, enter the new password for the Web Manager. After you confirm the password, click Next. 4. In Step 2, check Enable NTP client update, select a Time Zone and NTP server, and then click Next. Page 23 of 57...
- Page 24 5. In Step 3, select a WAN access type, type the User Name and Password, and then click Next. 6. In Step 4, type the Wireless Network Name, select wireless mode, country, and aztech channel, and then click Next. The default Wireless Network Name is . You can replace this with your own network name.
- Page 25 User Manual 7. In Step 5, select the wireless security encryption , type the settings, and then click Finished. 8. Click OK to start the Internet connection. Page 25 of 57...
-
Page 26: Advanced Menu
User Manual Advanced Menu The Advanced Menu allows you to configure the router’s advanced features. This section allows you to connect to your Internet Service Provider (ISP). There are a total of 4 WAN types for you to choose: Static IP, DHCP Client, PPPoE, and PPTP. DHCP Client (Default) DHCP Client is the default WAN Access Type. -
Page 27: Static Ip (Assigned By Isp)
User Manual Static IP (Assigned by ISP) Your ISP will provide the Static IP Address, Subnet Mask, and Default Gateway. IP Address Type the IP Address provided by your ISP. Subnet Mask Type the Subnet Mask provided by your ISP. Default Gateway Type the Default Gateway provided by your ISP. -
Page 28: Pppoe (Dsl)
User Manual PPPOE (DSL) When using Point To Point Protocol over Ethernet (PPPOE), your router should be connected to a modem that is in bridge mode. This is usually used for DSL Internet. Username and Password The account and password that your ISP assigned to you. For security, this field appears blank. -
Page 29: Pptp
User Manual PPTP Use Point To Point Tunneling Protocol (PPTP) if your ISP uses a PPTP connection. Your ISP will provide you a username and password. IP Address and Subnet Mask The private IP address and subnet mask that your ISP assigned to you. Server IP Address The IP address of the PPTP server. -
Page 30: L2Tp
User Manual L2TP Use Layer 2 Tunneling Protocol (L2TP) if your ISP uses an L2TP connection. Your ISP will provide you with a username and password. IP Address and Subnet Mask The L2TP IP address and subnet mask supplied by your ISP (Static only). Gateway The Gateway IP Address provided by your ISP. -
Page 31: Lan
User Manual LAN Settings This item allows you to manage the IP and DHCP Server setting for the wireless router. IP Address Type the router’s IP address. The default router IP address is 192.168.1.254. When you change the router IP address, you will need to enter the new IP address to access the Web Manager. Subnet Mask Type the Subnet Mask. -
Page 32: Lan Clients
User Manual LAN Clients Displays the IP address, MAC Address, and expiration time of computers in the local network. Page 32 of 57... -
Page 33: Wireless
Wireless Network Name (SSID) Network ID is used for identifying the wireless LAN (WLAN). Client stations can roam freely using this product and other Access Points that have the same Network ID. (The factory setting is “aztech”.) Broadcast SSID Enabled by default. When enabled, broadcasts the SSID publicly. When disabled, users must specify the correct SSID to be able to connect to your network. - Page 34 User Manual devices. This is quite essential for those applications that have significant stocks of legacy 11b equipment installed and want a smooth migration path to higher data rates for users. • 802.11n/g Mode A mixed network in which 802.11g and 802.11n device share the same wireless medium.
-
Page 35: Security Settings
User Manual Security Settings To prevent unauthorized wireless stations from accessing data transmitted wirelessly, the Wireless Security Settings window offers WEP features, making your data transmission over air more secure and allows you to specify Encryption Key(s) if you enable encryption for the Access Point. - Page 36 User Manual (supplicant). IEEE 802.1x is also used to perform generation and distribution of encryption keys from Access Point (AP) to the station as part of or after the authentication process. A further factor here is dynamic WEP, which is based on legacy RC4 WEP encryption and is available in this Access Point under the setting for enabling IEEE 802.1x security in association with disabled Wired Equivalent Privacy (WEP) settings.
- Page 37 User Manual WPA with RADIUS/WPA2 with RADIUS WPA with RADIUS/WPA2 with RADIUS is a wireless security standard that defines stronger encryption, authentication and key management. Network Authentication Select WPA-PSK or WPA2-PSK Data Encryption If network authentication is WPA-PSK, then the data encryption value is TKIP. If network authentication is WPA2-PSK, then the WPA2 cipher default value is AES.
-
Page 38: Detailed Settings
User Manual Detailed Settings This page provides more technical settings on wireless LAN. These settings should not be changed unless you know what effect will take. WMM Support WMM (Wi-Fi Multi-media) function promotes wireless Quality of Service technology. This function is Wi-Fi WMM compliant. Enable SuperG Mode Enhance wireless performance when transmitting data. -
Page 39: Wireless Access Control
User Manual Preamble Type Defines the length of the PLCP synchronization field for communication between the Access Point and Network Card. Select the appropriate preamble type and press the Apply button to set it. The default setting is “Long Preamble”. Wireless Client Security Separation Disable Wireless Client Security Separation to allow wireless stations connected to the device to communicate with each other. -
Page 40: Wds Settings
User Manual WDS Settings Extend the range of your network without having to use cables to link the Access Points by using the Wireless Distribution System (WDS). Under WDS, your Access Points are still functioning as a regular Access Point, which can provide the link services to wireless clients. -
Page 41: Wps Settings
User Manual WPS Settings WPS Settings allows you to enable Wi-Fi Protected Setup (WPS). When enabled, Wi-Fi Protected Setup automatically detects and connect wireless clients into the wireless network by pressing the WPS button on the router. Note: WPS can only be used with wireless client devices that have a compatible WPS component. Page 41 of 57... -
Page 42: Radius Settings
User Manual RADIUS Settings The page provides to setup the RADIUS server information when you enable security Legacy 802.1x, WPA with RADIUS or WPA2 with RADIUS. You should configure RADIUS server IP address, Port and Shared Secret that are the same with your server. Wireless Clients Displays the MAC Address, IP Address, and RSSI of the active wireless client. -
Page 43: Routing
User Manual Routing Routing options include: Route Settings Static Routing Dynamic Routing Route Settings Allows you to enable NAT and display the Routing table. Routing Table Routing Table displays the information used by routers when making packet-forwarding decisions. Packets are routed according to the packet's destination IP address. Page 43 of 57... -
Page 44: Dynamic Routing
User Manual Dynamic Routing Dynamic Routing allows the router to automatically adjust to physical changes in the network. The router, using the RIP protocol, determines the network packets’ route based on the fewest number of hops between the source and the destination. The RIP protocol regularly broadcasts routing information to other routers on the network. -
Page 45: Static Routing
User Manual Static Routing If the router is connected to more than one network, you may need to set up a static route between them. A static route is a pre-defined pathway that network information must travel to reach a specific host or network. You can use static routing to allow different IP domain users to access the Internet through the router. -
Page 46: Security
User Manual Security Security is a system or group of systems that enforce an access control policy between two networks. It may also be defined as a mechanism used to protect a trusted network from an un-trusted network. The wireless router has capabilities of Port Filtering, IP Filtering, MAC Filtering, Port Forwarding, URL filtering, Denial-of-Service, and DMZ. -
Page 47: Ip Filtering
User Manual IP Filtering IP Filtering gives you the ability to block access to IP addresses that you specify. Select Enable IP Filtering to activate this setting. Clear this check box to disable it. Enter the Local IP Address that you want to filter and select Protocol from the drop-down list box. -
Page 48: Mac Filtering
User Manual MAC Filtering The MAC filter allows you to configure the device to exclude other devices from accessing the router. Every Ethernet device has a unique MAC address. The MAC address is assigned at the factory and consists of six pairs of hexadecimal characters, for example, 00-60-B3- 00-00-02. -
Page 49: Url Filtering
User Manual URL Filtering The URL Filtering gives you the ability to block access to the URL address you specify. Enter the URL Address and click Apply Changes to save the settings. Click Cancel to start configuring this part of the screen again. Page 49 of 57... -
Page 50: Port Filtering
User Manual Port Filtering The Port Filtering gives you the ability to block access only the port that you specify. Select Enable Port Filtering to activate this setting. Clear this check box to disable it. Enter the Port Range that you want to filter and select Protocol from the drop-down list box. -
Page 51: Denial Of Service
User Manual Denial of Service The firewall must be active to protect against Denial of Service (DoS) attacks. A denial-of- service attack is characterized by an explicit attempt by hackers to prevent legitimate users of a service from using that service. The DMZ (Demilitarized Zone) provides a way for public servers such as Web (HTTP) servers, FTP servers, SMTP (e-mail) servers, and DNS servers to be visible to the outside world. -
Page 52: Config File
User Manual Config File This page allows you to save current settings to a file or restore from a file. Save Settings to File: Makes a back up file of your current router configuration. Load Settings from File: Restores your configuration using a configuration file. DDNS Dynamic DNS is a service that provides you with a valid, unchanging Internet domain name (a URL) to go with that (possibly everchanging) IP address. -
Page 53: Factory Reset
User Manual Factory Reset Allows you to reset the device to its factory settings. Reset The Reset button will clear all user-entered modification and will reset the device settings back to its factory default values. • LAN IP address: 192.168.1.254 •... -
Page 54: Password
User Manual Password Allows you to change the password for the Web Manager. To change the Web Manager’s password: 1. Select Password from the Advanced Menu. 2. Type the New Password and confirm it. 3. Click Apply Changes. Note: After you change the Web Manager’s password, please take note of your new password. Otherwise, you will not able to access the Wireless Router setup. -
Page 55: System Log
User Manual System Log System log displays logs and alert messages. Old logs are deleted as new logs are created. Page 55 of 57... -
Page 56: Time Settings
User Manual Time Settings You may synchronize System Log’s timestamp with an NTP server over the Internet. Restart Click Restart to restart the device. Log Out Click Yes to end your session. Page 56 of 57... -
Page 57: Safety Precautions
User Manual Safety Precautions Do not open, service, or change any component. Only qualified technical specialists are allowed to service the equipment. Observe safety precautions to avoid electric shock Check voltage before connecting to the power supply. Connecting to the wrong voltage will damage the equipment.
Need help?
Do you have a question about the 4-Port Wireless N Router and is the answer not in the manual?
Questions and answers