Table of Contents
Advertisement
Quick Links
IMPORTANT:
THESE INSTRUCTIONS ARE TO
REMAIN WITH THE HOMEOWNER
TESTED and LISTED to;
CAN/ULC S627 AND UL 1482
SAFETY NOTICE
If this stove is not properly installed, a
house fire may result. For your safety,
follow the installation instructions.
Contact local building or fire officials
about restrictions and installation
inspection requirements in your area.
Meets the U.S. Environmental Protection
Agency's 2020 Particulate Emission Standards
(Crib Wood).
Visit www.pacificenergy.net for the most recent version of this manual
040523-28
SERIAL #
OPERATING AND
INSTALLATION
INSTRUCTIONS
MODEL:
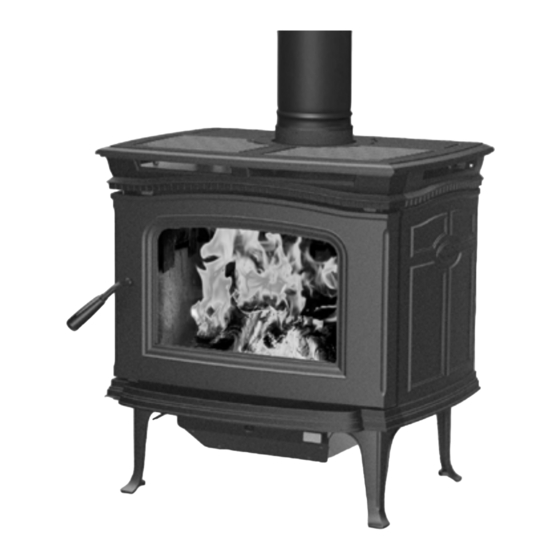
ALDERLEA T4
ALT4-LE
LE
100003978
Advertisement
Table of Contents

Related Manuals for Pacific energy ALDERLEA T4 LE


Summary of Contents for Pacific energy ALDERLEA T4 LE
- Page 1 IMPORTANT: THESE INSTRUCTIONS ARE TO REMAIN WITH THE HOMEOWNER TESTED and LISTED to; CAN/ULC S627 AND UL 1482 SERIAL # OPERATING AND INSTALLATION SAFETY NOTICE INSTRUCTIONS If this stove is not properly installed, a house fire may result. For your safety, follow the installation instructions.
-
Page 2: Table Of Contents
Ash Removal ..............8 Blower Operation ............. 23 Ash Clean out system: ............. 8 Firebrick Installation ..............23 Disposal of Ashes............... 8 Replacement Parts - Alderlea T4 LE ........26 Maintenance ................9 Maintenance Checks ............... 10 Weekly: ................10 Monthly ................10 When Cleaning the Chimney System: ...... -
Page 3: Rating Label
This manual describes the installation and operation of the; Pacific Energy, ALDERLEA T4 LE and ALDERLEA T4 LE Classic freestanding wood heater. SAFETY NOTICE: If this stove is not properly installed, a house fire may result. For your safety, follow the installation instructions. -
Page 4: Safety
Safety CAUTION: Never use gasoline, gasoline type lantern fuel, kerosene, charcoal lighter fluid or similar liquids to start or "freshen up" a fire in this heater. Keep all such liquids well away from the heater while it is in use. Instruct all members of your family on the safe operation of the heater. -
Page 5: To Avoid A Chimney Fire
Chimney fires are easy to detect; they usually involve one or more of the following: • Flames and sparks shooting out of the top of the chimney • A roaring sound • Vibration of the chimney To Avoid a Chimney Fire 1. -
Page 6: Operation
Operation CAUTION: Hot while in operation. Keep children, clothing and furniture away. Contact may cause skin burns. WARNING: Always keep loading door closed when burning. This heater is not designed for open door burning. WARNING: No alteration or modification of the combustion air control assembly is permitted. Any tampering will void warranty and could be very hazardous. -
Page 7: Lighting A Fire
Lighting a fire WARNING: Never use chemicals or any other volatile liquid to start a fire. 1. Adjust the air control to the “High” position (all the way to the left) and open the door. 2. Place crumpled newspaper in the centre of the heater and crisscross with several pieces of dry kindling. Add a few small pieces of dry wood on top. -
Page 8: Restarting After Extended Or Overnight Burns
Restarting After Extended or Overnight Burns 1. Open door and rake hot embers towards the front of the heater. Add a couple of dry, split logs on top of embers, close door. 2. Adjust air control to high and in just a few minutes, logs should begin burning. 3. -
Page 9: Maintenance
This heavy deposit is building up at least as quickly in the chimney. 2. DOOR GASKETS - The gasket used by Pacific Energy (7/8"fiberglass rope) (7/8"fiberglass rope) requires only light pressure to seal. -
Page 10: Maintenance Checks
Maintenance Checks Check the following parts for damage such as cracks, excessive corrosion, burned out sections and excessive warping: (See website for descriptions and more detail) Weekly: • Firebrick - Visual, for cracking. • Door Gasket - sagging, placement, damage. Monthly •... -
Page 11: Baffle / Tube Removal
4. Inspect the gasket between baffle and supply tube. If necessary, replace with gasket (prt#80000365) available from your Pacific Energy dealer. 5. Re-install baffle assembly in reverse order. The two side pieces of blanket insulation must be tight against the side rails. -
Page 12: Assembly
Assembly 1. Carefully remove wood crating top and supports. 2. Remove plastic cover. 3. Remove the Brick Pack from the firebox. Install Firebricks (see section; Firebrick Installeation) after stove is in its final location, and the chimney is installed. Dimensions 7 3/8”... -
Page 13: Floor Protector
Floor Protector The stove may be installed on a combustible floor provided noncombustible ember protection is used. This protection must extend as follows: U.S.A. Only In USA: 16" (406 mm) to the front and 8" (203 mm) to the sides of the fuel Minimum Width - 34"(864mm) loading door opening. -
Page 14: Residential Installation
Residential Installation Clearances: Single Wall Flue Connector 10" 7" 10" 255mm 180mm 17 3/8" 255mm 20 1/2" 520mm 440mm 10" 10" 255mm 255mm 10" 7" 255mm 180mm 23 7/8" 605mm Double Wall Flue Connector 8" 5" 8" 18 1/2" 15 3/8" 130mm 205mm 470mm... -
Page 15: Chimney And Connector
Warning: Under no circumstances is this heater to be installed in a makeshift or "temporary" manner. It may be fired only after the following conditions have been met. DO NOT ATTEMPT TO CONNECT THIS HEATER TO ANY AIR DISTRIBUTION DUCT. DO NOT INSTALL IN ANY FIREPLACE. -
Page 16: Combustion Air
Installation Procedure 1. Select the position for your wood stove based on the clearances diagram. Position the stove and floor protection. 2. Mark the position for the hole in the ceiling and roof by using a string and plumb-bob hanging over the exact center of the stoves flue pipe. - Page 17 Spark arrester rain cap Follow chimney manufacture specifcations for distance between vent termination heigth and chimney at roof line. Also consult local building Listed regulations. Insulated Chimney Storm collar Roof ashing as per Local Chimney Support and Federal codes Minimum 7’ [2.1m] Wall Thimble Ceiling Height 56“...
- Page 18 Fireclay Flue Liner Concrete Cap Ensure that the Masonry chimney meets all National Fire Protection Association and local building codes. Chimney Have the chimney cleaned and inspected by a professional to ensure there are no cracks, weak mortar or other signs of deterioration. See vent manufactuer’s installation instructions 6”...
-
Page 19: Through Wall Installations (As Per Nfpa 211)
Through Wall Installations (as per NFPA 211) ATTENTION: VAPOUR BARRIER MUST BE MAINTAINED WHEREVER CHIMNEY OR OTHER COMPONENTS PENETRATE TO THE EXTERIOR OF THE STRUCTURE. SEE LOCAL BUILDING CODES FOR PROPER AND APPROVED METHODS OF MAINTAINING VAPOUR BARRIER. Minimum chimney clearance SYSTEM A to brick and combustibles 2”... - Page 20 SYSTEM C Minimum chimney clearance from masonry to sheet steel supports and combustibles 2” (51 mm) Two ventilated air channels, each 1” (25.4 mm) Chimney connector Minimum 6” (152 mm) glass ber insulation Two ventilated air channels, each 1” (25.4 mm); Sheet steel supports Masonry chimney construction of sheet steel...
-
Page 21: Mobile Home Installation
Mobile Home Installation These mandatory requirements for installation into a mobile Home, are in addition to those listed under Residential Installation. Clearances to combustible surfaces and materials are shown below. Use Only Double Wall Flue Connector for Mobile Home 5" 8"... -
Page 22: Trouble Shooting
Trouble Shooting Problem Cause Cure Excessive Creosote 1) Wood is too wet - Use dry wood Build-up 2) Turning down air control - Do not turn down until: too soon a) there is a good bed of coals b) the wood is charred 3) Draft too low - Chimney plugged or restricted, check flue - Improper chimney height and/or diameter... -
Page 23: Optional Blower
Optional Blower The optional blower kit (kit #11140001) is equipped with a three prong power cord and may be installed at any time. Follow installation instructions supplied with the kit. Route power supply cord away from heater. Electrical rating: 115 volts A.C.-1.1 amps. Fan output rating: 140 CFM Blower Operation Proper blower speed matched with air control setting will ensure peak performance from your stove. - Page 24 Begin firebrick installation with the rear wall. 1. Stand one "A" firebrick vertically behind the tab located on the brick rail. Slide the firebrick toward the center of the rear wall (Figure 13). Slide a 2nd "A" firebrick underneath the tab on the brick rail (Figure 13). Repeat steps 1 &...
- Page 25 5. Place two "A" firebricks on the firebox floor as shown. Place a third "A" firebrick against the rear wall as shown in (Figure 17). 6. Place the "C" firebrick so that it sits beside the ash dump, against the lefthand side wall and the "A" firebrick located directly behind the ash dump (Figure 17).
-
Page 26: Replacement Parts - Alderlea T4 Le
Parts Diagram - Alderlea T4 LE (WHEN ORDERING, INCLUDE PART NUMBER WITH DESCRIPTION) TOP, ALT4 ..............Gasket, Door, Neo 1.6/ Vista LE ..... 80000670 ...METALIC BLACK PAINT ......80002471 Glass Retainer, Neo 1.6 / Vista LE ....80002356 ...MAJOLICA BROWN ENAMEL ....80002472 Glass(C/W Tape), Neo 1.6 ....... - Page 27 100003978 ALT 4-LE 040523-28...
- Page 28 ©2023 Copyright Pacific Energy Fireplace Products LTD. Reproduction, adaptation, or translation without prior written permission is prohibited except as allowed under the copyright laws. For technical support, please contact your retailer Web site: www.pacificenergy.net 2975 Allenby Rd., Duncan, BC V9l 6V8...
Need help?
Do you have a question about the ALDERLEA T4 LE and is the answer not in the manual?
Questions and answers