Advertisement
Table of Contents
- 1 Your New RTX-71D-CHG Kit Includes
- 2 Installation
- 3 Attach the OEM Light/Wiper Switches
- 4 Connect the Provided Main Harness and Buzzer
- 5 Mount the RTX System with OEM Bezel and Switches
- 6 Install the A/C / Heat Controls
- 7 Refer to the Main Manual for Wiring Instructions
- 8 WARNING about Chemical Exposure
- Download this manual
RTX-71D-CHG
Dakota Digital RTX Instrument Installation
For 1971-74 Dodge Charger, B-body Mopar and GTX/Roadrunner
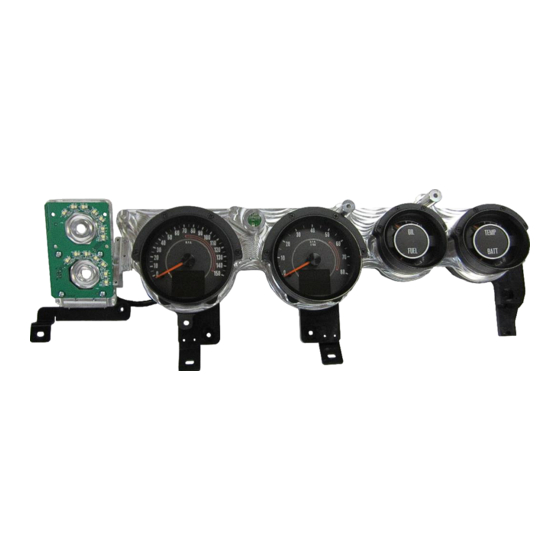
Your new RTX-71D-CHG kit includes:
RTX Display
Indicator
Universal Sender
Switch
Buzzer
Installation Manuals
Harness
Pack
(8) #8 x 1/2"
Self-Tapping Screws
Main Harness
Control Box
(1) #10-32 x 1/2"
(2) #10-32 Flange Nut
Screw
(2) #10 Lock Washer
(1) #10-32 x 7/8"
Screw
Manual # 650800
Advertisement
Table of Contents

Subscribe to Our Youtube Channel
Related Manuals for Dakota Digital Retrotech RTX-71D-CHG


Summary of Contents for Dakota Digital Retrotech RTX-71D-CHG
- Page 1 RTX-71D-CHG Dakota Digital RTX Instrument Installation For 1971-74 Dodge Charger, B-body Mopar and GTX/Roadrunner Your new RTX-71D-CHG kit includes: RTX Display Indicator Universal Sender Switch Buzzer Installation Manuals Harness Pack (8) #8 x 1/2” Self-Tapping Screws Main Harness Control Box (1) #10-32 x 1/2”...
- Page 2 Installation 1. Remove the stock gauge cluster from the dash. Retain all factory hardware for reassembly. Locations of hardware to remove are shown by the red arrows. 2. Remove the bezel from the stock gauge cluster by removing the eight (8) screws shown in blue arrows.
- Page 3 4. Attach the OEM light/wiper switches to the left side of the mounting plate on the RTX system. Switches may vary with vehicle. Headlight Switch Wiper Switch 5. Attach the OEM bezel to the RTX system by using the provided 8x #8 x 1/2” self-tapping screws. (8) #8 x 1/2”...
- Page 4 7. If the original parking brake indicator is desired, plug in the provided indicator harness in the OEM parking brake location. Do not wire this harness to the system’s control box. The White/Green wire goes to the indicator circuit, and the White/Black wire goes to the chassis to ground. Indicator Harness 8.
- Page 5 10. Refer to the main manual for wiring instructions to complete the RTX installation. WARNING: This product can expose you to chemicals including lead, which is known to the State of California to cause cancer and birth defects or other reproductive harm. For more information go to www.P65Warnings.ca.gov Manual # 650800...
Need help?
Do you have a question about the Retrotech RTX-71D-CHG and is the answer not in the manual?
Questions and answers