Table of Contents
Advertisement
Quick Links
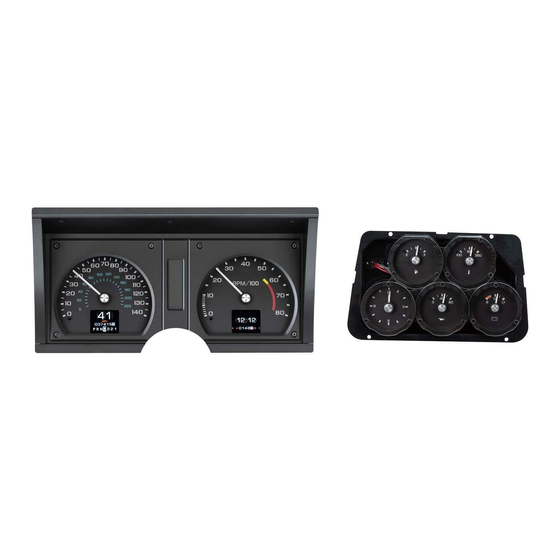
RTX-78C-VET
Dakota Digital RTX Instrument Installation
For 1978-'82 Corvette
Your new RTX-78C-VET kit includes:
RTX Displays
Buzzer
Universal Sender
Installation Manuals
Switch
Pack
assembly
(3) Block-Off Lenses
Y Harness
Clock Harness
(5) 1" Screws
Control Box
(2) Main Harnesses
Installation
1. Remove the stock main gauge cluster and the center gauge cluster from the dash and save all center
gauge hardware for reassembly.
Manual # 650739
Advertisement
Table of Contents

Related Manuals for Dakota Digital Retrotech RTX-78C-VET


Summary of Contents for Dakota Digital Retrotech RTX-78C-VET
- Page 1 RTX-78C-VET Dakota Digital RTX Instrument Installation For 1978-’82 Corvette Your new RTX-78C-VET kit includes: RTX Displays Buzzer Universal Sender Installation Manuals Switch Pack assembly (3) Block-Off Lenses Y Harness Clock Harness (5) 1” Screws Control Box (2) Main Harnesses Installation 1.
- Page 2 2. Remove the stock gauge assembly from the center gauge bezel; the only items to be reused are the front bezel and the gauge mounting hardware. Now is a good time to clean or refinish the bezel. 636234-B 636234-A 3. Peel the paper off the two block-off lenses needed (636234-A and 636234-B) and place them shiny side down in the two rectangular openings.
- Page 3 6. Connect the main harness and the buzzer (optional for audio feedback) to the back of the RTX main display; carefully route the other end of the main harness to the control box mounting location as the display is installed into the dash using the five (5) supplied 1” screws. Buzzer Connector 7.
Need help?
Do you have a question about the Retrotech RTX-78C-VET and is the answer not in the manual?
Questions and answers