Salda SMARTY XP Mounting And Installation Instruction
Source: salda.lt/en, vetter-lufttechnik.de
Hide thumbs
Also See for SMARTY XP:
- Mounting and installation instruction (48 pages) ,
- Mounting and installation instruction (44 pages) ,
- Mounting and installation instruction (60 pages)
Table of Contents
Advertisement
Quick Links
Advertisement
Table of Contents

Related Manuals for Salda SMARTY XP


Summary of Contents for Salda SMARTY XP
- Page 1 SMARTY XP SMARTY XV MOUNTING AND INSTALLATION INSTRUCTION...
-
Page 2: Table Of Contents
5.3. UNPACKING 5.4. PIPING AND INSTRUMENTATION DIAGRAM 5.5. MOUNTING 5.5.1. UNIT PLACING AND MOUNTING POSITIONING REQUIREMENTS 5.5.2. CEILING-MOUNTING OF THE UNIT (SMARTY XP) 5.5.3. FLOOR MOUNTING (SMARTY XV) 5.5.4. WALL-MOUNTING OF THE UNIT (SMARTY XV) 5.5.5. DRAINAGE (SMARTY XV) 5.6. CONNECTION OF THE AIR DUCT 5.7. - Page 3 9. CONNECTION TO WIRING TERMINALS (VERSION S300) 10. ACCESSORIES SETUP (VERSION S300) 10.1. ACCESS OF CONFIGURATION PARAMETERS 10.2. HEATER 10.3. PREHEATER 10.4. SMOKE DETECTOR 10.5. FIREPLACE PROTECTION, SYSTEM MODE SWITCH OR RAPID VENTILATION SWITCH INPUT 10.6. ALARM INDICATION OUTPUT 10.7. REMOTE CONTROLLER AND KNX ROOM SENSORS 11.
-
Page 4: Symbols And Marking
2. SYMBOLS AND MARKING Warning – pay attention Additional information Apply the auxiliary label on the unit (on an easily accessible location) or on the dashed location of the technical manual in order to keep the im- portant information about the unit. Figure 2.1. -
Page 5: Safety Instructions And Precautions
Danger: Fumes Salda Antifrost the air in from the room and the duct-exhaust gases out through chimney or extraction ducting. The heating appliance can be starved protection (see Salda Antifrost function in the Remote Controller Operation Manual). SMARTY v2023.1 EN |... -
Page 6: Information About The Product
4. INFORMATION ABOUT THE PRODUCT 4.1. DESCRIPTION included in the standard package. Control functions depend on selected control board type: MiniMCB, MiniMCB basic or Siemens S300. OPTIONAL HEATING ELEMENTS HEAT TEMPER- CONTROL BYPASS PRODUCT NAME TYPE RECOVERY ATURE DUCT BASED DUCT BOARD DAMPER... -
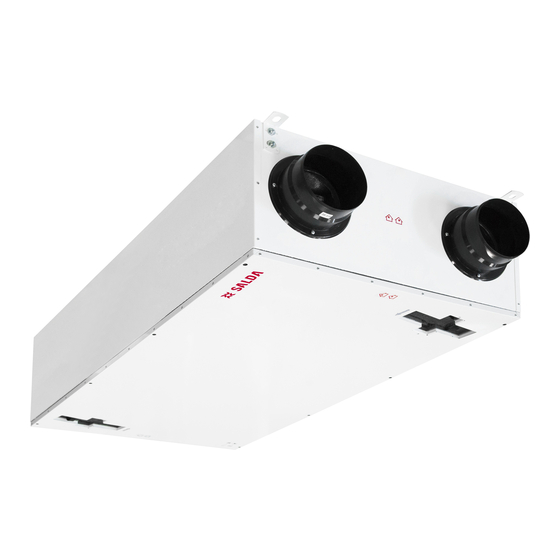
Page 7: Dimensions And Weight
4.2. DIMENSIONS AND WEIGHT Figure 4.2.1. Smarty 2X P 1.1/1.2; Smarty 3X P / 4X P Figure 4.2.2. Smarty 2X P S300 SMARTY v2023.1 EN |... - Page 8 Figure 4.2.3. Smarty 2X V 1.1/1.2 Figure 4.2.4. Smarty 2X V S300 Figure 4.2.5. Smarty 3X V / 4X V 1.1/1.2 | EN SMARTY v2023.1...
- Page 9 Figure 4.2.6. Smarty 3X V / 4X V S300 SMARTY 2X P 1.1/1.2 2X P S300 2X V 1.1/1.2 2X V S300 3X P / 4X P 3X V / 4X V [mm] 1010 1228 [mm] [mm] [mm] øD [mm] øDa [mm] [mm]...
-
Page 10: Technical Data
4.3. TECHNICAL DATA 2X P 3X P 4X P F2 4X P F2 4X P SMARTY 2X P 1.1 2X P 1.2 S300 3X P 1.1 3X P 1.2 S300 S300 Exhaust air fan phase/voltage [50 Hz/VAC] 1/230 1/230 1/230 [kW/A] 0,05/0,4 0,09/0,75... -
Page 11: Operating Conditions
4.4. OPERATING CONDITIONS SMARTY 2X P 1.1 2X P 1.1 E 2X P 1.2 2X P 1.2 E 2X P S300 2X P S300 E -2 .. 40 °C -8 .. 40 °C -2 .. 40 °C -8 .. 40 °C -2 .. -
Page 12: Description Of Components
4.6. DESCRIPTION OF COMPONENTS Figure 4.6.1. Smarty 2X P 1.1/1.2 Figure 4.6.2. Smarty 2X P S300 Figure 4.6.3. Smarty 3X P 1.1/1.2; Figure 4.6.4. Smarty 3X P / 4X P S300 Smarty 4X P F2 1.1/1.2 Figure 4.6.5. Smarty 2X V 1.1/1.2 Figure 4.6.6. -
Page 13: Installation
• The recommended storage period should not be longer than one year. In case of storing the units for a period longer than one year, checking if ture has not accumulated must be performed before the installation of the unit. Figure 5.2.1. Smarty XP Figure 5.2.2. Smarty XV... -
Page 14: Piping And Instrumentation Diagram
• Before commencing the installation of the unit, please check if all ordered equipment have been delivered. Any variation from the ordered equip- ment list must be reported to the product supplier. Figure 5.3.1. Smarty XP Figure 5.3.2. Smarty 2X V 1.1/1.2 Figure 5.3.3. - Page 15 Figure 5.4.2. SMARTY XP 1.2 (* Only heater or preheater can be connected at a time; ** Check the manual for details; Figure 5.4.3. SMARTY XP S300 (* Only heater or preheater can be connected at a time; ** Components connection only with PE1;...
-
Page 16: Mounting
Figure 5.4.6. SMARTY XV S300 (* Only heater or preheater can be connected at a time; ** Components connection only with PE1; *** Components connection only without PE1) THE LIST OF COMPONENTS Plate heat exchanger Supply air fan Exhaust fan Extract air temperature sensor Exhaust air temperature sensor Supply air temperature sensor... -
Page 17: Unit Placing And Mounting Positioning Requirements
• • • • • out maintenance, servicing and/or repairs signs may occur. α Figure 5.5.1. (only for units with condensation heat exchanger) Figure 5.5.2. Figure 5.5.3. Smarty XV ceiling-mounting positions (W=400 mm) 5.5.1. UNIT PLACING AND MOUNTING POSITIONING REQUIREMENTS 1,5xL 1,5xL Figure 5.5.1.1. -
Page 18: Ceiling-Mounting Of The Unit (Smarty Xp)
5.5.2. CEILING-MOUNTING OF THE UNIT (SMARTY XP) Figure 5.5.2.1. Ceiling-mounting of the unit α ⌀D Figure 5.5.2.2. Drainage system installation (øD=150 mm) (only for units with condensation heat exchanger) 5.5.3. FLOOR MOUNTING (SMARTY XV) Figure 5.5.3.1. Floor mounting (optional accessory required) 5.5.4. -
Page 19: Drainage (Smarty Xv)
5.5.5. DRAINAGE (SMARTY XV) DRAINAGE SYSTEM INSTALLATION SMARTY 2X V øD Figure 5.5.5.1. Drainage system installation (øD=150 mm) ATTENTION: Screwing force may not exceed 2 Nm. DRAINAGE SYSTEM INSTALLATION SMARTY 3X V / 4X V 1. Connect the drain couplings (ZPGGM056 2. - Page 20 • Air ducts are often mistakenly connected in inappropriate location. The ventilation units bear the labels indicating the correct air duct connection Figure 5.6.1. Smarty XP: D or Da dimensions depend on unit. NOTE. In case air ducts of ø D - 125 mm are used, using of NPU 125 coupling is required.
-
Page 21: Connection Of The Unit To Electric Network
5.7. CONNECTION OF THE UNIT TO ELECTRIC NETWORK • • • • The unit must be earthed according to electrical equipment installation regulation. • • • • made during transportation. • The manufacturer does not assume any liability for personal injuries and property damage due to non-conformance with the provided instructions. -
Page 22: Maintenance
6. MAINTENANCE 6.1. SAFETY INSTRUCTION Unplug the unit from the mains before opening the door (disconnect the power plug from the outlet or in case a two-pole au- tomatic circuit breaker installed, disconnect it as well. Make sure that it cannot be turned on by third parties) and wait until the fans completely stop (for about 2 min.). -
Page 23: Filters Maintenance
Figure 6.3.4. Smarty 3X V / 4X V 6.4. FILTERS MAINTENANCE • • Figure 6.4.1. Smarty XP Figure 6.4.2. Smarty 2X V Figure 6.4.3. Smarty 3X V / 4X V 6.5. HEAT EXCHANGER MAINTENANCE • Proceed to maintenance and repair after any rotation in the fan stopped. -
Page 24: Fan Maintenance
Prior to commencing any maintenance or repairs, make sure the ventilation units is disconnected from the power source. SMARTY XP (version 1.1 / 1.2): • Remove the fan connectors from the control board. Supply air fan connects to X15, X2, X4 connectors. Extract air fan connects to X16, X2, X4 connectors. - Page 25 SMARTY XP (version S300): • SMARTY 2/3X V (version S300): • Disconnect X1F and X2F connectors (located in the control board compartment) from the control board harness. • Remove cables of fans from the casing; • Pull out fans assemblies.
-
Page 26: Bypass Dampers And Pre-Heater (Version 1.1) Maintenance
Figure 6.6.7. Smarty 2X P NOTE. Prior to performing steps in Figure 6.6.7, steps in Figure 6.3.1 (1-3) and Figure 6.5.1 (1-4) / Figure 6.5.2 (1-2) should be carried out. Figure 6.6.8. Smarty 3X P / 4X P NOTE. Prior to performing step in Figure 6.6.8, steps in Figure 6.3.2 and Figure 6.5.4 (1-3) should be carried out. Figure 6.6.9. - Page 27 Figure 6.7.1. Smarty XP bypass damper Figure 6.7.2. Smarty XP S300 bypass damper SMARTY XV (version 1.1 / 1.2): • • Bypass damper and pre-heater are mounted on one block. The pre-heater shall be disconnected by removing X29 connector. The bypass damp- er shall be disconnected by removing X25.
-
Page 28: Control Board Maintenance
Figure 6.7.6. Smarty 2X V S300 Figure 6.7.7. Smarty 3X V / 4X V S300 6.8. CONTROL BOARD MAINTENANCE SMARTY XP: • • • Remove the control board through the front part of the device. • Figure 6.8.1. Smarty 2X P Figure 6.8.2. - Page 29 Figure 6.8.4. Smarty 3/4X P S300 SMARTY XV (version 1.1 / 1.2): • • • Disconnect the connectors from the control board. • The connectors are marked according to connection location. Thus during automation reassembly please observe the marking of the connec- "MCB MINIMCB TECHNICAL MANUAL".
-
Page 30: Control
WIFI stick + mobile app POS8.4440 BACnet IP 7.2. DEVICE FUNCTIONS application and SALDA AIR mobile application. environment settings. application for installer and service users. For unit control instructions, refer to the operation manual of the existing control device. | EN... -
Page 31: Connection Of Accessories
8. CONNECTION OF ACCESSORIES 8.1. HEATER AND PRE-HEATER 8.1.1. VERSION 1.1 Smarty 1.1 units feature one connection for external electrical air heater and one for external air pre-heater. Pre-heater is integrated inside the • • EKA connection: SMARTY v2023.1 EN |... - Page 32 EKA NIS connection: | EN SMARTY v2023.1...
-
Page 33: Version
8.1.2. VERSION 1.2 Smarty 1.2 units feature one connection of external electrical heater/pre-heater. In factory settings, the connection is intended for the pre-heater, • • EKA connection: SMARTY v2023.1 EN |... - Page 34 EKA NIS connection: | EN SMARTY v2023.1...
- Page 35 WEB application service or on the ST-SA-Control panel. SETTINGS IN THE ENVIRONMENT OF THE MB-GATEWAY WEB APPLICATION SERVICE • • Service > Heaters > Heater and pre-heater position; • For the Stouch control panel, changing of the settings is not possible •...
-
Page 36: Version S300
Mini MCB When using the supply air heater, the supply air sensor (TJ) must be installed downstream the heater (or cooler) at the length 8.1.3. VERSION S300 SMARTY air handling units are able to control one heater or preheater coil at a time. When the preheater is used, one more temperature sensor "ACCESSORIES SETUP (VERSION S300)". -
Page 37: Fire Protection Signal Input (Fire Protection Input (Nc)) (Version 1.1 / 1.2)
Figure 8.1.3.2.1. Signals for electrical preheater T1:1 (X8 analog input) from T1:3 (B1). This sensor then is called TP, see the piping and instrumentation diagram. Additionally, temperature sensor Figure 8.1.3.2.2. Temperature sensors when preheater is used 8.2. FIRE PROTECTION SIGNAL INPUT (FIRE PROTECTION INPUT (NC)) (VERSION 1.1 / 1.2) Automation controller A zone X4 More information can be found in the MCB miniMCB Technical Manual. -
Page 38: External Co /Rh Sensors (Version 1.1 / 1.2)
/RH (input 0-10VDC) sensors. Sensors connection: Smarty 3X V 1.1 and Smarty 4X V F2 1.1 come with the integrated RH sensor connected. Smarty XP 1.2 / Smarty XV 1.2 units feature one connection for external CO /RH (input 0-10VDC) sensors. Sensors connection: These sensors feature 3 functions: Supply RH, Extract RH and Extract CO Supply RH transmitter shall be installed inside supply air duct. -
Page 39: Co Concentration According To Pettenkofer Limit
8.6. CONCENTRATION ACCORDING TO PETTENKOFER LIMIT 8.7. CONNECTION OF SUPPLY AND EXHAUST AIR DAMPERS (VERSION 1.1 / 1.2) Installation diagram See "PIPING AND INSTRUMENTATION DIAGRAM". Wiring diagram Automation controller D zone. Upon activation of output X13:3, the dampers open. Upon activation of output X13:4, the dampers close. 8.8. -
Page 40: Connection Of Remote Control Panel Or Modbus (Version 1.1 / 1.2)
Same interface and controller terminals are used for QMX3 room sensors P30, P40 and P70 connection. Air Handling unit can be connected to the Building Management System via BACnet IP or Modbus (RS485). BACnet Vendor Name: Siemens Building Technologies Default BACnet/IP port: 47808 (0xBAC0) Default Device Object Instance number: 1 Baudrate: 19200 bps Data: 8 Bit... -
Page 41: Operation Indication Output (Version S300)
Figure 8.11.1. D2 digital input connection "ACCESSORIES SETUP (VERSION S300)". 8.12. OPERATION INDICATION OUTPUT (VERSION S300) If indication about the status of the air handling unit is needed, it can be connected to dedicated Q24 signal on T7:1. When AHU is ON, indication "ACCESSORIES SETUP (VERSION S300)". -
Page 42: Recommended Schemes For Connection Of Internal And External Components
8.15. RECOMMENDED SCHEMES FOR CONNECTION OF INTERNAL AND EXTERNAL COMPONENTS *Only Smarty 1.1 versions have N2 module. Figure 8.15.1. SMARTY XP 1.1/1.2; Smarty 2X V 1.1; Smarty 2X V / 3X V / 4X V F2 1.2 (219.1017.0.1.1-PS) | EN... - Page 43 Figure 8.15.2. SMARTY XP 1.1/1.2; Smarty 2X V 1.1; Figure 8.15.3. SMARTY XP 1.1/1.2, Smarty 2X V 1.1; Smarty 2X V / 3X V / 4X V F2 1.2 (219.1017.0.1.2-PS) Smarty 2X V / 3X V / 4X V F2 1.2 (219.1017.0.1.3-PS) Figure 8.15.4.
- Page 44 Figure 8.15.5. Figure 8.15.6. Preheater, Bypass wiring (Smarty 3XV-PE-0k) | EN SMARTY v2023.1...
- Page 45 Figure 8.15.7. Preheater (SP35) Smarty 4X P F2 unit fans connect to Smarty 4X V F2 unit fans connect through X32/X33 connectors Figure 8.15.8. SMARTY v2023.1 EN |...
- Page 46 Figure 8.15.9. Figure 8.15.10. Smarty 3X V / 4X V F2 1.1 (219.1349.0.1.1-PS) | EN SMARTY v2023.1...
- Page 47 Figure 8.15.11. Smarty 3X V / 4X V F2 1.1 (219.1349.0.1.2-PS) Figure 8.15.12. Smarty 3X V / 4X V F2 1.1 (219.1349.0.1.3-PS) SMARTY v2023.1 EN |...
- Page 48 Figure 8.15.13. Figure 8.15.14. | EN SMARTY v2023.1...
-
Page 49: Connection To Wiring Terminals (Version S300)
9. CONNECTION TO WIRING TERMINALS (VERSION S300) HV Area SELV Area 24V= 24V= Ref1 Heat Sink Figure 9.1. S300 controller SMARTY v2023.1 EN |... -
Page 50: Accessories Setup (Version S300)
10. ACCESSORIES SETUP (VERSION S300) system. play.google.com/store/apps. 10.1. ACCESS OF CONFIGURATION PARAMETERS • • • Turn on the unit. • SIBPAdmin). • Start ABT Go application and open menu. • • Log in to access the device (by default: user name is Administrator OneBT •... -
Page 51: Heater
10.2. HEATER • In CONFIGURATION ONLINE CONFIGURATION BASIC and press OK • Set HEATING COIL parameter to ELECTRIC HEATING COIL 21Y. • Press APPLY – RESTART DEVICE DONE. • In CONFIGURATION ONLINE CONFIGURATION EXTENDED and press OK • Select Q1 as ELECTRIC HEATING COIL COMMAND, X8 as HEATING COIL OVERTEMPERATURE DETECTOR and A3 as HEATING COIL ELECTRIC POSITION. •... -
Page 52: Alarm Indication Output
10.6. ALARM INDICATION OUTPUT triggered only B type alarm, only: • In CONFIGURATION ONLINE CONFIGURATION EXTENDED and press OK • Change Y1 A - ALARM INDICATION OUTPUT, B - ALARM INDICATION OUTPUT (depending on preferred indication function). • Press APPLY – RESTART DEVICE DONE. -
Page 53: Ecodesign Data Table
0,65 0,65 0,85 0,85 0,85 0,85 Declared maximum internal leakage rates Declared maximum external leakage rates Timer Timer Timer Timer Timer Timer ErP Compliance 2018 2018 2018 2018 2018 2018 Internet address for disassembly instructions https://select.salda.lt SMARTY v2023.1 EN |... - Page 54 0,65 0,65 0,85 0,85 0,85 0,85 Declared maximum internal leakage rates Declared maximum external leakage rates Timer Timer Timer Timer Timer Timer ErP Compliance 2018 2018 2018 2018 2018 2018 Internet address for disassembly instructions https://select.salda.lt | EN SMARTY v2023.1...
- Page 55 0,65 0,65 0,85 0,85 0,85 0,85 Declared maximum internal leakage rates Declared maximum external leakage rates Timer Timer Timer Timer Timer Timer ErP Compliance 2018 2018 2018 2018 2018 2018 Internet address for disassembly instructions https://select.salda.lt SMARTY v2023.1 EN |...
- Page 56 Timer Timer Timer Timer ErP Compliance 2018 2018 2018 2018 2018 2018 Internet address for disassembly instructions https://select.salda.lt Climate SMARTY SMARTY SMARTY SMARTY SMARTY SMARTY zone 4X P F2 1.1 4X P 1.1 E 4X P F2 1.2 4X P 1.2 E...
- Page 57 Timer Timer Timer Timer ErP Compliance 2018 2018 2018 2018 2018 2018 Internet address for disassembly instructions https://select.salda.lt Climate SMARTY SMARTY SMARTY SMARTY SMARTY SMARTY zone 4X V F2 1.1 4X V 1.1 E 4X V F2 1.2 4X V 1.2 E...
-
Page 58: Declaration Of Conformity
14. DECLARATION OF CONFORMITY Manufacturer SALDA, UAB LT-78109 Šiauliai, Lithuania Tel.: +370 41 540415 www.salda.lt Smarty* Machinery Directive 2006/42/EC EMC Directive 2014/30/EU Low Voltage Directive 2014/35/EU Ecodesign Directive 2009/125/EC RoHS 2 Directive 2011/65/EU Ecodesign requirements for ventilation units Nr. 1253/2014 Energy labeling of residential units Nr. -
Page 59: Warranty
15. WARRANTY date. such damage. damaged by installing the control system. 4.1. mechanical damage; 4.2. damage caused by entering outside objects, materials, liquids; lation and mounting regulations, deliberate or careless users or third-party behavior. days and deliver the equipment to manufacturer. Delivery costs should be covered by customer. Manufacturer reserves the right to change this technical passport any time without prior notice, if some typographic errors or inaccurate information is found, as well as after improving the apps and/or the devices. - Page 60 ** - At least. NOTE. The customer shall be required to complete the Product Maintenance Table. LINKS TO OTHER DOCUMENTS AHU’S CONTROLLER (S300) ROOM OPERATOR UNIT POS8 DE MANUAL DK MANUAL FR MANUAL https://select.salda.lt/file/ https://select.salda.lt/file/ https://select.salda.lt/file/ https://select.salda.lt/file/ https://select.salda.lt/file/ siemens-climatix-s300en siemens-room-opera- smarty-de...
Need help?
Do you have a question about the SMARTY XP and is the answer not in the manual?
Questions and answers