
Related Manuals for Javad TRIUMPH-2


Summary of Contents for Javad TRIUMPH-2
- Page 1 P a i r i n g S u p p l e m e n t a n d A p p e n d i x U p d a t e Version 20150309...
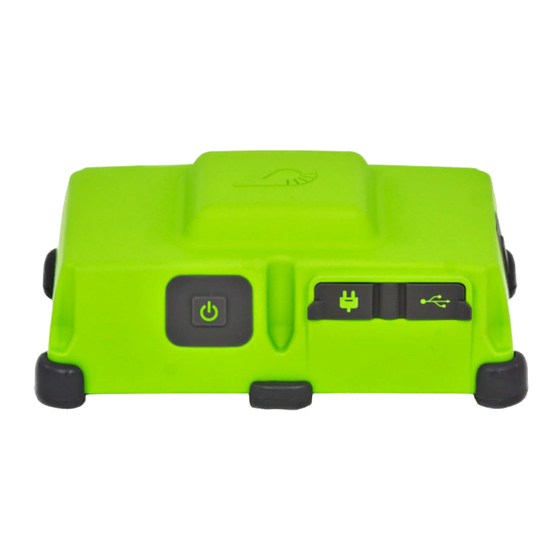
- Page 2 (01-630100-01) Ancillaries Depending on the which options you purchased with your TRIUMPH-LS, you may have in your RTK kit the TRIUMPH-2 to TRIUMPH-2 + Charging Kit serve as the RTK Base. The above illustration is how the as- sembled charging system looks for the TRIUMPH-2 while it’s Shown assembled while the TRIUMPH-2 is being charged being charged.
- Page 3 Pairing the Radio * Note: The TRIUMPH-2 paired with the HPT901BT works as a UHF base for the TRIUMPH-LS when the FH915 radio has been installed Your radio (HPTxxxBT) and the TRIUMPH-2 receiver come at the factory on the TRIUMPH-LS.
- Page 4 Step 4; otherwise proceed with the completion of Step 3. The USB drivers for the TRIUMPH‐2 can be downloaded from our website: http://www.javad.com/jgnss/support/update.html; The very first time that your TRIUMPH‐2 is connected to your scroll down the page and download jgnssusb.zip...
-
Page 5: Click Install
Control, allow the Installation Wizard program to run. The package (jgnssusb.zip) includes: jgnssusb_x86L.exe Š - JAVAD GNSS USB Drivers Installer for x86 (32-bit) jgnssusb_x64L.exe Š - JAVAD GNSS USB Drivers Installer for x64 (64-bit) jgnss_usbser_news.txt Š - news file for USB Serial drivers: TRIUMPH-2, HPT401BT, HPT901BT, HPT404BT, HPT435BT, ALPHA jgnss_usbio_news.txt... - Page 6 Click on Start, and then Devices and Printers Click on File, and then Device Manager Once the drivers have been successfully installed, power off your triumph-2 and disconnect the USB cable from the PC. Click Restart Now www.javad.com Pairing the Radio...
- Page 7 USB port the next time, the COM assign- ment will be the same and once again visible. Once paired, that specific TRIUMPH-2 will be the slave to that specific radio and accordingly only accept the Bluetooth That’s it - congratulations! Your GNSS USB drivers are in-...
- Page 8 NetView. For additional details on using NetView, please refer to the NetView Software Manual available at our website: http://www.javad.com/downloads/javadgnss/manuals/ NetView/NetView_Software_Manual.pdf On the left panel, click on Connection and then choose from a previously saved profile in any of the 10 available slots, or click on an empty slot to create a new one.
- Page 9 NetView. From this pane, you may also Disconnect with a click on Dis www.javad.com Pairing the Radio...
- Page 10 Click External Modem via Bluetooth Step 9. Click OK Step 10. Choose the appropriate (virtualized) se- rial port from the pull down list for the HPTxxxBT. Click Pair to begin the automated pairing pro- cess. www.javad.com Pairing the Radio...
- Page 11 HPTxxxBT should now be blue. Click Connection (on the left panel), followed by a click on Dis to disconnect. Power off the radio and then the receiver before exiting NetView. Now take them outside and put them to work! www.javad.com Pairing the Radio...
-
Page 12: Specifications
Weight 1.23 lbs (0.56 kg) * For the full list of standard and optional features see www.javad.com ** The operating temperature range of Li-Ion batteries is -30 ° C to +55° The storage temperature of Li-Ion batteries is -20 ° C to +45°... - Page 13 Specifications...
-
Page 14: Appendix A - Blinking Leds
3. RECORDING LED blinks on each recording. tween the receiver and an external Function Symbol Blue Yellow device. BLUETOOTH Connected Searching No connection Not Active Revision 1.3 from May 28, 2014 www.javad.com Appendix A - Blinking LEDs Explained... - Page 15 TRIUMPH-2 communicates with radio via Bluetooth wireless link. Up to 50 ft (~15 m) is the practicable range of the communication between TRIUMPH-2 and HPT401BT/HPT404BT. Actually in the field they keep reliable con- nection up to 130 ft (~40 m). TRIUMPH-2 and radio are paired at the factory, so they automatically connect together after power applied.
-
Page 16: Appendix B - Triumph-2 Antcal Data
[10-590293-01] and is reflected by the ARPs suffix A attached at the end of the antenna model’s name: During its first year in existence, the TRIUMPH-2 had a special JAVTRIUMPH_2A. Finalization was coordinated through the distinction made by NGS, specifically in regards to its an- International GNSS Service (IGS) in December 2014. - Page 17 GPS pole, the correct HI will reflect the addition of the 25 mm adapter; i.e., 2.025 m. If the TRIUMPH-2 is setup on a standard tripod, measure the slant height from the mark to the green triangle on the side.
- Page 18 Zenith Angle (degrees) T2A - IGS T2 - NGS 12/10/2014 3/13/2014 Comparison of Triumph-2/2A Phase Center Variations www.javad.com Appendix B - TRIUMPH-2 AntCal...
- Page 19 [3.2] [0.0] [0.0] [1.6] [2.8] [48.7] L2 PCO Offset (mm) [0.0] [2.4] [4.4] [6.1] [7.4] [8.1] [8.5] [8.3] [7.9] [7.1] L2 PCV at Elevation (mm) [6.4] [5.7] [5.3] [5.1] [5.2] [5.9] [7.3] [0.0] [0.0] www.javad.com Appendix B - TRIUMPH-2 AntCal...
-
Page 20: Appendix C - Triumph-Ls Antcal Data
Appendix C - TRIUMPH-LS AntCal Data http://www.ngs.noaa.gov/ANTCAL/Antennas.jsp?manu=Javad PCOs and PCVs Beginning in January 2015, NGS is listing the model anten- na type for the internal antenna of the TRIUMPH-LS as the JAVTRIUMPH_LSA. Additionally, the antenna calibration data for the internal antenna has been updated. This sep-... - Page 21 Note: IGS Phase Center Offset locations added for illustrative purposes OPUS kindly reminds users of non-con- forming antennas like the TRIUMPH-2 and the TRIUMPH-LS that the adapter must be added. IGS - PCO 12/10/2014 www.javad.com Appendix C - TRIUMPH-LS AntCal...
- Page 22 Zenith Angle (degrees) LSA - IGS LS - NGS 12/10/2014 10/30/2013 Comparison of Triumph-LS/LSA Phase Center Variations www.javad.com Appendix C - TRIUMPH-LS AntCal...
- Page 23 [4.3] [0.0] [0.0] [1.3] [5.4] [132.4] L2 PCO Offset (mm) [0.0] [-0.4] [-0.5] [-0.5] [-0.4] [-0.5] [-0.7] [-1.1] [-1.7] [-2.2] L2 PCV at Elevation (mm) [-2.7] [-2.8] [-2.4] [-1.4] [0.3] [3.0] [7.2] [0.0] [0.0] www.javad.com Appendix C - TRIUMPH-LS AntCal...
- Page 24 900 Rock Avenue, San Jose, CA 95131 USA Phone: +1(408)770-1770 Fax: +1(408)770-1799 www.javad.com Copyright © JAVAD GNSS, Inc., 2015 All rights reserved. No unauthorized duplication.
Need help?
Do you have a question about the TRIUMPH-2 and is the answer not in the manual?
Questions and answers