Table of Contents
Advertisement
Quick Links
BY APPOINTMENT TO
HER MAJESTY THE QUEEN
MANUFACTURERS OF HAYTER
HORTICULTURAL MACHINERY
TORO U.K. LIMITED, SPELLBROOK,
BISHOPS STORTFORD, HERTS
Operator's Manual
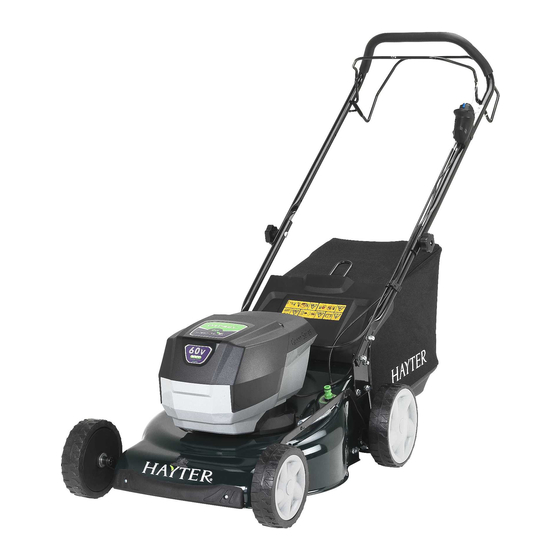
Osprey 46 GS 60V* Autodrive
* 60V maximum / 54V typical.
Model No. CODE613A - Serial No. 323000101 and Up
Register at www.hayter.co.uk
Original Instructions (EN)
Form No. 3460-216 Rev A
Advertisement
Table of Contents

Related Manuals for Hayter CODE613A


Summary of Contents for Hayter CODE613A
- Page 1 MANUFACTURERS OF HAYTER HORTICULTURAL MACHINERY TORO U.K. LIMITED, SPELLBROOK, BISHOPS STORTFORD, HERTS Operator’s Manual Osprey 46 GS 60V* Autodrive * 60V maximum / 54V typical. Model No. CODE613A - Serial No. 323000101 and Up Register at www.hayter.co.uk Original Instructions (EN)
- Page 3 It is designed to use Hayter approved lithium-ion battery packs. Using these products for purposes other than their intended use could prove dangerous to you and bystanders. CODE613A does not include a battery or a charger. These are available to purchase from your local Hayter Sales Dealer.
- Page 4 Safety-Alert Symbol The safety-alert symbol appears above information that alerts you to unsafe actions or situations and is followed by the word DANGER, WARNING, or CAUTION. Figure 2 Safety-alert symbol The safety-alert symbol appears above information that alerts you to unsafe actions or situations and is followed by the word DANGER, WARNING, or CAUTION.
-
Page 5: Table Of Contents
Contents Safety 7 - 9 - Training - Preparation - Operation - Maintenance and Storage Safety and Instructional Decals 10 - 12 Setup 13 - 15 - Mounting the Battery Charger (Optional) - Assembling the Handle 14 - 15 - Assembling the Grass Bag Product Overview - Specifications - Appropriate Temperature Ranges... - Page 6 - Folding the Handle Maintenance 27 - 19 - Lubricating the Machine - Replacing the Blade - Blade Sharpening - Adjusting the Self-Propel Lever - Prepare the Battery Pack for Recycling - Securing Nuts and Bolts - Rear Deflector - Blade Brake Test - Storage Troubleshooting 32 - 33...
-
Page 7: Safety
9. Do not use non-rechargeable batteries. 10. Charge the battery pack with only the battery charger specified by Hayter. A charger suitable for 1 type of battery pack may create a risk of fire when used with another battery pack. -
Page 8: Operation
Operation 1. Contact with the moving blade will cause serious injury. Keep your hands and feet away from the cutting area and all moving parts of the machine. Keep clear of any discharge opening. 2. Using this machine for purposes other than its intended use could prove dangerous to you and bystanders. -
Page 9: Maintenance And Storage
6. When servicing the blade, be aware that the blade can still move even though the power source is off. 7. Check the grass collection bag frequently for deterioration or wear, and replace a worn bag with a Hayter [replacement] bag. -
Page 10: Safety And Instructional Decals
Safety and Instructional Decals Safety decals and instructions are easily visible to the operator and are located near any area of potential danger. Replace any decal that is damaged or missing. CodexxxA Read the Operator’s Manual. For indoor use. Do not discard. Double insulated. - Page 11 134-4550 Warning—read the Operator’s Manual. Thrown object hazard—keep bystanders away; shut off the motor and wait for all moving parts to stop before leaving the machine; pick up debris before mowing. Cutting/dismemberment hazard of the hand, Cutting/dismemberment hazard of the foot, mower blade—stay away from moving parts;...
- Page 12 134-4551-A 134-4551 Read the Operator’s Manual. To shut off the machine, release the bar. To start the machine, squeeze the bar to the handle and press the button. Easy Wash™ port Located on top deck Height of Cut Moulded in top cover...
-
Page 13: Setup
Setup Note: The battery pack is not fully charged when you purchase it. Before using the tool for the first time, refer to Charging the Battery Pack. The electric-start button has been placed in the battery compartment for safe delivery. Ensure that you remove it from the compartment and store in a safe place prior to assembly. -
Page 14: Assembling The Handle
Assembling the Handle No Parts Required 1. Attach the lower handle to the mower housing with 4 bolts, 4 flat washers, 4 split washers, and 4 nuts Figure 5). Figure 5 Bolt (4) Split washer (4) Flat washer (4) Nut (4) 2. -
Page 15: Assembling The Grass Bag
3. Insert the cables into the cable clamp and attach the cable clip to the handle. Figure 7. Figure 7 Cable clip Assembling the Grass Bag 1. Slide the grass bag frame (1) into the grass bag. Figure 8. 2. Position all 6 grass bag clips (2) over the grass bag frame. Figure 8. Figure 8 Grass Bag Frame Grass Bag Clip... -
Page 16: Product Overview
Blade Control Bar Battery Compartment Specifications Model Weight* Length Width Cutting Width Height CODE613A 28.3 1400 1050 * Without battery or packaging. Appropriate Temperature Ranges Charge/store the battery 5°C (41°F) to 40°C (104°F)* pack at Use the battery pack at -30°C (-22°F) to 49°C (120°F)*... -
Page 17: Operation
Operation Note: Determine the left and right sides of the machine from the normal operating position. Before Operation Inserting the Electric-Start Button Remove the electric-start button from the plastic parts bag and insert it into the electric starter. Figure 10. Figure 10 Electric-start button Electric starter... -
Page 18: Adjusting The Cutting Height
Adjusting the Cutting Height WARNING: Adjusting the cutting-height could bring your hands into contact with a moving blade, and result in serious injury. • Shut off the machine, remove the electric-start button, remove the battery pack, and wait for all movement to stop before adjusting the cutting height. - Page 19 There are 7 cutting-height settings from 25 to 70 mm. Figure 13. 2 3 4 5 Figure 13 70.0 mm 40.0 mm 62.5 mm 6. 32.5 mm 55.0 mm 25.0 mm 47.5 mm...
-
Page 20: During Operation
During Operation Starting the Machine 1. Ensure that the battery pack is installed in the machine; refer to Installing the Battery Pack. 2. Insert the electric-start button into the electric starter switch. Figure 14A. 3. Squeeze the blade-control bar and hold it to the handle. Figure 14B. 4. -
Page 21: Installing The Grass Bag
Installing the Grass Bag 1. Raise and hold up the rear deflector. Figure 16A. Figure 16 2. Install the grass bag, ensuring that the pins on the bag rest in the notches on the handle (Figure 16B). 3. Lower the rear deflector. Removing the Grass Bag 1. -
Page 22: Removing The Battery Pack From The Machine
Removing the Battery Pack from the Machine 1. Lift up the battery-compartment lid. 2. Press the battery-pack latch to release the battery pack and remove the battery pack. 3. Close the battery compartment lid. Figure 18 Adjusting the Blade Speed This machine has 2 blade-speed settings: AUTO and MAX. -
Page 23: Operating Tips
• Avoid striking solid objects with the blade. Never deliberately mow over any object. • For best performance, install a new Hayter blade before the cutting season begins or when necessary. Cutting Grass • Cut only about a third of the grass blade at a time. For improved runtime, cut grass at a higher height of cut. -
Page 24: After Operation
After Operation Charging the Battery Pack Important: The battery pack is not fully charged when you purchase it. Before using the tool for the first time, place the battery pack in the charger and charge it until the LED display indicates the battery pack is fully charged. -
Page 25: Cleaning Under The Machine
5. Refer to the following table to interpret the LED indicator light on the battery charger. Indicator light Indicates No battery pack inserted Green blinking Battery pack is charging Green Battery pack is charged Battery pack and/or battery charger is over or under the appropriate temperature range Red blinking Battery pack charging fault*... -
Page 26: Folding The Handle
Folding the Handle WARNING: Folding or unfolding the handle improperly can damage the cables, causing an unsafe operating condition. • Do not damage the cables when folding or unfolding the handle. • If a cable is damaged, contact an Authorised Service Dealer. 1. -
Page 27: Maintenance
Maintenance Remove the electric-start button and battery pack from the machine before maintaining or cleaning the machine. Use only the manufacturer’s recommended replacement parts and accessories. Inspect and maintain the machine regularly. Have the machine repaired only by an Authorised Service Dealer. -
Page 28: Replacing The Blade
Replacing the Blade Service Interval: Yearly Important: You will need a torque wrench to install the blade properly. If you do not have a torque wrench or are uncomfortable performing this procedure, contact an Authorised Service Dealer. If the blade is damaged or cracked, replace it immediately. If the blade edge is dull or nicked, have it sharpened and balanced, or replace it. -
Page 29: Blade Sharpening
Blade Sharpening A slightly worn blade may be re-sharpened. Both blade edges must be sharpened equally to ensure balance. Sharpen the blade every 25 mowing hours or more frequently if conditions require. Remove the blade from the mower and clean using a brush and water. Inspect the blade for signs of damage. Sharpen both cutting edges with a flat file to restore performance. -
Page 30: Adjusting The Self-Propel Lever
Batteries are to be removed from the machine and safely disposed of. Contact your local council or your authorised Hayter dealer for more information on how to responsibly recycle the battery. Securing Nuts and Bolts Regularly check that all securing nuts and bolts are tight. -
Page 31: Blade Brake Test
If the blade does not stop within 3 seconds or there is a grinding or scraping, metal-to-metal noise when you release the motor stop lever, contact a Hayter Authorised Service Dealer. This same recommendation applies if you observe heavy vibrations when using the mower. -
Page 32: Troubleshooting
Troubleshooting Perform only the steps described in these instructions. All further inspection, maintenance, and repair work must be performed by an authorised service centre or a similarly qualified specialist if you cannot solve the problem yourself. Problem Possible Cause Corrective Action The machine does not start. - Page 33 Troubleshooting Problem Possible Cause Corrective Action It is difficult to remove the 1. The battery pack/tool is new or there 1. Clean the terminals on the battery and the battery pack from the tool. is corrosion in the battery terminals tool.
-
Page 34: Warranty
Hayter Authorised Service Dealer for assistance when making these adjustments. Making a Claim To make a warranty claim, return the unit to a Hayter Authorised Service Dealer, along with proof of purchase stating the machine serial number and date of purchase and the service receipt(s) or stamped service card. -
Page 35: Privacy Policy
EEA/UK Privacy Notice Our Use of Your Personal Information Toro U.K. Limited, and its parent, The Toro Company, respect your privacy. When you purchase our products, we may collect certain personal information about you, either directly from you or through your local retail outlet.
Need help?
Do you have a question about the CODE613A and is the answer not in the manual?
Questions and answers