
Related Manuals for Hayter CODE613A


Summary of Contents for Hayter CODE613A
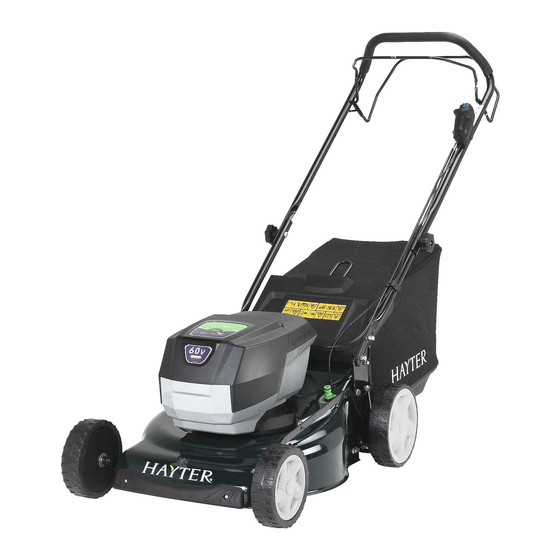
- Page 1 Operator’s Manual 46cm Lawn mower Model No. CODE613A - Serial No. 320000101 and Up Original Instructions (EN) Form No. 3438-372 Rev A...
- Page 2 THIS PAGE HAS BEEN LEFT INTENTIONALLY BLANK...
-
Page 3: Table Of Contents
- Operating Tips ..............15 - General Mowing Tips ............15 - Cutting Grass ..............15 - Cutting Leaves ............... 15 - After Operation ..............16 - 17 ©2020 - Hayter Limited Spellbrook, Bishop’s Stortford, Printed in China Herts, CM23 4BU All Rights Reserved... - Page 4 - Prepare the Battery Pack for Recycling ....... 18 - Storage ................19 Troubleshooting ..............20 - 21 Warranty ................22 Privacy Policy ..............Blank Page ................24 ©2020 - Hayter Limited Spellbrook, Bishop’s Stortford, Printed in China Herts, CM23 4BU All Rights Reserved...
-
Page 5: Introduction
Assembled: xxxxxx Country Of Origin: xxxxx CODE613A does not include a battery or a charger. These are available to purchase from your local Safety Hayter sales dealer. IMPORTANT SAFETY INSTRUCTIONS... -
Page 6: Operation
3. Disengage the self-propel lever before starting labels. the machine. 5. Use only the battery pack specifi ed by Hayter. 4. Do not tilt the appliance when starting the motor. Using other accessories and attachments may increase the risk of injury and fi re. -
Page 7: Maintenance And Storage
2. Do not attempt to repair the machine except as battery pack above 68°C (154°F) or incinerate it. indicated in the instructions. Have an Authorised Replace the battery pack with a genuine Hayter Service Dealer perform service on the machine battery pack only; using another type of battery using identical replacement parts. -
Page 8: Safety And Instructional Decals
The battery pack is charging. The battery pack is over or under the appropriate temperature range. The battery pack is fully charged. Battery pack charging fault ©2020 - Hayter Limited Spellbrook, Bishop’s Stortford, Printed in China Herts, CM23 4BU All Rights Reserved... - Page 9 Blade control bar - engage Electric-start button Blade control bar - disengage 134-4213 Read the Operator’s Manual. For indoor use. Do not discard. Double insulated. ©2020 - Hayter Limited Spellbrook, Bishop’s Stortford, Printed in China Herts, CM23 4BU All Rights Reserved...
-
Page 10: Setup
No Parts Required 1. Attach the lower handle to the mower housing with 4 bolts, 4 fl at washers, 4 split washers, and 4 nuts (Figure 3). ©2020 - Hayter Limited Spellbrook, Bishop’s Stortford, Printed in China Herts, CM23 4BU... -
Page 11: Inserting The Electric-Start Button
Remove the electric-start button from the plastic parts bag and insert it into the electric starter (Figure Grass Bag Frame Grass Bag Clip Figure 6 Electric-start button Electric starter ©2020 - Hayter Limited Spellbrook, Bishop’s Stortford, Printed in China Herts, CM23 4BU All Rights Reserved... -
Page 12: Product Overview
Electric Starter Battery charger Handle Knob Battery pack CODE106A Easy Wash Port (Not Shown) Green Series Motor Battery Compartment Grass Bag Assembly Figure 9 ©2020 - Hayter Limited Spellbrook, Bishop’s Stortford, Printed in China Herts, CM23 4BU All Rights Reserved... -
Page 13: Operation
Adjust the cutting height as desired. Figure 12. To adjust the cutting height, disengage the lever, raise or lower the machine, and then engage the lever. Figure 13. ©2020 - Hayter Limited Spellbrook, Bishop’s Stortford, Printed in China Herts, CM23 4BU... -
Page 14: During Operation
Bagging the Grass Clippings Use the grass bag when you want to collect grass and leaf clippings from the lawn. Figure 17 ©2020 - Hayter Limited Spellbrook, Bishop’s Stortford, Printed in China Herts, CM23 4BU All Rights Reserved... -
Page 15: Removing The Battery Pack
For best performance, install a new blade before the cutting season begins. 1. Lift up the battery compartment lid. • Replace the blade when necessary with a Hayter 2. Press the battery-pack latch to release the replacement blade. battery pack and remove the battery pack. -
Page 16: After Operation
Easy-wash port 4. To remove the battery pack, slide the battery backward out of the charger. 5. Refer to the following table to interpret the LED ©2020 - Hayter Limited Spellbrook, Bishop’s Stortford, Printed in China Herts, CM23 4BU All Rights Reserved... -
Page 17: Folding The Handle
Figure 22 3. Remove the blade, saving all mounting hardware (Figure 23). Figure 21 4. Install the new blade and all mounting hardware (Figure 23). ©2020 - Hayter Limited Spellbrook, Bishop’s Stortford, Printed in China Herts, CM23 4BU All Rights Reserved... -
Page 18: Lubricating The Machine
Do not attempt to destroy or disassemble the battery pack or remove any of its components. Contact your local council or your authorised Hayter dealer for more information on how to responsibly recycle the battery. -
Page 19: Storage
• Store the machine, battery pack, and battery charger in an enclosed clean, dry area. ©2020 - Hayter Limited Spellbrook, Bishop’s Stortford, Printed in China Herts, CM23 4BU All Rights Reserved... -
Page 20: Troubleshooting
2. The battery pack is weak. 2. Properly dispose of the battery pack at a battery recycling facility. ©2020 - Hayter Limited Spellbrook, Bishop’s Stortford, Printed in China Herts, CM23 4BU All Rights Reserved... - Page 21 2. Contact an Authorised Service Dealer. The machine is vibrating. 1. The blade is bent or damaged. 2. Inspect the blade and replace if necessary. ©2020 - Hayter Limited Spellbrook, Bishop’s Stortford, Printed in China Herts, CM23 4BU All Rights Reserved...
-
Page 22: Warranty
Hayter Authorised Service Dealer for assistance when making these adjustments. Making a Claim To make a warranty claim, return the unit to a Hayter Authorised Service Dealer, along with proof of purchase stating the machine serial number and date of purchase and the service receipt(s) or stamped service card. -
Page 23: Privacy Policy
To do so, please contact us by email at legal@toro.com. If you have concerns about the way in which Hayter Ltd. has handled your information, we encourage you to raise this directly with us. Please note that European residents have the right to complain to your Data Protection Authority. -
Page 24: Blank Page
THIS PAGE HAS BEEN LEFT INTENTIONALLY BLANK...
Need help?
Do you have a question about the CODE613A and is the answer not in the manual?
Questions and answers