Raven RS1 Installation Manual
For fendt 200 vfp varioguide (with fendt one, model year 2021)
Hide thumbs
Also See for RS1:
- Calibration and operation manual (125 pages) ,
- Calibration & operation manual (100 pages) ,
- Installation manual (84 pages)

Subscribe to Our Youtube Channel
Related Manuals for Raven RS1


Summary of Contents for Raven RS1
- Page 1 RS1™ Installation Manual for Fendt 200 VFP Varioguide (with Fendt One, Model Year 2021) 016-5033-272 Rev. B 11/2022 E43866 Copyright 2022...
- Page 2 Raven systems, or products used as components of systems, which rely upon the reception of these signals or availability of these services. Raven Industries accepts no responsibility for the use of any of these signals or services for other than the stated purpose.
-
Page 3: Table Of Contents
Kit Components ................................6 Updates ...................................7 Chapter 3 Installation ....................... 9 Mount the Harness ..............................9 Mount the RS1™ ...................................12 Insert the SIM Card ..............................13 Install CR7™ or CR12™ ............................14 Install Field Computer Harness ........................... 15 Activate Automatic Steering .......................... - Page 4 Table of Contents RS1™ Installation Manual for Fendt 200 VFP Varioguide (with Fendt One, Model Year 2021)
-
Page 5: Important Information
• Do not operate this Raven system or any agricultural equipment while under the influence of alcohol or an illegal substance. • Be alert and aware of surroundings and remain in the operator seat at all times when operating this Raven system. -
Page 6: Electrical Safety
• Do not connect the power leads to the battery until all system components are mounted and all electrical connections are completed. • Always start the machine before initializing this Raven system to prevent power surges or peak voltage. • To avoid tripping and entanglement hazards, route cables and harnesses away from walkways, steps, grab bars, and other areas used by the operator or service personnel when operating or servicing the equipment. -
Page 7: Recommendations And Best Practices
The word “harness” is used to describe any electrical cables and leads, both bundled and unbundled. Use the following guidelines and recommendations when connecting and routing harnesses while installing or maintaining this Raven system: • Leave protective caps/covers over harness connectors until needed to avoid dirt and moisture from contaminating electrical circuits. - Page 8 • Remove visible surface water from electrical components and connections using pressurized air or an aerosol cleaning agent. Allow components to dry thoroughly before reconnecting cables. RS1™ Installation Manual for Fendt 200 VFP Varioguide (with Fendt One, Model Year 2021)
-
Page 9: Chapter 2 Introduction
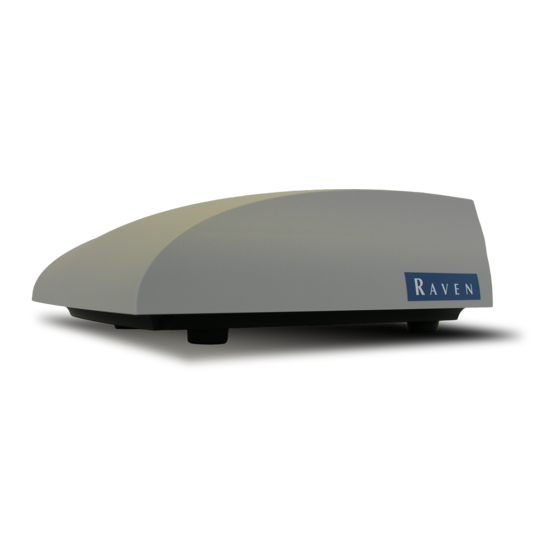
I NTRODUCTION CHAPTER C H A P T E R 2 This system is designed to provide hands-free steering of the machine via GNSS (Global Navigation Satellite Systems) coordinates. This manual applies to the following machines. Make. Fendt Model. 200 VFP Gen 3 Varioguide Ready with Fendt One FIGURE 1. -
Page 10: Installation Best Practices
RECOMMENDATIONS Before installing the RS1™ system, park the machine where the ground is level, clean, and dry. Bleed pressure from the hydraulic system and leave the machine turned off for the duration of the installation process. -
Page 11: Kit Components
KIT COMPONENTS This section contains a list of the components that are included in the RS1 kit. Before beginning the system installation, compare the items in the kit with the components on this list. If you have questions about the kit, contact your Raven dealer. -
Page 12: Updates
Applied Technology Division website: https://portal.ravenprecision.com Sign up for e-mail alerts to receive notifications when updates for your Raven products are available on the Raven website. At Raven Industries, we strive to make your experience with our products as rewarding as possible. -
Page 13: Chapter 3 Installation
C H A P T E R 3 MOUNT THE RS1™ ASSEMBLE THE BRACKETS 1. Use the supplied hardware to secure the two adhesive aluminum strips to the RS1 bottom mounting bracket assembly. FIGURE 1. RS1 Mount and Latch Plate Assembly 2. - Page 14 5. Select a location to mount the round adhesive plate for the Laird cellular antenna. The cellular antenna should be as far away from the RS1 as possible within reach of the cellular antenna cable.. RS1™ Installation Manual for Fendt 200 VFP Varioguide (with Fendt One, Model Year 2021)
-
Page 15: Insert The Sim Card
3. Insert the SIM card into the SIM slot. FIGURE 5. SIM Card Inserted in SIM Slot NOTE: The SIM card must be inserted into the J11 slot or the RS1 will not connect to wireless or a CORS network. Installation: Mount the RS1™... - Page 16 1. Remove all 10 screws from the roof to access the connectors within the roof. There are 5 screws on each side. FIGURE 6. Roof Cap Screw Locations RS1™ Installation Manual for Fendt 200 VFP Varioguide (with Fendt One, Model Year 2021)
- Page 17 INSTALLATION 2. Locate the X3058 connector at the roof line on the right side of the machine cab. FIGURE 7. OEM X3058 Connector Location NOTE: If installed on the machine, the AGCO Connect module will be connected to this plug. 3.
- Page 18 9. Reinstall the X4250 connector in the factory position (review Figure 8 on page 13). 10. Connect the RS1 cable for Fendt 200 (One) (P/N 115-4010-240) to the X4250 connector. 11. Route the remaining connector on the cable onto the roof and connect to the port on the back of the RS1. NOTE: If the RS1 is removed for storage or security, ensure that any cable connectors on the roof are covered with a protective cap to prevent dust and water from entering the connector.
- Page 19 INSTALLATION MOUNT THE CR7™ OR CR12™ The following items outline some best practices or suggestions for mounting the Raven field computer: NOTE: For more installation instructions, review the manual provided with the field computer. • Always ensure the terminal is placed in the most appropriate position facing the driver seat for easy access and use.
- Page 20 Mount the 9-pin ISOBUS connector to the panel mount connector in the cabin of the machine. • Mount the 3-pin power connector. • Route the harness to the field computer. FIGURE 13. ISOBUS and Power Connector RS1™ Installation Manual for Fendt 200 VFP Varioguide (with Fendt One, Model Year 2021)
-
Page 21: Activate Automatic Steering
FIGURE 14. Pre-Activation on Armrest Engage/Disengage automated steering Activate/Deactivate the PVED 2. After a successful self-test of the steering system, the LED will activate and RS1 automated steering may be activated by pressing the autosteering button on the joystick. Installation: Activate Automated Steering... - Page 22 CHAPTER 3 SYSTEM DIAGRAMS FIGURE 15. RS1 with CR7 System Diagram for Fendt Varioguide with Fendt One (P/N 054-5033-272 Rev. RS1™ Installation Manual for Fendt 200 VFP Varioguide (with Fendt One, Model Year 2021)
- Page 23 INSTALLATION FIGURE 16. RS1 with CR12 System Diagram for Fendt Varioguide with Fendt One (P/N 054-5033-273 Rev. Installation: System Diagrams...
- Page 24 CHAPTER 3 RS1™ Installation Manual for Fendt 200 VFP Varioguide (with Fendt One, Model Year 2021)
- Page 25 Bring the defective part and proof of purchase to your Raven dealer. If the dealer approves the warranty claim, the dealer will process the claim and send it to Raven Industries for final approval. The freight cost to Raven Industries will be the customer’s responsibility.
- Page 26 Bring the defective part and proof of purchase to your Raven dealer. If the dealer approves the warranty claim, the dealer will process the claim and send it to Raven Industries for final approval. The freight cost to Raven Industries will be the customer’s responsibility.
- Page 27 WHAT IS NOT COVERED BY THE EXTENDED WARRANTY? Raven Industries will not assume any expense or liability for repairs outside our facility without written consent. Raven Industries is not responsible for damage to any associated equipment or products and will not be liable for loss of profit, labor, or other damages.
Need help?
Do you have a question about the RS1 and is the answer not in the manual?
Questions and answers