Raven RS1 Installation Manual
Hide thumbs
Also See for RS1:
- Calibration and operation manual (125 pages) ,
- Calibration & operation manual (100 pages) ,
- Installation manual (84 pages)

Related Manuals for Raven RS1


Summary of Contents for Raven RS1
- Page 1 Fendt Varioguide RS1 Installation Manual 016-5033-192 Rev. A 8/2020 E35756 Copyright 2020...
- Page 2 Raven systems, or products used as components of systems, which rely upon the reception of these signals or availability of these services. Raven Industries accepts no responsibility for the use of any of these signals or services for other than the stated purpose.
-
Page 3: Table Of Contents
Table of Contents Chapter 1 Important Information..................1 Safety ....................................1 Displays and Control Consoles ............................1 Electrical safety ..................................2 Touch Screen .................................... 2 Recommendations and Best Practices ........................ 2 Harness Routing ..................................2 Chapter 2 Introduction......................5 Installation Best Practices ............................5 Recommendations ................................. - Page 4 Table of Contents Fendt Varioguide RS1 Installation Manual...
-
Page 5: Chapter 1 Important Information
• Do not operate this Raven system or any agricultural equipment while under the influence of alcohol or an illegal substance. • Be alert and aware of surroundings and remain in the operator seat at all times when operating this Raven system. -
Page 6: Electrical Safety
• Do not connect the power leads to the battery until all system components are mounted and all electrical connections are completed. • Always start the machine before initializing this Raven system to prevent power surges or peak voltage. • To avoid tripping and entanglement hazards, route cables and harnesses away from walkways, steps, grab bars, and other areas used by the operator or service personnel when operating or servicing the equipment. - Page 7 IMPORTANT INFORMATION • Avoid abrasive surfaces and sharp edges such as sheared or flame cut corners, fastener threads or cap screw heads, hose clamp ends, etc. • Do not connect, affix, or allow harnessing to come into contact with components with high vibration forces, hot surfaces, or components carrying hot fluids beyond the temperature rating of harness components.
- Page 8 CHAPTER 1 Fendt Varioguide RS1 Installation Manual...
-
Page 9: Chapter 2 Introduction
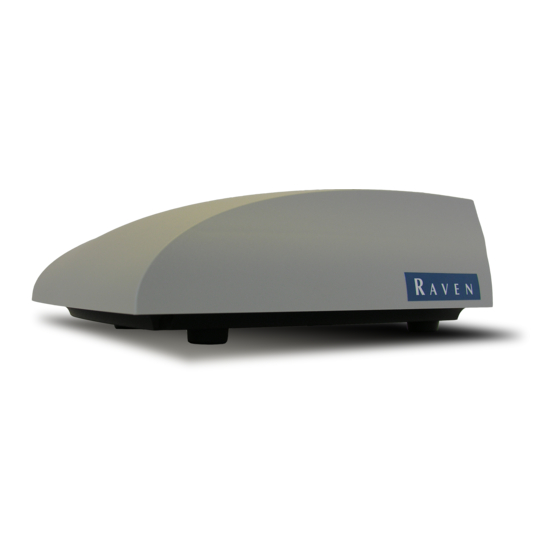
CHAPTER C H A P T E R 2 Congratulations on your purchase of the Raven RS1™ system! This system is designed to provide cutting-edge, hands-free steering of the machine via Global Positioning System (GPS) coordinates. This manual applies to the following machines. For future reference, write your serial number in the space below. -
Page 10: Installation Best Practices
RECOMMENDATIONS Before installing the RS1™ system, park the machine where the ground is level, clean, and dry. Bleed pressure from the hydraulic system and leave the machine turned off for the duration of the installation process. -
Page 11: Updates
Applied Technology Division web site: https://portal.ravenprecision.com Sign up for e-mail alerts to receive notifications when updates for your Raven products are available on the Raven web site. At Raven Industries, we strive to make your experience with our products as rewarding as possible. - Page 12 CHAPTER 2 Fendt Varioguide RS1 Installation Manual...
- Page 13 C H A P T E R 3 INSTALL THE RS1 INSTALL THE RS1 ROOF GLAND AND CABLE 1. Locate the ideal placement to mount the roof gland. 2. Mark screw holes and a center hole using the roof gland as a guide.
- Page 14 FIGURE 4. Roof Gland Assembly 6. Mount the roof gland with the supplied self-drilling screws. 7. When mounted, tighten the black ring to prevent water and dirt into the roof gland. FIGURE 5. Dustcap with Lanyard Fendt Varioguide RS1 Installation Manual...
-
Page 15: Installation
9. Open the metal plate of the roof hatch by removing the twelve M6 screws. 10. Locate the Fendt connector inside the cabin roof and connect it with the RS1 cable. 11. Connect the cable from the roof gland to the black Fendt connector. - Page 16 CHAPTER 3 MOUNT THE RS1 1. Mount the RS1 bottom assembly on the center line on the front section of the roof of the cab, using the two adhesive aluminum strips. FIGURE 8. Bottom Assembly of RS1 Mount NOTE: The mount stays permanently attached to the roof of the tractor.
- Page 17 The GPS antenna is mounted in front of the rear axle. INSERT THE SIM CARD When the RS1 is used with RTK accuracy or remote support, a working SIM card is needed. Before installing the SIM card, ensure the SIM pin code is switched off.
-
Page 18: Install Cr7 Or Cr12
Secure all cables int he cabin so there are no free-hanging cables. • Ensure the driver has a clear, unobstructed view all around the cabin. FIGURE 12. CR7 Mounted in Various Positions FIGURE 13. CR12 Mounted in Various Positions Fendt Varioguide RS1 Installation Manual... -
Page 19: Install Field Computer Harness
Guide the harness to the field computer. FIGURE 14. ISOBUS and Power Connector ACTIVATE AUTOMATIC STEERING To activate automatic steering for Fendt Varioguide systems with RS1: 1. Press the pre-activation steering button. FIGURE 15. Pre-Activation on Armrest 2. After a successful self-test of the steering system, the LED will activate and automatic steering can be activated. -
Page 20: System Drawings
CHAPTER 3 SYSTEM DRAWINGS FIGURE 16. Fendt Varioguide CR7 & RS1 System Drawing (P/N 054-5033-192 Rev. A) Fendt Varioguide RS1 Installation Manual... - Page 21 INSTALLATION FIGURE 17. Fendt Varioguide CR12 & RS1 System Drawing (P/N 054-5033-193 Rev. A) Installation: System Drawings...
- Page 22 CHAPTER 3 Fendt Varioguide RS1 Installation Manual...
- Page 23 Index Hydraulic Fittings Introduction Installation Recommendations 6 Point of Reference Updates 016-5033-192 Rev. A...
- Page 24 Index Fendt Varioguide RS1 Installation Manual...
- Page 25 Bring the defective part and proof of purchase to your Raven dealer. If the dealer approves the warranty claim, the dealer will process the claim and send it to Raven Industries for final approval. The freight cost to Raven Industries will be the customer’s responsibility.
- Page 26 Bring the defective part and proof of purchase to your Raven dealer. If the dealer approves the warranty claim, the dealer will process the claim and send it to Raven Industries for final approval. The freight cost to Raven Industries will be the customer’s responsibility.
Need help?
Do you have a question about the RS1 and is the answer not in the manual?
Questions and answers