Table of Contents
Advertisement
Quick Links
Parts List
Cork board (pre-stamped)
Coloured card
Card board (pre-stamped parts)
Round rod
Metal eyelet
Sandpaper
Superglue
Veneer
Wooden sticks
1
100.803
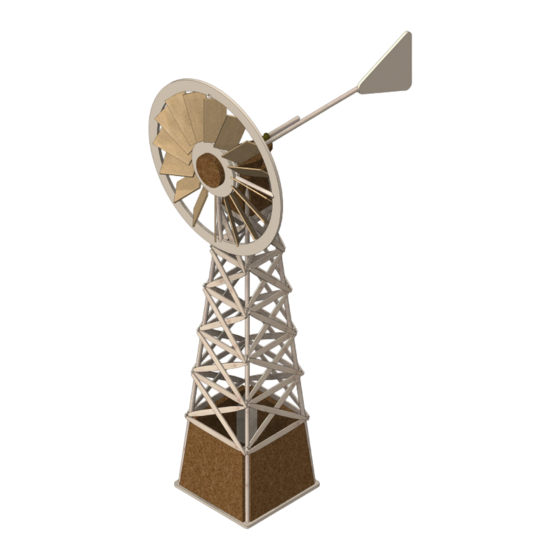
Wind Machine
The Opitec Range of projects is not intended as play toys for young children. They are
teaching aids for young people learning the skills of craft, design and technology. These
projects should only be undertaken and operated with the guidance of a fully qualified
adult. The finished projects are not suitable to give to children under 3 years old. Some
Quantity
1
1
1
6
4
1
1
1
1 pack
Required Tools:
Jigsaw
Pencil
Craft Knife
Please Note
parts can be swallowed. Danger of suffocation!
Size (mm)
250x125x4
Pre-stamped parts
210x150
195x155
Pre-stamped parts
ø3x300
ø4/3
Wind blades
Wooden sticks
Ruler
Scissors
Prickling Awl
Craft Knife
Pliers
Description
Forms
Round rods
Bearing
Sandpaper
Glue
Part No.
1
2
3
4
5
6
7
8
9
Advertisement
Table of Contents

Subscribe to Our Youtube Channel
Related Manuals for Opitec Wind Machine


Summary of Contents for Opitec Wind Machine
- Page 1 Pliers Please Note The Opitec Range of projects is not intended as play toys for young children. They are teaching aids for young people learning the skills of craft, design and technology. These projects should only be undertaken and operated with the guidance of a fully qualified adult.
- Page 2 Instructions 100.803 Wind Machine Carefully remove the pre-stamped parts (a-G) from the cork board (1). Cut out the carboard connectors (2a+2b) and carefully scratch the fold lines with the tip of the scissors. Glue the cardboard connectors (2a) to the cork base part (A) with the Glue the finished base centered on the cardboard part (3g).
- Page 3 Instructions 100.803 Wind Machine Glue the cardboard connectors (2b) to the cork part (B) with the superglue as shown. Glue a metal eyelet (5) in the cardboard part (3e), glue the cork walls around the cardboard part (3e) and connect them together. To finish, insert a metal eyelet (5) from above into the cork part (C) and glue on centered.
- Page 4 Instructions 100.803 Wind Machine Cut four pieces of equal length (46 mm) from a round rod (4) and Glue the three cardboard discs (3b, 3d and 3f) on top of each other as clean up the saw cuts. Flatten the ends of the rods with pliers before shown, so that the holes are exactly aligned.
- Page 5 Instructions 100.803 Wind Machine Cut out the blades from the cardboard (2) or transfer the dimensions Cut a 150 mm long piece of round rod and glue on the wind blade (3c) to the wooden veneer (8). Then carefully cut out of the veneer with a centered, as shown.
Need help?
Do you have a question about the Wind Machine and is the answer not in the manual?
Questions and answers