Advertisement
Quick Links
©
by B. Elsner
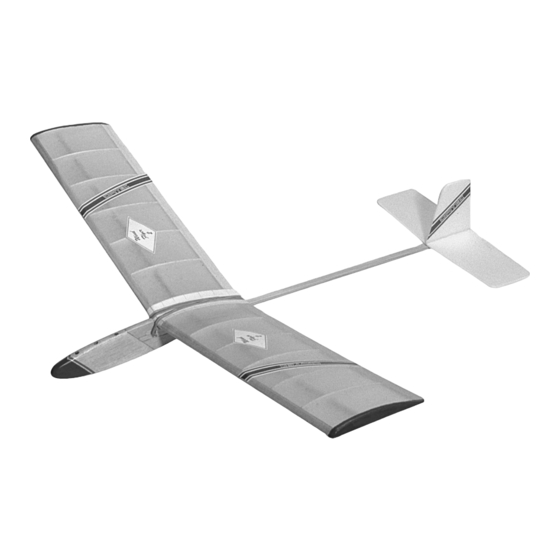
Technical data:
Wingspan
Length
Wing area
Tail area
Total area
Weight
Wing loading
Building time as a group project, approximately 10 hours
Recommended for pupils 10 years old plus
E102056#1
1 0 2 . 0 5 6
W i n d f l y e r I I
Please Note
The OPITEC range of projects is not intended as play
toys for young children.They are teaching aids for young
people learning the skills of Craft, Design and Technolo-
gy.These projects should only be undertaken and tested
with the guidance of a fully qualified adult.
The finished projects are not suitable to give to children
under 3 years old. Some parts can be swallowed. Dan-
ger of suffocation!
735 mm
625 mm
9,19 dm2
1,75 dm2
10,94 dm2
120 g
6,9 g/dm2
1
Advertisement

Related Manuals for Opitec Windflyer II


Summary of Contents for Opitec Windflyer II
- Page 1 Building time as a group project, approximately 10 hours Recommended for pupils 10 years old plus Please Note The OPITEC range of projects is not intended as play toys for young children.They are teaching aids for young people learning the skills of Craft, Design and Technolo- gy.These projects should only be undertaken and tested...
- Page 2 1. Product information Article: Flying model in construction kit form Conditions: For flying in still or very light winds Use: With pupils aged 10 plus 2. Material information 2.1. Material: Balsa wood (Technically a tropical hardwood, soft and light) Beech wood (Hardwood) Pine wood (Soft wood) Plywood (Multi layered, glued crosswise) Working:...
- Page 3 4. Material list Part Material Quantity Size Part no. Body Plywood 8 x 80 x 300 mm (Fuselage) Pine strip 6 x 8 x 495 mm Nose sides Balsa 2 x 50 x 250 mm 4 / 1 2 / 1 3 Pre-cut Balsa 2 x 100 x 500 mm...
- Page 4 6. The layout of the balsa pre-cut ribs, sheet and Depron Pre-cut balsa ribs etc Balsa sheet tailplane Depron sheet Note: Do not alter the layout due to the cutting direction! E102056#1...
- Page 5 7. Instructions General notes: Keep to the drying time for the glue, otherwise you may have difficulties. Other parts can be made whilst the glue is drying. Use white glue, check that any glue you use does not melt the styropor / Depron foam. Use a block and glasspaper for sanding all flat surfaces (sanding block is not included) Use an all purpose glue to fix the sandpaper to a block.
- Page 6 7.1.6 Fit the boom spar (3)into the nose and glue it into position. 7.1.7 Drill the 5mm dia holes into the lead weight chambers (These holes will be covered with sellotape at a later stage) 7.1.8 Cut two 25mm lengths from the dowel 3 dia x 150mm. Use a modelling knife (roll the dowel under the blade) Using the plan as reference glue one dowel at the front end of the nose and the other at the end (see plan) Note:...
- Page 7 7.2 Tailplane and Fin 7.2.1 Cut out te pattern for the tailplane (7) (Plan 8). Apply spots of glue to the rear of the pattern and lay it out on the foam sheet 3 x 114 x 410 (See page 4). Firstly cut out the 3mm slot in the Tailplane using a steel ruler and sharp modelling knife (7) and then the remaining contours.
- Page 8 7.3 Wings 7.3.1 Cut out the patterns (Pages 21) and glue them together Note: Make sure that the joins are accurate Esq 3 Cutting lines 7.3.2 Place a strip of sellotape (broken lines) over each of the ribs so that the glue from the wing does not stick to the plans 7.3.3 Press out the ribs ( 12 /13) from the pre-stamped balsa sheet, clean them up as necessary 7.3.4 Place all the ribs( 12/13) together on the main spar (9) and sand them from front to back with a block and...
- Page 9 7.3.8 Selloptape the plans to a building board. Note: The minimum size of building board should be approximately 10 x 150 x 400mm (Large enough for one wing half) 7.3.9 Pin the main spar to the board 7.3.10 Lay out and glue the ribs in position along the main spar. Press the ribs down so that they are flush with the board.
- Page 10 7.3.16 Carefully remove the wings from the board, sand the edges ( see wing diagram) 7.3.17 Sand the angled middle wing ribs 7.3.18 Trace the patterns for the wing joiners (14/15/16) on to the 160 gm white card and cut them out using a mo- delling knife and a steel ruler.
- Page 11 7.4 Covering the wings, water shrinking and doping 7.4.1 Cut the tissue paper through the middle with a razor blade (approx 255 x 380mm) 7.4 2 Coat the leading/ trailing edges/ ribs on the underside of the wing with wallpaper paste or Glutofix 7.4.3 Line up the paper with the wing edge and gently stretch it over the wing smoothing out any wrinkles as you 7.4.4 Coat the top of the wing,leading edge etc with paste 7.4.5 Hold the wing in the air, turn it slowly so that the covering paper lays over the top of the wing.
- Page 12 Do not coat any Depron parts with dope as this can cause it to melt! 7.5 Decorating 7.5.1 The decorative 'Opitec' strips can be stuck on the wings and fin 7.5.2 Fill in the label (see plan) and glue it to the right hand side of fuslage with an all purpose glue...
- Page 13 7.6 Balancing 7.6.1 Side balance Lay the wings on a table top and try to balance them. They should always fall to different sides. If this does not happen add a little weight to the lighter wing tip. Glue small pieces of lead to the wing tip. 7.6.2 Fix the wings to the fuselage with a diagonally stretched rubber band.
- Page 14 E102056#1...
- Page 15 Plan / patterns Scale 1:1 E102056#1...
- Page 16 E102056#1...
- Page 17 Plan / patterns Scale 1 : 1 E102056#1...
- Page 18 E102056#1...
- Page 19 Plan / pattern Scale 1 : 1 E102056#1...
- Page 20 E102056#1...
- Page 21 Wing patterns Scale 1 : 1 Selloptape E102056#1...
- Page 22 E102056#1...
- Page 23 Patterns for parts 15,16,17 and 22 scale 1 : 1 Flight direction Middle rib (A) E102056#1...
- Page 24 E102056#1...
- Page 25 Patterns for parts 15,16,17 and 22 Scale 1 : 1 E102056#1...
Need help?
Do you have a question about the Windflyer II and is the answer not in the manual?
Questions and answers