Advertisement
Quick Links
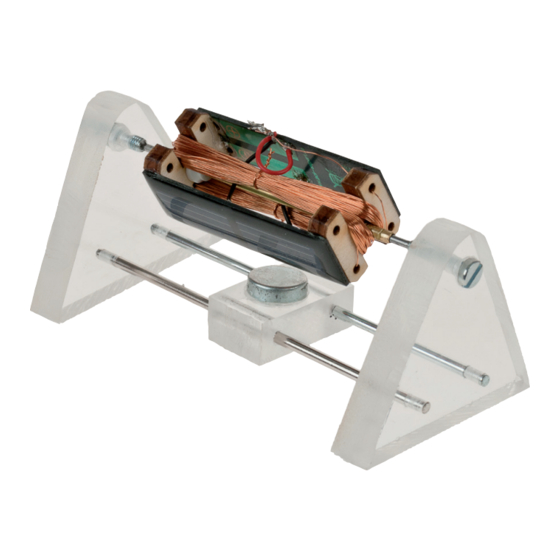
P r e m i u m - L i n e S o l a r - M o t o r
The OPITEC range of projects is not intended as play toys for
young children. They are teaching aids for young people learning
the skills of Craft, Design and Technology. These projects should
only be undertaken and operated with the guidance of a fully
qualified adult. The finished projects are not suitable to give to
children under 3 years old. Some parts can be swallowed. Danger
Content
Solar cell
Acrylic
Ready made spool carrier
Brass tube
Distance discs
Nails
Metal axle
Machine screws
Magnet
Copper wire
Cable
D113727#2
113.727
Please Note
of suffocation!
2
1
2
1
2
2
2
2
1
1
1
Solar cell 0,5V - 150mA
100x65x12 Stand, Magnet
Coil carrier and axle
100x0,5x3 Motor axle
ø2,9 Fixing rotor to axle
40x2 Axle points/ weights
120x3 Connection for stand
16x4 Bearing
15x6 Magnet
20000x0,3 Spool
500 Wiring
Necessary tools:
Fretsaw or hacksaw
Drills ø2, ø3, ø3,3, ø8
Forstner bit ø15
Thread tap M4
Side cutters,
Crimp pliers
Hacksaw
Soldering iron,solder
Workshop file
Wire strippers
All purpose glue
Machine vicel
Try square
Centre punch
Countersink
Oil
Wood strip
Brass nails(40 x 2)
1
2
3
4
5
6
7
8
9
10
11
1
Advertisement

Related Manuals for Opitec Hobbyfix 113.727


Summary of Contents for Opitec Hobbyfix 113.727
- Page 1 All purpose glue Machine vicel Please Note Try square The OPITEC range of projects is not intended as play toys for Centre punch young children. They are teaching aids for young people learning Countersink the skills of Craft, Design and Technology. These projects should...
- Page 2 Instructions General: The instructions describe 2 variations one of which the rotor is lying and the second varaition ( see diagram 1)where the rotor is vertical.The construction of the rotor is the identical. The different patterns for the stands are on page Step 1: Trace the pattern (Page 5) on to the acrylic sheet.
- Page 3 INSTRUCTIONS Step 8: Step 6: Step 7: Sharpen the tip of both nails (6) Screw both screws into the two feet a Glue the two spool carriers (2) to a cleanly with a workshop file. Shorten + b. Countersink the screw head into solar cell (1) as shown.
- Page 4 INSTRUCTIONS Step 14: Winding calculator (Wind exactly according to the Now wind the coil with copper wire (10) onto the spool carrier according number of wraps) to the calculator to the right. Leave Left Right approx. 80 – 100 mm overhanging at both ends.
- Page 5 INSTRUCTIONS Step 18: Place the finished morot between the twoscrews (8), so that it can turn freely and easily! Place the motor in sunlight and Den Motor ins Sonnenlicht stellen und turn it on. Done! Template Acrylic glass Base/sides M 1:1 Variation 1 Variation 2 Ø...
Need help?
Do you have a question about the Hobbyfix 113.727 and is the answer not in the manual?
Questions and answers