Advertisement
Quick Links
Advertisement

Subscribe to Our Youtube Channel
Related Manuals for Kogan KASPAMSDLTA


Summary of Contents for Kogan KASPAMSDLTA
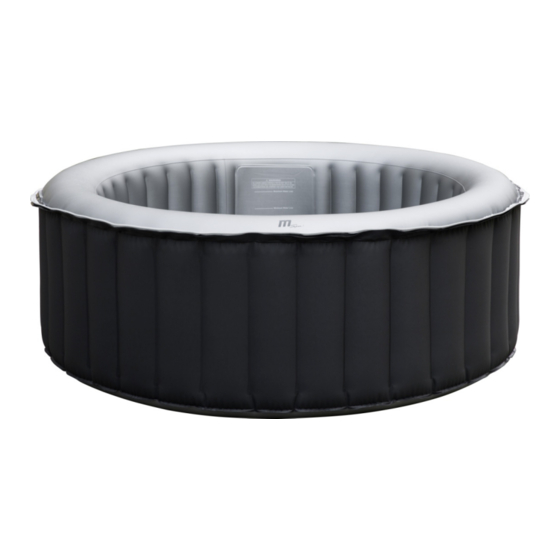
- Page 1 DELIGHT INFLATABLE PORTABLE OUTDOOR HOT TUB MASSAGE SPA 6 PERSONS KASPAMSDLTA...
-
Page 2: Table Of Contents
Safety & Warnings Components Before First Use Assembly Operation Cleaning & Care Troubleshooting Specifications... -
Page 3: Safety & Warnings
If a leakage current exceeding 10mA is detected, the device will cut off the power supply. If this occurs, unplug the power cord, stop using the spa immediately, and contact help.Kogan.com for assistance. Do not attempt to reset the spa by yourself. - Page 4 • The pump must be tested before each use. Refer to the ‘PRCD testing’ section of this user guide for instructions. • If the power cord is damaged, stop use immediately and contact help.Kogan.com for assistance. • Do not use extension cords, plug adaptors, or converter plugs to connect the spa to the electrical supply.
- Page 5 To reduce the risk of injury: • The water in a spa should never exceed 40°C. A water temperature between 38°C and 40°C is considered safe for a healthy adult. Lower water temperatures are recommended for young children, or if the spa will be used for more than 10 minutes. •...
- Page 6 • Always enter and exit the spa slowly and cautiously. Beware of wet slippery surfaces. • To avoid damage to the pump, do not operate the spa unless it is filled with water. • Leave the spa immediately if the user feels uncomfortable or sleepy. •...
-
Page 7: Components
COMPONENTS A Spa cover B Spa tub C Wired controller D Digital lock E Filter cartridge and cartridge base F Drain valve adapter G Repair kit H Wrench... -
Page 8: Before First Use
BEFORE INSTALLING Note: The measured zone dimensions are limited by walls and fixed partitions. Zones Description Zone 0 is the interior of the basin including any recesses in their walls Zone 0 or floors. Zone 1 is limited by: • Zone 0 Zone 1 •... - Page 9 Site preparation and requirements • The spa can be installed indoors or outdoors in around 10 minutes. This spa is for household use only. • The spa must be set up on a flat, smooth, and supporting surface that can support the maximum load of the filled spa with the maximum number of occupants.
- Page 10 PRCD testing WARNING: Risk of electric shock: This product is provided with a PRCD located at the end of the power cord. The PRCD must be tested before each use. Do not use the spa if the PRCD does not function properly. Disconnect the power cord until the fault has been identified and corrected.
-
Page 11: Assembly
INSTALLATION 1. Move the entire package to the selected site. Do not drag the spa tub across the ground as this can cause damage and future leakage. Open the packaging carefully as it can be re-used to store the spa during long-term storage or when not in use. 2. - Page 12 5. Spa inflation • Plug the spa into a grounded power socket. • Press ‘RESET’ on the PRCD and the screen on the controller will display numbers. • Turn the inflation knob to ‘ON’ and press and hold the bubble button on the controller for at least 2 seconds to start inflating.
- Page 13 Ensure the manometer shows the Yellow section in the following conditions: Yellow • After inflation but before filling the spa with water. • When leaving the spa outdoors unattended for an extended period at a temperature higher than 20°C. Ensure the manometer shows the Green section in the Yellow following conditions: Green...
- Page 14 7. Water filling • Confirm the spa’s location and point the drain valve towards a suitable draining area before filling water. • Fill the spa tub with fresh water to a level between the minimum and maximum line marked on the inside of the spa wall. Do not overfill the spa. Notes: •...
- Page 15 9. Digital lock operation Place the spa cover over the spa tub and make sure the zipper on the spa cover is closed. Lock the cover with the digital lock. The default password is “000”. Follow the steps below to change the password: •...
-
Page 16: Operation
OPERATION Controller Temperature display Heater button Filter button Bubble button Timer button Up button Down button Temperature display Once the spa is turned on, press RESET on the PRCD. The display will show the current water temperature. Heating Press the HEATER button to turn the heating system on/off. •... - Page 17 Filtration Press the FILTER button to turn the filtration function on/off. The light on the button will turn green when activated. • The filtration system will automatically start when heating is activated. It cannot be turned off while the heating system is in operation.
- Page 18 Heating timer • Press the TIMER button to set up a timer that alerts the spa to start heating after a user-determined time of up to 99 hours. The button will turn green when pressed. • Press the UP and DOWN buttons to adjust the time when the spa will start heating.
-
Page 19: Cleaning & Care
CLEANING & CARE Spa water Protect all the spa occupants from possible water related illnesses by keeping the spa water clean and sanitised. Always practice good hygiene. Ensure spa water quality by following these procedures: • Change the spa water every 3–5 days depending on spa use. If dirt is visible in the water, or the water becomes cloudy and proper water chemistry does not clear it up, change the water and clean the spa tub. - Page 20 Water balance Follow the guidelines below to maintain the water balance of the spa water. Parameter Test frequency Correct level 7.2–7.6 when using Chlorine Daily 7.2–7.8 when using Bromine Free chlorine Daily 3–5 ppm Bromine residual Daily 2–4 ppm Total alkalinity (TA) Weekly 80–120 ppm Total hardness (TH) Weekly...
- Page 21 4. From the inside of the spa tub, open the drain valve cap. Water will start to flow out through the garden hose. When the water stops draining, lift the spa tub towards the drain, pouring out any remaining water to empty the spa. 5.
- Page 22 If the spa inlet or outlet is stuck with dirt, use the wrench to unscrew it and clean the inlet/outlet. Notes: • Never remove the filter cartridge when the spa is filled with water. • Do not throw away the cartridge base when replacing the filter cartridge. The base should only be changed when it becomes loose over extended use.
- Page 23 Storage and preparation for future use It is recommended to use the original packaging to store the spa and its components. 1. Drain and clean the spa by following the ‘Spa Drainage’ and ‘Spa Tub Cleaning’ sections of this user guide. 2.
-
Page 24: Troubleshooting
• Add water until the water level reaches at least the minimum line. The display shows E1 shows 15 • Clean parts and tubes that water goes seconds after pressing the through. FILTER or HEATING button. • Contact help.Kogan.com for assistance. - Page 25 • Close the drainage valve. The spa is The drainage valve is not • If leaking persists, stop use immediately leaking. closed completely. and contact help.Kogan.com for assistance. Water is leaking from the Repair the leaking hole/split with the spa tub. repair kit.
- Page 26 Power failure Check the power supply. The filter cartridge is stuck The filter pump Clean or replace filter cartridge. due to dirt or other objects. does not work. Add water until the water level reaches at The water level is too low. least the minimum water line.
-
Page 27: Specifications
SPECIFICATIONS Round Shape 6 people Seating capacity 930L Water capacity Outside diameter 2.04m Inside diameter 1.6m 0.70m Height 25.5kg Weight Control system Voltage and frequency AC 220–240V, 50Hz Total power 2100W Heater 1500W Bubble massage 600W Filter pump AC 12V/35W... - Page 28 Need more information? We hope that this user guide has given you the assistance needed for a simple set-up. For the most up-to-date guide for your product, as well as any additional assistance you may require, head online to help.kogan.com...
Need help?
Do you have a question about the KASPAMSDLTA and is the answer not in the manual?
Questions and answers