Table of Contents
Advertisement
Quick Links
Advertisement
Table of Contents

Subscribe to Our Youtube Channel
Related Manuals for Kogan IBIZA KASPABWIBZA


Summary of Contents for Kogan IBIZA KASPABWIBZA
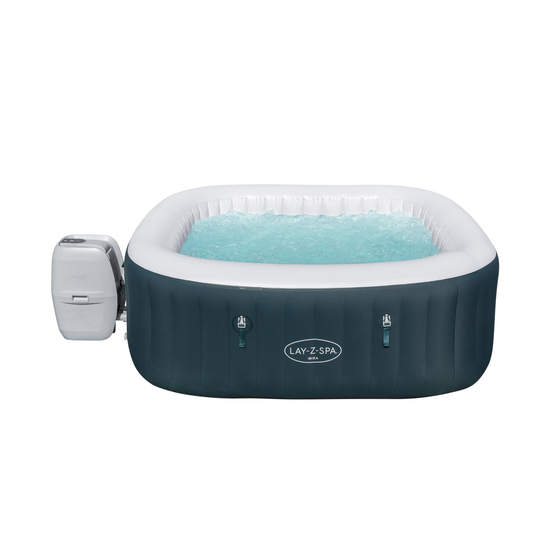
- Page 1 IBIZA INFLATABLE PORTABLE OUTDOOR HOT TUB MASSAGE SPA 4-6 PERSONS KASPABWIBZA...
-
Page 3: Safety And Warnings
• RISK OF INJURY: Do not operate spa if inlet or outlet pipes are broken or missing. Never attempt to replace the inlet and outlet pipes. Contact help.kogan.com for assistance. • Risk of electric shock: Install at least 2 metres from all metal surfaces. - Page 4 • Do not use spa during chemical maintenance. • Keep this user guide for future reference. If the user guide is lost, refer to kogan.com for a digital copy. • The appliance must be supplied by earthed power source. An earthed power cord is supplied.
- Page 5 • Do not bury cord. Locate cord to minimize damage from lawn mowers, hedge trimmers and other equipment. • During pregnancy, soaking in hot water may result in serious injury or death to the unborn child. Limit use to 10 minutes at a time and be conscious of temperature. To reduce the risk of injury: •...
- Page 6 Caution: • We strongly recommend not to unfold and inflate the spa if the ambient temperature is below 15°C. We suggest inflating the spa indoors and then continuing set up outdoors. If the outdoor temperature is lower than 6°C, the spa heater must always be on.
- Page 7 (x1) (x1) Note: Examine equipment before use. Notify Kogan.com support of any damaged or missing parts at the time of purchase. Verify that the equipment components represent the model that you had intended to purchase. For reference please use the diagrams below.
-
Page 8: Before Installing
BEFORE INSTALLING 807kg 1.5-2˚ C /h 778 L 1325 L/h 0.8PSI 1779Lb 0.055Bar 205gal 350 gal/h 3-4˚ F /h Selecting the Location WARNING: The selected location has to be able to support the entire expected load. An adequate drainage system has to be provided to deal with overflow water for both indoor and outdoor installations. - Page 9 Notes for Winter Installation: It is important to follow these suggestions if you are setting up the spa during the winter period. This will prevent damage to the PVC material and extend the life of your product drastically. • If the ambient temperature is below 10°C, we suggest keeping the package indoor where the temperature is above 15°C for at least 2h before inflation.
-
Page 10: Installation
INSTALLATION Step 1: Step 2: P6609ASS16 Step 3: Step 4: Inflation time for reference only, may not be exact. - Page 11 Step 5: Step 6: Step 7: Step 8: Step 9: Step 10: Step 11:...
- Page 12 If you are unsure about the quality of the electrical supply, please consult a qualified electrician before use. WARNING: The PRCD plug must be tested before each use to avoid risk of electric shock. WARNING: Do not use the pump if this test fails. Contact help.kogan.com for assistance.
- Page 13 Spa Pump Equipotential Bonding Terminal It is recommended to arrange for a qualified electrician to connect the spa pump to an equipotential bonding terminal using a minimum 2.5mm solid copper conductor. When inflating, you will notice that air will be expelled from the area where the air hose connects to the pump, this is normal for technique requirements.
-
Page 14: Operation
OPERATION Using the Spa Lock/Unlock Button On/Off Button Power-Saving Timer Button Temperature Decrease Celsius/Fahrenheit Heat Button Toggle Massage System Button Water Filter Button Temperature Increase... - Page 15 A. LOCK/UNLOCK BUTTON: The pump has a 5-minute auto-lock, this light will turn on. To lock or unlock the pump, place a finger over the lock/unlock button for 3 seconds. B. POWER-SAVING TIMER BUTTON: Designed to help avoid wasting power by setting the time and duration of the heating cycle for the spa.
- Page 16 C. HEAT BUTTON: Use this button to activate the heating system. When the light above the heat button is red, the heating system is activated. When the light is green, the water is at the set temperature and the heating system is at rest. NOTES: •...
- Page 17 NOTES: • The WATER HEATER rate may change in the conditions below: When the outdoor temperature is below 15°C. If the cover is not in position when the heating function is activated. • To display the current water temperature, run the filter system for at least a minute. The water temperature as tested by an external thermometer may vary from the temperature as displayed on the spa panel by as much as approximately 2°C.
- Page 18 Ambient Temperature Water Temperature Set Temperature Heating Duration 10°C 10°C 40°C 18.5 h 15°C 15°C 40°C 15 h 20°C 20°C 40°C 11.5 h 25°C 25°C 40°C 8.5 h 30°C 30°C 40°C 5.5 h • Be sure to cover the spa with the spa cover whenever the heating function is activated. Leaving the spa uncovered will increase the heating duration required.
-
Page 19: Cleaning And Care
CLEANING & CARE Caution: Ensure the pump is unplugged before beginning spa maintenance to avoid risk of injury or death. Adding air: Your spa will require additional air to be added from time to time. Changes in temperature from day to night will change the pressure in the spa and may cause a certain amount of deflation. - Page 20 Water Maintenance Many pollutants in the water settle on surfaces below the water line. These pollutants can cause bacterial, algal or fungal growth. It is recommended that spas are cleaned as regularly as necessary. After a time, tenacious stains or biofilms may develop on the accessible surfaces below the water line or high concentrations of salts or unwanted reaction by-products may also occur.
- Page 21 Using chemical liquid (not included) Important: Add chemical liquid in small doses and in the centre of the pool avoid directly contact of the chemical with the spa surface, the direct contact of chemical with spa material will damage the material and discoloured the surface. Note: Remove the chemical dispenser from spa when the spa is in use.
-
Page 22: Disassembly & Storage
DISASSEMBLY & STORAGE Draining the Spa Step 1: Step 2: Step 3: Step 4: Note: Dry the Spa Pool Step 5: Make sure the spa and pump are completely dry. This is essential to extend the life of the spa. We recommend using the pump to blow dry the spa, pump and pipes. - Page 23 Cleaning the Spa Detergent residues and dissolved solids from bathing suits and chemicals may build up on the spa walls. Use soap and water to clean the walls and rinse thoroughly. NOTE: DO NOT use hard brushes or abrasive cleaners. Deflation Your spa is equipped with a deflation function to remove all the air from inside the chamber to make it easier to pack and store.
-
Page 24: Troubleshooting
TROUBLESHOOTING Here are some helpful tips to help you to diagnose and rectify some common sources of trouble. If you still require help, or experience any problems whatsoever, do not hesitate to contact help.kogan.com for further assistance. Problems Probable Causes... - Page 25 The control panel has an auto-lock, which is activated • To unlock the control panel, press the after 5 minutes of inactivity. The LED display has one button for 3 seconds. If the control panel will not unlock, restart Control panel is icon: If the lock icon is the pump - unplug and plug in the...
- Page 26 Error Codes Causes Reasons Solution • The water flow sensor flags didn’t fall back into the Unplug, and gently strike the side of The water flow correct position. the pump, then plug it back in. sensors work • The water flow sensors are without pressing broken.
- Page 27 50°C. • The pump’s thermometer connectors are not working. Contact kogan.com for support. The pump’s • The pump’s thermometer is thermometer broken. connections have issues. In the event of cut-off, unplug the spa and stop using at once.
-
Page 28: Specifications
SPECIFICATIONS Capacity 4-6 adults Dimensions 1.80 m x 1.80 m x 66 cm Inflation pressure 0.8 PSI / 0.055 Bar Litres 778 L... - Page 29 NOTES...
- Page 32 Need more information? We hope that this user guide has given you the assistance needed for a simple set-up. For the most up-to-date guide for your product, as well as any additional assistance you may require, head online to help.kogan.com...
Need help?
Do you have a question about the IBIZA KASPABWIBZA and is the answer not in the manual?
Questions and answers