Advertisement
Quick Links
Advertisement

Subscribe to Our Youtube Channel
Related Manuals for Kogan KASPAMSBRGA


Summary of Contents for Kogan KASPAMSBRGA
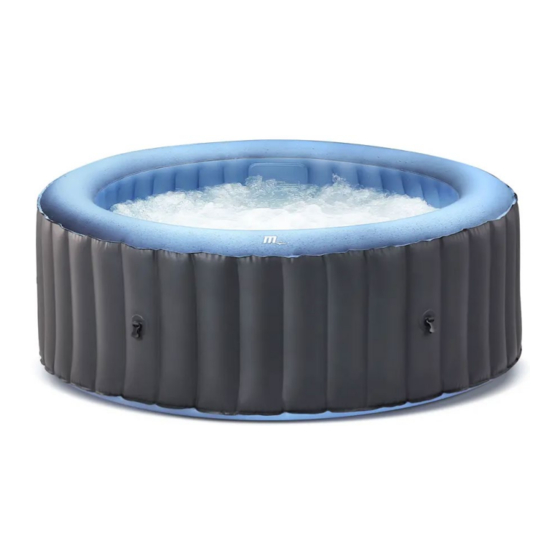
- Page 1 INFLATABLE PORTABLE OUTDOOR HOT TUB MASSAGE SPA 6 PERSONS KASPAMSBRGA...
-
Page 2: Table Of Contents
Safety & Warnings Components Before First Use Assembly Operation Cleaning & Care Specifications Troubleshooting... -
Page 3: Safety & Warnings
If a leakage current exceeding 10mA is detected, the device will cut off the power supply. In the event of cut-off, unplug the spa and stop use. Contact help.kogan.com for assistance in resetting the space. Do not attempt to reset the spa by yourself. - Page 4 The pump must be tested before each use. Refer to the PRCD page of the Installation section for instructions. • Contact help.kogan.com for assistance if any parts are damaged or missing upon arrival. • If the supplied power cord is damaged, stop use immediately and contact help.Kogan.com for assistance.
- Page 5 • Keep this user guide for future reference. If the user guide is lost, refer to help.Kogan.com for a digital copy. • The spa must be supplied by earthed power source. An earthed power cord is supplied. • Cleaning and user maintenance must be performed by an adult above 18 years old who understands the risk of electric shock.
- Page 6 • Electric installations must follow national wiring rules; consult a qualified electrician with any questions. Consult your physician for recommendations. • Caution: • Do not use the spa alone. • People with infectious diseases should not use the spa. • It is recommended that you use the spa for no longer than 15 minutes at a time.
-
Page 7: Components
COMPONENTS A Spa cover B Spa tub D Filter cartridge and E Spa drain C Wired controller cartridge base Valve adapter F Repair kit G Wrench... -
Page 8: Before First Use
BEFORE FIRST USE Note: The measured zone dimensions are limited by walls and fixed partitions. Zones Description of the zones Zone 0 is the interior of the basin including any recesses in the walls or Zone 0 floor. Zone 1 is limited by: •... - Page 9 Site preparation & requirements • The spa can be installed indoors or outdoors in around 10 minutes by one or more persons. For household use only. • The spa must be set up on a flat, smooth, and supporting surface that is able to bear the maximum load of the filled spa with the listed maximum number of occupants.
- Page 10 PRCD Testing WARNING: Risk of electric shock: This product is provided with a PRCD located at the end of the power cord. The PRCD must be tested before each use. Do not use the spa if the PRCD does not function properly. Disconnect the power cord until the fault has been identified and corrected.
-
Page 11: Assembly
ASSEMBLY WARNING: Always ensure the spa is unplugged before beginning any maintenance work to avoid the risk of injury or death. Move the entire package to the selected site. Do not drag the spa tub across the ground as this can cause damage and future leakage. Open the carton carefully as this can be used to store the spa during long term storage or when not in use. - Page 12 Spa Inflation • Plug the spa into the grounded supply socket. • Press the RESET button on the PRCD, the screen on the controller will show numbers. • Turn the inflation knob to the inflation status ON and long press (>2 minutes) the bubble button on the controller to start inflating until the yellow section of the manometer is pushed out.
- Page 13 Always read the manometer to ensure that the spa is filled at the correct air pressure for the conditions. Ensure the manometer points to the Yellow section in the following conditions: Yellow • After inflation but before filling the spa with water. •...
- Page 14 Water Filling • Before filling with water, ensure the bottom drain and valve cap are securely closed. • Fill the spa tub with fresh water to a level between MIN and MAX water lines on the inside of the spa wall. •...
-
Page 15: Operation
OPERATION Controller LED display Heater button Filter button Bubble button Timer button Up button Down button LED Display Once the spa is turned on, press RESET on the PRCD. The LED will display the current water temperature. Note: The actual water temperature may vary from the temperature displayed on the LED screen by approximately 1 °C. - Page 16 IMPORTANT: The following conditions will lead to slower heating: • An ambient temperature lower than 10°C. • An outdoor wind speed above 3.5-5.4m/s (8-12mph). • If the air bubble function is activated when the heater is on. • Open the spa top lid when the Bubble function is on. •...
- Page 17 Filtration • Press the FILTER button to turn the function on/off. The light on the button will turn green when the function is activated. • The filtration system will automatically start when the heating is activated. • After turning off the heating system, the filtration system will automatically stop in 30 seconds.
-
Page 18: Cleaning & Care
CLEANING & CARE Filter Cartridge Inspect and clean the filter cartridge gently after each use. Ensure the spa is empty. Pull out the filter cartridge from the base. Use a garden hose to rinse off the cartridge. Reinstall the clean or spare cartridge back onto the spa tub wall. •... - Page 19 Spa Water • Change the spa water every 3-5 days depending on use. If there is visible dirt or the water becomes cloudy, change the water and clean the spa tub. See the “Spa Tub Cleaning” section for further instructions. •...
- Page 20 Water Treatment: • Always follow the chemical manufacturer's directions and note the health and hazard warnings. • It is good practice to keep all air jets open and valves closed to allow chemically treated water to flush through all pipework. •...
- Page 21 Remove the spa drain valve cap from the outside of the spa tub and attach the drain valve adapter with the garden hose to the spa drain valve. From the inside of the spa tub, open the drain valve cap, water will start to flow out through the garden hose.
- Page 22 Use a clean towel to wipe up any remaining water and moisture on the spa tub and controller. Spa Tub Cleaning After the spa water is drained, use a sponge and a mild soap solution to wipe away any soil or stains on the inside of the spa wall.
- Page 23 Storage & Preparation for Future Use It is recommended to use the original packaging to store the spa and its components. Drain and clean the spa by following the Spa Drainage and Spa Tub Cleaning sections on pages 20-22 of this user guide. Reverse the assembly instructions to deflate and disassemble the spa tub.
-
Page 24: Specifications
SPECIFICATIONS Shape Round Seating capacity 6 people Water capacity 930L Outside diameter 2.04m Inside diameter 1.6m Height 0.70m Weight 24kg Control System Voltage and frequency AC 220-240V, 50Hz Rating power 2100W Heater 1500W Massage air blower 600W Filter pump 1325L/hr Top lid Rhino-Tech reinforced PVC Liner material... -
Page 25: Troubleshooting
TROUBLESHOOTING Error Code Chart LED Reading Cause Solution Signal wire is loose Contact help.Kogan.com for assistance. Communication failed Contact help.Kogan.com for assistance. Water temperature is Change the water. below 0°C or above 50°C Temperature sensor failure Contact help.Kogan.com for assistance. - Page 26 Spa inlet and outlet are not Tighten the inlet and outlet. securely tightened Close the drainage valve. Drainage valve is not closed Contact help.Kogan.com if leaking completely Spa leaking persists. Repair the leaking hole/split with the Water leaking from the spa included repair kit.
- Page 27 Water has been used for a Change the water. long period of time Insufficient filtering time Extend the filtration time. Water is not clean Dirty filter cartridge Clean or replace the filter cartridge. Refer to the chemical manufacturer’s Improper water maintenance instructions Spa tub is an Check the air pressure and release air if...
- Page 28 Need more information? We hope that this user guide has given you the assistance needed for a simple set-up. For the most up-to-date guide for your product, as well as any additional assistance you may require, head online to help.kogan.com...
Need help?
Do you have a question about the KASPAMSBRGA and is the answer not in the manual?
Questions and answers