Table of Contents
Advertisement
Quick Links
Advertisement
Table of Contents

Related Manuals for Kogan KASPAMSDLTA


Summary of Contents for Kogan KASPAMSDLTA
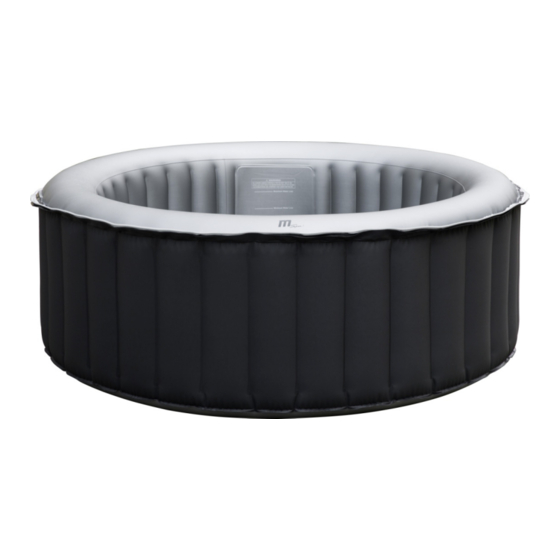
- Page 1 DELIGHT INFLATABLE PORTABLE OUTDOOR HOT TUB MASSAGE SPA 6 PERSONS KASPAMSDLTA...
-
Page 3: Safety And Warnings
• RISK OF INJURY: Do not operate spa if inlet or outlet pipes are broken or missing. Never attempt to replace the inlet and outlet pipes. Contact help.kogan.com for assistance. • Risk of electric shock: Install at least 2 metres from all metal surfaces. - Page 4 • Do not use spa during chemical maintenance. • Keep this user guide for future reference. If the user guide is lost, refer to kogan.com for a digital copy. • The appliance must be supplied by earthed power source. An earthed power cord is supplied.
- Page 5 • Do not bury cord. Locate cord to minimize damage from lawn mowers, hedge trimmers and other equipment. • During pregnancy, soaking in hot water may result in serious injury or death to the unborn child. Limit use to 10 minutes at a time and be conscious of temperature. To reduce the risk of injury: •...
- Page 6 Caution: • We strongly recommend not to unfold and inflate the spa if the ambient temperature is below 15°C. We suggest inflating the spa indoors and then continuing set up outdoors. If the outdoor temperature is lower than 6°C, the spa heater must always be on.
- Page 7 COMPONENTS A Spa Cover B Spa tub E Filter cartridge and C Wired controller D Digital lock Cartridge base F Spa drain G Repair kit H Wrench Valve adapter...
-
Page 8: Before Installing
BEFORE INSTALLING Note: The measured zone dimensions are limited by walls and fixed partitions. Zones Description of the zones Zone 0 is the interior of the basin including any recesses in Zone 0 their walls or floors. Zone 1 is limited by: •... - Page 9 FIRST USE AND SET-UP PREPARATION Site preparation and requirements • The spa can be installed indoor and outdoor around 10 minutes by at least one person. For household use only. • The spa must be set up on a flat, smooth and supporting surface that can support the maximum load of the filled spa with listed maximum occupants.
- Page 10 PRCD Testing WARNING: Risk of electric shock: This product is provided with a PRCD located at the end of the power cord. The PRCD must be tested before each use. Do not use the spa if the PRCD does not function properly. Disconnect the power cord until the fault has been identified and corrected.
-
Page 11: Installation
INSTALLATION 1. Move the entire package to a selected site. Open the carton carefully as it can be re- used to store the spa during long term storage or when not in use. 2. Lay out all the parts on the ground and make sure all parts are accounted for. Make sure the spa tub is right side up. - Page 12 Yellow Green White Note: Check before inflation whether the manometer cap is screwed up tight on the valve of pool body. If not, please tighten and then inflate. After inflation, the manometer cannot be removed, otherwise air will be released. When the Yellow section is pushed out, the spa inflation is completed.
-
Page 13: Operation
OPERATION 5. Water Filling 5.1 Check the spa liner is at the selected area and point the drain valve toward a suitable draining area before filling water. 5.2 Fill the spa tub with fresh water to a level between Minimum and Maximum line marked on the inside of the spa wall. - Page 14 5.6 Turn on the Heater on the controller, refer to the “Controller operation” section on the following page. 5.7 Maximum heating temperature is 40°C. Hourly heating rate is about 2°C - 2.5°C for 2 persons spa and 4 persons square spa, 1.5°C - 2°C for 4 persons round spa and 1.2°C - 1.8°C for 6-person spa.
- Page 15 Controller Operation Heater Button Filter Button Bubble Button Timer Button Up Button Down Button Temperature display: press RESET on PRCD, read the current temperature on the screen. Heater Button: Press HEATER button to start or stop heating. The filter will automatically be running for 15 seconds to test the working condition once the HEATER function is started.
- Page 16 Bubble Button: To activate the bubbling massage function. The light of Bubble button displays green when activated. The bubbling will be shut down automatically after every 20 minutes operation for safety concern. It can be re-activated 10 minutes after shutdown. Attention: The bubble function can only be activated when the inflation knob is in <OFF>...
-
Page 17: Maintenance
MAINTENANCE Frequency Action Clean the filter cartridge or change Cumulative use up to 150hrs or a new one. Filter Cartridge cleaning reminder is activated The filter cartridge may need to be replaced within 150hrs for initial use. Not in used for 2~3 days or longer Use an overall cover for protection Check water quality in time and Use an overall cover for protection... - Page 18 Water Treatment: • Always follow the chemical manufacturer's direction and the health and hazard warning. • Never mix chemicals together. Add the chemicals to the spa water separately. Thoroughly dissolve each chemical before adding one to the water. • Please note that chlorine and bromine products should never be mixed. This is extremely dangerous.
- Page 19 Change the spa water every 3-5 days depends on the spa use. See “Cleaning, draining and storage” section for instruction. Use spa chemicals to maintain proper water conditions. Spa damage resulting from misuse of chemicals and mismanagement of spa water is not covered by the warranty.
-
Page 20: Cleaning And Care
CLEANING & CARE Spa Drainage Turn off all the buttons (heater, filter and bubble) on the control panel unit. Connect the drain valve adapter to a garden hose and point the other end of the garden hose to a suitable draining area with local environmental regulations (Fig.1) Remove the drain valve cap from the outside of the spa tub and attach the drain valve adapter with the garden hose to the drain valve (Fig.2) From the inside of the spa tub, open the drain valve cap, water will start to flow out... - Page 21 Spa Tub Cleaning If dirt is visible in the water or water becomes cloudy and proper water chemistry does not clear it up, change the water and clean the spa tub. After the spa water is drained, remove the cartridge from the inside of the spa tub wall, clean and /or replace the filter cartridge.
- Page 22 Storage and Preparation For Future Usage Drain and clean the spa by following the information in this user guide. Reserve the set-up instructions to deflate and disassemble the spa tub, spa control unit. Make sure all the spa components and accessories are thoroughly clean and dry before storage.
-
Page 23: Specifications
SPECIFICATIONS Bubble Spa Seating Water Outside Inside Shape Height Weight Capacity Capacity Dimensions Dimensions Round 930L 92.04m 9I.6m 0.70m 25.5kg Control System AC 220-240V~ 50Hz Total Power 2100W Heater 1500W Massage Air Blower 600W Filter Pump AC 12V/35W... -
Page 24: Troubleshooting
Close the drainage valve. Drainage valve is not closed Spa leaking completely Contact kogan.com for support if spa is still leaking. Water leaks from the spa pool Repair the leaking hole/spilt with the body repair kit material... - Page 25 Power failure Check the power supply Filter cartridge stuck by dirt or Filter pump Clean or replace filter cartridge other objects does not work Add more water to reach the minimum Low water level water line Please check the air pressure and release air if necessary Spa tub in an Extra air pressure by strong...
- Page 26 NOTES...
- Page 28 Need more information? We hope that this user guide has given you the assistance needed for a simple set-up. For the most up-to-date guide for your product, as well as any additional assistance you may require, head online to help.kogan.com...
Need help?
Do you have a question about the KASPAMSDLTA and is the answer not in the manual?
Questions and answers