Zeiss AxioCam ERc 5s User Manual
Hide thumbs
Also See for AxioCam ERc 5s:
- User manual (36 pages) ,
- Operating instructions manual (16 pages)
Table of Contents
Advertisement
Advertisement
Table of Contents

Related Manuals for Zeiss AxioCam ERc 5s


Summary of Contents for Zeiss AxioCam ERc 5s
- Page 1 User Guide AxioCam ERc 5s Rev.2 Microscope Camera...
- Page 2 ZEISS. No program, documentation, or subsequent upgrade thereof may be disclosed to any third party, unless prior written consent of ZEISS has been procured to do so, nor may be copied or otherwise duplicated, even for the customer's internal needs apart from a single back-up copy for safety purposes.
- Page 3 Content...
- Page 4 Content AxioCam ERc 5s | V 1.0 en...
-
Page 5: Table Of Contents
16 2.3 Warranty 16 2.4 Intended Use 17 Shipment 21 Technical data 25 4.1 Axiocam ERc 5s Rev.2 25 4.1.1 Spectral Sensitivity 26 Connecting the camera 29 5.1 Camera layout and cables 29 5.2 Connecting the camera to the mains supply 31... - Page 6 9.3.3 The color of my image does not correspond to the impression through the ocular 59 9.4 Other 59 10 Maintenance 63 10.1 Optical System 63 10.2 Cleaning the infrared filter or protective glass 63 AxioCam ERc 5s | V 1.0 en...
-
Page 7: About This Guide
About this guide... - Page 8 1 About this guide AxioCam ERc 5s | V 1.0 en...
-
Page 9: Introduction
1 About this guide 1.1 Introduction Welcome Welcome to the AxioCam ERc 5s user guide. The camera is a high-resolution digital camera with a color CMOS sensor for light- microscopy applications. To make it easier for you to set up the camera, please follow the instructions in these chapters step by step. -
Page 10: Safety Notes Conventions
Shortcuts do appear like Crtl+C , that means you must press Crtl-Key and C-Key together. Procedures Following formats are used for procedures (instructive sequences): Prerequisites ¢ Stands for a condition which must be fulfilled before starting with the action. AxioCam ERc 5s | V 1.0 en... - Page 11 1 About this guide | 1.3 Text formats and conventions Procedure 1 Stands for a single step the user is asked to perform. Web-Links Web-Links do appear in blue text color. To open the linked website, simply click on the link. AxioCam ERc 5s | V 1.0 en...
- Page 12 1 About this guide | 1.3 Text formats and conventions AxioCam ERc 5s | V 1.0 en...
-
Page 13: Safety
Safety... - Page 14 2 Safety AxioCam ERc 5s | V 1.0 en...
-
Page 15: Safety Notes
2 Safety 2.1 Safety Notes The AxioCam ERc 5s has been manufactured and tested by ZEISS according to the regulations specified in CE and has left the manufacturer’s premises in perfect working order. In order to ensure that this condition is maintained and to avoid any risks when operating the system, the user must comply with any notes and warnings contained in this manual. -
Page 16: Limitation Of Liability
2.2 Limitation of liability No warranty shall be assumed by ZEISS during the warranty period if the equipment is operated without observing the safety regulations. In any such case, ZEISS shall be exempt from statutory liability for accidents resulting from such operation. -
Page 17: Intended Use
2 Safety | 2.4 Intended Use 2.4 Intended Use NOTICE The camera should only be used for training and research. The images / videos from this camera must not be used for the direct generation of diagnostic results. AxioCam ERc 5s | V 1.0 en... - Page 18 2 Safety | 2.4 Intended Use AxioCam ERc 5s | V 1.0 en...
-
Page 19: Shipment
Shipment... - Page 20 3 Shipment AxioCam ERc 5s | V 1.0 en...
- Page 21 3 Shipment 3 Shipment Content Order No. 1 x AxioCam ERc 5s Rev.2 camera 426540-9901-000 1 x USB 2.0 data Y-cable 1 x DVD with ZEN 2012 (blue edition) software and device driver Accessory Package The accessory package is optional. For any use without a PC, the accessory package is required.
- Page 22 3 Shipment AxioCam ERc 5s | V 1.0 en...
-
Page 23: Technical Data
Technical data... - Page 24 4 Technical data AxioCam ERc 5s | V 1.0 en...
-
Page 25: Axiocam Erc 5S Rev.2
4 Technical data | 4.1 Axiocam ERc 5s Rev.2 4 Technical data 4.1 Axiocam ERc 5s Rev.2 Feature Value Sensor type Micron CMOS color sensor Number of pixels 2560 (H) x 1920 (V) = 5 megapixels Pixel size 2.2 µm x 2.2 µm Chip size 5.70 x 4.28 mm, corresponds to... -
Page 26: Spectral Sensitivity
4 Technical data | 4.1 Axiocam ERc 5s Rev.2 Info Computer hardware, operating system and software may decrease the frame rates. Selecting a part of the sensor area or applying binning can increase the frame rate. All specifications are subject to change without notice. -
Page 27: Connecting The Camera
Connecting the camera... - Page 28 5 Connecting the camera AxioCam ERc 5s | V 1.0 en...
-
Page 29: Camera Layout And Cables
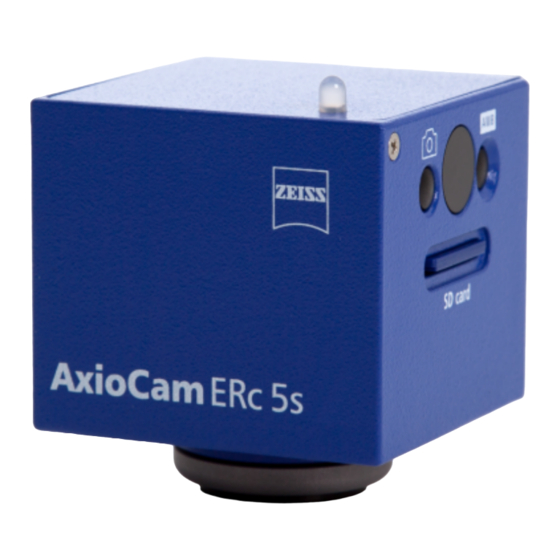
Fast Ethernet port for communication and image data transfer. HDMI port for image data transfer to a monitor, TV or projector. (Mini) USB 2.0 port for communication and image data transfer, as well as power supply. AxioCam ERc 5s | V 1.0 en... - Page 30 Card slot for SD / SDHC memory cards Connecting Cables The following connecting cables are required for voltage supply and use of the ports: Name Figure Remarks USB 2.0 Y cable Connection between camera and PC / plug-in power supply AxioCam ERc 5s | V 1.0 en...
-
Page 31: Connecting The Camera To The Mains Supply
Connection between camera and (not supplied) network or WLAN router Info If the ZEISS Labscope app is used, a commercially available WLAN router will be required. 5.2 Connecting the camera to the mains supply Prerequisites ¢ The power supply has been adapted with the appropriate country-specific adapter. -
Page 32: Connecting The Camera To A Display (Without Pc)
Set the monitor / projector’s aspect ratio to 1:1 or Aspect. Refer to the documentation provided by the monitor / projector’s manufacturer. For further camera settings using the on-screen display menu (OSD), the remote control is required, see chapter Remote Control [} 37]. AxioCam ERc 5s | V 1.0 en... -
Page 33: Connecting The Camera To A Network
Insert the Ethernet cable into the camera’s Ethernet port. Insert the other end of the Ethernet cable into a WLAN router. If you want to use the camera together with the ZEISS Labscope app, a WLAN router will be required. We recommend a high-performance 802.11n WLAN with sufficient free bandwidth. -
Page 34: Function Indicator
For the definitions of the LED color signals, refer to the list below: Signal Description Green Power supplied Green flash Cameras start sequence finished; Write to SD card Camera not ready Red flash Camera error No power supplied AxioCam ERc 5s | V 1.0 en... -
Page 35: Remote Control And Osd Menu
Remote Control and OSD menu... - Page 36 6 Remote Control and OSD menu AxioCam ERc 5s | V 1.0 en...
-
Page 37: Remote Control
Arrow Up Increase contrast Up / increase value Arrow Reduce contrast Down / reduce value Down Arrow Left Reduce brightness Left Arrow Right Increase brightness Right Enter Trigger automatic white OK (apply value) balance AxioCam ERc 5s | V 1.0 en... -
Page 38: On Screen Display Menu
To ensure that the white balance applies to the light source and not the main color of the sample, the Push button mode can be set. Here the white balance is carried out only once if the AWB / Enter button is pressed outside the OSD menu. AxioCam ERc 5s | V 1.0 en... -
Page 39: Exposure Menu
In Once mode a one-time automatic adjustment will be carried out when confirmed with OK, but then deactivated again. Auto level Influences the AET / AGC control when Continuous mode is set. ¢ Extreme left: very dark image ¢ Extreme right: very light image AxioCam ERc 5s | V 1.0 en... -
Page 40: Resolution Menu
Observe the following: Prior to conversion to the full HD resolution (1080p30), check that the monitor supports this option. If 1080p30 has already been activated and the monitor displays no image, follow the instructions as described in this chapter Camera [} 57]. AxioCam ERc 5s | V 1.0 en... - Page 41 Because pressing the button causes the microscope to shake, motion blur would be visible in the image with immediate exposure. This effect is eliminated by snapshot delay. The snapshot delay can be set between 0 and 10 seconds. AxioCam ERc 5s | V 1.0 en...
-
Page 42: Setup User Menu
On a PC observe the following: If the settings are saved, Startup Set is automatically set to this storage location. Startup Set This setting determines which user storage location (USER 1-4) is to be loaded each time the camera is switched on. AxioCam ERc 5s | V 1.0 en... -
Page 43: Technical Information Menu
6.2.5 Technical Information Menu Illustration 10: Technical Information menu Menu entry Description Version Current firmware version MAC adress of the built-in camera Currently used IP adress Destination IP Currently used multicast target address NETMASK Currently used netmask AxioCam ERc 5s | V 1.0 en... - Page 44 6 Remote Control and OSD menu | 6.2 On Screen Display Menu AxioCam ERc 5s | V 1.0 en...
-
Page 45: Installing Software And Drivers
Installing software and drivers... - Page 46 7 Installing software and drivers AxioCam ERc 5s | V 1.0 en...
-
Page 47: Installing Zen Software And Drivers
Prerequisites ¢ To acquire images with the AxioCam ERc 5s on a PC, you must install ZEN software. You will find the software installation on the DVD delivered. The camera drivers will be installed automatically during the installation of the software. - Page 48 7 Installing software and drivers | 7.2 Installing Labscope App AxioCam ERc 5s | V 1.0 en...
-
Page 49: Acquiring Images
Acquiring images... - Page 50 8 Acquiring images AxioCam ERc 5s | V 1.0 en...
-
Page 51: Introduction
8 Acquiring images 8.1 Introduction The AxioCam ERc 5s is a high-resolution digital camera for color images. It is suitable for use as an accessory for educational and routine microscopy in laboratory environments and for use by trained laboratory personnel. It has been designed to be used in the field of light microscopy for general observation, routine work, and simple applications in which a sufficient amount of light is available. -
Page 52: Acquiring The First Image In Zen
In the chapter Optimize Live Image settings, you will learn how to optimize the live image display. Click on the Set Exposure button. The exposure time will be automatically determined and set. AxioCam ERc 5s | V 1.0 en... -
Page 53: Image Acquisition With Labscope
Refer to these information screens for using Labscope. To disable or to re-enable all the information screens, go to the Labscope settings, which is found in the Settings menu on your iPad. For further support in using Labscope see www.zeiss.com/microscopy/community. AxioCam ERc 5s | V 1.0 en... - Page 54 8 Acquiring images | 8.4 Image acquisition with Labscope AxioCam ERc 5s | V 1.0 en...
-
Page 55: Troubleshooting
Troubleshooting... - Page 56 9 Troubleshooting AxioCam ERc 5s | V 1.0 en...
-
Page 57: Camera
The buttons are temporarily locked, as Control the camera via PC software or flashes red when a button is the camera is being accessed Zeiss app, or close the PC software or pressed. exclusively from the PC or network. Zeiss app. -
Page 58: Labscope
9.2 Labscope Problem-solving notes for the use of the camera in conjunction with the network / WLAN and Labscope app are to be found separately at the Zeiss website www.zeiss.com/microscope/community. AxioCam ERc 5s | V 1.0 en... -
Page 59: Zen Software
The color of the image on the monitor / project does not correspond to the image in ZEN ¢ Simultaneuous usage of the camera through both a monitor / projector (HDMI port) and through a PC (mini USB port) is not supported. AxioCam ERc 5s | V 1.0 en... - Page 60 9 Troubleshooting | 9.4 Other AxioCam ERc 5s | V 1.0 en...
-
Page 61: Maintenance
Maintenance... - Page 62 10 Maintenance AxioCam ERc 5s | V 1.0 en...
-
Page 63: Optical System
(wool). Use cleaning fluid for optics/lenses only to clean the IR filter. Do not use tap water to clean the IR filter. AxioCam ERc 5s | V 1.0 en... - Page 64 Carl-Zeiss-Promenade 10 07745 Jena, Germany microscopy@zeiss.com www.zeiss.com/microscopy Carl Zeiss Microscopy GmbH Königsallee 9-21 37081 Göttingen Germany ZEISS reserves the right to make modifications to this document without notice. © Jena 2014 by Carl Zeiss Microscopy GmbH - all rights reserved...
Need help?
Do you have a question about the AxioCam ERc 5s and is the answer not in the manual?
Questions and answers