Table of Contents
Advertisement
Advertisement
Table of Contents

Related Manuals for AGFA DX-D 100


Summary of Contents for AGFA DX-D 100
- Page 1 DX-D 100 5410/050 5411/050 5411/300 5411/400 User Manual 0187K EN 20191024 1609...
-
Page 2: Table Of Contents
..........27 Classification ............28 Compliance ............. 29 For USA ............29 Connectivity ............30 Connecting DX-D 100 to a wired network ..31 Connecting USB devices .......32 Installation .............. 33 Storage of Allen wrench ....... 33 Labels ..............34 Messages .............. - Page 3 DX-D 100 | Contents | iii Getting started ..............48 Starting DX-D 100 ............ 49 Operating DX-D 100 ..........51 Displacement and positioning workflow ..52 Basic imaging workflow .......53 Using the ‘virtual keyboard’ ......58 Operation controls of the barcode reader ..
-
Page 4: Legal Notice
Agfa and the Agfa rhombus are trademarks of Agfa-Gevaert N.V., Belgium or its affiliates. NX and DX-D 100 are trademarks of Agfa NV, Belgium or one of its affiliates. All other trademarks are held by their respective owners and are used in an editorial fashion with no intention of infringement. -
Page 5: Introduction To This Manual
DX-D 100 | Introduction to this Manual | 5 Introduction to this Manual Topics: • Scope • About the safety notices in this document • Disclaimer 0187K EN 20191024 1609... -
Page 6: Scope
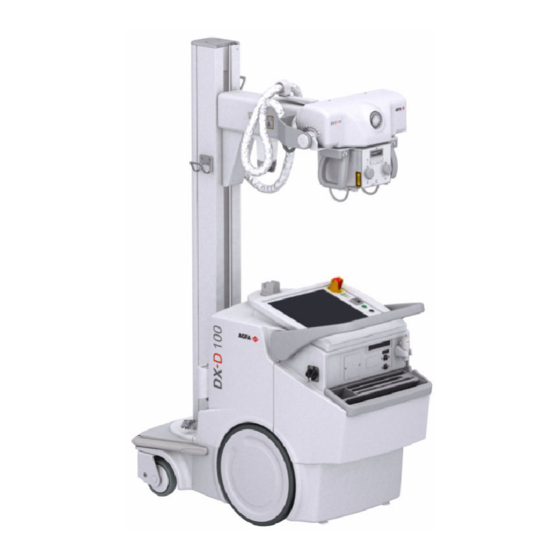
6 | DX-D 100 | Introduction to this Manual Scope This User Manual describes the features of the DX-D 100 System, an integrated mobile Digital Radiography X-Ray System to be used as medical diagnostic aid in General Radiography and emergency departments. It explains how the different components of the DX-D 100 System work together. -
Page 7: About The Safety Notices In This Document
DX-D 100 | Introduction to this Manual | 7 About the safety notices in this document The following samples show how warnings, cautions, instructions and notes appear in this document. The text explains their intended use. DANGER: A danger safety notice indicates a hazardous situation of direct, immediate danger for a potential serious injury to a user, engineer, patient or any other person. -
Page 8: Disclaimer
8 | DX-D 100 | Introduction to this Manual Disclaimer Agfa assumes no liability for use of this document if any unauthorized changes to the content or format have been made. Every care has been taken to ensure the accuracy of the information in this document. -
Page 9: Introduction
DX-D 100 | Introduction | 9 Introduction Topics: • Intended Use • Intended User • Configuration • Options and Accessories • Operation Controls • System Documentation • Product Complaints • Classification • Compliance • Connectivity • Installation • Labels •... -
Page 10: Intended Use
10 | DX-D 100 | Introduction Intended Use • The DX-D 100 system is a mobile X-ray imaging system used in hospitals, clinics and medical practices by physicists, radiographers and radiologists to make, process and view static X-ray radiographic images of the skeleton (including skull, spinal column and extremities), chest, abdomen and other body parts on adult, pediatric or neonatal patients. -
Page 11: Intended User
DX-D 100 | Introduction | 11 Intended User This manual has been written for trained users of Agfa products and trained diagnostic X–Ray clinical personnel who have received proper training. Users are those persons who actually handle the equipment and those who have authority over the equipment. -
Page 12: Configuration
12 | DX-D 100 | Introduction Configuration DX-D 100 is an integrated mobile Digital Radiography X-Ray System. Topics: • DX-D 100 • Integration 0187K EN 20191024 1609... -
Page 13: Dx-D 100
• configuration with portable DR Detector, type number 5410/050 • configurations with wireless DR Detector, type numbers 5411/050, 5411/300 and 5411/400 The DX-D 100 configuration with wireless DR Detector has two variants of the vertical column: 0187K EN 20191024 1609... - Page 14 14 | DX-D 100 | Introduction Figure 3: telescopic column Figure 2: standard column 0187K EN 20191024 1609...
-
Page 15: Integration
DX-D 100 | Introduction | 15 Integration The integrated NX software controls all actions on the X-ray unit and induces the workflow. The integration between the NX software and the X-ray generator console is established by means of the X-ray device interface software. -
Page 16: Options And Accessories
16 | DX-D 100 | Introduction Options and Accessories • Dose Area Product meter (DAP) • Infrared remote control • RFID reader for user authentication • Barcode scanner for entering patient data • Grids • Allen Wrench 0187K EN 20191024 1609... -
Page 17: Operation Controls
DX-D 100 | Introduction | 17 Operation Controls The two configurations of the DX-D 100 mostly have the same operation controls: Configuration with portable DR Detector The main operation controls of the DX-D 100 with portable DR Detector: Control console... - Page 18 DR Detector. The network connector is marked ETH Grid holder with integrated charger for DR Detector battery Figure 5: DX-D 100 configuration with wireless DR Detector The configuration with wireless DR Detector (type number 5411/300) can alternatively be delivered with a fixed DR detector cable mounted to the mobile X-ray unit.
-
Page 19: The Control Console
DX-D 100 | Introduction | 19 The Control Console The control console is displayed on the touch screen of the DX-D 100 mobile X- ray unit. It consists of two parts: • the NX application, to define patient information, select exposures and process the images •... - Page 20 20 | DX-D 100 | Introduction Battery status (empty) icon Meaning Full Medium Low Empty Wired DR Detector Wireless DR Detector is off or disconnected (empty) Connec- tion status icon (wi- fi/wired) DR Detec- Meaning Good Wired DR tor is off or...
-
Page 21: The Control Panel
DX-D 100 | Introduction | 21 The Control Panel The control panel consists of the following items: Emergency switch Battery charge level indicators Switch on/off key (or keypad) Power line connection lamp Collimator lamp Figure 7: the control panel Figure 8: Optional keypad replacing the key to switch the unit on and off. -
Page 22: Infrared Remote Control
22 | DX-D 100 | Introduction Infrared remote control The infrared remote control consists of the following main elements: Collimator lamp button Infrared window Exposure button Figure 9: the infrared remote control 0187K EN 20191024 1609... -
Page 23: Portable Dr Detector
DX-D 100 | Introduction | 23 Portable DR Detector When performing an exposure, keep in mind the following detector orientation aids: 1. Tube side 2. Patient orientation marker For an overview of the operation controls of the DR Detector, refer to the user manual of the DR Detector. -
Page 24: Storage Bin
24 | DX-D 100 | Introduction Storage bin The configuration with wireless DR Detector has a storage bin with slots for the specific components of the system. A box or roll of protective bags for the detector The slot can be used for storing the Allen wrench that is used to uncouple the wheels from the motors. -
Page 25: System Documentation
Technical documentation is available in the product service documentation which is available from your local support organization. The user documentation consists of: • DX-D 100 User Documentation CD (digital media). • NX User Documentation CD (digital media). • User documentation for the supported DR Detectors. -
Page 26: The Dx-D 100 User Documentation Contains
The DX-D 100 User Documentation contains: • DX-D 100 User Manual (this document), document 0187. • DX-D 100 Mobile X-Ray Unit User Manual, document 0188. • DX-D DR Detector Calibration Key User Manual, document 0134. The Getting Started material contains: •... -
Page 27: Product Complaints
Manufacturer address: Agfa Service Support - local support addresses and phone numbers are listed on www.agfa.com Agfa - Septestraat 27, 2640 Mortsel, Belgium Agfa - Fax +32 3 444 7094... -
Page 28: Classification
28 | DX-D 100 | Introduction Classification Type of protection against Class 1 Equipment electric shock Degree of protection Type B Applied Parts against electric shock Degree of protection IPX0 as defined in IEC60529. Ordinary equip- against ingress of liquids ment (enclosed equipment without protection against ingress of liquids). -
Page 29: Compliance
DX-D 100 | Introduction | 29 Compliance The DX-D 100 has been designed in accordance with the MEDDEV Guidelines relating to the application of Medical Devices and have been tested as part of the conformity assessment procedures required by 93/42/EEC MDD (European Council Directive 93/42/EEC on Medical Devices). -
Page 30: Connectivity
DX-D 100 communicates with other devices in the hospital network using one of the following protocols: • DICOM • IHE DX-D 100 can be connected to a RIS system (input scheduling), a PACS system (output image/data management) and to a hardcopy device (output image). Topics: •... -
Page 31: Connecting Dx-D 100 To A Wired Network
To connect DX-D 100 to a wired network: 1. Place the unit in parking position. Refer to the DX-D 100 Mobile X-Ray Unit User manual to find out how to do this. 2. Extract the network cable and plug it into a network socket. -
Page 32: Connecting Usb Devices
32 | DX-D 100 | Introduction Connecting USB devices WARNING: Only USB devices powered via the USB cable may be connected to a USB port of the PC of the mobile X-ray system. The use of USB devices powered by an AC/DC power supply is strictly forbidden. -
Page 33: Installation
DX-D 100 | Introduction | 33 Installation CAUTION: Selecting the wrong DR detector can cause the need to retake the image. On a configuration with multiple wireless DR Detectors of the same type, it is required to apply labeling to the DR Detector containing a unique nickname for each DR Detector. -
Page 34: Labels
34 | DX-D 100 | Introduction Labels The labels are listed and explained in the relevant modules of the DX-D 100 User Documentation. Type label positioned on the column. The type label information for each combi- nation of X-ray tube and X-ray generator is available in the technical data. -
Page 35: Messages
DX-D 100 | Introduction | 35 Messages Under certain conditions the system shows a dialog box in the middle of the screen containing a message, or a message is displayed in a fixed message area in the user interface. This message informs the user that either a problem has occurred or that a requested action cannot be performed. -
Page 36: Cleaning And Disinfecting
36 | DX-D 100 | Introduction Cleaning and Disinfecting All appropriate policies and procedures should be followed to avoid contamination of the staff, patients and equipment. All existing universal precautions should be extended to avoid potential contaminations and to avoid patients coming into (close) contact with the device. The user is responsible for selecting a disinfection procedure. -
Page 37: Cleaning
DX-D 100 | Introduction | 37 Cleaning To clean the exterior of the equipment: 1. Stop the system. CAUTION: Wet cleaning of the equipment while it is connected to the electric circuit includes the risk of electric shock and of short circuit. -
Page 38: Disinfecting
If you plan to use other disinfectants, approval of Agfa is needed before use, as most disinfectants can damage the device. UV disinfection is also not allowed. Perform the procedure following the instructions for use, the disposal instructions and the safety instructions of the selected disinfectants and tools and of the hospital. -
Page 39: Approved Disinfectants
DX-D 100 | Introduction | 39 Approved disinfectants Refer to the Agfa website for specifications on the disinfectants that have been found compatible with the cover material of the device and can be used on the outer surface of the device. -
Page 40: Patient Data Security
40 | DX-D 100 | Introduction Patient data security The user must ensure that the patients’ legal requirements are met and that the security of the patient data is guarded. The user must define who can access patient data in which situations. -
Page 41: Maintenance
DX-D 100 | Introduction | 41 Maintenance Maintenance procedures are described in the DX-D 100 Mobile X-Ray Unit User Manual and in the DR Detector user manuals. 0187K EN 20191024 1609... -
Page 42: Safety Directions
Safety is only guaranteed when changes, additions, maintenance or repairs are carried out by an Agfa certified field service engineer. A non certified engineer performing a modification or service intervention on a medical device, acts on his own responsibility and makes the warranty void. - Page 43 DX-D 100 | Introduction | 43 WARNING: Do not drive the unit on ramps with an inclination higher than 5 degrees. WARNING: To avoid the risk of overbalance, the mobile unit must not be in stationary position on surfaces with the following inclination angles: •...
- Page 44 CAUTION: Damaged grid. Reduced image quality. Please handle the grids with special care. For directions concerning X-ray radiation safety, electrical safety and electromagnetic safety, refer to the DX-D 100 Mobile X-Ray Unit User Manual, document 0188. Topics: • Cleaning the system •...
-
Page 45: Cleaning The System
• Shut down the system properly before cleaning. • No moisture may penetrate into the system. • Refer also to the relevant modules of the DX-D 100 User Documentation. Disinfection of the system • Shut down the system before cleaning. -
Page 46: Emergency Stop Button
CAUTION: After an examination, send images to a hardcopy printer and/or PACS as soon as possible. To stop DX-D 100 under normal conditions, refer to the procedure for stopping DX-D 100. Related Links Stopping DX-D 100... -
Page 47: Environmental Protection
DX-D 100 | Introduction | 47 Environmental protection Figure 14: WEEE symbol Figure 15: Battery symbol WEEE end user notice The directive on Waste Electrical and Electronic Equipment (WEEE) aims to prevent the generation of electric and electronic waste and to promote the reuse, recycling and other forms of recovery. -
Page 48: Getting Started
48 | DX-D 100 | Getting started Getting started Topics: • Starting DX-D 100 • Operating DX-D 100 • Stopping DX-D 100 • Stopping NX by logging out of Windows 0187K EN 20191024 1609... -
Page 49: Starting Dx-D 100
DX-D 100 | Getting started | 49 Starting DX-D 100 To start DX-D 100: 1. Unplug the unit from the mains power. 2. Unlock the device. • To unlock the device using the key, switch the key on the control panel to the “ON”... - Page 50 • attach a fully charged battery pack to the DR Detector. • turn on the DR Detector. • if needed, register the DR Detector to the DX-D 100 X-Ray System. 6. At the start of each day and when the selected tube has not been in use for approximately one hour, perform the X-ray tube warm-up as follows: •...
-
Page 51: Operating Dx-D 100
DX-D 100 | Getting started | 51 Operating DX-D 100 The DX-D 100 can be operated in two different ways: connected to a wired network or using a wireless network. In the basic workflow described below, the situation using a wireless network is described. -
Page 52: Displacement And Positioning Workflow
52 | DX-D 100 | Getting started Displacement and positioning workflow CAUTION: Before using DX-D 100, check the battery levels on the control panel. If the red indicator is blinking, operation is not allowed. In that case, it is necessary to charge the batteries. -
Page 53: Basic Imaging Workflow
DX-D 100 | Getting started | 53 WARNING: Monitor with special care the patient position or anyone present, to avoid injury caused by unit movements. Intravenous tubing, catheters and other patient connected lines should be routed away from moving equipment. - Page 54 The DR Detector is activated. The DR Detector Switch shows which DR Detector is active and shows its status. The DX-D 100 software console is displayed and the default X-ray exposure parameters for the selected exposure are displayed. Preparing the exposure 1.
- Page 55 DX-D 100 | Getting started | 55 Figure 16: Collimator light CAUTION: Misalignment of the DR Detector and the X-ray tube causes unnecessary exposure of the patient to radiation. Checking the exposure settings Topics: • On the NX application •...
- Page 56 56 | DX-D 100 | Getting started Executing the exposure 1. Take a safe distance from the X-ray tube. CAUTION: Excessive user or operator radiation exposure. Always keep a distance of at least 2 meters from the focal spot and X-ray beam, protect body and do not expose hands, arms or other parts of the body to the primary beam.
- Page 57 DX-D 100 | Getting started | 57 Note: If you use a wired network, NX may display error messages while working unplugged because it cannot send images. To prevent error messages being displayed, halt the send queue and restart it when plugging in the network cable.
-
Page 58: Using The 'Virtual Keyboard
58 | DX-D 100 | Getting started Using the ‘virtual keyboard’ When selecting a text field, the virtual keyboard is displayed: Button Function Enter button Close button Floating virtual keyboard button After entering text, select another text field to continue typing or hide the virtual keyboard by clicking the Enter button. - Page 59 DX-D 100 | Getting started | 59 Restriction on the use of virtual keyboard software DX-D 100 contains software components licensed from Comfort Software Group. These products may only be used as part of and in connection with DX- D 100.
-
Page 60: Operation Controls Of The Barcode Reader
60 | DX-D 100 | Getting started Operation controls of the barcode reader The barcode reader setup includes following components : • A battery powered barcode reader • A USB access point that receives the barcode readouts from the barcode reader via bluetooth. - Page 61 DX-D 100 | Getting started | 61 Restoring the connection between the barcode reader and the USB access point The bluetooth LED is flashing fast when it has lost connection to the USB access point. To restore the connection: 1. Scan the barcode on the USB access point.
-
Page 62: Charging A Dr Detector Battery
62 | DX-D 100 | Getting started Charging a DR Detector battery Depending on the configuration, the grid holder includes a charger for a specific model of DR Detector batteries. To charge a DR Detector battery: 1. Insert the battery in the charger. -
Page 63: Managing The Access Codes For The On/Off Keypad
DX-D 100 | Getting started | 63 Managing the access codes for the on/off keypad One or more access codes can be configured for unlocking the on/off keypad. Power button Status indicator lights Enter button Topics: • Modifying the access code •... - Page 64 64 | DX-D 100 | Getting started 5. Press and hold the number 1 button until the blue status indicator starts blinking fast. 6. Dial the new four digit access code and press the enter button. The green status indicator light is blinking.
-
Page 65: Managing The Rfid Reader For User Authentication
DX-D 100. Each RFID key must be linked to a Windows user account. Multiple RFID keys can be linked to the same Windows user account. An RFID key can be configured on more than one DX-D 100 system. Topics: •... - Page 66 66 | DX-D 100 | Getting started 8. Enter PIN code 0102. If an individual PIN code is entered, the user will be required to enter that PIN code each time when logging in to the system. 9. Touch the RFID reader with the new RFID key.
- Page 67 2. Go to C:\Program Files(x86)\Aloaha\SerialStore 3. Find the file that matches the card’s serial number and delete the file. Copying the configuration of the RFID reader to another DX-D 100 system The configuration of the RFID reader can be copied to other systems.
-
Page 68: Stopping Dx-D 100
68 | DX-D 100 | Getting started Stopping DX-D 100 To stop DX-D 100: 1. Stop NX and shut down the PC from the Windows Start menu or login window. 2. Put the unit in parking position. a) Use the tube-collimator handles to restore the default position of the collimator and the X-ray tube. - Page 69 DX-D 100 | Getting started | 69 b) remove the battery pack. 0187K EN 20191024 1609...
-
Page 70: Stopping Nx By Logging Out Of Windows
70 | DX-D 100 | Getting started Stopping NX by logging out of Windows 1. Go to the Main Menu. 2. Click the Log Off button. Figure 20: Log Off buton 3. The third step. As a result: • NX is closed. -
Page 71: Problem Solving
DX-D 100 | Problem solving | 71 Problem solving Topics: • Corner area of detector not exposed • Motorized movement has stopped and unit cannot be moved 0187K EN 20191024 1609... -
Page 72: Corner Area Of Detector Not Exposed
72 | DX-D 100 | Problem solving Corner area of detector not exposed Details A small area in the corner of the detector has not been ex- posed. Cause When making an exposure with small source-image distance (e.g. 1 m) and with the collimator in rotated position (e.g. -
Page 73: Motorized Movement Has Stopped And Unit Cannot Be Moved
DX-D 100 | Problem solving | 73 Motorized movement has stopped and unit cannot be moved The motorized movement has stopped because the unit is switched tails off or a problem has occurred. The unit cannot be moved. Cause The wheels are blocked. -
Page 74: Technical Data
74 | DX-D 100 | Technical Data Technical Data Topics: • DX-D 100 Technical Data DX-D 100 Technical Data The technical data are provided in this chapter or in the User Manual of the component. Table 1: Environmental conditions of the mobile X-ray unit... -
Page 75: Dr Detector Technical Data
DX-D 100 | Technical Data | 75 DR Detector Technical Data Refer to the DR Detector User Manual. Mobile X-Ray Unit Technical Data Refer to the DX-D 100 Mobile X-Ray Unit User Manual (document 0188). 0187K EN 20191024 1609...
Need help?
Do you have a question about the DX-D 100 and is the answer not in the manual?
Questions and answers