Table of Contents
Advertisement
Quick Links
DISPLACEMENT AND
POSITIONING
Before using DX-D 100, check the battery
levels on the control panel. If the red indicator
is blinking, operation is not allowed. In that
case, it is necessary to charge the batteries.
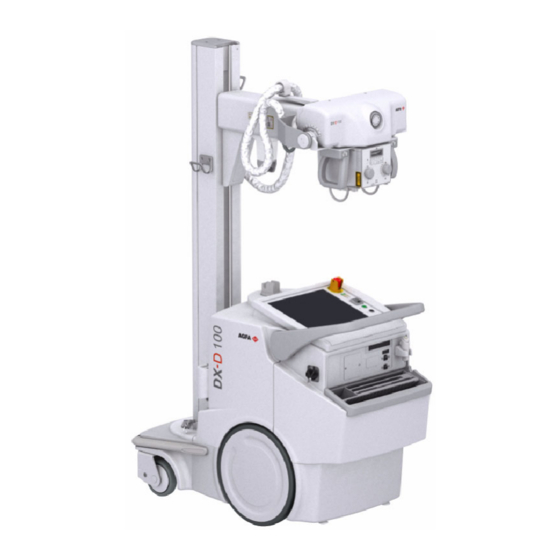
1
Drive the unit
Grip and hold the locking bar towards the handlebar.
Push the handlebar with both hands to drive forwards.
Release the locking bar to block motion.
2
Release the arm
Press the brake control at the tube-collimator handles
to release the arm from parking position.
Press and hold the brake control while using the
handles to rotate the column and move the arm
horizontally and vertically.
WARNING:
Monitor with special care the patient position
or anyone present, to avoid injury caused by
unit movements. Intravenous tubing,
catheters and other patient connected lines
should be routed away from moving
equipment.
0186C EN 20161007
Getting started with DX-D 100 - Performing a DR exposure
3
Position the unit
Use the motion controls to adjust the position of the
unit with respect to the patient.
The four buttons on the tube-collimator handles control
the motion of each driving wheel (forwards/backwards).
1
2
3
1
Backwards to the right
2
Forwards to the right
3
Forwards to the left
4
Backwards to the left
4
Position the X-ray tube and
collimator
Use the tube-collimator handles to rotate the X-ray tube
on its transversal or horizontal axis. Use the collimator
handles to rotate the collimator on its vertical axis.
BASIC IMAGING
Note: If you use a wired network the network
cable must be plugged in to be able to query
the RIS or to send images.
4
5
Retrieve patient info
On the RIS, schedule the examinations.
In NX, query the RIS.
Define the patient info for the examination.
Start the exam.
6
Select the exposure
In NX, select the thumbnail for the exposure in the Image
Overview pane of the Examination window.
The DR Detector is activated. The DR Detector Switch
shows which DR Detector is active and shows its status.
The DX-D 100 software console is displayed and the
default X-ray exposure parameters for the selected
exposure are displayed.
Advertisement
Table of Contents

Subscribe to Our Youtube Channel
Related Manuals for AGFA DX-D 100


Summary of Contents for AGFA DX-D 100
- Page 1 Getting started with DX-D 100 - Performing a DR exposure DISPLACEMENT AND BASIC IMAGING Position the unit POSITIONING Note: If you use a wired network the network Use the motion controls to adjust the position of the cable must be plugged in to be able to query unit with respect to the patient.
- Page 2 Getting started with DX-D 100 - Performing a DR exposure On the software console: In NX: Check if the exposure settings displayed on the While the acquisition is ongoing, the X-ray on Prepare the exposure console are suitable for the exposure. If other exposure indicator is displayed on the software console.
Need help?
Do you have a question about the DX-D 100 and is the answer not in the manual?
Questions and answers