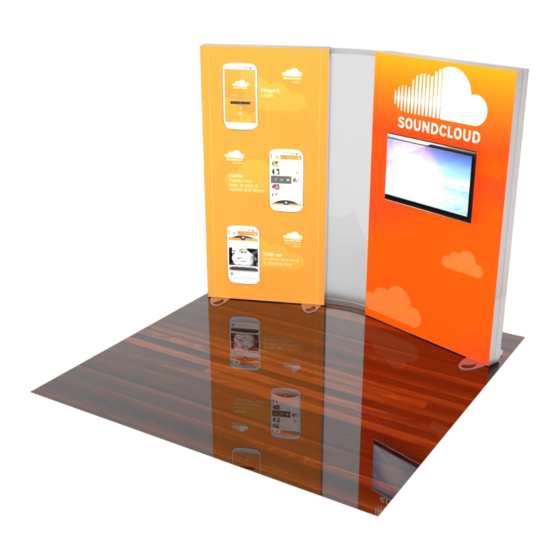
Summary of Contents for Eco-Systems ECO-1094
- Page 1 © 2022 Order #XXXXX ECO-1094 - 10’ x 10’ Display 10’ 10’ Plan View SETUP INSTRUCTIONS If you would like to tell us about your experience with your setup instructions please email us at info@classicexhibits.com...
- Page 2 © 2022 Order #XXXXX Grid View = 1 sq foot...
-
Page 3: General Setup Instructions
© 2022 Order #XXXXX General Information General Setup Instructions - Read entire setup instruction manual prior to WARNING unpacking parts and pieces. - The setup instructions are created specifically for this configuration. - Setup instructions are laid out sequentially in steps, including exploded views with detailed explanation for assembly. - Page 4 © 2022 Order #XXXXX EuroLT Assembly Level 1 = Blue Panel Lock Level 2 = When Required Level 3 = Green Level 4 = Black Panel Lock With Right Hand Thumb When Required Using Your Setup Instructions Close to Seam Color Coded Clip Squeeze, Left Hand...
- Page 5 © 2022 Order #XXXXX CEI152 Frame Assembly Corner Connection Corner Bracket Installation 1) Slide TWO-PIECE TS RV 2 L-bracket into Upper Interior Center Slot of extrusion so that two Horizontal set screws are inside groove. Tighten two set screws to secure. Upper Slide verticals over brackets of lower...
- Page 6 © 2022 Order #XXXXX CEI110 Frame Assembly Corner Connection Corner Bracket Assembly 1) Slide TWO-PIECE TS RV 2 L-bracket into Upper Interior Center Slot of extrusion so that two Horizontal set screws are inside groove. Tighten two set screws to secure. Upper Slide verticals over Horizontal...
- Page 7 © 2022 Order #XXXXX SEG Installation Graphic Removal Corner A Corner B Corner D Corner C Step 1 Step 2 Step 3 It is important to first insert To remove the graphic from Insert corner A. Turn edge of Repeat Step 1 for opposite Once all corners are inserted, graphic into each alternate the frame, locate the fabric...
- Page 8 © 2022 Order #XXXXX Crate Packing CRATE PACKING Crate 1 of 1...
- Page 9 © 2022 Order #XXXXX Left Lightbox Assembly Item Qty. Description Steps: 96”h CEI152 Vertical Extrusion Refer to the CEI152 Frame Assembly general information page. 96”h CEI152 Vertical Extrusion 46”w CEI152 Horizontal Extrusion 1) Install U-Channel to horizontal [15]. See U-Channel Attachment detail.
- Page 10 © 2022 Order #XXXXX Right Lightbox Assembly Item Qty. Description Steps: 96”h CEI152 Vertical Extrusion Refer to the CEI152 Frame Assembly general information page. 96”h CEI152 Vertical Extrusion 46”w CEI152 Horizontal Extrusion 1) Install U-Channel to horizontal [20]. See U-Channel Attachment detail.
- Page 11 © 2022 Order #XXXXX Lightbox Wiring Steps: 1) Connect power cords to Supernova lights as shown. Light to Light Attachment Light to Transformer Attachment Male Female Lights Power Transformer 144W / 6 Amp / 24V Maximum of 7 lights per chain / 11 lights per Transformer Transformers LEFT &...
- Page 12 © 2022 Order #XXXXX Lightbox Connection & Graphics Steps: Item Qty. Description 1) Assemble horizontals [10] between verticals [14,19], inserting Infill. 19.722”w Z45 curved Horizontal Extrusion 2) Apply SEG Graphics to lightbox frames. Refer to the SEG Installation general information page. Completed Assembly SEG Blocker SEG Blocker...
- Page 13 © 2022 Order #XXXXX ECO-42C Reception Counter Item Qty. Description Steps: 46”w CEI110 Horizontal Extrusion 1) Connect horizontals [3,4] between verticals [1,2], 30.5”h CEI110 Vertical Extrusion sliding backer panel between verticals. CEI-110 Corner Connection detail. 2) Attach left & right cabinets to frame assembly [1/2/3/4] CEI-110 Corner Connection using bolts &...


Need help?
Do you have a question about the ECO-1094 and is the answer not in the manual?
Questions and answers