Table of Contents
Advertisement
Quick Links
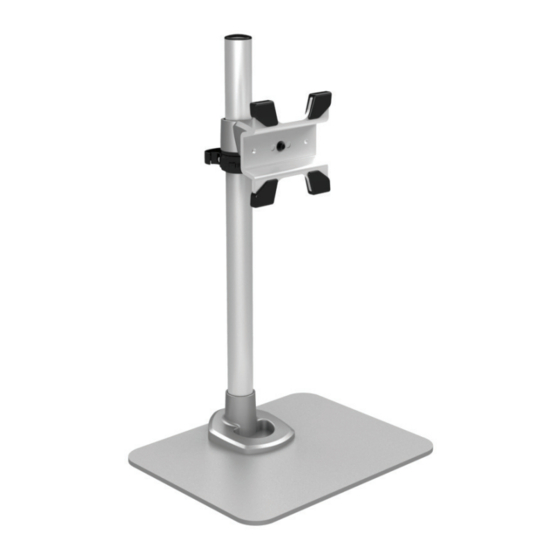
Adjustable Desktop Monitor Stand with
Cable Hook
ARMPIVSTND
DE: Bedienungsanleitung - de.startech.com
FR: Guide de l'utilisateur - fr.startech.com
ES: Guía del usuario - es.startech.com
IT: Guida per l'uso - it.startech.com
NL: Gebruiksaanwijzing - nl.startech.com
PT: Guia do usuário - pt.startech.com
For the most up-to-date information, please visit: www.startech.com
Manual Revision: 12/04/2018
*actual product may vary from photos
Advertisement
Table of Contents

Related Manuals for StarTech.com ARMPIVSTND


Summary of Contents for StarTech.com ARMPIVSTND
- Page 1 DE: Bedienungsanleitung - de.startech.com FR: Guide de l'utilisateur - fr.startech.com ES: Guía del usuario - es.startech.com IT: Guida per l'uso - it.startech.com NL: Gebruiksaanwijzing - nl.startech.com PT: Guia do usuário - pt.startech.com For the most up-to-date information, please visit: www.startech.com Manual Revision: 12/04/2018...
- Page 2 StarTech.com. Where they occur these references are for illustrative purposes only and do not represent an endorsement of a product or service by StarTech.com, or an endorsement of the product(s) to which this manual applies by the third-party company in question. Regardless of any direct acknowledgement elsewhere in the body of this document, StarTech.com hereby...
-
Page 3: Table Of Contents
Table of Contents Introduction ....................1 Packaging Contents ..........................1 Product Overview ..................2 Installation ....................2 Stand Assembly ............................2 Standard LCD / LED Monitor Mounting .................... 4 iMac / Apple Cinema Display Mounting ................... 5 Adjusting Monitor Mount Resistance ....................9 Specifications ..................10 Technical Support ..................11 Warranty Information ................11... -
Page 4: Introduction
Introduction Packaging Contents • 1 x Instruction Manual Aluminum Base Support Post Monitor Mount Qty: 1 Qty: 1 Qty: 1 Cable Clip Iron Position Ring M5x18mm Hex Screws Qty: 1 Qty: 1 Qty: 4 Flange Plastic Caps Access Card Qty: 1 Qty: 4 Qty: 1 3mm Allen Wrench... -
Page 5: Product Overview
Product Overview +45º -15º Note: The size and type of monitor mounted may restrict tilt motion 102mm 122mm 330mm 260mm Installation Stand Assembly 1. Attach the Aluminum Base (1) and Support Post (2) using 4 M5x18mm Hex Screws (6) and the 3mm Allen Wrench (10). Instruction Manual... - Page 6 2. Attach the Rubber Feet (15) to the Base (1). 3. Slide the Cable Clip (4) onto the Support Post (2) to your desired height. Hand- tighten the set screw and then close the quick-release clamp to lock into place. 4.
-
Page 7: Standard Lcd / Led Monitor Mounting
Warning: Ensure the Iron Position Ring is installed, and that the monitor is slid onto the Support post facing forward (over the base). The Iron Position Ring limits the ability to swivel the monitor around too far, causing the center of gravity to shift and possibly fall over. -
Page 8: Imac / Apple Cinema Display Mounting
3. Slide the Monitor Mount (3) onto the Support Post (2) until it rests on the Iron Position Ring (5) and tighten the set screw using the M3 Allen Wrench (15). iMac / Apple Cinema Display Mounting 1. Power off your iMac / Apple Cinema display and disconnect all cables. 2. - Page 9 4. Once the latch is released, tilt the display forward another 10° to expose the 8 screws on top of the stand. The stand should lock into place. 5. When the stand is locked, hold the sides of the display and carefully place it face- down on a protective surface, with the stand hanging over the edge of your work surface.
- Page 10 7. Align the hole in the Flange (7) with the pin on the back of your iMac, then use the Torx Tool (12) and the screws removed in the previous step to attach the Flange. 8. Place the 4 Plastic Caps (8) onto the ends of the Monitor Mount (3). 9.
- Page 11 10. Slide the Monitor Mount (3) onto the Support Post (2) until it rests on the Iron Position Ring (5) and tighten the set screw using the M3 Allen Wrench (15). Instruction Manual...
-
Page 12: Adjusting Monitor Mount Resistance
Adjusting Monitor Mount Resistance Warning: Forced movement of the Mount Bracket without loosening the screws may damage the product or the mounted displays. Always support your display from underneath when making any adjustments to the height, or the Mount Bracket to avoid damage to the display. Note: For all adjustments outlined below, turning the screw clockwise will increase the resistance, while turning the screw counter-clockwise will decrease resistance. -
Page 13: Specifications
Specifications Weight Capacity 30.9 lbs (14 kg) Max Display Size 30” VESA Compatibility 75x75 mm and 100x100 mm Instruction Manual... -
Page 14: Technical Support
Limitation of Liability In no event shall the liability of StarTech.com Ltd. and StarTech.com USA LLP (or their officers, directors, employees or agents) for any damages (whether direct or indirect, special, punitive, incidental, consequential, or otherwise), loss of profits, loss of business, or any pecuniary loss, arising out of or related to the use of the product exceed the actual price paid for the product. - Page 15 StarTech.com is an ISO 9001 Registered manufacturer of connectivity and technology parts. StarTech.com was founded in 1985 and has operations in the United States, Canada, the United Kingdom and Taiwan servicing a worldwide market.
Need help?
Do you have a question about the ARMPIVSTND and is the answer not in the manual?
Questions and answers