
Subscribe to Our Youtube Channel
Related Manuals for WAGO 750-8 Series


Summary of Contents for WAGO 750-8 Series
- Page 1 Anwendungshinweis WAGO-I/O-SYSTEM 750 ETHERNET Controller 750-8xx Connecting Multiple WRF06LCD RS-485 Multifunction Room Operating Units ® Modbus from Thermokon to the WAGO-I/O-SYSTEM Version: 10.04.2019...
- Page 2 Imprint © 2012 by WAGO Kontakttechnik GmbH & Co. KG All rights reserved. WAGO Kontakttechnik GmbH & Co. KG Hansastraße 27 D-32423 Minden +49 (0) 571/8 87 – 0 Phone: +49 (0) 571/8 87 – 1 69 Fax: Email: info@wago.com Web: http://www.wago.com...
-
Page 3: Table Of Contents
Table of Contents Table of Contents Important Notes ................... 4 Legal Principles ..................... 4 1.1.1 Subject to Change ..................4 1.1.2 Copyright ....................... 4 1.1.3 Personnel Qualification .................. 4 1.1.4 Intended Use ....................4 Scope of Applicability ................... 5 Symbols......................5 Number Notation ................... -
Page 4: Important Notes
1.1.1 Subject to Change WAGO Kontakttechnik GmbH & Co. KG reserves the right to make any alterations or modifications that serve the purpose of technical progress. WAGO Kontakttechnik GmbH & Co. KG owns all rights arising from granting patents or from the legal protection of utility patents. -
Page 5: Scope Of Applicability
Important Notes Scope of Applicability This application note is based on the stated hardware and software from the specific manufacturer, as well as the associated documentation. This application note is therefore only valid for the described installation. New hardware and software versions may need to be handled differently. Please note the detailed description in the specific manuals. -
Page 6: Number Notation
Font Conventions Table 2: Font Conventions Font Type Explanation italic Names of paths and files are shown in italics, e.g.: C:\Programs\WAGO-I/O-CHECK Menu Menu options are shown in bold, e.g.: Save A “greater than” between two names characterizes the selection of a >... -
Page 7: Description
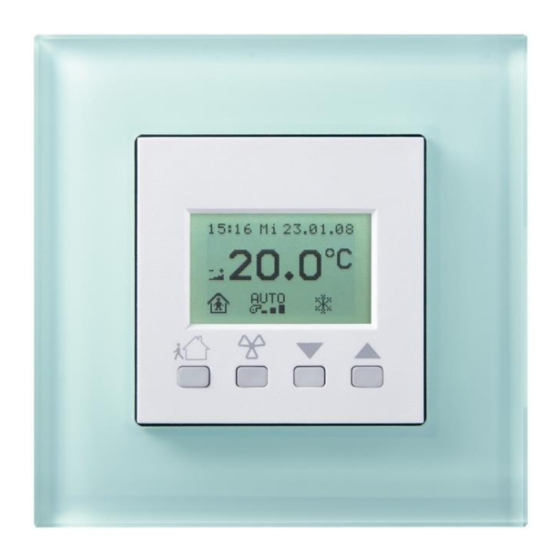
Description Description The fundamental way of carrying out the communication between the WAGO I/O ® System and the WRF06 RS-485 Modbus multifunction room operating unit from Thermokon is described in this application note. In addition, this application note describes how the visualization interface in the library can be used to configure the room operating unit. -
Page 8: Setup
Table of Contents Setup Slave 1 A B + 24 VDC Slave 2 A B + 24 VDC Figure 1: Connection Diagram WAGO-IO-SYSTEM/Thermokon WRF06LCD Anwendungshinweis... -
Page 9: Sample Program
Sample Program Note Access options For the visualization of the WAGO-I/O-PRO CAA, it is essential to establish a connection between the PC and the WAGO fieldbus controller. Depending on the fieldbus controller used, two options are available. The first option is available for all types of fieldbus controllers. Connection to the fieldbus controller's service interface is established via 750-923 USB communication cable. -
Page 10: Figure 2: Wrf06 Master And Configuration Module
Table of Contents Figure 2: WRF06 Master and Configuration Module One instance of the FbWRF06 function block is required for each room operating ® unit to be addressed. The Modbus address of the required slave is set at the “bSlaveNo” input. “1” for Modbus ®... -
Page 11: Figure 3: Data Exchange With A Multifunction Room Operating Unit
Sample Program Figure 3: Data Exchange with a Multifunction Room Operating Unit The “SLAVE1_INPUT” input variable is of type “typWRF06_INPUT”. The possible input values are depicted in this data type. The “typWRF06_INPUT” input variable can be transferred to the specified segments via the “bRefresh” input. -
Page 12: Visualization Interface
Table of Contents Visualization Interface The DisplayWRF06 visualization shows, for example, how the output values of the room operating unit can be displayed. Options have also been implemented in the visualization to change input values. The visualization makes it possible to read the output values for temperature, set point 1 and current controller mode. -
Page 13: Configuration Interface
Configuration Interface Configuration Interface The ConfigWRF06 configuration interface can be used to set the register values of the WRF06 configuration register. Note Configuration Interface The configuration interface is stored in the “ThermokonWRF06_01.lib” library. It can be opened via the “Visualization” button . -
Page 14: Figure 5: Locked Configuration Interfacebasic Parameters Of The Selected Room
Table of Contents Basic parameters of the selected room operating Figure 5: Locked Configuration Interface unit can be set or read from the “General” configuration page. ® Like all other configuration pages, there is a Modbus Slave field on the top left that can be used to select the slave. -
Page 15: Figure 7: "Display" Configuration Interface
Configuration Interface On the one hand, the values shown on the display can be selected on the “Display” page and and on the other, the display of the room temperature can be changed. There are also input fields on this page for possible alarm messages. Figure 7: “Display”... -
Page 16: Figure 8: "Buttons/Inputs" Configuration Interface
Table of Contents Figure 8: “Buttons/Inputs” Configuration Interface The “Buttons/Inputs” configuration page are used to configuration the buttons on the WRF06 room operating panel, as well as the functions of the digital inputs. Note Selection Options Non-selectable settings are between the individual adjustable functions of the buttons and the digital inputs. -
Page 17: Figure 9: "External Values" Configuration Interface
Configuration Interface Figure 9: “External values” Configuration Interface The “External values” configuration page is used to affect how the external values are displayed. Units and the description of the values can be modified. Figure 10: “Set point 1” Configuration Interface Anwendungshinweis... -
Page 18: Figure 11: "Set Point 2" Configuration Interface
Table of Contents Figure 11: “Set point 2” Configuration Interface The “Set point 1” and “Set point 2” configuration pages can be used to view and change the settings of both set points. The possible settings include the display format, increment, adjustment limit and displayable texts. In addition, the set point can be defined on this page after a reset. -
Page 19: Figure 13: "Fan Settings" Configuration Interface
Configuration Interface The controller settings can be made on the “Controller settings” configuration page. Figure 13: “Fan settings” Configuration Interface The last configuration page is intended for fan settings. You have the option of defining individual fan stages. Anwendungshinweis... -
Page 20: Required Libraries
SysLibRtc.lib Reading the time from the controller List of Figures Figure 1: Connection Diagram WAGO-IO-SYSTEM/Thermokon WRF06LCD .. 8 Figure 2: WRF06 Master and Configuration Module ........... 10 Figure 3: Data Exchange with a Multifunction Room Operating Unit ....11 Figure 4: Visualization Interface for Testing the Functions ........12 Figure 5: Locked Configuration InterfaceBasic parameters of the selected room operating unit can be set or read from the “General”... - Page 21 Configuration Interface Anwendungshinweis...
- Page 22 WAGO Kontakttechnik GmbH & Co. KG Postfach 2880 · D-32385 Minden Hansastraße 27 D-32423 Minden +49 (0)5 71/8 87 – 0 Phone: +49 (0)5 71/8 87 – 1 69 Fax: Email: info@wago.com Internet: http://www.wago.com...
Need help?
Do you have a question about the 750-8 Series and is the answer not in the manual?
Questions and answers