
Subscribe to Our Youtube Channel
Related Manuals for Daikin MicroTech I


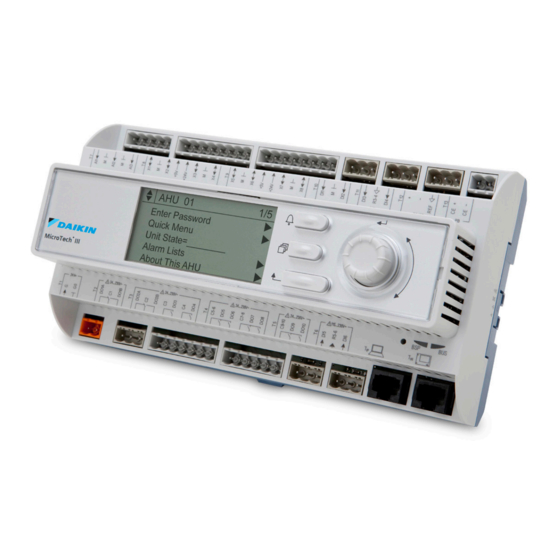
Summary of Contents for Daikin MicroTech I
- Page 1 Installation and Maintenance IM 1285-4 Group: Applied Air Systems Part Number: IM 1285 Date: January 2022 Self-Contained Systems MicroTech I to MicroTech III Unit Controller Conversion ® ®...
-
Page 2: Table Of Contents
Frost Protection Switches 3/4 ....14 MicroTech I Display and Board Removal ..6 Wire Freezestat ......16 Removing Temperature Sensors, Pressure Sensors and Pressure Switches . -
Page 3: Introduction
24 VAC Relays (HP1-4 and R63) 193413601 DIN Rails (1 Meter) 349901938 The MicroTech I to MicroTech III conversion will require 32-48 White Wire Organizers 2" Depth 300044174 hours of labor. This time can be increased or decreased White Wire Organizers 2" Depth Cover 300044173 depending on the experience and skill of the technician(s). -
Page 4: Labeling Wires
300047027 The purpose of this instruction manual is to guide a technician through the process of converting a MicroTech I Controller (MT I) to a MicroTech III Controller (MT III) on a Self-Contained unit. The MT III controller has an advanced navigation structure, improved metrics, trending data capability and network compatibility. - Page 5 Introduction Figure 3: Output Board Figure 4: Input Board www.DaikinApplied.com IM 1285-4 • MICROTECH III...
-
Page 6: Installation
Installation Installation MicroTech I Display and Board Removal Once each of the wires is labeled, unplug all wires from MCB, Output Board, and Input Board. Leave all paired wires in their respective plugs to keep them organized. Unscrew each of the boards from the control panel. -
Page 7: Installing Din Rails, Microtech Iii Mcb, Expansion
Installation Installing DIN Rails, MicroTech III MCB, Expansion Modules, Relays, Terminal Blocks, and Wire Raceways DIN Rails NOTE: Use the image in Appendix H on page 41 as a Two separate DIN rails are required to mount the MT III, guide when laying out the components in the control expansion modules, relays, and terminal blocks in the panel. -
Page 8: Relays
Installation Relays Terminal Blocks High Pressure Switch 1 (HP1), High Pressure Switch 2 (HP2), In order to ensure organization and accuracy when wiring, High Pressure Switch 3 (HP3), and High Pressure Switch 4 five terminal blocks are required to be installed in the control (HP4) each require a relay to indicate a high pressure alarm panel of the unit. -
Page 9: Wire Raceways
Installation Wire Raceways Installing Freezestat The white wire raceways are designed to ensure an organized A non-averaging type freezestat (FS1) is used to protect control panel. Mount the wire raceways as shown in the hydronic coils from subfreezing temperatures. The control is diagram in Appendix H on page 41. -
Page 10: Installing Water Flow Sensor
See Figure 13 Figure manual. NOTE: Daikin only supports installing ABB (ACS320, ACH550, and ACH580), Schneider (ATV212) or Danfoss (FC102) VFDs. The installation location of the VFD is dependent on the technician. They must choose a location with proper ventilation to avoid overheating. -
Page 11: Wiring
Wiring Wiring Wiring to the MicroTech III Transformers NOTICE Power must NOT be applied to the MT III or other devices when wiring to The secondary’s of the T1 and T2 transformers each consist the controller. of a positive (+) and a common potential. Table 3 shows each terminal block is designated for a specific potential. -
Page 12: Wiring Temperature Sensors
Wiring Wiring Temperature Sensors Mount the DAT, RAT, MAT, and EWT temperature sensors in the correct location. Guide the wires for each sensor into the control panel. Use the sensor plate and plastic sensor support when installing the DAT and RAT sensors. Follow the wiring diagram in Figure NOTE: The RAT sensor needs to be mounted far enough... -
Page 13: Wiring Pressure Switches (Pc5, Pc7 And Dhl)
Wiring Wiring Pressure Switches (PC5, PC7 and DHL) and R63 Relay The PC5 pressure switch wires directly to the MT III as shown The DHL switch is wired in series with the R63 relay shown in below in Figure 17. PC5 is a normally closed switch that Figure 18. -
Page 14: Wiring High Pressure Switches 1/2 And Hp1/Hp2 Relays
Wiring Wiring High Pressure Switches 1/2 and Wiring Low Pressure Switches 1/2, Frost HP1/HP2 Relays Protection Switches 1/2, and Resistors HP1 and HP2 relays are wired in parallel to the HP1 and HP2 For compressor number one, the LP1 and FP1 switches are switches. - Page 15 Wiring Figure 19: High Pressure Switch 1 (HP1) Figure 20: Low Pressure Switch 1 (LP1) www.DaikinApplied.com IM 1285-4 • MICROTECH III...
-
Page 16: Wire Freezestat
Wiring Wire Freezestat Wiring Waterside Economizer and Water Regulator/Bypass Valves The Freezestat (FS1) is a temperature-based switch that is designed to open at low temperatures in order to protect the The Waterside Economizer valve actuator (ACT3) and Water coil. The Freezestat should be wired in series with a 1 kΩ Regulator/Bypass valve actuator (ACT4) will be supplied resistor. -
Page 17: Wiring The Vfd
Wiring Wiring the VFD Programming the MicroTech III and VFD A VFD on the Supply Fan motor is required if the unit is Programming the MicroTech III designed for a Variable Air Volume application. The MT III and VFD communicate drive status and speed through Modbus. Once the MT III and all of the auxiliary electrical devices are The jumpers shown on VFD are necessary. -
Page 18: Appendix
Appendix Appendix Appendix A Figure 25: Dip Switch Settings Expansion Switch #5 in the up position (all others down) Board A Expansion Switch #4 in the up position (all others down) Board B Switch #4 and #5 in the Expansion up position (all others Board C down) - Page 19 Appendix Appendix B Figure 26: 200s Wiring Diagram www.DaikinApplied.com IM 1285-4 • MICROTECH III...
- Page 20 Appendix Figure 26 continued: 200s Wiring Diagram IM 1285-4 • MICROTECH III www.DaikinApplied.com...
- Page 21 Appendix Figure 27: 800s Wiring Diagram www.DaikinApplied.com IM 1285-4 • MICROTECH III...
- Page 22 Appendix Figure 27 continued: 800s Wiring Diagram IM 1285-4 • MICROTECH III www.DaikinApplied.com...
- Page 23 SD memory card no larger than 8GB with a FAT32 file system format for firmware higher than 8.46 Note – If the controller has a BSP version older than 8.40 or the APP version is earlier than 2506017300 contact Daikin Applied Technical Response group for support.
- Page 24 Appendix Figure 28 continued: Code Update SIL 4. Drag the zip file to the freshly formatted SD card and extract it to the root directory of the SD card. See picture below as an example of where the zip file resides on the SD card (E:\) directory. Note: Every computer will have a different drive letter designation for the SD card.
- Page 25 Appendix Figure 28 continued: Code Update SIL 4. Save the existing configuration and parameters to the memory card. a. From the Main Menu select Service Menus then Save/Restore Settings. Set SaveToCard option to “Yes” and press the Enter button. Wait till “Yes” reverts to “No” 5.
- Page 26 Appendix Figure 28 continued: Code Update SIL Downloading Software to the Controller 1. Power the controller off and wait 15 seconds 2. Make sure that all communication modules that need to be updated are connected. 3. Insert the end of a 3/64” Allen Key or other similar tool in the service port on the controller and hold the service button depressed.
- Page 27 Appendix Figure 28 continued: Code Update SIL 5. From the Main Menu scroll down to About this AHU and observe the APP version has no square bracket “…]”at the end. If a square bracket appears then the parameter restore process failed and needs to be repeated. 6.
- Page 28 Appendix Figure 28 continued: Code Update SIL UNIT CONFIGURATION Configuration Description Values (Default in Bold) Special DPS_H Code Position Condition Unit Type 0=Applied Rooftop (RTU) ● ● ● ● ● 1=Self-Contained (SCU) 2=Commercial Rooftop (MPS) 3=Rebel Cool Only (DPS/DAH) 4=Rebel Heat Pump (DPS_H) Control Type 0=Zone Control ●...
- Page 29 Appendix Figure 28 continued: Code Update SIL 4=Evap MD3 5=Evap DF 6=Not Used 7=EBM 8=INV 9=INV w/MicroC OA Coil Damper Type 0=None Values 1, 2, 5 & 7 ● ● ● ● ● only apply if 1=Single Position 30% Position 1 = 0 2=Single Position 100% (RTU), 2 (MPS), 3 3=Economizer Airside...
- Page 30 Appendix Figure 28 continued: Code Update SIL Return/Exhaust Fan 0=None ● ● ● ● Capacity Control 1=Tracking Method 2=Building Pressure 3=Speed 4=OADamper Second Duct 0=No ● ● Pressure Sensor 1= Yes 0=No Entering Fan Temp ● ● ● ● Sensor 1=Yes Energy Recovery 0=None...
- Page 31 Appendix Figure 28 continued: Code Update SIL For questions about the procedure please contact the Technical Response team at: TechresponseAAH@daikinapplied.com or 844-521-3928 9 of 9 Page www.DaikinApplied.com IM 1285-4 • MICROTECH III...
- Page 32 3421 OUTPUT3 MAX 44ma 1800 rpm 1800 rpm 1800rpm 1800 rpm 1800 rpm 4201 GAIN The Daikin software version [will grow over time] 4202 INTEGRATION TIME 5302 EFB STATION ID SAF=1,R/EAF=2 5303 EFB BAUD RATE 5304 EFP PARITY 8 NONE 2...
- Page 33 Appendix Table 5: ACH580 Parameters MD5 Parameters Name Unit VALUE GROUP 96 - SYSTEM 96.04 MACRO SELECT HVAC DEFAULT GROUP 99 - MOTOR DATA 99.06 MOTOR NOM CURR Motor Specific 99.07 MOTOR NOM VOLT Motor Specific Motor Specific 99.09 MOTOR NOM SPEED 99.10 MOTOR NOM POWER Motor Specific GROUP 12 - STANDARD AI...
- Page 34 Appendix Appendix E Figure 29: Parameters On the PC exactly… Appears as… Parameter MCT 10 Noun MCT 10 value Keypad Menu-then drop Keypad Noun Keypad Value Comments 0-03 Regional Settings North America start at 0-0* Basic Settings 0-03 Regional Settings [1] North America Required change to allow many 60 Hz settings 1-21...
- Page 35 Appendix Appendix F Figure 30: ATV 212 (MD2) Drive Parameters PART NUMBER PART DESCRIPTION 170632000 Rooftop - MT3 SAF (set 321) PARAMETERS Drive Voltage Application ATV21 SAF/RAF, RT/SC Default Logical Code Function Description Unit Min. Value Max. Value New Value Value Address Automatic acceleration/deceleration...
- Page 36 Appendix Figure 30 continued: ATV 212 (MD2) Drive Parameters PART NUMBER PART DESCRIPTION Rooftop - MT3 SAF (set 321) PARAMETERS 170632000 Drive Voltage Application ATV21 SAF/RAF, RT/SC Default Logical Code Function Description Unit Min. Value Max. Value New Value Value Address F207 Frequency setting mode selection 2...
- Page 37 Appendix Figure 30 continued: ATV 212 (MD2) Drive Parameters PART NUMBER PART DESCRIPTION Rooftop - MT3 SAF (set 321) PARAMETERS 170632000 Drive Voltage Application ATV21 SAF/RAF, RT/SC Default Logical Code Function Description Unit Min. Value Max. Value New Value Value Address F471 VIA gain...
- Page 38 Appendix Figure 30 continued: ATV 212 (MD2) Drive Parameters PART NUMBER PART DESCRIPTION Rooftop - MT3 SAF (set 321) PARAMETERS 170632000 Drive Voltage Application SAF/RAF, RT/SC ATV21 Default Logical Code Function Description Unit Min. Value Max. Value New Value Value Address 0.01Hz 0,00...
- Page 39 Appendix Figure 30 continued: ATV 212 (MD2) Drive Parameters PART NUMBER PART DESCRIPTION Rooftop - MT3 SAF (set 321) PARAMETERS 170632000 Drive Voltage Application SAF/RAF, RT/SC ATV21 Default Logical Code Function Description Unit Min. Value Max. Value New Value Value Address 0.01Hz 0,00...
- Page 40 Appendix Appendix G Figure 31: Danfoss VFD Wiring Figure 32: Schneider VFD Wiring IM 1285-4 • MICROTECH III www.DaikinApplied.com...
- Page 41 Appendix H Figure 33: Typical Transformer Schematic Wire Raceway TB1A TB1B TB2A TB2B Wire Raceway Relays MT III MCB EXP A EXP B EXP C SPS1 Wire Raceway Orange: 24 VAC + Purple: 24 VAC Common Red: 120 VAC + Blue: 120 VAC Common TB2B TB1A...
- Page 42 Daikin Applied Training and Development Now that you have made an investment in modern, efficient Daikin equipment, its care should be a high priority. For training information on all Daikin HVAC products, please visit us at www.DaikinApplied.com and click on Training, or call 540-248-9646 and ask for the Training Department.
Need help?
Do you have a question about the MicroTech I and is the answer not in the manual?
Questions and answers