Table of Contents
Advertisement
Quick Links
HPE Apollo 2000 Gen10 Plus Chassis Maintenance and
Service Guide
Abstract
This document is for the person who installs, administers, and troubleshoots servers and storage systems. Hewlett
Packard Enterprise assumes you are qualified in the servicing of computer equipment, trained in recognizing hazards in
products with hazardous energy levels, and are familiar with the weight and stability precautions for rack installations.
Part Number: P26199-002
Published: August 2020
Edition: 2
Advertisement
Table of Contents

Subscribe to Our Youtube Channel
Related Manuals for HP HPE Apollo 2000 Gen10 Plus


Summary of Contents for HP HPE Apollo 2000 Gen10 Plus
- Page 1 HPE Apollo 2000 Gen10 Plus Chassis Maintenance and Service Guide Abstract This document is for the person who installs, administers, and troubleshoots servers and storage systems. Hewlett Packard Enterprise assumes you are qualified in the servicing of computer equipment, trained in recognizing hazards in products with hazardous energy levels, and are familiar with the weight and stability precautions for rack installations.
- Page 2 © Copyright 2020 Hewlett Packard Enterprise Development LP Notices The information contained herein is subject to change without notice. The only warranties for Hewlett Packard Enterprise products and services are set forth in the express warranty statements accompanying such products and services. Nothing herein should be construed as constituting an additional warranty.
-
Page 3: Table Of Contents
Contents Illustrated parts catalog....................6 Mechanical components......................................6 Rack rail spare kit......................................6 SFF drive blank spare part..................................6 System components........................................6 Fan board spare part....................................7 Power backplane spare part..................................7 Power distribution board spare part..............................8 Power interface board spare parts...............................8 Power supply spare parts..................................8 Fan spare part........................................ - Page 4 Removing and replacing a fan....................................40 Removing and replacing a drive backplane power cable........................41 Removing and replacing the fan board................................42 Removing and replacing a drive backplane..............................44 Removing and replacing the bezel ear assembly............................46 Removing and replacing the system interconnect assembly......................50 Removing and replacing the energy pack..............................52 Removing and replacing the PIB..................................54 Removing and replacing the power backplane............................
- Page 5 Power backplane-distribution board components............................88 Cabling..........................89 Cabling guidelines........................................89 Front I/O cabling........................................... 90 Drive backplane cabling......................................91 n2600 8 SFF U.3 drive backplane cabling........................... 91 n2600 24 SFF basic drive backplane cabling..........................92 Energy pack cabling........................................93 APM module cabling........................................93 RCM sideband cabling....................................... 94 Specifications........................
-
Page 6: Illustrated Parts Catalog
Illustrated parts catalog Mechanical components Hewlett Packard Enterprise continually improves and changes product parts. For complete and current supported spare parts information, see the Hewlett Packard Enterprise PartSurfer website: https://www.hpe.com/info/partssurfer Item Description Rack rail spare kit SFF drive blank spare part Rack rail spare kit Customer self repair: mandatory Description... -
Page 7: Fan Board Spare Part
https://www.hpe.com/info/partssurfer Item Description Fan board spare part Power backplane spare part Power distribution board (PDB) spare part Power interface board (PIB) spare parts Power supply spare parts Fan spare part System interconnect assembly spare part Bezel ear assembly spare parts System cable spare kit Not shown Fan board spare part... -
Page 8: Power Distribution Board Spare Part
For more information on the removal and replacement procedures, see Removing and replacing the power backplane. Power distribution board spare part Customer self repair: optional Description Spare part number Power distribution board P25431-001 For more information on the removal and replacement procedures, see Removing and replacing the PDB. Power interface board spare parts Customer self repair: optional Description... -
Page 9: Bezel Ear Assembly Spare Parts
Bezel ear assembly spare parts Customer self repair: optional Description Spare part number Right bezel ear assembly—This spare part includes the bezel ear with the front P25453-001 I/O cable. Left bezel ear assembly—This spare part includes the bezel ear with the front P25460-001 I/O and ambient temperature sensor cables. -
Page 10: Drive Backplane Spare Parts
Item Description Drive backplane spare parts Energy pack spare part Rack consolidation management (RCM) board spare part SFF SATA, SAS, or NVMe drive—For more information on the removal and replacement procedures, see Removing and replacing a hot-plug drive. Drive backplane spare parts Customer self repair: optional Description Spare part number... -
Page 11: Customer Self Repair
Customer self repair Hewlett Packard Enterprise products are designed with many Customer Self Repair (CSR) parts to minimize repair time and allow for greater flexibility in performing defective parts replacement. If during the diagnosis period Hewlett Packard Enterprise (or Hewlett Packard Enterprise service providers or service partners) identifies that the repair can be accomplished by the use of a CSR part, Hewlett Packard Enterprise will ship that part directly to you for replacement. - Page 12 REMARQUE: Certaines pièces Hewlett Packard Enterprise ne sont pas conçues pour permettre au client d'effectuer lui- même la réparation. Pour que la garantie puisse s'appliquer, Hewlett Packard Enterprise exige que le remplacement de la pièce soit effectué par un Mainteneur Agréé. Ces pièces sont identifiées par la mention "Non" dans le Catalogue illustré. Les pièces CSR sont livrées le jour ouvré...
- Page 13 Per il servizio di garanzia per i soli componenti è obbligatoria la formula CSR che prevede la riparazione da parte del cliente. Se il cliente invece richiede la sostituzione ad Hewlett Packard Enterprise dovrà sostenere le spese di spedizione e di manodopera per il servizio.
- Page 14 • Obligatorio—Componentes cuya reparación por parte del usuario es obligatoria. Si solicita a Hewlett Packard Enterprise que realice la sustitución de estos componentes, tendrá que hacerse cargo de los gastos de desplazamiento y de mano de obra de dicho servicio. Opcional—Componentes cuya reparación por parte del usuario es opcional.
- Page 15 Afhankelijk van de leverbaarheid en de locatie worden CSR-onderdelen verzonden voor levering op de eerstvolgende werkdag. Levering op dezelfde dag of binnen vier uur kan tegen meerkosten worden aangeboden, indien dit mogelijk is gezien de locatie. Indien assistentie is gewenst, belt u het Hewlett Packard Enterprise Support Center om via de telefoon ondersteuning van een technicus te ontvangen.
- Page 16 Serviço de garantia apenas para peças A garantia limitada da Hewlett Packard Enterprise pode incluir um serviço de garantia apenas para peças. Segundo os termos do serviço de garantia apenas para peças, a Hewlett Packard Enterprise fornece as peças de reposição sem cobrar nenhuma taxa.
- Page 17 Customer self repair...
- Page 18 Customer self repair...
- Page 19 Customer self repair...
-
Page 20: Removal And Replacement Procedures
Removal and replacement procedures Safety considerations Before performing service procedures, review all the safety information. Electrostatic discharge Be aware of the precautions you must follow when setting up the system or handling components. A discharge of static electricity from a finger or other conductor may damage system boards or other static-sensitive devices. This type of damage may reduce the life expectancy of the system or component. -
Page 21: Rack Warnings And Cautions
This symbol on an RJ-45 receptacle indicates a network interface connection. WARNING: To reduce the risk of electric shock, fire, or damage to the equipment, do not plug telephone or telecommunications connectors into this receptacle. This symbol indicates the presence of a hot surface or hot component. If this surface is contacted, the potential for injury exists. -
Page 22: Server Warnings And Cautions
WARNING: To reduce the risk of personal injury or damage to the equipment, be sure that: • The rack has anti-tip measures in place. Such measures include floor-bolting, anti-tip feet, ballast, or a combination as specified by the rack manufacturer and applicable codes. •... - Page 23 WARNING: To reduce the risk of personal injury from hot surfaces, allow the drives and the internal system components to cool before touching them. WARNING: To reduce the risk of electric shock or damage to the equipment: • Never reach inside the chassis while the system is powered up. •...
-
Page 24: Preparation Procedures
Preparation procedures To access some components and perform certain service procedures, you must perform one or more of the following procedures: Power down the server • • Remove the hot-plug drive • Remove the power supply Remove the server blank •... -
Page 25: Remove The Power Supply
Procedure 1. Back up all the server data on the drive. 2. Determine the status of the drive from drive LED definition. 3. Press the handle release button (callout 1), and then use the drive handle to pull the drive out of the bay (callout 2). Remove the power supply WARNING: To reduce the risk of personal injury from hot surfaces, allow the power supply or power supply blank to cool before touching it. -
Page 26: Remove The Server Blank
6. Remove the power supply. Remove the server blank CAUTION: To prevent improper cooling and thermal damage, do not operate the system unless all bays are populated with either a component or a blank. Procedure 1. Press and hold the server blank latch. 2. -
Page 27: Disconnect The Tube Set
Disconnect the tube set Procedure 1. Power down the server. 2. Push the female connector (jack) to the male connector (plug) for about 1/8 of an inch. 3. Rotate the female connector counter-clockwise until the tube is pushed off the connector by the springs inside. Remove the server CAUTION: To avoid accidentally dropping the server, observe the following: •... -
Page 28: Extend The Chassis From The Rack
3. If installed, disconnect the tube set. 4. Disconnect all peripheral cables from the server. 5. Remove the server: a. Loosen the release lever thumbscrew (callout 1). b. Use the release lever to pull the server out of the bay (callout 2). 6. -
Page 29: Remove The Chassis From The Rack
d. Disconnect the tube set. e. Disconnect all peripheral cables from the servers and chassis. 2. Open the bezel ear latch. 3. Loosen the bezel ear screw. 4. Use the bezel ear latches to pull the chassis out of the rack until the rack rail lock is engaged. Remove the chassis from the rack WARNING: To reduce the risk of personal injury or equipment damage, be sure that the rack is adequately stabilized before extending a component from the rack. - Page 30 If installed, disconnect the tube set. Disconnect all peripheral cables from the servers and chassis. Label the drives before removing them. The drives must be returned to their original location. Remove all drives. Remove all power supplies. If installed, remove all server blanks. Remove all servers.
-
Page 31: Remove The Access Panel
12. Place the chassis on a sturdy, level surface. Remove the access panel WARNING: To reduce the risk of personal injury from hot surfaces, allow the drives and the internal system components to cool before touching them. CAUTION: To prevent damage to electrical components, take the appropriate anti-static precautions before beginning any installation, removal, or replacement procedure. -
Page 32: Install The Chassis Into The Rack
a. Loosen the thumbscrew (callout 1). b. To disengage the access panel from the chassis, slide the panel towards the rear chassis (callout 2). c. Lift the access panel up and off the chassis (callout 3). Install the chassis into the rack Prerequisites •... - Page 33 2. Install the following components: a. Install all drives. b. Install all power supplies. c. If removed, install all server blanks. d. Install all servers. 3. Connect all peripheral cables to the servers and chassis. 4. If removed, connect the tube set. 5.
-
Page 34: Connect The Tube Set
9. Power up the servers. Connect the tube set Procedure 1. Push the female connector (jack) to the male connector (plug). 2. Rotate the female connector clockwise until it is fully engaged. Power up the server The Apollo n2000 Gen10 Plus series chassis firmware initiates an automatic power-up sequence when the servers are installed. -
Page 35: Removing And Replacing The Rack Rails
• Use a virtual power button selection through iLO 5. • Press and release the Power On/Standby button. When the server goes from standby mode to full power mode, the server power LED changes from amber to green. Removing and replacing the rack rails WARNING: To reduce the risk of personal injury or equipment damage, be sure that the rack is adequately stabilized before extending a component from the rack. - Page 36 • Square-hole rack 7. Remove the rack rails from the front rack columns: a. Retract and hold the front retention bracket (callout 1). b. Remove the pegs on the mounting flange from the rack holes, and then release the front retention bracket (callout Removal and replacement procedures...
-
Page 37: Removing And Replacing A Drive Blank
To replace the component, reverse the removal procedure. Removing and replacing a drive blank CAUTION: To prevent improper cooling and thermal damage, do not operate the system unless all bays are populated with either a component or a blank. Remove the drive blank. To replace the drive blank, while pressing the release latch, slide the component into the bay until it is fully seated. -
Page 38: Removing And Replacing A Power Supply
Removing and replacing a power supply Power supply warnings and cautions WARNING: To reduce the risk of electric shock or damage to the equipment: • Do not disable the power cord grounding plug. The grounding plug is an important safety feature. •... -
Page 39: Removing And Replacing A Hot-Plug Drive
6. Remove the power supply. To replace the component, reverse the removal procedure. Removing and replacing a hot-plug drive CAUTION: To prevent improper cooling and thermal damage, do not operate the system unless all bays are populated with either a component or a blank. Procedure 1. -
Page 40: Removing And Replacing A Fan
To replace the component, reverse the removal procedure. Removing and replacing a fan CAUTION: To prevent improper cooling and thermal damage, do not operate the chassis unless all bays are populated with a component or a blank. Procedure 1. Power down the servers. 2. -
Page 41: Removing And Replacing A Drive Backplane Power Cable
To replace the component, reverse the removal procedure. Removing and replacing a drive backplane power cable Procedure 1. Power down the servers. 2. Remove all power: a. Disconnect each power cord from the power source. b. Disconnect each power cord from the chassis. 3. -
Page 42: Removing And Replacing The Fan Board
8. Grip both sides of the fan cage, and then lift the cage from the chassis. 9. Disconnect the drive backplane power cable. To replace the component, reverse the removal procedure. Removing and replacing the fan board Procedure Power down the servers. Remove all power: a. - Page 43 • Extend the chassis from the rack. • Remove the chassis from the rack. Remove the access panel. Remove all fans. Grip both sides of the fan cage, and then lift the cage from the chassis. Disconnect the following cables from the fan board: a.
-
Page 44: Removing And Replacing A Drive Backplane
To replace the component, reverse the removal procedure. Removing and replacing a drive backplane Prerequisites Before you perform this procedure, make sure that you have a T-15 Torx screwdriver available. Procedure Power down the servers. Remove all power: a. Disconnect each power cord from the power source. b. - Page 45 Remove the access panel. Remove all fans. Grip both sides of the fan cage, and then lift the cage from the chassis. 10. Disconnect all cables from the drive backplane. 11. Remove the drive backplane: a. Remove the drive backplane screws (callout 1). b.
-
Page 46: Removing And Replacing The Bezel Ear Assembly
• 6 SFF basic drive backplane To replace the component, reverse the removal procedure. Removing and replacing the bezel ear assembly Prerequisites Before you perform this procedure, make sure that you have a T-10 Torx screwdriver available. Procedure Power down the servers. Remove all power: Removal and replacement procedures... - Page 47 a. Disconnect each power cord from the power source. b. Disconnect each power cord from the chassis. If installed, disconnect the tube set. Disconnect all peripheral cables from the servers and chassis. Do one of the following: • Extend the chassis from the rack. Remove the chassis from the rack.
- Page 48 If the ambient temperature sensor cable in the left bezel ear remains secured in its protective foam, carefully release the cable. • Right bezel ear Removal and replacement procedures...
- Page 49 10. Release the front I/O cable: a. Disconnect the front I/O cable from the fan board (callout 1). b. Release the front I/O cable from the triangular cable bracket (callout 2). c. Thread the front I/O cable out of the chassis (callout 3). •...
-
Page 50: Removing And Replacing The System Interconnect Assembly
To replace the component, reverse the removal procedure. The left bezel ear spare assembly ships with a set of drive configuration labels. Select the label that matches your system drive configuration and attach it to the new left bezel ear. Removing and replacing the system interconnect assembly Prerequisites Before you perform this procedure, make sure that you have a T-10 Torx screwdriver available. - Page 51 Grip both sides of the fan cage, and then lift the cage from the chassis. 10. Disconnect all server node signal cables from the drive backplane. 11. Remove the system interconnect assembly: a. Remove the screws from the system interconnect post. Removal and replacement procedures...
-
Page 52: Removing And Replacing The Energy Pack
b. Move the system interconnect post away from the server bay (callout 1). c. Release the node signal cables from the triangular bracket (callout 2). To replace the component, reverse the removal procedure. Removing and replacing the energy pack Prerequisites Before you perform this procedure, make sure that you have a T-10 Torx screwdriver available. - Page 53 a. Disconnect each power cord from the power source. b. Disconnect each power cord from the chassis. 3. If installed, disconnect the tube set. 4. Disconnect all peripheral cables from the servers and chassis. 5. Remove the chassis from the rack. 6.
-
Page 54: Removing And Replacing The Pib
To replace the component, reverse the removal procedure. Removing and replacing the PIB CAUTION: Before replacing a DIMM, expansion card, or other similar PCA components due to a perceived hardware error, make sure first that the component is firmly seated in the slot. Do not bend or flex circuit boards when reseating components. - Page 55 • PIB assembly for Flexible Slot power supplies • PIB assembly for Performance power supplies 10. Remove the PIB from the bracket. • PIB for Flexible Slot power supplies Removal and replacement procedures...
-
Page 56: Removing And Replacing The Power Backplane
• PIB for Performance power supplies To replace the component, reverse the removal procedure. Removing and replacing the power backplane CAUTION: Before replacing a DIMM, expansion card, or other similar PCA components due to a perceived hardware error, make sure first that the component is firmly seated in the slot. Do not bend or flex circuit boards when reseating components. - Page 57 a. Disconnect each power cord from the power source. b. Disconnect each power cord from the chassis. If installed, disconnect the tube set. Disconnect all peripheral cables from the servers and chassis. Remove the chassis from the rack. Remove the access panel. Remove all fans.
- Page 58 11. If installed, remove the energy pack. 12. Remove the PIB assembly. 13. Disconnect the RCM sideband cable from the PDB. 14. Remove the PDB assembly. 15. Remove the power backplane bracket screws (callout 1), and then remove the bracket (callout 2). 16.
-
Page 59: Removing And Replacing The Pdb
To replace the component, reverse the removal procedure. Removing and replacing the PDB Removing the PDB CAUTION: Before replacing a DIMM, expansion card, or other similar PCA components due to a perceived hardware error, make sure first that the component is firmly seated in the slot. Do not bend or flex circuit boards when reseating components. - Page 60 Remove the fan board. 10. Remove the PDB cover screws (callout 1), and then remove the cover (callout 2). 11. If installed, remove the energy pack. 12. Remove the PIB assembly. 13. Disconnect the RCM sideband cable from the PDB. 14.
- Page 61 b. Use the power backplane bracket to slide the assembly towards the drive backplane (callout 2). c. Lift the assembly off the chassis (callout 3). 15. Remove the power backplane bracket screws (callout 1), and then remove the bracket (callout 2). Removal and replacement procedures...
-
Page 62: Replacing The Pdb
16. Detach the power backplane from the PDB. Replacing the PDB CAUTION: Before replacing a DIMM, expansion card, or other similar PCA components due to a perceived hardware error, make sure first that the component is firmly seated in the slot. Do not bend or flex circuit boards when reseating components. - Page 63 Install the power backplane bracket (callout 1), and then install the bracket screws (callout 2). Install the PDB assembly: a. Place the PDB assembly on the chassis (callout 1). b. Use the power backplane bracket to slide the assembly towards the rear chassis (callout 2). c.
- Page 64 Connect the RCM sideband cable to the PDB. Install the PIB assembly. If removed, install the energy pack. Install the PDB cover. Install the fan board. Install the fan cage. 10. Install all fans. 11. Install the access panel. 12. Install the chassis into the rack. 13.
-
Page 65: Removing And Replacing The Rcm Sideband Cable
For detailed instructions, see the service advisory on the HPE website: https://www.hpe.com/support/apollo2000gen10plus-reentering-SN-PID c. Reboot the server. Removing and replacing the RCM sideband cable Prerequisites Before you perform this procedure, make sure that you have a T-10 Torx screwdriver available. Procedure 1. -
Page 66: Removing And Replacing The Rcm Board
Removing and replacing the RCM board Prerequisites Before you perform this procedure, make sure that you have the following items available: • T-10 Torx screwdriver • T-15 Torx screwdriver Procedure Power down the servers. Remove all power: a. Disconnect each power cord from the power source. b. - Page 67 10. Slide the RCM module out of the bay. 11. Remove the RCM board screws (callout 1), and then remove the board (callout 2). Removal and replacement procedures...
-
Page 68: Removing And Replacing The Apm Module Cable
To replace the component, reverse the removal procedure. Removing and replacing the APM module cable Prerequisites Before you perform this procedure, make sure that you have the following items available: • T-10 Torx screwdriver • T-15 Torx screwdriver • Phillips No. 2 screwdriver Procedure Power down the servers. - Page 69 10. Slide the APM tray out of the bay. 11. Remove the APM module cable: a. Loosen the cable screws (callout 1). b. Open the cable clip (callout 2). c. Remove the APM module cable from the tray (callout 3). Removal and replacement procedures...
- Page 70 To replace the component, reverse the removal procedure. Removal and replacement procedures...
-
Page 71: Troubleshooting
Troubleshooting NMI functionality An NMI crash dump enables administrators to create crash dump files when a system is hung and not responding to traditional debugging methods. An analysis of the crash dump log is an essential part of diagnosing reliability problems, such as hanging operating systems, device drivers, and applications. -
Page 72: Diagnostic Tools
Diagnostic tools Product QuickSpecs For more information about product features, specifications, options, configurations, and compatibility, see the product QuickSpecs on the Hewlett Packard Enterprise website (https://www.hpe.com/info/qs). UEFI System Utilities The UEFI System Utilities is embedded in the system ROM. Its features enable you to perform a wide range of configuration activities, including: •... -
Page 73: Secure Boot
Procedure 1. From the System Utilities screen, select System Configuration > BIOS/Platform Configuration (RBSU) > Boot Options > Boot Mode. 2. Select a setting. • UEFI Mode (default)—Configures the system to boot to a UEFI compatible operating system. • Legacy BIOS Mode—Configures the system to boot to a traditional operating system in Legacy BIOS compatibility mode. -
Page 74: Ilo Service Port
Prerequisites Embedded UEFI Shell is set to Enabled. Procedure 1. From the System Utilities screen, select Embedded Applications > Embedded UEFI Shell. The Embedded UEFI Shell screen appears. 2. Press any key to acknowledge that you are physically present. This step ensures that certain features, such as disabling Secure Boot or managing the Secure Boot certificates using third-party UEFI tools, are not restricted. -
Page 75: Hpe Insight Remote Support
Intelligent Provisioning 3.30 and later includes HPE Rapid Setup Software. When you launch F10 mode from the POST screen, you are prompted to select whether you want to enter the Intelligent Provisioning or HPE Rapid Setup Software mode. NOTE: After you have selected a mode, you must reprovision the server to change the mode that launches when you boot to F10. -
Page 76: Usb Support
USB support Hewlett Packard Enterprise Gen10 and Gen10 Plus servers support all USB operating speeds depending on the device that is connected to the server. External USB functionality Hewlett Packard Enterprise provides external USB support to enable local connection of USB devices for server administration, configuration, and diagnostic procedures. -
Page 77: Component Identification
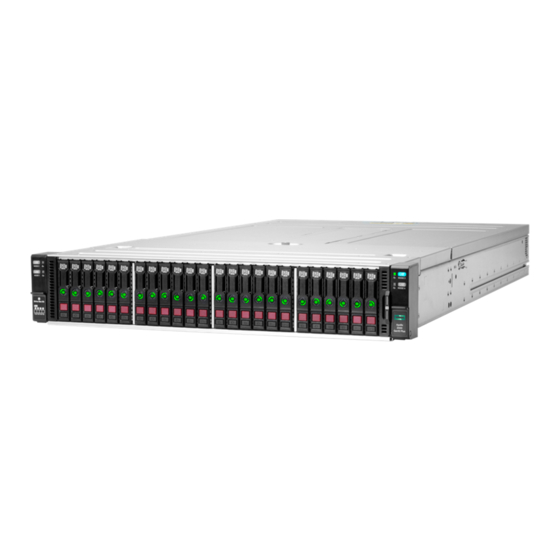
Component identification System components Item Description Fan board System interconnect assemblies Access panel Power backplane-distribution board assembly PDB cover Rack consolidation management (RCM) module (optional) Server blank 1U server node Chassis Front panel components HPE Apollo n2400 Gen10 Plus Chassis Component identification... - Page 78 Item Description Nonremovable bezel blanks Chassis information pull tab HPE Apollo n2600 Gen10 Plus Chassis with 8 SFF drives Item Description SFF hot-plug drives Chassis information pull tab Nonremovable bezel blanks HPE Apollo n2600 Gen10 Plus Chassis with 24 SFF drives Item Description SFF hot-plug drives...
-
Page 79: Information Pull Tab
Information pull tab Item Description QR code label Chassis serial number/product ID label Use a mobile device to scan the QR code label to display the chassis mobile product page (https://www.hpe.com/qref/ apollo2000gen10plus). This page contains links to chassis setup information, spare part numbers, QuickSpecs, troubleshooting resources, and other useful product links. - Page 80 Item Description Status Definition Deactivated Node 1 UID button/LED Solid blue Activated Flashing blue • 1 flash per second = Remote management or firmware upgrade in progress • 4 flashes per second = iLO manual soft reboot sequence initiated • 8 flashes per second = iLO manual hard reboot sequence in progress Deactivated...
-
Page 81: Front Panel Led Power Fault Codes
Item Description Status Definition Flashing blue • 1 flash per second = Remote management or firmware upgrade in progress • 4 flashes per second = iLO manual soft reboot sequence initiated • 8 flashes per second = iLO manual hard reboot sequence in progress Deactivated When the LEDs described in this table flash simultaneously, a power fault has occurred. -
Page 82: Rear Panel Components
Rear panel components Item Description Power supply 2 Power supply 1 1, 2 Apollo Platform Manager (APM) 2.0 port in the APM module APM 2.0 port in the RCM module iLO ports The RCM and APM modules are both chassis options. To enable the APM 2.0 port, in the System Utilities screen, select System Configuration >... -
Page 83: Rear Panel Leds And Buttons
Rear panel LEDs and buttons Item Description Status Definition Power supply LED Solid green The power supply is operating normally. One or more of the following conditions exists: • Power is unavailable • Power supply failure • Power supply is in standby mode •... -
Page 84: Server Node Orientation
Server node orientation The server node cover facilitates smooth node entry and ejection from the bay. When installing the server into the bay, observe the correct node orientation. • Left side—The node cover must be facing down with the release lever on the top side of the bay. •... -
Page 85: Drive Numbering
1U system • Node 1 > Drive box 1 • Node 2 > Drive box 2 • Node 3 > Drive box 3 • Node 4 > Drive box 4 Drive numbering Apollo n2600 Gen10 Plus Chassis with 8 SFF drives Apollo n2600 Gen10 Plus Chassis with 24 SFF drives HPE Smart Carrier drive LEDs and components This HPE Smart Carrier supports SAS, SATA, and NVMe drives. - Page 86 HPE Smart Carrier drive LEDs Item Description Status Locate • Solid blue = The drive is being identified by a host application. • Flashing blue = The drive carrier firmware is being updated or requires an update. Activity ring • Rotating green = Drive activity.
-
Page 87: Fan Numbering
HPE Smart Carrier components Item Description Definition Drive handle • Pull the open handle to remove a drive. • Close the handle to fully seat and lock a drive into place. Handle release button Releases the drive handle for removal and insertion. Fan numbering The system supports up to seven non-hot-plug, dual-rotor fans. -
Page 88: Fan Board Connectors
Fan board connectors Item Description Drive backplane power cable connectors Right front I/O cable connector SAS expander sideband cable connector Fan connectors Left front I/O cable connector Power backplane-distribution board components Item Description Power backplane Power backplane connector Fan board connector Energy pack connector Power interface board (PIB) connectors Power distribution board (PDB) -
Page 89: Cabling
Cabling Cabling guidelines The cable colors in the cabling diagrams used in this chapter are for illustration purposes only. Most of the system cables are black. Observe the following guidelines when working with system cables. Before connecting cables • Note the port labels on the PCA components. Not all of these components are used by all systems: ◦... -
Page 90: Front I/O Cabling
• Remove cables that are no longer being used. Retaining them inside the system can restrict airflow. If you intend to use the removed cables later, label and store them for future use. Front I/O cabling Cable color Description Orange Ambient temperature sensor cable Blue Left front I/O cable... -
Page 91: Drive Backplane Cabling
Drive backplane cabling The drive backplane cabling images in this section show the following: • Drive power connections from the fan board to the drive backplane. • Server node signal connections from the system interconnect posts to the drive backplane. n2600 8 SFF U.3 drive backplane cabling Drive power cabling Cable color... -
Page 92: N2600 24 Sff Basic Drive Backplane Cabling
Cable color Description Pink Signal cable for the server node 1 Gold Signal cable for the server node 2 Blue Signal cable for the server node 3 Orange Signal cable for the server node 4 n2600 24 SFF basic drive backplane cabling Drive power cabling Cable color Description... -
Page 93: Energy Pack Cabling
Cable color Description Pink Signal cable for the server node 1 Gold Signal cable for the server node 2 Blue Signal cable for the server node 3 Orange Signal cable for the server node 4 Energy pack cabling APM module cabling Cabling... -
Page 94: Rcm Sideband Cabling
RCM sideband cabling Cabling... -
Page 95: Specifications
Specifications Environmental specifications Specification Value Temperature range — Operating 10°C to 35°C (50°F to 95°F) Nonoperating –30°C to 60°C (–22°F to 140°F) Relative humidity (noncondensing) — Operating 8% to 90% 28°C (82.4°F), maximum wet bulb temperature Nonoperating 5% to 95% 38.7°C (101.7°F), maximum wet bulb temperature All temperature ratings shown are for sea level. -
Page 96: Power Supply Specifications
Power supply specifications CAUTION: Do not mix power supplies with different efficiency and wattage in the chassis. Install only one type of power supply. Verify that all power supplies have the same part number and label color. The system becomes unstable and may shut down when it detects mismatched power supplies. -
Page 97: Hpe 1800 W-2200 W Flex Slot Platinum Hot-Plug Power Supply
HPE 1800 W–2200 W Flex Slot Platinum Hot-plug Power Supply Specification Value Input requirements — Rated input voltage 200 VAC to 240 VAC 240 VDC for China only Rated input frequency 50 Hz to 60 Hz (Not applicable to 240 VDC) Rated input current 10.0 A at 240 VAC 8.2 A at 240 VDC for China Only... - Page 98 Specification Value Nominal input current 15.8 A at 200 VAC 11.7 A at 277 VAC Maximum rated input wattage rating 3127 W at 200 VAC 3210 W at 277 VAC BTUs per hour 10,671 at 200 VAC 10,951 at 277 VAC Power supply output —...
-
Page 99: Websites
Storage white papers and analyst reports https://www.hpe.com/storage/whitepapers For additional websites, see Support and other resources. Product websites HPE Apollo 2000 Gen10 Plus Chassis product page https://www.hpe.com/servers/apollo2000 HPE Apollo 2000 Gen10 Plus Chassis support page https://www.hpe.com/support/apollo2000gen10plus HPE Apollo 2000 Gen10 Plus Chassis user documents https://www.hpe.com/info/apollo2000gen10plus-docs... -
Page 100: Support And Other Resources
Support and other resources Accessing Hewlett Packard Enterprise Support • For live assistance, go to the Contact Hewlett Packard Enterprise Worldwide website: https://www.hpe.com/info/assistance • To access documentation and support services, go to the Hewlett Packard Enterprise Support Center website: https://www.hpe.com/support/hpesc Information to collect •... -
Page 101: Remote Support
IMPORTANT: Access to some updates might require product entitlement when accessed through the Hewlett Packard Enterprise Support Center. You must have an HPE Passport set up with relevant entitlements. Remote support Remote support is available with supported devices as part of your warranty or contractual support agreement. It provides intelligent event diagnosis, and automatic, secure submission of hardware event notifications to Hewlett Packard Enterprise, which will initiate a fast and accurate resolution based on your product's service level. -
Page 102: Documentation Feedback
Additional regulatory information Hewlett Packard Enterprise is committed to providing our customers with information about the chemical substances in our products as needed to comply with legal requirements such as REACH (Regulation EC No 1907/2006 of the European Parliament and the Council). A chemical information report for this product can be found at: https://www.hpe.com/info/reach For Hewlett Packard Enterprise product environmental and safety information and compliance data, including RoHS and REACH, see:...
Need help?
Do you have a question about the HPE Apollo 2000 Gen10 Plus and is the answer not in the manual?
Questions and answers