Table of Contents
Advertisement
Advertisement
Table of Contents

Related Manuals for Sherwood Newcastle R-871


Summary of Contents for Sherwood Newcastle R-871
-
Page 3: Safety Instructions
SAFETY INSTRUCTIONS 1. Read Instructions - All the safety and operating instructions should be read before the product is operated. 2. Retain instructions - The safety and operating instructions should be retained for future reference. 3. Heed Warnings - All warnings on the product and in the operating instructions should be adhered to. -
Page 4: Introduction
Introduction READ THIS BEFORE OPERATING YOUR UNIT CAUTION : TO REDUCE THE RISK OF ELECTRIC SHOCK, DO NOT REMOVE COVER (OR BACK). NO USER- SERVICEABLE PARTS INSIDE. REFER SERVICING TO QUALIFIED SERVICE PERSONNEL. WARNING : TO REDUCE THE RISK OF FIRE OR ELECTRIC SHOCK, DO NOT EXPOSE THIS APPLIANCE TO RAIN OR MOISTURE. -
Page 5: Table Of Contents
CONTENTS • SAFETY INSTRUCTIONS ............2 •... -
Page 6: System Connections
System Connections • Please be certain that this unit is unplugged from the AC outlet before making any connections. • Since different components often have different terminal names, carefully read the operating instructions of the component connected. • Be sure to observe the color coding when connecting audio, video and speaker cords. •... -
Page 7: Connecting Video Components
• Connect the jacks of VIDEO 3/VIDEO 4 to the video component in the same way. Note: • When Sherwood DVD player such as V-768, etc. is connected to the DIGI-LINK jack for system control, you should connect the DVD player to the "... -
Page 8: Connecting Audio Components
Continued • There are three types of video jacks (COMPONENT, S-VIDEO, (composite) VIDEO) for connecting video components. Connect them to the corresponding video jacks according to their capability. • For your reference, the excellence in picture quality is as follows : “COMPONENT” >“S-VIDEO”> “(composite) VIDEO”... - Page 9 4. CONNECTING EXTERNAL INS • Use these jacks to connect the corresponding outputs of a DVD player or external decorder, etc. that has 6, 7 or 8 channel analog audio outputs. • In case of 6 or 7 channel outputs, do not connect both of the SURROUND BACK L and R inputs or the SURROUND BACK R input of this unit.
-
Page 10: Connecting Dc Trigger Out
7. CONNECTING SYSTEM CONTROL • Connect this jack to the DIGI-LINK jack of the external Sherwood component that uses the DIGI-LINK II or III remote control system. 8. CONNECTING DC TRIGGER OUT • Connect a component to DC TRIGGER OUT jack that allows DC 12V to turn on when a specific input source is selected. -
Page 11: Connecting Speakers
9. CONNECTING SPEAKERS • Be sure to connect speakers firmly and correctly according to the channel(left and right) and the polarity (+ and -). If the connections are faulty, no sound will be heard from the speakers, and if the polarity of the speaker connection is incorrect, the sound will be unnatural and lack bass. - Page 12 Speaker placement Ideal speaker placement varies depending on the size of your room and the wall coverings, etc. The typical example of speaker placement and recommendations are as follows : ■Front left and right speakers and center speaker • Place the front speakers with their front surfaces as flush with TV or monitor screen as possible.
-
Page 13: Connecting Pc For Upgrades
For more information on future upgrades and external control, visit the Sherwood web site at www.sherwoodamerica.com or contact your dealer. • Do not disconnect the connection cable while updating the operating software, etc. - Page 14 12. CONNECTING MULTI-ROOM SYSTEM KIT • The multi-room system kit(sold separately ) is essential for operation from a remote location . For information on the multi-room system kit, contact the Xantech corporation at 1-800-843-5465 or www.xantech.com. • IR IN jack allows you to control this receiver from another room with the remote control unit. •...
- Page 15 14. SWITCHED AC OUTLETS • These outlets are switched on (power-on mode) and off (standby mode) according to power control as follows (Maximum total capacity is 120 W (1A)). Standby mode - Switched AC outlet off Power - on mode - Switched AC outet on 15.
-
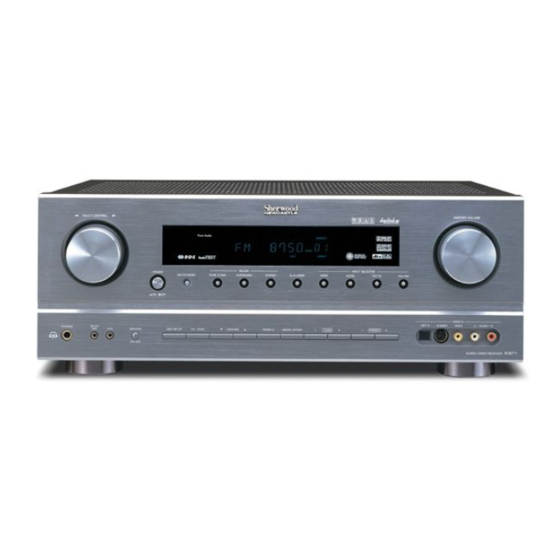
Page 16: Front Panel Controls
Front Panel Controls 1. POWER switch 2. POWER ON/STANDBY button/indicator 3. VIDEO INPUT SELECTOR button 4. AUDIO INPUT SELECTOR button 5. EXTERNAL IN button 6. BAND button 7. MASTER VOLUME CONTROL knob 8. HEADPHONE jack 9. SPEAKER button 10. PURE AUDIO button 11. - Page 17 SETUP MIC JACK • To use Auto Setup function, connect the supplied microphone to the SETUP MIC jack.(For details, refer to "When selecting the AUTO SETUP" on page 55.) Notes: • Because the microphone for Auto Setup is designed for use with this receiver, do not use a microphone other than the one supplied with this receiver.
-
Page 18: Universal Remote Controls
(For details, refer to “USING FUNCTIONS OF REMOTE CONTROL” on page 20.) DIGI LINK system remote controls This remote control can also operate Sherwood compatible components bearing the DIGI LINK(II or III) logo. • For DIGI LINK system remote control operation, first make the DIGI LINK connections between Sherwood components. - Page 19 FUNCTION TABLE of the NUMBERED BUTTONS. Notes : • Some functions for each component may not be available or may work differently. • Depending on other kinds of components that are available for each DEVICE button, some functions may not be available or may work differently, too.
-
Page 20: Operating Components With Remote Control
• When operating a Sherwood CD player or tape deck using digi link system remote control, aim the remote control at the REMOTE SENSOR of this receiver. -
Page 21: Using Functions Of Remote Control
Sherwood CD player, “DVD” for Sherwood DVD player, “AUX” for Sherwood tape deck and “TV” for Sherwood TV respectively as its factory setup code. So, you don’t need to enter its code for each Sherwood component except in such a case that its code does not work. - Page 22 If only a few functions operate, check to see if another code will work with more buttons. • When operating a Sherwood CD player or tape deck using the system remote control, aim the remote control at the REMOTE SENSOR on this receiver.
- Page 23 Programing the commands from other remote controls (LEARNING mode) • If the setup codes are not available for your component or you want to program a missing or special function into one button of a device, the learning function enables this remote control to learn the commands from other remote controls.
- Page 24 Erasing the programmed command from one button Perform the steps ③ and ④ in “Entering a setup code” procedure on page 20 to select the delecting mode (“DELETE”). • Then “BTTN” is displayed on the LCD screen for several seconds. While “SEL”...
- Page 25 Programming a macro function • The macro function enables you to program a series of button operations(up to 15) on this remote control into a single button. • You can store up to three separate macro command sequences into “M1”, “M2” and “M3” buttons.
- Page 26 Programming a punch-through function • The punch-through function allows the volume controls, channel controls or transport controls to link to a different device while a device is controlled with this remote control as a master device. • For example, since this receiver will likely be used as the sound system while watching TV, you may want to use volume controls to operate this receiver although this remote control is set...
- Page 27 Operating a punch-through function • While this remote control is set to control a master device, aim the remote control at the REMOTE SENSOR of the punch-through device and press the desired button of the programmed punch-through controls. Example: When pressing “PLAY (▶)” button. Erasing the programmed puch-through function Perform the steps ③...
- Page 28 Erasing all the punch-through functions programmed under a master device mode Perform the steps ③ and ④ in “Entering a setup code” procedure on page 20 to select a master device and the punch-through mode (“PUNCH”). • Then “VOL” is displayed on the LCD screen for several seconds.
-
Page 29: Room 2 Remote Controls
ROOM 2 Remote Controls This remote control unit is an additional remote control unit for the ROOM 2 source playback only. • You can use the ROOM 2 functions with this remote control unit more conveniently in another room than with the universal remote control unit. -
Page 30: Operations
Operations Notes: • Before operating this receiver with the supplied remote control, refer to "Universal Remote Controls" on page 17 for details about operation. • Before operating this receiver, first set this unit as desired for optimum performance, doing the OSD menu setting procedures. - Page 31 When CD, AUX, VIDEO 1~ 5 is selected as an input source Select the digital or the analog input connected as desired. ■Notes: • When TUNER, TAPE or EXTERNAL IN is selected as an input source, the digital input cannot be selected. •...
- Page 32 Achieving higher purity of sound quality • The PURE AUDIO indicator lights up, the fluorescent display goes off and all the video- related circuits are turned off, meaning no video signal transfer. • When the pure audio is activated, the optimum surround mode (or stereo mode, etc.) will be automatically selected depending on the signal format being input.
-
Page 33: Surround Sound
SURROUND SOUND • This receiver incorporates a sophisticated Digital Signal Processor that allows you to create optimum sound quality and sound atmosphere in your personal Home Theater. Surround modes ■DTS Digital Surround DTS Digital Surround(also called simply DTS) is a multi-channel digital signal format which can handle higher data rates. - Page 34 ■Dolby Pro Logic IIx surround Dolby Pro Logic IIx decodes all stereo (2 channel ) and 5.1 channel sources and extends to 7.1channel surround playback. It delivers the most natural, full range and immersing 7.1 channel listening experience. Dolby Pro Logic IIx surround includes three modes as follows : •...
-
Page 35: Enjoying Surround Sound
ENJOYING SURROUND SOUND Notes: • Before surround playback, first perform the speaker setup procedure, etc. on the OSD menu for optimum performance. (For details, refer to "SETTING THE SPEAKER/ROOM EQ SETUP" on page 55.) • When playing digital signals from the Dolby Digital program source or selecting the surround mode such as Dolby Pro Logic II /Dolby Pro Logic IIx Music, Dolby Headphone, Dolby Virtual Speaker modes, you can adjust their parameters for optimum surround effect. - Page 36 Continued To cancel the surround mode for stereo operation 2CH downmix mode • This mode allows the multi-channel signals encoded in DTS or Dolby Digital format to be mixed down into 2 front channels and to be reproduced through only two front speakers or through headphones. •...
- Page 37 Adjusting the current channel level • After adjusting each channel level with test tone, adjust the channel levels either according to the program sources or to suit your tastes. • You can adjust the current channel levels as desired. These adjusted levels are just memorized into user’s memory ("CALIBRATE"), not into preset memory("REFERENCE 1", "REFERENCE 2").
- Page 38 Memorizing the adjusted channel levels • You can memorize the adjusted channel levels into preset memory("REFERENCE 1", "REFERENCE 2") and recall the memorized whenever you want. After performing the steps ①~④ in "Adjusting the current channel level" procedure on page 36, press the (MEMORY/) ENTER button.
-
Page 39: Listening To Radio Broadcasts
LISTENING TO RADIO BROADCASTS Auto tuning Select the desired band. Press the TUNING UP(+)/DOWN(-) buttons for more than 0.5 second. Manual tuning • Manual tuning is useful when you already know the frequency of the desired station. • After selecting the desired band, press the TUNING UP(+) / DOWN(-) buttons repeatedly until the right frequency has been reached. - Page 40 Manual presetting • You can store up to 30 preferred stations in the memory. Tune in the desired station with auto or manual tuning. Select the desired preset number (1~30) and press the MEMORY/ENTER button. • The station has now been stored in the memory. •...
-
Page 41: Listening To Xm Satellite Radio
XM Satellite Radio (only for North America) Ⓡ • This receiver is the XM Ready receiver. You can receive XM Satellite Radio Connect-and-Play (sold separately) and subscribing the XM service. What's XM Satellite Radio? XM offers 170 digital channels with 69 commercial-free music channels. XM, the nation's leading satellite radio service, launched nationwide on November 12, 2001. - Page 42 Channel search • In the XM mode, press the TUNING UP (+)/DOWN (-) buttons repeatedly to select the desired channel. Direct search • Direct search is useful when you already know the channel number. In the XM mode, select the direct search mode.
- Page 43 Continued Select the desired channel in the selected category. Presetting channels • You can store up to 30 preferred channels in the memory. Select the desired channel with preforming channel search, direct search or category search. To memorize the channels, perform the steps ②...
-
Page 44: Recording
RECORDING • The analog signals from the EXTERNAL INs as well as the digital signals from the coaxial or optical digital input can be heard but cannot be recorded. • When recording the analog signals from CD, AUX, VIDEO 1~5, be sure to select the analog input. (For details, refer to "When CD, AUX, VIDEO 1~5 is selected as an input source"... -
Page 45: Digital Audio Recording With Md Recorder
Start recording on the VIDEO 1. DIGITAL AUDIO RECORDING WITH MD RECORDER • Only when the OPTICAL DIGITAL OUT of this receiver is connected to the OPTICAL DIGITAL IN of the MD recorder or CD recorder, you can enjoy high-quality sound of digital recording without converting the original signals. Refer to "CONNECTING VIDEO COMPONENTS", "CONNECTING AUDIO COMPONENTS"... -
Page 46: Other Functions
• While operating the sleep timer, " " lights up. • When the sleep time is selected, all display panels of Sherwood components connected by the DIGI LINK III are dimly lit. Displaying the audio information • You can check the audio information of the input source other than tuner on your monitor TV. -
Page 47: Room 2 Source Playback
ROOM 2 SOURCE PLAYBACK • This function allows enjoying one source in the main room and playing another in a different room at the same time. • When you connect the multi-room system kit to the IR IN jack of this receiver, you can control this receiver with not only the universal remote control unit but also the ROOM 2 remote control unit in a different room, too. -
Page 48: Osd Menu Settings
OSD Menu Settings • The OSD (On-Screen Display) menu is a setting menu that is displayed on the monitor TV and allows you to perform the setup procedures easily. In most situations, you will only need to set this once during the installation and layout of your home theater, and it rarely needs to be changed later. - Page 49 Confirm your selection. When selecting the SYSTEM SETUP When selecting the SPEAKER /ROOM EQ SETUP When selecting the SOUND PARAMETER • For the setting details, see page in ⇨. • Adjust the setting(s) in each setting category to your preference. •...
-
Page 50: Setting The System Setup
SETTING THE SYSTEM SETUP When selecting the items other than OSD POSITION ADJUST Press the CURSOR UP(▲)/DOWN(▼) buttons to select the desired item. Press the CURSOR LEFT(◀)/RIGHT(▶) buttons to set the selected item as desired. When selecting the AMP ASSIGN •... - Page 51 Continued When selecting the SUBWOOFER MODE • "SW PLUS+" mode is valid only when "FRONT" and "CENTER" are set to "LARGE" and "SUBWOOFER" is set to "YES" on the SPEAKER/ROOM EQ SETUP menu. (For details, refer to "SETTING THE SPEAKER/ ROOM EQ SETUP" on page 55.) NORMAL : When the low frequency signals of channels set to "LARGE"...
- Page 52 When selecting the CINEMA EQ OFF : To turn off the cinema EQ function. ("CINEMA-EQ" goes off.) ON : To compensate for edgy or shrill movie sound tracks. ("CINEMA-EQ" lights up.) ■Note : When the EXTERNAL IN is selected as an input source, the CINEMA EQ is automatically set to OFF. When selecting the BACKGROUND BLACK : To display the black as the color background of the OSD menu.
-
Page 53: Setting The Input Setup
SETTING THE INPUT SETUP When selecting the items other than NAME Press the CURSOR UP(▲)/DOWN(▼) buttons to select the desired input source, then press the ENTER button. Press the CURSOR UP(▲)/DOWN(▼) buttons to select the desired item. Press the CURSOR LEFT(◀)/RIGHT(▶) buttons to set the selected item as desired. When selecting the DIGITAL AUDIO •... - Page 54 Continued When selecting the VIDEO ASSIGN 2 • You should assign the connected COMPONENT VIDEO INs to the desired of VIDEO 1 ~ 5. (For details, refer to "CONNECTING VIDEO COMPONENTS" on pages 6 ~ 7.) • You can select the desired of COMP 1 ~ 3. ■Note : •...
- Page 55 When selecting the DC TRIGGER • To turn on the component connected to the DC TRIGGER OUT jack when this input source is selected, you should set the DC TRIGGER to ON for this input source. OFF : To turn off the DC trigger function. ON: To turn it on.
-
Page 56: Setting The Speaker / Room Eq Setup
SETTING THE SPEAKER / ROOM EQ SETUP • After you have installed this receiver and connected all the components, you should adjust the speaker settings for the optimum sound acoustics according to your environment and speaker layout. • Even when you change speakers, speaker positions, or the layout of your listening environment, you should adjust the speaker settings, too. - Page 57 Continued Press the CURSOR UP(▲)/DOWN(▼) buttons to select the AUTO SETUP, then press the ENTER button. Press the CURSOR UP(▲)/DOWN(▼) buttons to select the START, then press the ENTER button • Loud test tones are output from each speaker and then if measurements at the first position have been completed, "SECOND POSITION"...
- Page 58 Continued To check the results, press the ENTER button. When selecting the SPEAKER CONFIGURATION Press the CURSOR UP(▲)/DOWN(▼) buttons to select the SPEAKER CONFIGURATION, then press the ENTER button. Press the CURSOR UP(▲)/DOWN(▼) buttons to select the desired speaker. • Then the results are memorized and the SPEAKER/ROOM EQ SETUP menu is displayed.
- Page 59 Continued Press the CURSOR LEFT(◀)/ RIGHT(▶) buttons to set the selected speaker as desired. Notes : • When speakers are set to "SMALL", you should set their crossover frequency correctly according to their frequency characteristics. (For details, refer to "When selecting the SPEAKER CROSSOVER" on page 60.) •...
- Page 60 When selecting the SPEAKER DISTANCE Press the CURSOR UP(▲)/DOWN(▼) buttons to select the SPEAKER DISTANCE, then press the ENTER button. Press the CURSOR UP(▲)/DOWN(▼) buttons to select the desired item. Press the CURSOR LEFT(◀)/RIGHT(▶) buttons to set the selected item as desired. Repeat the above steps ②...
- Page 61 When selecting the SPEAKER CROSSOVER • When speakers are set to "SMALL", be sure to set their crossover frequency correctly according to their frequency characteristics. Press the CURSOR UP(▲)/DOWN(▼) buttons to select the SPEAKER CROSSOVER, then press the ENTER button. Press the CURSOR UP(▲)/DOWN(▼) buttons to select the desired speaker.
- Page 62 When selecting the ROOM EQ • The room EQ is a kind of room equalizer for your speakers. According to the acoustic characteristics of your room measured by the auto setup, the room EQ automatically adjusts the frequency response of your speakers.
-
Page 63: Setting The Ch Level Setup
SETTING THE CH LEVEL SETUP ■Note : • Depending on the speaker settings("NONE" or "NO", etc.), some channels cannot be selected. Adjusting the current channel level • You can adjust the current channel levels as desired. These adjusted levels are just memorized into user’s memory("CALIBRATE"), not into preset memory("REFERENCE 1", "REFERENCE 2"). - Page 64 Memorizing the adjusted channel levels • You can memorize the adjusted channel levels into preset memory("REFERENCE 1", "REFERENCE 2") and recall the memorized whenever you want. After performing the steps ①~③ in "Adjusting the current channel level" procedure on page 62, press the CURSOR UP(▲)/DOWN(▼) buttons to select a channel (, not the MODE (memory mode) and the LFE LEVEL SETUP), then press the ENTER button.
-
Page 65: Setting The Sound Parameter
SETTING THE SOUND PARAMETER When selecting the NIGHT MODE • This function compresses the dynamic range of previously specified parts of the Dolby Digital sound track (with extremely high volume) to minimize the difference in volume between the specified and non- specified parts. - Page 66 When selecting the DOLBY PLII MUSIC • You can adjust the various surround parameters for optimum surround effect. Note: • The parameter settings are valid only when listening in either Dolby Pro Logic II Music mode or the Dolby Pro Logic IIx Music mode. Press the CURSOR UP(▲)/DOWN(▼) buttons to select the DOLBY PLII MUSIC, then press the ENTER button.
- Page 67 When selecting the DOLBY HEADPHONE • You can select the desired listening mode for each Dolby Headphone mode. Note: • The listening mode setting is valid only when playing analog stereo, PCM 2 channel or Dolby Digital 2 channel source. Press the CURSOR UP(▲)/DOWN(▼) buttons to select the DOLBY HEADPHONE, then press the ENTER button.
- Page 68 When selecting the DOLBY VIRTUAL SPEAKER • You can select the speaker layout to be used actually for each Dolby Virtual Speaker mode. Note: • The speaker layout settings are valid only when listening in a Dolby Virtual Speaker mode. Press the CURSOR UP(▲)/DOWN(▼) buttons to select the DOLBY VIRTUAL SPEAKER, then press the ENTER button.
-
Page 69: Setting The Room 2 Setup
SETTING THE ROOM 2 SETUP • The ROOM 2 function allows enjoying one source in the main room while playing another in a different room at the same time. Notes: • The analog signals from the EXTERNAL INs and the digital signals cannot be output to the different room, meaning no playback in a different room. -
Page 70: Troubleshooting Guide
Remote control unit does not • Batteries are not loaded or exhausted. operate. • The remote sensor is obstructed. Other Sherwood components do • DIGI LINK connections are not made properly. not react to remote control commands. OSD function is not available. -
Page 71: Specifications
Specifications AMPLIFIER SECTION • Power output, stereo mode, 8 Ω , THD 0.08 %, 20 Hz~20 kHz • Total harmonic distortion, 8 Ω , 95 W, 1 kHz ..0.05% • Intermodulation distortion 60 Hz : 7 kHz= 4 : 1 SMPTE, 8 Ω , 95 W ..0.1% •... -
Page 72: Setup Code Table
Setup Code Table Admiral Aiko Akai Alaron Ambassador America Action Ampro Anam Audiovox Baysonic Belcor Bell & Howell Bradford Brockwood Broksonic Candle Carnivale Carver Celebrity Cineral Citizen Concerto Contec Craig Crosley Crown Curtis Mathes Daewoo Daytron Denon Dumont Dwin Electroband Emerson Envision Fisher... - Page 73 Pulsar Quasar Radio Shack Realistic Runco Sampo Samsung Samsux Sansei Sansui Sanyo Scimitsu Scotch Scott Sears Semivox Semp Sharp Sherwood Shogun Signature Sony Soundesign Squareview Starlite Supreme Sylvania Symphonic Tandy Technics Technoi Ace Techwood Teknika Telefunken Toshiba Totevision Vector Research...
- Page 74 Headquarter Hitachi Hughes Net.Sys Jensen Kenwood Kodak Lloyd’s Logik MGN Technology Magnasonic Magnavox Magnin Marantz Marta Matsushita Memorex Minolta Mitsubishi Motorola Multitech Nikko Noblex Olympus Opimus Orion Panasonic Penny Pentax Philco Philips Pilot Pioneer Profitronic Proscan Protec Pulsar Quarter Quartz Quasar Radio Shack Radix...
- Page 75 Sharp 027 (TV use 041) Sony 002 (TV use 000) Symphonic Zenith Harman/Kardon Kenwood Megavox Mitsubishi Onkyo Panasonic Philips Pioneer Proscan Samsung Sherwood Sony Technics Theta Digital Toshiba Yamaha Zenith Allegro Archer Bell&Howell Century Citizen Comtronics Contec Easten Emerson Everquest...
- Page 76 Echostar Expreevu General Instrument Hitachi Hughes Net.Sys Jerrold Megavox Memorex Next Level Panasonic Philips Primestar Radio Shack Realistic Sherwood Sony Star Choice Toshiba Uniden Zenith AUX-TAPE/MD Sherwood 000 (for tape deck) 035 (for MD recorder) AUX-LD Denon Mitsubishi Pioneer Sony...
- Page 77 Carver Denon Emerson Fisher Garrard Genexxa Harman/Kardon Hitachi Kenwood Krell Linn Megavox Marantz Mission Nikko Onkyo Opimus Panasonic Parasound Philips Pioneer Proton Quasar Realistic Rotel Sansui Sanyo Scott Sears Sharp Sherwood Sony Soundesign Tascam Teac Technics Victor Wards Yamaha Yorx...
Need help?
Do you have a question about the Newcastle R-871 and is the answer not in the manual?
Questions and answers