Sherwood NewCastle R-945 User Manual
Sherwood newcastle r-945: user guide
Hide thumbs
Also See for NewCastle R-945:
- Brochure & specs (4 pages) ,
- Operating instructions manual (29 pages) ,
- Service manual (64 pages)
Table of Contents
Advertisement
Introduction
U N P A C K I N G
Congratulations on Your Purchase!
Your new high fidelity receiver is designed to deliver
maximum enjoyment and years of trouble free service.
Please take a few moments to read this manual
thoroughly. It will explain the features and operation of
your unit and help ensure a trouble free installation.
Please unpack your unit carefully. We recommend that
you save the carton and packing material. They will be
helpful if you ever need to move your unit and may be
required if you ever need to return it for service. Your unit
is designed to be placed in a horizontal position and it is
important to allow at least two inches of space behind
your unit for adequate ventilation and cabling
convenience.
To avoid damage, never place the unit near radiators, in
front of heating vents, in direct sunlight, or in excessively
humid or dusty locations. Connect your complementary
components as illustrated in the following section.
CAUTION
RISK OF ELECTRIC SHOCK
DO NOT OPEN
CAUTION : TO REDUCE THE RISK OF
ELECTRIC SHOCK, DO NOT
REMOVE COVER (OR BACK).
NO USER-SERVICEABLE PARTS
INSIDE. REFER SERVICING TO
QUALIFIED SERVICE PERSONNEL.
This symbol is intended to alert the user to the
presence of uninsulated "dangerous voltage"
within the product's enclosure that may be of
sufficient magnitude to constitute a risk of
electric shock to persons.
This symbol is intended to alert the user to the
presence of important operating and
maintenance (servicing) instructions in the
literature accompanying the appliance.
WARNING
To reduce the risk of fire or electric shock, do not expose
this appliance to rain or moisture.
Caution : Do not block ventilation openings or stack
other equipment on the top.
A N D
FOR U.S.A.
Note to CATV System Installer: This reminder is
provided to call the CATV system installer's attention
to Article 820-40 of the NEC that provides guidelines
for proper grounding and, in particular, specifies that
the cable ground shall be connected to the
grounding system of the building, as close to the
point of cable entry as practical.
FCC INFORMATION
This equipment has been tested and found to
comply with the limits for a Class B digital device,
pursuant to Part 15 of the FCC Rules. These limits
are designed to provide reasonable protection
against harmful interference in a residential
installation. This equipment generates, uses and can
radiate radio frequency energy and, if not installed
and used in accordance with the instructions, may
cause harmful interference to radio communications.
However, there is no guarantee that interference will
not occur in a particular installation. If this equipment
does cause harmful interference to radio or
television reception, which can be determined by
turning the equipment off and on, the user is
encouraged to try to correct the interference by one
or more of the following measures:
Reorient or relocate the receiving antenna.
Increase the separation between the equipment
and receiver.
Connect the equipment into an outlet on a circuit
different from that to which the receiver is
connected.
Consult the dealer or an experienced radio/TV
technician for help.
CAUTION: Any changes or modifications in
construction of this device which are not expressly
approved by the party responsible for compliance
could void the user's authority to operate the
equipment.
2
Advertisement
Table of Contents

Related Manuals for Sherwood NewCastle R-945


Summary of Contents for Sherwood NewCastle R-945
- Page 1 Introduction U N P A C K I N G Congratulations on Your Purchase! Your new high fidelity receiver is designed to deliver maximum enjoyment and years of trouble free service. Please take a few moments to read this manual thoroughly.
-
Page 2: Read This Before Operating
READ THIS BEFORE OPERATING FOR U.S.A. AND CANADA FOR YOUR SAFETY Units shipped to the U.S.A. and Canada are designed for operation on 120 V AC only. Safety precaution with use of a polarized AC plug. However, some products may be supplied with a nonpolarized plug. -
Page 3: System Connections
Disconnect the indoor antenna before replacing it with the outdoor one. Place the AM loop antenna as far as possible from the receiver, TV set, speaker cords and the AC input cord and set it to a direction for the best reception. - Page 4 Caution: The Coaxial Digital Input LED may stay illuminated even after a digital signal is removed from the input. Turning off the receiver will re-set this indicator and allow it to properly report the signal status at the input.
-
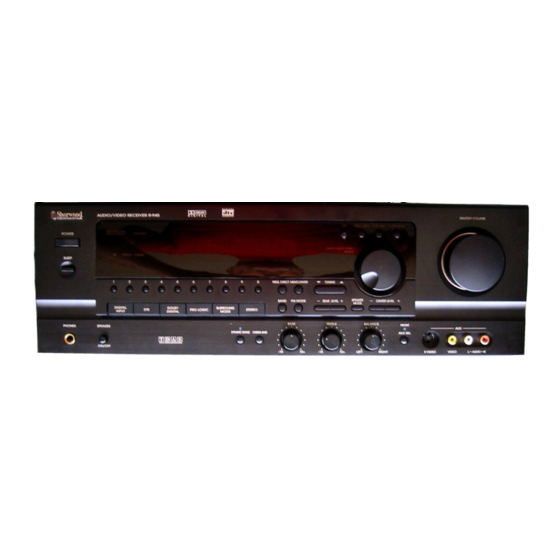
Page 6: Front Panel Controls
Front Panel Controls AVT-686... -
Page 7: Universal Remote Control
TV and to operate this receiver by moving an arrow that appears on the screen of your monitor TV. Sherwood mode: Allows you to operate this receiver, and other Sherwood components like cassette decks, CD players and equalizers, etc. (To operate other Sherwood components, you should make the DIGI LINK connections between them) Non-Sherwood mode: Allows you to operate the non-Sherwood audio and video components. - Page 8 Some functions for CD player, tape deck or equalizer may not be available. For details about functions, refer to the operating instructions of each component. The TV/OFF and the CH buttons may not be available for this receiver. (for receiver) REPEAT A...
- Page 9 REMOTE SENSOR on the component. When operating a Sherwood CD player or tape deck using the system remote control, aim the remote control at the REMOTE SENSOR on this receiver.
-
Page 10: Entering A Set-Up Code
For system remote control operation, the set-up code for each Sherwood component such as CD player and tape deck is “001”respectively. Enter each set-up code for CD player and tape deck doing steps 3,4 and 5 as follows. -
Page 11: L I S T E N I N G T O A P R O G R A M
Operations Note: Before operating this receiver with the supplied remote control, refer to “Universal Remote Controls” on page 8 for details about operation. L I S T E N I N G T O A P R O G R A M Turn the power on. - Page 12 When CD, DVD, LDP or AUX/TV is selected as input source Select the digital (or the analog) input connected as desired. Each time this button is pressed, the corresponding input is selected as follows; In the DTS mode OPTICAL – In the Dolby Digital(AC-3) mode:Not available for CD (RF:LDP only) OPTICAL COAXIAL...
-
Page 13: Surround Sound
Home Theater. Surround modes This receiver has 8 different surround modes to allow you to enjoy surround sound with various program sources: DTS , DOLBY DIGITAL(AC-3), DOLBY PRO LOGIC, DOLBY 3 STEREO, THEATER, HALL,STADIUM,CHURCH. -
Page 14: Enjoying Surround Sound
Speaker placement To obtain the best surround sound effect in your home, place the speakers as follows; Front speakers : Place each front speaker about 1m (40”) from the TV set. Center speaker : Place the center speaker either above or below the TV set to assure good visualization of center channel program. - Page 15 Adjusting the speaker settings Adjusting the settings of the center speaker, rear speakers and subwoofer connected. Press the SPEAKER MODE button for more than 2 seconds to enter the center speaker mode. In THEATER, HALL, STADIUM, CHURCH or normal stereo mode, it will enter the subwoofer mode directly.
- Page 16 Memorize the desired subwoofer mode while it flickers. If the subwoofer display goes off, repeat again from the above step 2. Checking the speaker setting Each time this button is pressed briefly, the setting of the center speaker, the rear speakers or the subwoofer is displayed.
- Page 17 Adjuet the delay time. Each time this button is pressed, the delay time changes in regular intervals. If the delay time disappears, start from the step 12 again. Memorize the delay time. In Dolby Pro Logic mode, the rear delay time can be memorized without pressing the DELAY TIME button.
-
Page 18: Listening To Radio
LISTENING Select the tuner. Select the desired band. BAND FREQUENCY Each time this button is pressed, the band is changed to FM or AM. When pressing the BAND button without selecting the TUNER, the tuner will be selected automatically. Auto tuning Press TUNING for more than 0.5 second. - Page 19 At the desired station, press this button again to stop scanning. MEMORY BACKUP FUNCTION The following items, set before the receiver is turned off, are memorized. • INPUT SELECTOR settings • VCR 1 REC SELECTOR settings • Surround mode settings •...
-
Page 20: Audio Recording
AUDIO RECORDING • The digital signals from the optical, coaxial or RF digital input can be heard but cannot be recorded. Recording with TAPE 1 Select the desired input as recording source except for TAPE1 and TAPE 2 MONITOR. Be sure that the TAPE 2 MONITOR indicator goes off. Start recording on the tape deck connected to TAPE 1. -
Page 21: Recording With Vcr1
RECORDING WITH VCR1 • The digital signals from the optical, coaxial or RF digital input can be heard but cannot be recorded. Dubbing from video components to VCR 1 Example) When dubbing from LD player to VCR 1 Select LDP as program source. PROGRAM SOURCE being enjoyed. - Page 22 Enjoying other video inputs during dubbing Example) When viewing DVD on the TV set and hearing its sound from the speakers during dubbing from LDP to VCR 1. Select DVD as the program source. Select LDP as recording source. Start recording on the VCR 1. Start play on the LDP.
-
Page 23: Video Source
; 10 20 30 60 90 OFF Unit : Minutes When the sleep time is selected, all display panels of Sherwood components connected by the DIGILINK are dimly lit. Checking the brightness of the fluorescent displays Each time this button is pressed,... - Page 24 Entering video labels This function can be operated only on video input sources such as DVD, LDP, VCR 1 and AUX/TV. Select the desired video input source to enter its label. Press the VIDEO LABELS button for more than 2 seconds.
-
Page 25: Using The Osd
This receiver incorporates an OSD (On screen display) function to provide information about basic operation of this receiver and to simplify the set-up procedures. The OSD function uses a monitor TV connected to this receiver as a display and has two kinds of display modes such as current status display and menu screen. -
Page 26: Menu Screen
When selecting the desired surround mode or adjusting the delay time. SURROUND: DOLBY DIGITAL DELAY TIME CENTER: 5 msec REAR: 20 msec Surronnd mode and delay time display MENU SCREEN • This mode is used to set the input selector, the VCR 1 REC selector, the surround mode, the speaker mode and the test tone. The menu screen operation is performed moving an arrow with the CURSOR control ( control. -
Page 27: Surround Mode
When selecting the VCR1 REC SELECTOR VCR1 REC SELECTOR VIDEO: DVD AUDIO: PHONO GO TO MAIN MENU When selecting the SPEAKER MODE SPEAKER MODE CENTER: LARGE REAR:YES SUBWOOFER: OFF GO TO MAIN MENU Select the desired item using the CURSOR UP( )or DOWN ( ) button and change the conditions of the items using the CURSOR LEFT (... -
Page 28: Troubleshooting Guide
If a fault occurs, run through the table below before taking your receiver for repair. If the fault persists, attempt to solve it by switching the receiver off and on again. If this fails to resolve the situation, consult your dealer. Under no circumstances should you repair the receiver yourself as this will invalidate the guarantee! -
Page 29: Specifications
Specifications AMPLIFIER SECTION Power output, stereo mode, 8 Ω, THD 0.2%, 20 Hz~20 kHz...2 Total harmonic distortion, 8 Ω, 100 W, 1 kHz...0.09 % Intermodulation distortion 60 Hz: 7 kHz= 4:1 SMPTE, 8 Ω,100 W ...0.1 % Input sensitivity, 47 kΩ Phono ...3.5 mV Line (CD, TAPE, VIDEO) ...200 mV Signal to noise ratio, IHF A weighted... -
Page 30: Set-Up Code Tables
019 081 191 SEARS SHARP 026 057 094 131 174 175 181 184 Maker/Brand Set-up codes SHERWOOD 001 002 024 038 055 102 103 105 106 SONY 018 047 093 101 223 247 248 160 166 015 SOUNDESIGN SOUNDSTREAM SUMO... - Page 31 SCOTT 069 102 SHARP 013 026 031 051 066 078 099 108 152 173 183 198 199 SHERWOOD 001 003 019 051 099 096 112 115 119 166 SIGNATURE SONY 048 053 081 097 109 110 126 133 177 225 226 164...
- Page 32 SATELLITE ( Satellite receivers, etc.) Maker/Brand Set-up codes AMPLICA CAPETRONICS CHANNEL MASTER 013 014 015 018 036 055 CHAPARRAL 008 009 012 077 CITOH CURTIS MATHES 050 145 DRAKE 005 006 007 010 011 112 116 141 DX ANTENNA 024 046 056 076 ECHOSTAR 038 040 057 058 093 094 095 096 097 098 099 100 122 EUROSAT...
- Page 33 TV (continued) Maker/Brand Set-up codes PANASONIC 034 056 080 092 164 PHILCO 001 003 024 056 059 060 063 064 164 004 PHILIPS 001 003 004 005 038 059 093 164 127 PIONEER 001 018 023 025 116 135 PORTLAND 004 143 PROSCAN 144 160 161 165 167...
- Page 34 VCR (continued) Maker/Brand Set-up codes MITSUBISHI 013 020 045 046 051 059 061 142 151 034 040 MULTITECH 024 034 012 023 039 043 048 NORDMENDE OPTONICA 053 054 PANASONIC 066 070 083 133 140 145 PENTAX 013 020 031 063 PHILCO 031 034 067 PHILIPS...
Need help?
Do you have a question about the NewCastle R-945 and is the answer not in the manual?
Questions and answers