Novexx Solutions ALX 73 Series Operating Manual
Hide thumbs
Also See for ALX 73 Series:
- User manual (135 pages) ,
- Service manual (54 pages) ,
- Operating manual (43 pages)
Table of Contents
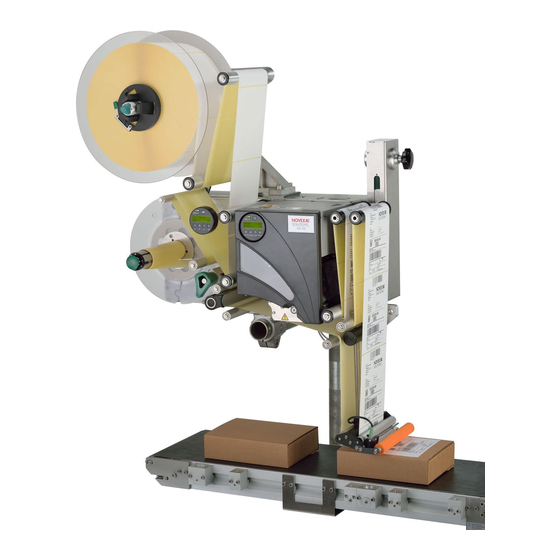
Advertisement
Quick Links
04/11 Rev. 5.07-00
Cleaning
Cleaning instructions ..................................... 2
Safety ........................................................ 2
Cleaning agents ........................................ 2
Cleaning interval ....................................... 2
General cleaning ........................................... 3
Printhead ....................................................... 4
General notes ............................................ 4
Cleaning the printhead .............................. 5
Replacing printheads ................................ 7
Testing the printhead ................................ 8
OPERATING MANUAL
ALX 73x
Rubber rollers ................................................9
Feed rollers/print roller ..............................9
Pressure roller .........................................10
Deviator rollers ............................................11
Sensors .......................................................12
Cleaning the punch sensor ......................12
Cleaning the material end sensor ............13
Cleaning the ribbon path .............................14
Replacing the filter liner ...............................15
Advertisement
Table of Contents

Related Manuals for Novexx Solutions ALX 73 Series


Summary of Contents for Novexx Solutions ALX 73 Series
-
Page 1: Table Of Contents
04/11 Rev. 5.07-00 OPERATING MANUAL ALX 73x Cleaning Cleaning instructions ........2 Rubber rollers ..........9 Safety ............2 Feed rollers/print roller ......9 Cleaning agents ........2 Pressure roller .........10 Cleaning interval ........2 Deviator rollers ..........11 Sensors ............12 General cleaning ........... 3 Cleaning the punch sensor ......12 Printhead ............ -
Page 2: Cleaning Instructions
LEANING Cleaning instructions Safety WARNING! Dangerous situations may arise during maintenance and cleaning work. Accidents may occur due to mechanical or electrical effects if the relevant safety instructions are not observed! Switch off the device before cleaning or maintenance and pull out the mains power connecting line! ... -
Page 3: General Cleaning
LEANING General cleaning Dust particles are especially likely to accumulate in the area of the print mechanics. Remove dust particles with a soft brush or a vacuum cleaner. Clean the housing with a cloth and a standard com- mercial neutral cleaner. -
Page 4: Printhead
LEANING Printhead General notes The thermal head [2A] and its holder [2C] are referred to together as the printhead [1]. CAUTION! Danger of irreversible adjustment of the prin- thead position. Never loosen the screws [1A] on the prin- thead. ... -
Page 5: Cleaning The Printhead
LEANING Cleaning the printhead WARNING! Burn hazard! The printhead can become hot during operation. Be careful whenever touching the printer. Paper dust and coloured particles from the thermal transfer ribbon may collect on the printhead during printing. Over time, this can significantly impair the printing quality in the following ways: •... - Page 6 LEANING Cleaning with a cleaning stylus Run the stylus many times back and forth across the thermal strip [5A] of the printhead. [5] Clean the printhead with the cleaning stylus. A Thermal strip Using a cleaning strip Rub the rough side of the cleaning strip [6A] many times back and forth across the thermal strip of the printhead.
-
Page 7: Replacing Printheads
LEANING Replacing printheads The printhead can only be replaced as a complete unit as shown in [12A]. WARNING! Burn hazard! The printhead can become hot during operation. Be careful whenever touching the printer. 1. Switch off the machine. 2. Remove the mains power connecting line. [8] Printhead in the ALX 736. -
Page 8: Testing The Printhead
LEANING 8. The resistance of the new printhead can be entered SYSTEM PARAMETER > Head resistance using the rameter. The resistance is given on the printhead sticker [12 B]. CAUTION! Entering the wrong resistance can damage the printhead! Enter the resistance that is applied against the installed printhead. -
Page 9: Rubber Rollers
LEANING Rubber rollers Feed rollers/print roller Printer: The feed roller [13A] and print roller [13B] can be cleaned from the bottom of the machine without any ad- ditional assembly work. The ribbon roller [13D] is freely accessible while the cover is open and the ribbon is re- moved. -
Page 10: Pressure Roller
LEANING Pressure roller WARNING! Burn hazard! The printhead can become hot during operation. Be careful whenever touching the printer. 1. Switch off the machine. 2. Remove the mains power connecting line. 3. Remove the material and ribbon. 4. Remove the bolt [14B] (using 3 mm Allen key). 5. -
Page 11: Deviator Rollers
LEANING Deviator rollers Glue from the label material may adhere to the deviator rollers. Moisten a clean cloth with cleaning solvent and wipe off the dirty deviator rollers [17] with it. [17] Rubber rollers (dark grey) and deviator rollers (light grey) on the ALX 73x. -
Page 12: Sensors
LEANING Sensors Clean the sensors regularly to remove any material res- idue and dust. The cleaning intervals depend on the materials in use. Cleaning the punch sensor To access the punch sensor, first remove the guiding section: 1. Switch off the machine. 2. -
Page 13: Cleaning The Material End Sensor
LEANING Cleaning the material end sensor The material end sensor [21A] is located inside the ma- terial guide. The sensor must be cleaned of material and dust residue regularly. The cleaning intervals de- pend on the material in use. Clean the sensor arm using compressed air (canned air is available as an accessory). -
Page 14: Cleaning The Ribbon Path
LEANING Cleaning the ribbon path All parts which come into contact with the ribbon [22] must be cleaned on a regular basis. The following min- imum distances apply: • Once per week • Every 5000 m of ribbon [22] Parts where ribbon residue gathers: A Ribbon roller B Deflector roller + stress relief C Deflector... -
Page 15: Replacing The Filter Liner
LEANING Replacing the filter liner CAUTION! A clogged dust filter can result in overheating, thereby causing a machine failure. Replace the filter liner on the fan regularly. The replacement interval for the filter liner must be de- fined according to the specific circumstances. The fol- lowing factors determine the frequency: •...
Need help?
Do you have a question about the ALX 73 Series and is the answer not in the manual?
Questions and answers